
It's 1 in the morning on a Wednesday night and aside from the fact that I smell like an odd combination of sweat, welding gas, and that weird coating they cover mild-steel tubing in, I already have a great feeling about our first Mini Stock outing. I know, it's months away, and we've barely even scratched the surface of what needs to be completed in order to hit the track, but tonight, just hours before a looming deadline, we have the very beginnings of a solid foundation in place—the rollcage.
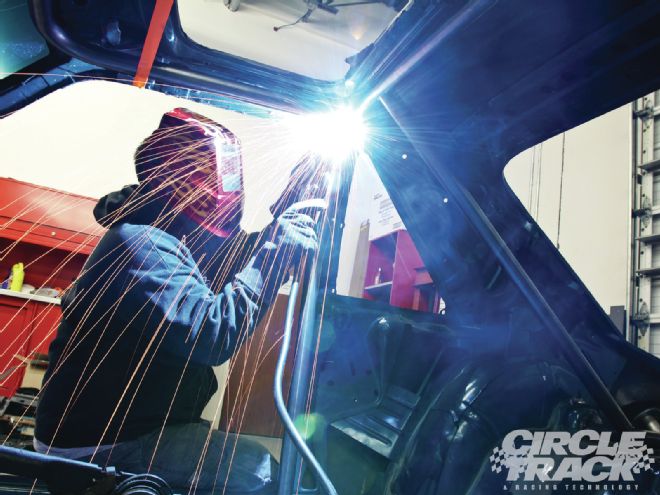
Let's rewind a couple of days and see how we got this far. If you've been following the City Boy chronicles, you know that it was just a couple of months ago that we convinced (tricked) Editor Fisher into letting Pete Epple and I—two completely useless newbies—build a Mini Stock. And, much to the amusement of several staffers here at the Circle Track world headquarters, what we dragged home to start building wasn't much of a car to start with. So, as our first real assignment, Rob decided to see if we could handle a rollcage install, by ourselves. OK, I thought, how tough could welding some tubes be?
To get us started, we called our friends at Competition Engineering by Moroso and ordered up a 10-point rollcage kit, which ships complete from the factory pre-bent and ready to install into a variety of chassis, including early body late-model Mustangs.
Why start with a kit? Why not? With a Mustang-specific main hoop, halo, and down bar, using the Competition Engineering kit saved us time, money, and aggravation, since we knew up front that all of the difficult bars were already taken care of and bent properly for our application. For an idiot and a half-decent fabricator, that convenience and expertise was essential.
 Before getting into any fabrication project, it’s paramount that you understand every detail on paper before you ever start cutting or welding. Competition Engineering supplies a nice set of instructions with its 10-point rollcage kit, so take the time to read it thoroughly.
Of course, those of you familiar with Mini Stock rules will know that a 10-point 'cage doesn't consist of the four horizontal driver-side door bars, or the three horizontal passenger-side bars, but don't worry, we plan to cover that part of the install next month, once we have our new seat in hand.
In regards to what Competition Engineering does provide, you must understand that it can't possibly send all of the tubing pre-notched, since every car is slightly different and each fabricator prefers to do things a little differently, so our next call was to Williams Lowbuck Tools, in Norco, California, to set us up with a "Lowbuck Tubing Notcher."
I'm going to be honest here, when I first pulled the Lowbuck Tubing Notcher out of the box, I really had my doubts. I mean, you should see this thing, it looks way too simple and easy to actually do anything productive, let alone notch a piece of 1 5⁄8-inch DOM steel.
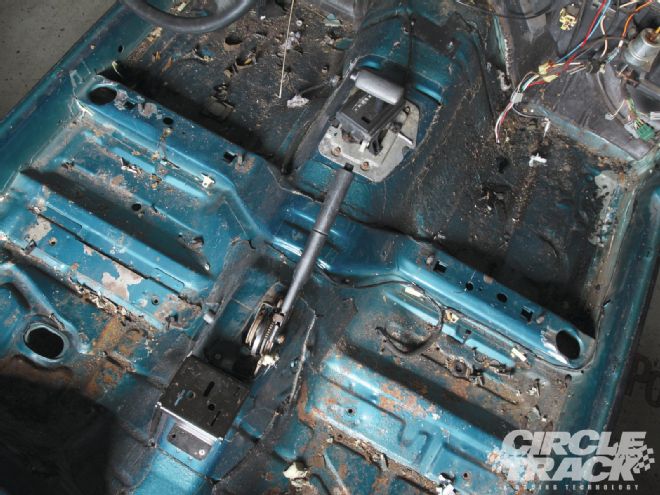 With a solid game plan and all of our supplies, it was time to get down to business. First up, we had to completely remove everything from the interior. That includes all of the plastics, the carpet and as much of the sound deadening and seam sealer as possible. There’s nothing fun about this part of the job!
Nevertheless, it's what we had and we were determined to make it work...boy are we glad we did! Turns out, the Lowbuck Notcher works great and saved us a ton of time over a traditional hole saw-style machine. If you don't believe us, make sure you check out the rest of the story to see how easily it really did work.
Anyway, enough about that; lets get on with the install! If you're going to try this at home, make sure you have a lot of experience welding and at least some fabrication skill. It isn't impossible to install a quality 'cage by yourself, but you do need to realize that the 'cage could one day be responsible for saving your life, and it isn't something to be taken lightly. On the flip side, however, we were able to pull it off—so you should have no problems if you take your time and make each weld count. OK, now seriously, on to the install!