If there's one thing I've learned as a technical writer, it's that tech is where we find it. Sometimes inspiration comes suddenly without warning so it's wise to keep the camera ready at all times. But of course, I never do that, so once again I'll have to stagger down to the house to get the ol' Box Brownie as I hope I won't miss a crucial shot.
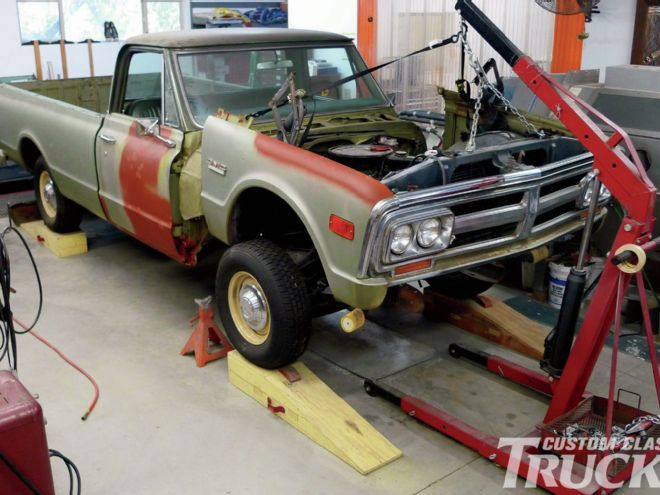
This farm-find 1971 GMC pickup is for my son-in-law Nathanial, who by now knows patience for sure. Since our friend Don Dillard of Highway 99 Hot Rods helped us tag-team extensive rust repair with new rocker and floor panels from Brothers Truck Parts, the finish bodywork and reassembly have moved along at a snail's pace, while customer jobs take priority. Having a project of this size scattered and delayed in its stall can cripple a small shop's production as it takes up a fair amount of space. At this point, however, the job is all but finished with the truck's still-assembled front group ready to reassume its position.
So, the way I figure, we're about a day's work away from having our center stall back—and we need it for the next personal pickup project—Mrs. Rotten's own 1947 Studebaker M5. "When are we gonna finish this GMC?" she asks me. "Soon as we have three strong backs together at the same time," I told her. Apparently that was not the answer she was lookin' for because she quickly hatched a plan to hang the GMC's heavy front group without waiting for assistance from visiting muscle men.
Granted, I'm proud of my wife. But apart from that, I truly believe her catch-as-catch-can cleverness is worth sharing. And fellas, this could work for you too.
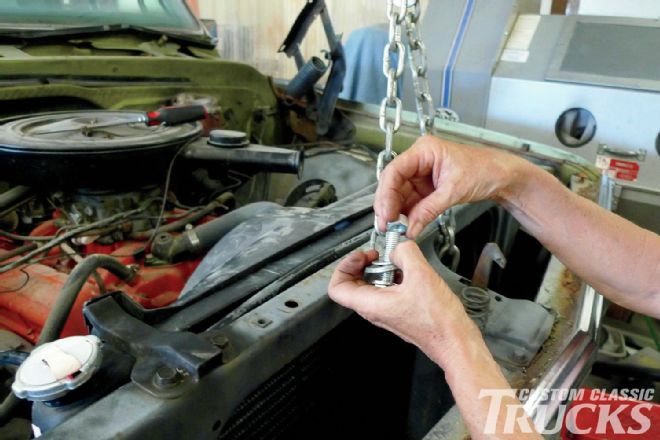
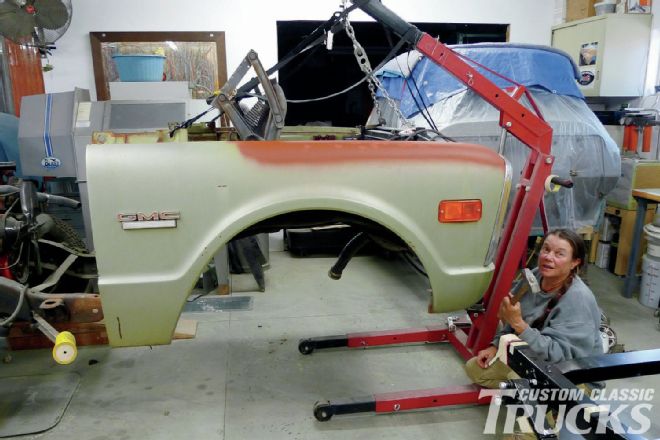 1. Using an adjustable engine chain, Mrs. Rotten first creates a V, which bolts into existing holes in the core support. From there a pair of ratchet straps are added in a V pattern running lengthwise from the chain’s center to existing holes in the rear upper fender corners. The ratchet straps control the angle o’ dangle.
 2. When hangin’ a front group singlehandedly, it’s best to take it slow, checking from side to side as you go. Loose hoses and wiring could easily become snagged or trapped on the wrong side of an inner panel. Here, attention must also be paid to door and fender edges, as not to mar the medium olive metallic finish.
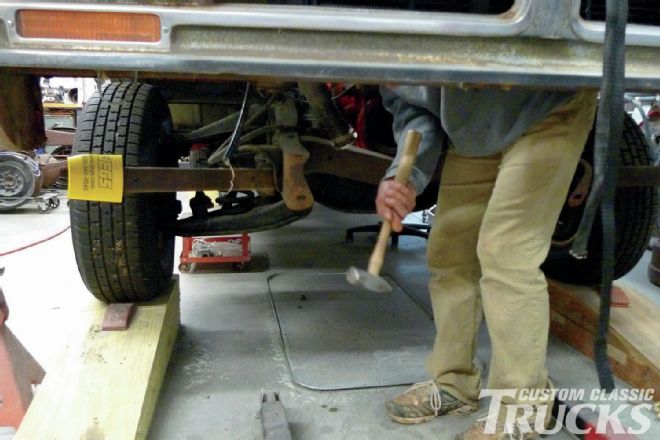 3. Earlier during disassembly, the truck’s core support bolts snapped clean off. The original core support bushings are in poor condition as well. With the front group hung high, this is Mrs. Rotten’s opportunity to address the issue. Hammer smacks, however, are not enough to dislodge the age-hardened bushings.
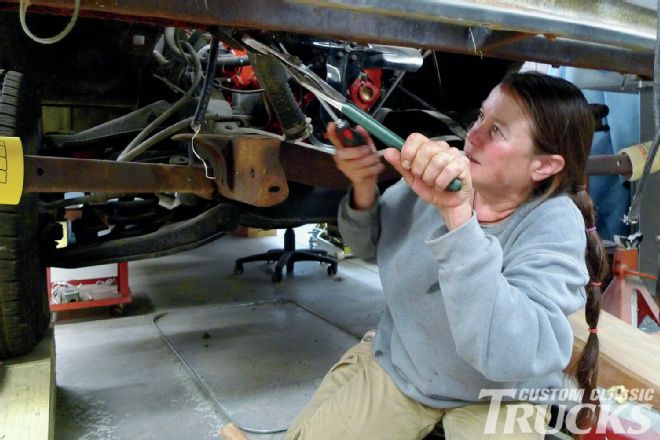 4. Now armed with a long screwdriver and a pair o’ vintage Diamalloy brand groove-joint pliers, Mrs. Rotten proceeds to mangle the stubborn rubbers free.
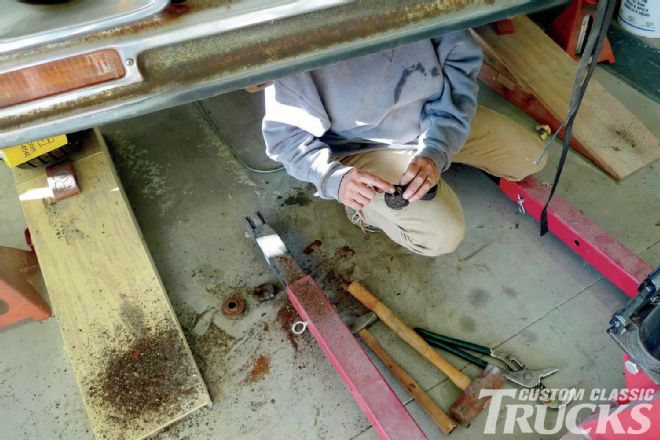 5. What’s left of the original core support bushings isn’t pretty. They’re rock-hard, crumbly, and upon initial inspection, they appear to be collapsed.
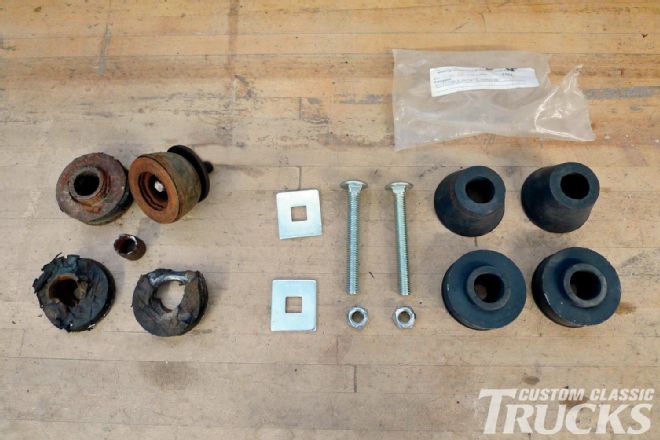 6. Here we’ll compare the original core support bushings (obviously the top photo) with new ones from Brothers. Sure enough, the new ones are indeed thicker, which gets us to thinkin’.
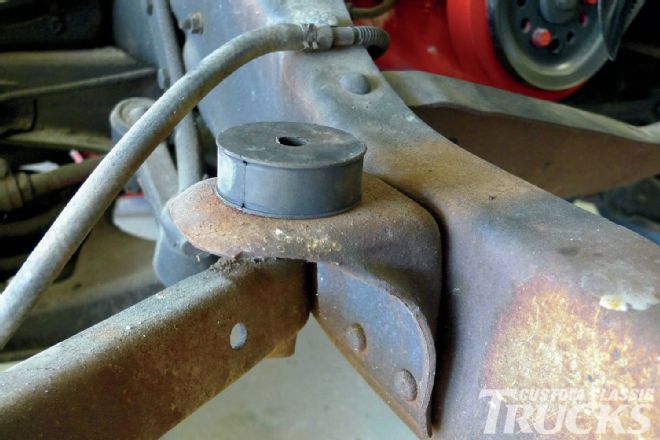 7. This ol' truck is not a complete off-frame build. The cab still rests on somewhat collapsed original bushings, which raises some concern. Will our new core support bushings require a shave in order to achieve uniform door-to-fender gaps?
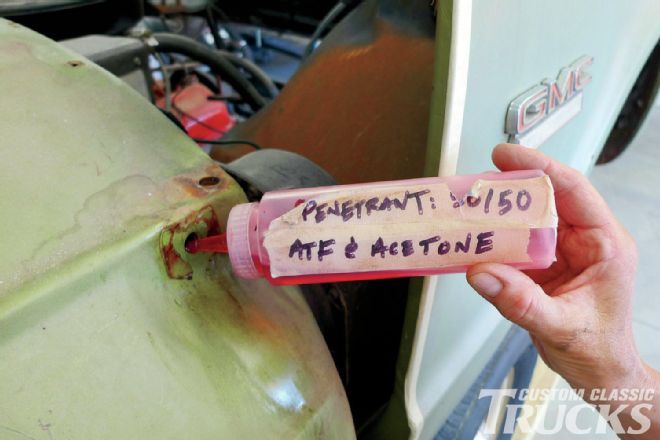 8. At times like these, just a drop o’ penetrating lubricant can be helpful. Due to the close proximity of the paint department, aerosol equivalents are not used. Here a 50/50 mix o’ acetone and ATF from a condiment bottle does the trick.
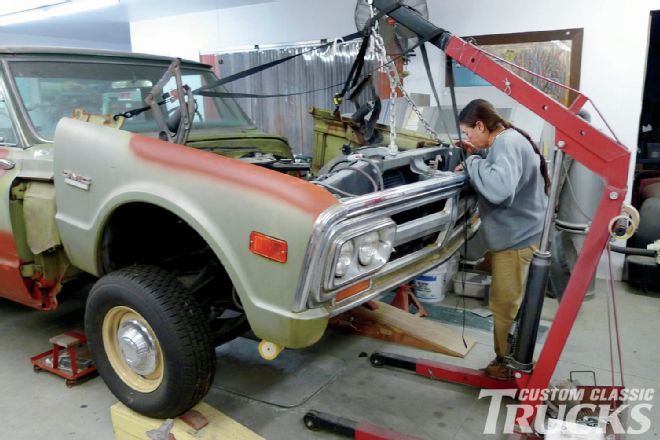
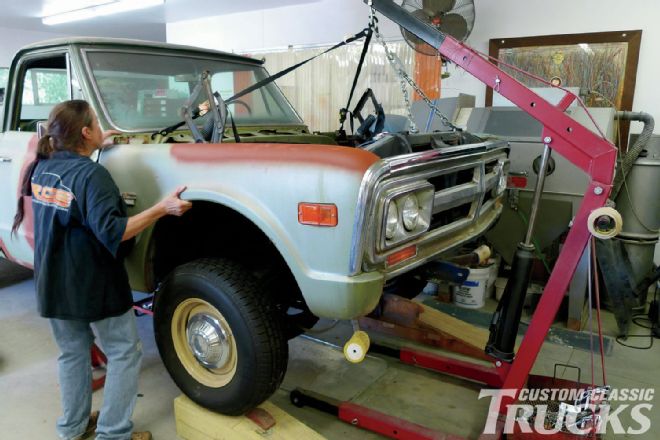 9. With necessary precautions taken, Mrs. Rotten proceeds to guide the front group into position. Numerous checks from side to side confirm that her plan is indeed working.
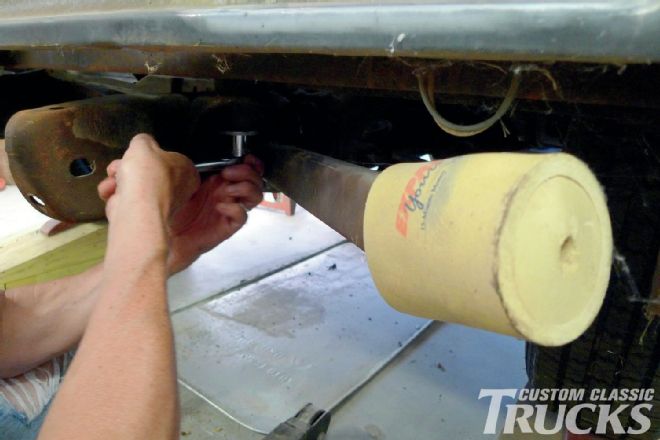
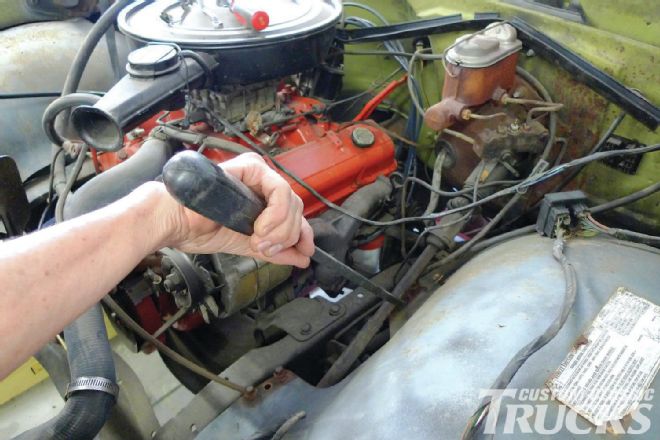 10. So far, the only snag encountered is here at the steering shaft. So, Mrs. Rotten grabs her favorite prybar, which is part of an affordable set from Harbor Freight.
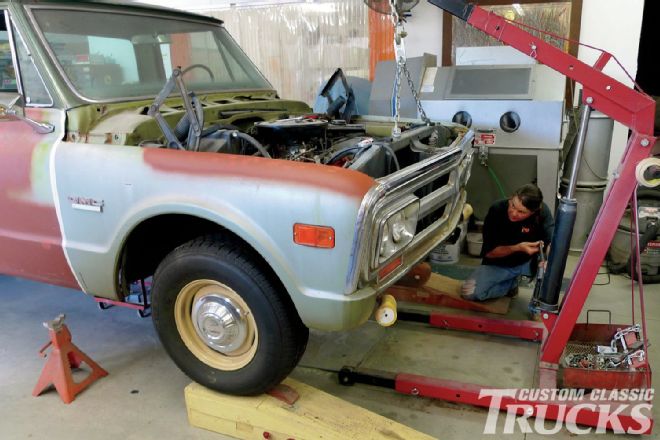 11. At this point we’re just about home free. The ratchet straps have already been removed. With the core support still suspended just a couple inches high, she’s now guiding the new core support bolts through their new rubber bushings.
 12. The engine chain will no longer be needed for this job. This means Mrs. Rotten is also finished trippin’ over the legs of the engine hoist, so it’ll be rolled out of the picture from here on.
 13. 'Round here, cooler cups are safety equipment. As the core support bolts are incrementally snugged, the door-to-fender gaps tell us that shaving of the new core support bushings will not be necessary.
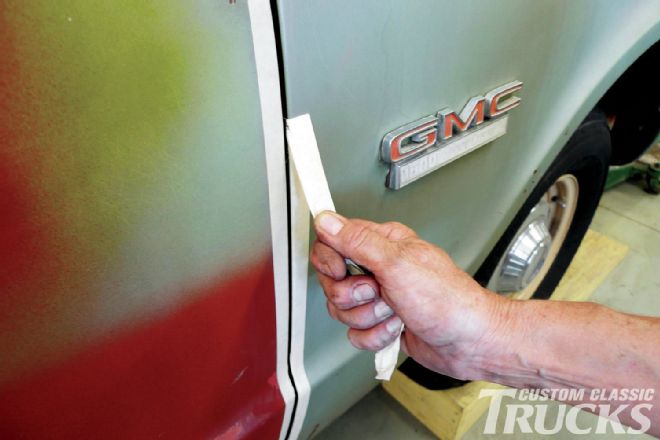 14. Now that the front group has stopped swingin’, protective tape can be removed. For final fitment, standard panel alignment procedures will be followed.
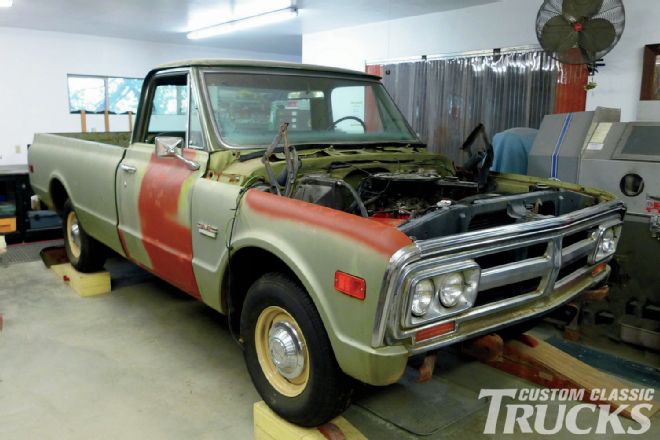 15. My own previous timeframe prediction was off, and that happens a lot. Even so, us Rottens are confident that this ol’ farm-find GMC can go home with its owner by the coming weekend. It’ll come back for custom classic modifications, but that’ll be another story.