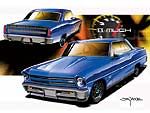
My '67 Chevy II project, called II Much, was at a crossroad. I wasn't happy with how the car was turning out: Instead of the ultimate g-Machine I had envisioned, my car was beginning to resemble a cool late-model "street rod." My original budget of $30K was shredded just buying tools, and my original schedule was in ruins as I taught myself how to weld, run a mill and bend sheet metal. My shop and garage are littered with my "automotive art collection," parts I had spent significant time making, but ultimately discarded as I learned how to make them better. A few of them hang on the wall mocking me as I remind myself that I am having fun.
I had just finished welding an aftermarket chassis and rollcage into the car. I had also made my own firewall, floor, trunk and wheel wells to go with the chassis and cage. The car body was done. The LS1 and T56 were over in the corner waiting patiently to do their stuff. Paint it, bolt it together, wire it, and drive it. My Chevy II could be running by the end of the year.
My first impression of the front suspension components of my aftermarket chassis was that I had to do more. I originally bought this particular chassis because their Mustang II offering was the best-handling front suspension I could find, but now that wasn't good enough for me. I wanted this Chevy II to really handle where I planned on racing it-Summit Point Raceway in neighboring West Virginia. Not only do they have an awesome two-mile road course, but also they've got a skid pad where I planned on making lateral g measurements. Based on this, I came to the conclusion that the street rod suspension had to go.
Since I was using custom frame rails, there wasn't an aftermarket offering I could use. And while I didn't have the experience to design a new suspension, I knew someone who did. My friend Katz Tsubai is an actual suspension designer. Katz agreed to take on the project if I would give him a clean sheet of paper: no factory spindles or control arms. He said we would need to make all of our own parts. That's where my friend Brian Schein comes in. Brian is a professional machinist and quickly signed up to make parts and welding jigs. I can't remember what I promised him to help me, but it worked.
Katz began design work in early 2003. We went through countless design iterations, working through tire and wheel combinations and figuring out what rack might work. Finally, we realized a custom rack was needed. I contacted Tony Woodward and walked him though our design and plan. Tony made some geometry suggestions and I ordered up a custom rack and had it sent to Katz. The next problem was that the aftermarket frame rails were not designed to work with a 9-inch wheel and a 265 tire. More design work followed and I ending up with notches in the frame and fender flanges lying on the garage floor. Now the car will have a turning diameter less than 45 feet, so I can make U-turns and drive through parking lots.
Late in 2003, Brian began designing the welding jigs for the control arms. During the coldest day of the year (late January 2004) with a foot of snow on the ground, I drove up to Brian's crowded unheated shop. After an all-night session I took home the jigs and the parts to weld together. Brian began designing the machine jigs for the aluminum uprights. I also contacted another friend, Glenn Estelle, to do a finite element analysis of the upright to see if 7075 aluminum would hold up: aluminum work hardens over time, so a cyclic analysis needed to be done. In the meantime, another friend, Rick Klein, cast some stainless steel uprights for me in case the aluminum didn't pass the FEA test. Ultimately, they did, though barely. The stainless uprights are now in my art collection.
Winter came and went and spring began. I welded in the new crossmember after taking countless measurements. I should have taken countless-plus-one measurements: I fully welded the crossmember exactly one-inch too far forward on the frame rails. Katz tried to bail me out, but could only tweak the design to get 0.25 inch back. As a result, the wheelbase of the car is now 0.75-inch longer. I finished up all the welding of the control arms and mounting points and Brian made steady progress on the uprights. Then Katz found some errors in the ball joint assumptions and we had to make some last-minute changes to the control arms. Finally, months behind schedule, the parts were done. We made nearly every part of the suspension ourselves. The only parts I actually bought were the ball joints (three different times), shocks and springs, rod ends and steering rack. Even the C4 hubs had to be machined to fit properly. If my ride breaks down in the middle of nowhere, I'll be flat-bedding the car home. No visits to the local auto parts store for me.
I'm going to show you what we came up with, as well as show you some of the theory behind the parts. Even if you decide you aren't going to cut your car down to frame rails and build a new suspension from chunks of aluminum and chrome moly, a lot of what you read here can be applied to selecting aftermarket suspension pieces, like control arms or spindles. Read on and learn more about what makes front suspensions work. And, if you're insane like me, grab your welding helmet.
First, what was wrong with the original front suspension? The old suspension was Mustang-II based and while Mustang II front suspensions are everywhere, it isn't because of their great handling. It is efficient packaging and good strength that make them attractive for street rod frames and aftermarket clips. With one cross member, two upper control arm mounts, beefy spindles, and plenty of spring rate, an experienced chassis builder can install one in a couple of days. Installation ease aside, they suffer from little camber gain, very low roll center, dynamic roll center movement, and a small suspension sweet spot. It was designed for a low-cost economy car, not for turning in at 120 mph.
So how does someone go from an empty sheet of paper to a working suspension? Katz designs suspensions from the outside in, so we started with the tires: Pirelli 265/30R18 PZero Corsas and Kinesis K28 18x9 wheels, with 7-3/8-inch backspacing. We established their position, factored in the brake rotors (Wilwood 14-inch SRPs), wheel hubs (C4) and then placed the lower control arm mounting point and lower ball joint. With the "bottom" of the geometry located, he worked up to allow the tallest possible spindle (see why the tires and rims have to be chosen first?) and then over to complete the upper control arm.
By utilizing a large-diameter wheel with lots of backspacing, the new suspension is able to use longer control arms, taller spindles, and has a bigger sweet spot. "Good" geometry for handling means just enough camber gain to counteract body roll, a roll center optimized with springs and sway bar, minimal side scrub and a small scrub radius. The short (25-inch tall) tires are just reality in my Chevy II platform. I was not going to stretch the wheel wells, or relieve the fenders and a 25-inch tire is all that could be crammed under the car and still have sufficient wheel travel with a reasonable turning radius.
Establishing all of these pickup points sounds hard, but there is help available. In the days of slide rules and Brylcream, engineers would make mockup parts from wood and clay. Today, we have computer-aided design tools. Katz's tool of choice is WinGeo, which is designed for professional use with a price to match. You can accomplish much of the same thing with less expensive software, such as that offered by Performance Trends. Different geometries can be quickly fed in and their resulting behavior studied.
Once we were satisfied with our basic geometry, secondary design elements had to be solved such as shock mounts, cross member fabrication, steering ratio and rack and pinion placement. Shock mounts have to be symmetrical and the cross member has to support mounting of the lower control arms and the rack. The placement of the rack to minimize bumpsteer is critical: not only do we need to be mindful of tie-rod angles and pivot points, but there are usually things in the way like harmonic balancers and oil pans.
All the design steps were iterated many times. We even iterated on the design as we were making parts. Check out the photos to see how it all came together. Was it all worth countless hours, sleepless nights and a 15-month delay in the completion of II Much? Only time will tell.
Now I'm eyeing my four-link rear suspension. The front suspension design has out-classed it and Katz tells me we can make a nice three-link setup (similar to the new Mustang) in no time. I think those old rear link arms will look good in my art collection.
Suspension Glossary
Geometry: the virtual connection points where the frame, control arms, spindles, and tie rods intersect.
Packaging: the real-world implementation of the geometry. Packaging always requires geometry compromises: a simple example is that the engine limits the length of the control arms.
Bump: when the tire is moving upwards towards the body of the car.Rebound is the opposite of bump.
Driver feedback: describes how a suspension responds when the driver turns, accelerates or stops. Predictable driver feedback is more important than great geometry. If the car responds in a comprehensible way, a good driver can learn how to make it go fast.
Roll center: a key element of suspension predictability. It is the pivot point where the body leans over in a turn. A low roll center allows the body to roll easily and one that is high will inhibit body roll. A roll center that is too high can cause the car to roll suddenly near the traction limit of the tires. Not good. Modern high performance designs use a roll center somewhere around 2 or 3 inches off the ground.
Dynamic roll center: how the roll center moves relative to the body as it leans over. A well-designed suspension will have the roll center at apex be within a fraction of an inch of the roll center at the entrance and exit of a turn.
Side scrub: where the tire wants to move sideways in relation to the car. It is caused by camber gain. Modern radial tires allow more camber gain because they are more tolerant of side scrub, but excessive side scrub can make a car feel very unstable.
Camber gain: refers to the ability of the top of the tire to "tip-in" as the body rolls toward it. The effect is to keep the tire flatter to the road surface during body roll. This may be the biggest difference between older and new suspension designs. Nevertheless, too much camber gain causes side scrub and it reduces the tire contact patch and the brake's effectiveness during hard braking (since the suspension is compressing as the car noses down). A good design rule of thumb for camber gain is to limit it to 1 or 2 degrees per inch of bump.
Bumpsteer: when suspension movement, usually bump, causes steering movement. Many musclecar suspension designs (Gen I F-bodies being particularly notorious) came from the factory with bumpsteer. It takes careful consideration of the tie-rod and steering arm geometry to minimize bumpsteer (no design can remove it entirely). An acceptable upper limit is about 0.02 inch of tie rod movement per 1 inch of suspension movement. Sweet spot: where the geometry of a suspension is at its most ideal. Most suspensions have about 4 inches of sweet spot: 2.5 inches for bump and 1.5 inches for rebound from ride height.
Scrub radius: the difference between the center of the contact patch and the actual swivel point of the spindle. Minimizing scrub radius by using highly backspaced wheels allows longer control arms to be used. A small scrub radius also reduces steering effort and resultant driver fatigue. A barometer for scrub radius is that it should never be more than 1 inch plus half the rim width, i.e. an 8-inch rim should have a scrub radius less than 5 inches.
Ride height: the position of the body relative to the tires. A common way to improve a car's handling (and looks) is to lower the ride height. This achieves a lower center of gravity (always good) with stiffer springs (usually good). Lowering the car too much can cause problems since most suspensions are designed for 2 to 2.5 inches of bump travel. If you lower your car 1.5 inches, you may only have an inch of reasonable bump geometry left before undesirable side effects occur.
Motion ratio: the ratio of the shock/spring movement to the wheel movement. If the spring were mounted in the same place as the ball joint, the spring would move the same amount as the wheel, having a motion ratio of 1.0. As the spring is brought to the inside of the control arm for packaging reasons, its stiffness has to increase to compensate for the leverage loss. Typical motion ratios are 0.65 to 0.75. That's why front springs are usually a lot stiffer than back springs, since live rear ends have a motion ratio near 1.
Ackerman angle: the difference in turning radius between the inside and outside front tires in a turn.
Editor's Note:
When we first got this transcript from reader John Parsons, we were at odds with running it. We asked ourselves "Who is this guy? What is his experience? And does he race, or does he merely want to?" Yet there are some tantalizing (and accurate) technical details in this piece that shed some important light on the mechanics of suspensions, so we elected to publish it-doing anything else would be a shame. The car you're about to read about, II Much, has been a long time in the making and has been the subject of much discourse on g-Machine websites like Pro-Touring.com. (You may even remember a news item we ran on it in June 2004.) We must stress to our readers and advertisers that as this is published, Parson's Chevy II has yet to turn a wheel in anger-i.e. we're still waiting for some proof of concept.
It's important for us to note that aftermarket manufacturers of performance suspensions have decades of experience in building suspensions and racing them. Unless you are a chassis engineer like Mark Stielow or Art Morrison, it's not advisable to start cutting up a proven set of components. However, if you like living on the wild side and just can't ignore the siren song of that welder sitting in the corner, be our guest and start thrashing!--Johnny Hunkins
WHY THREE-PIECE MODULAR WHEELS?
Kinesis forges all three-pieces of their modular wheel. A 3,500-ton press exerts 40,000 psi to push the aluminum center into place, removing porosity and aligning the grain into a radial shape. The result is a part that is lighter and stronger than a corresponding cast piece.
Lighter is better when it comes to wheels: they are unsprung weight. Unsprung weight is vehicle mass that isn't controlled by the springs. Wheels, tires, control arms and spindles are all unsprung weight. The weight acts like a pendulum and the more of it there is, the harder the suspension has to work. That makes for sluggish handling, difficult suspension tuning and parts that wear out faster. Wheels also act like flywheels, storing kinetic energy as the car is driven down the road. A heavier wheel stores more kinetic energy, which has to be absorbed by the brakes to stop the car. Just a few pounds can make a significant difference in stopping distance.
Kinesis wheels can be taken apart and pieces replaced if they get damaged or if the backspacing needs to be changed. Since I'm building a maximum-effort front suspension, I need to use the lightest and strongest wheels I can find for ultimate handling and braking performance. Like many things in the automotive world, the performance capabilities of these wheels really translate into jaw-dropping good looks.