Brakes are finicky buggers—especially when they’re not bled right, and even a pedal-to-the-metal panic stop won’t lock up the wheels. We filled our ’70 SS396 Chevelle with silicone-based DOT5 ’cause it won’t attack our obsessively detailed engine bay like conventional brake fluid would. But we still couldn’t get a firm pedal, even after bleeding nearly an entire bottle of fluid through the system and onto the driveway. Getting the system pressure-bled was a viable option, but the car wasn’t roadworthy yet, and we didn’t trust a soul around our million-dollar frame-off resto. We couldn’t find an affordable pressure-bleeding kit, either, so damn it, we made our own.
Pressure bleeding is a simple concept—force brake fluid through the lines using low-pressure compressed air to squeeze any entrapped air pockets out of the system. We already had an air compressor and a line pressure regulator, so all we needed was a way to route the compressed air into the brake system. Checking out similar systems, we found that we needed an adapter to fit in place of the master cylinder cap through which we could shoot low-pressure air into each fluid reservoir to bleed the front and rear brakes. We had a few design criteria: It had to seal perfectly to the cap, and it had to be easily removable to refill the master cylinder as we bled aerated fluid from the system.
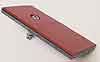
We had a plan. We needed a plate cut from thick steel, so we cruised to an industrial metal supplier and had them cut a plate of ¼-inch mild steel to overlap our ’70 disc brake master cylinder by ½ inch on every side. Cost: $5. The thick gauge ensured that it wouldn’t bend when we clamped it, and that we’d have enough metal to tap in a fitting for our compressor air line.
Our next stop was the local hardware store, where we bought a piece of a 1/8-inch-thick butyl rubber sheet. The McMaster-Carr Company also offers this in “60 Shore A” durometer, which is as hard as a tire tread—compliant enough to seal well. Next, we scored a ¼-inch NPT pipe tap and a male quick-release fitting for connection to the compressor line. Then it was back to the garage.
We sized up the plate on the master cylinder and marked it at the center of the front fluid chamber. We stuck it in a vise, drilled a 7/16-inch hole through the mark, and ran the tap into the hole. Remember, pipe thread is tapered, so it’s important not to run the tap too far down. You’ve tapped enough when the fitting screws in three or four complete threads by hand. Wrap the threads of the fitting with Teflon tape and screw it tightly into the hole.
We grabbed the neoprene and trimmed it to the dimensions of the plate with a sharp blade. Using a hole punch, we cut a hole through the neoprene where the compressed air entered the plate. Then we scuffed the bottom of the plate and the top of the neoprene with a Scotch-Brite pad, cleaned them with disc brake cleaner, and bonded them together with 3M Super Weatherstrip adhesive.
Bleedin’ time—rear brakes first. Make sure the compressor fitting is over the reservoir you want to bleed. Clamp it down tightly with a big C-clamp, set the compressor’s regulator to 10 psi open pressure, and for God’s sake, empty the water traps in the compressor lines first! Crack the bleeder screw farthest from the master cylinder (right rear, in most cases), and connect the air hose to the plate. Our reservoir emptied in less than a minute, so you should check the fluid level every 30 seconds and refill if necessary.
You know the rest of the drill. Bleed it ’til the fluid is clear, move on to the next closest corner to the master cylinder, and flip the plate around to bleed the front brake reservoir after finishing the rears. You won’t believe the awesome, rock-hard response you’ll be greeted with when you step on the binders for the first time, but be prepared that all your friends will want to borrow your homemade rig.