Early Chevys were really bad at providing drivers with detailed information about the health and well-being of their engines. As instrumentation technology progressed over the years there were fewer of the aptly named “idiot lights” and more gauges for things other than speed and engine rpm. Still, for performance driving enough info wasn’t provided and the accuracy of the gauges were a bit suspect.
A great example of this slow, yet incomplete gauge evolution is found on the third generation of our beloved Camaro. In addition to mph and rpm, GM saw fit to include basic water temp, oil pressure, and volt gauges. Yes, there was still a host of warning lights to inform you about problems once it’s too late, but at least they had the basics. Still, the third-gen Camaro was born in the dark ages of automotive quality and performance. As such, it had the nanny-state-approved 85-mph speedometer, since seeing higher speeds might be too tempting for the unwashed masses to resist. Since GM was starting to think globally, half of the speedometer was plastered with useless metric speed information.
Dakota Digital decided to throw the third-gen crowd a rather tasty bone and design one of their sweet VHX dash systems for 1982-’89 Camaros. They incorporate micro-controlled precision stepper motors, solid-state sensors, modern aesthetics, and 21st century lighting into one package that really updates the look of these dashes. Even better, the basic kit can be augmented with a lot of cool bells and whistles typically only seen on modern vehicles. Options like a compass, outside air temp, and even cruise control are available in easy-to-add modules. The VHX system also allows for the addition of up to 16 additional gauges. And you won’t have to cut even one hole in your dash!
We headed over to Joel Rode’s Hot Rod Specialties in Upland, California, to follow the install of a VHX system into a 1986 Camaro Z28.

01. The stock instrumentation in a third-gen is OK, and there are even some actual gauges instead of just idiot lights, but the speedometer borders on being criminal. Thanks to the government, it topped out at 85 mph (since nobody should go faster than that) and half the gauge was set up with km/h numbers.
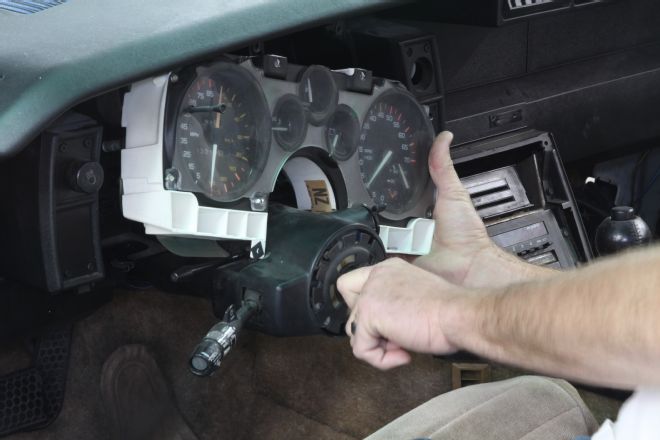
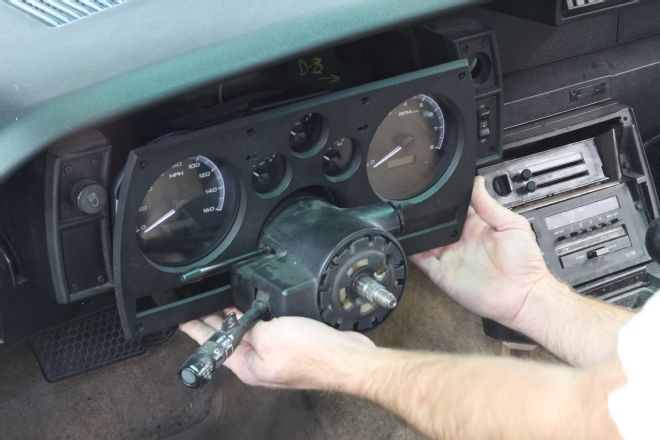
02. To make photographing the procedure less obscured, we pulled the steering wheel. We could most likely have gotten by with just dropping the column down, but this did give us more room.
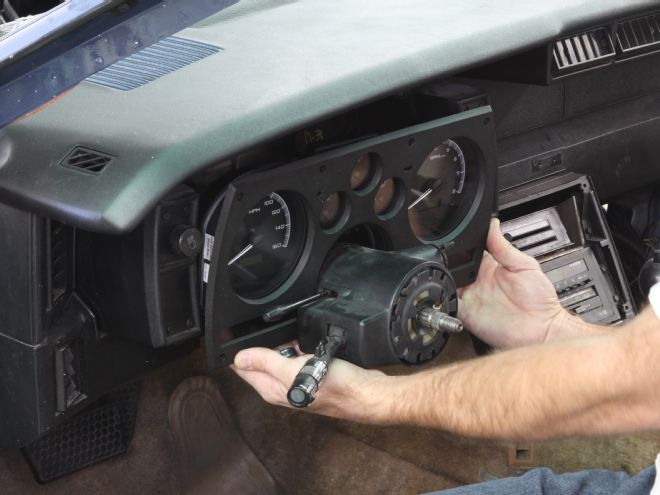
03. The outer bezel was held in place by several fasteners. Keep in mind that not all fasteners on a third-gen dash are actually real. Some are just plastic and will snap if you mess with them. With the outer bezel removed, we were able to access the screws holding the gauge cluster in place.
04. With the screws removed and the column loosened, we were able to push down on the column and remove the stock cluster. Once it was out a few inches we were able to reach behind to unplug the harness and unscrew the mechanical speedometer cable.
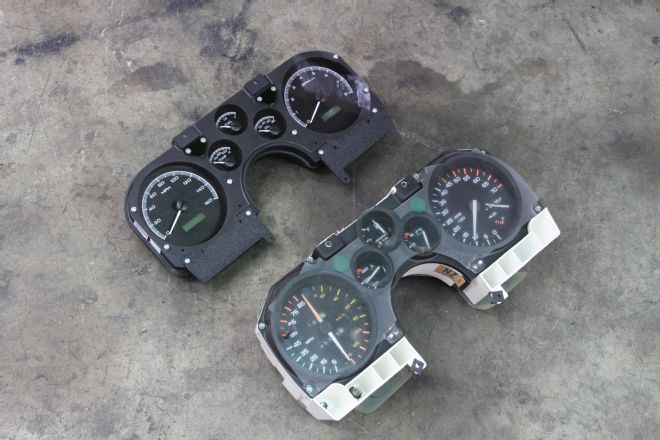
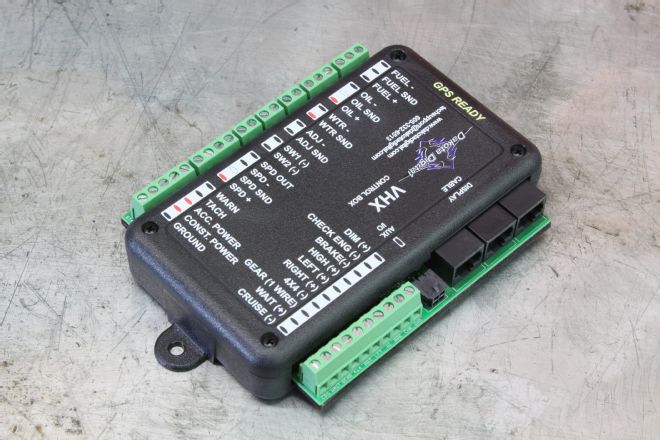
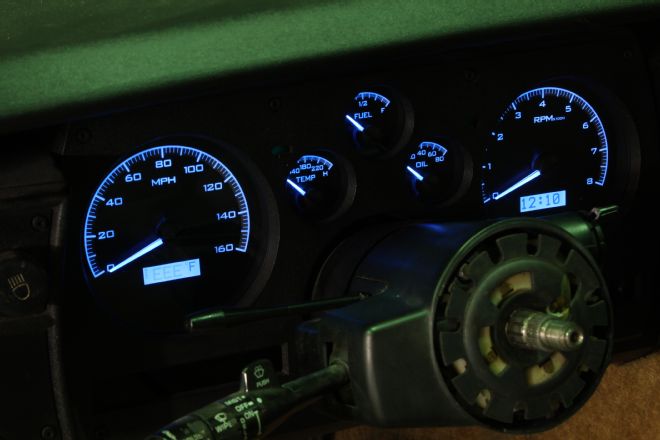
05. The VHX kit from Dakota Digital (PN VHX-82C-CAM) includes the display, control box, CAT5 cable, and a universal sensor pack. This system will definitely bring our 1986 Camaro into the 21st century; and it has a proper 160-mph speedo. It also has two digital displays that allow you to cycle through a host of information, including an odometer, two trip odometers, engine hours, high-speed recall, digital rpm, high-rpm recall, and a clock. There’s even some performance information such as 0-60 mph and quarter-mile time and speed. If you look closely, you’ll notice that they put the oil pressure gauge in a more predominant position. The car’s voltage can be checked by cycling through the LED displays.

06. On the back of the unit there are two plugs, but we really only needed to focus on the lower, CAT5 input. This is what makes the cluster module so easy to work with. All the info feeds in through this one CAT5 cable. The kit includes a cable that’s a couple of feet long, but if you need a longer one, CAT5 cables are readily available at just about any electronics store. The new Dakota Digital cluster for 1982-’89 Camaros is far less complicated looking than the old stock unit.

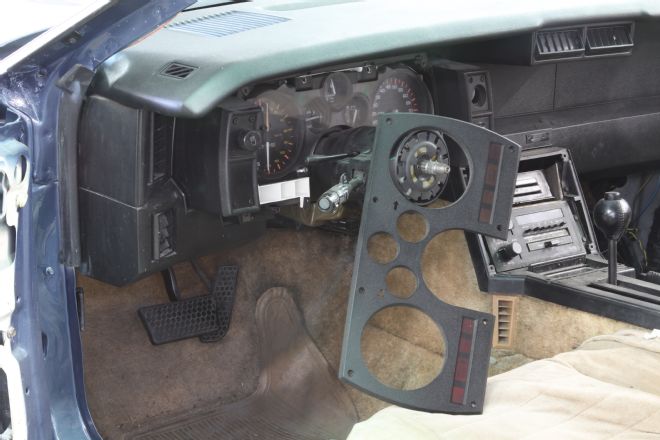
07. The stock bezel gets reused, but the new Dakota Digital cluster doesn’t use any factory warning lights and indicators since these are now integrated into the main unit. To clean things up, Dakota Digital includes two small, black block-off plates that attach to the back of the OE bezel as shown.
08. With the modified factory bezel in place, we could then slide the new cluster in and secure it using the original fasteners.
09. It was then time to wire the system into the car. This is done through the included VHX control box. Every wire needed for the new cluster feeds into this box and that data is then sent to the cluster via the CAT5 cable. The unit is ready to rock if you want to run GPS speed data (using the optional GPS-50-2 module). The unit can be mounted anywhere in the car; we chose to mount it under the dash.
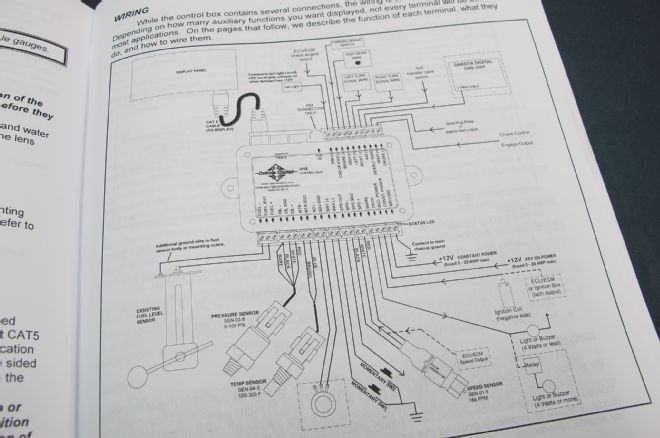
10. We’re not going to go into a blow-by-blow deal in regards to wiring. Dakota Digital provides excellent instructions that contain detailed schematics. In short, all of the wiring roads lead to the VHX control box, and that box has provisions for inputting quite a bit of data.
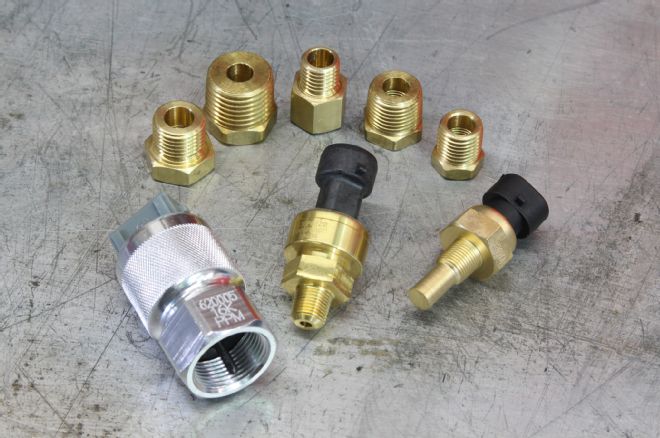
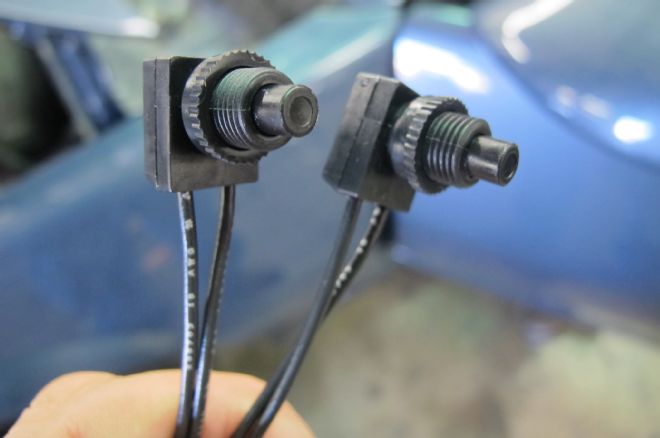
11. All of the VHX sensors are the modern plug-and-play type. The water temp sender and oil pressure senders have the standard 1/8-inch pipe thread, and the kit came with a set of adapters. For an LS install you will need a 12mm fitting to install the water temp sender into the passenger-side cylinder head. The speed sensor is pretty slick if you’re sticking with an older transmission with a mechanical speedometer output. If you have a modern trans with a VSS output, you can run a signal wire from the VSS output on the trans straight to the VHX control box. Or you can run the GPS module we mentioned earlier to feed the speedometer.
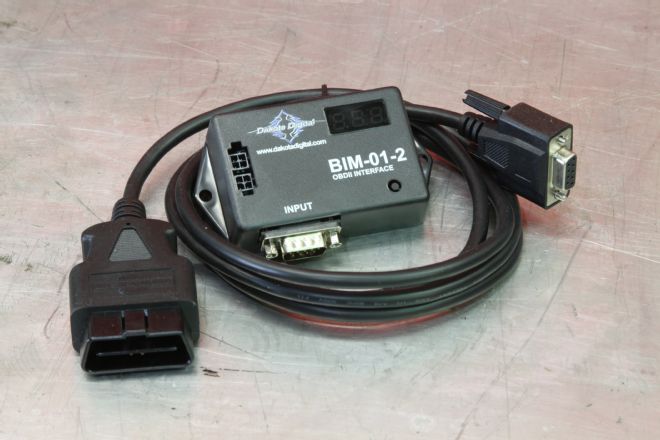
12. If you’re installing this cluster into a newer car (or an older car with and LS swap engine) this BIM-01-2 OBD-II/CAN bus interface makes life a lot easier. This module allows you to plug directly into the engine diagnostic port and extract engine and transmission data from the ECU. You’ll always be able to get speed, tachometer, water temp, and a check engine indicator and, depending on the vehicle, you might be able to get more data such as trans temp, intake air temp, gear position, and oil pressure. The unit can even provide a change of up to 25 percent to compensate for tire size or gear changes that might affect the speedometer.
13. These two buttons are what allowed us to run through the various menus and set up our dash. One wire from each was attached to a common ground while the other ends went to the VHX control box. We mounted them in an out-of-sight but easy-to-access location.
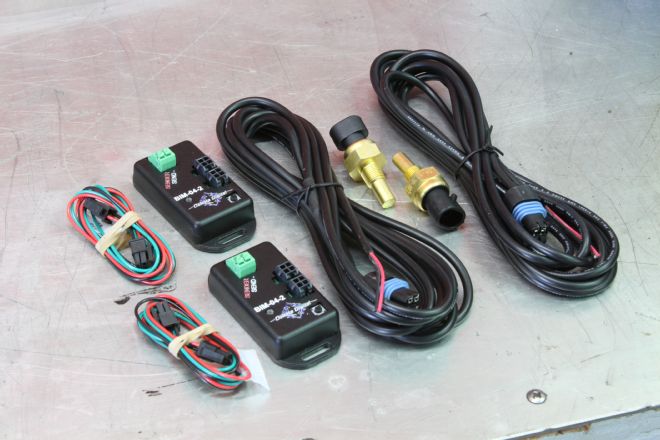
14. If you like options, then you’ll love this system. There’s a gear position sensor (PN GSS-2000), a compass with outside temperature module (PN BIM-17-2), a fan controller (PN PAC-2750), cruise control options, and more. We wanted to be able to track transmission fluid temperature and oil temperature so we picked up two temperature module kits (PN BIM-04-2), which simply wire into our VHX control box.
15. The VHX dash system can be ordered in several finishes with red, blue, or white LED lighting. The lighting intensity can be adjusted through the menu system or you can buy their optional Light Dimming kit (PN DIM-1). We still have to finish our LS engine install before we can finish programming the system, but it already looks light years better than the stocker.