It’s no secret that the easiest way to make more horsepower is to bump up the size of your engine. And, since an engine can only be overbored so much, the next, most logical, step is to install a longer stroke crankshaft. Easy, right?
Compared to what engine builders from decades past had to go through, upping the displacement of an engine has never been easier. For early hot rodders, there were no aftermarket stroker cranks. The path to bigger cubic inches and more horsepower was a lot more difficult. Racers of yore had to turn to offset grinding and scouring the junkyards for salvageable factory parts. Boy, we’re lucky those days are over!
But, what do you do with a stroker crank once it shows up, neatly packaged, on your porch? Even though many of these pieces are designed to drop right into a production block without any massaging at all, due to production variances, at the very least you will need to check to make sure all of the rotating assembly components play nice with each other—and the block. In the case of more aggressive stroke lengths, some amount of grinding on a production-based block is almost always necessary.
To demonstrate the process, we got our hands on a seasoned Mark IV 454 big-block Chevy to serve as a guinea pig. The block was sent out to L&R Engine in Santa Fe Springs, California, where it was hot tanked, mag’d, line honed, and sonic checked. The guys at L&R gave it a clean bill of health and punched it 0.100-inches over for a final bore size of 4.350 inches. Not all blocks can be machined this large so it is important to have your machinist verify wall thickness before you proceed.
Next, and with a displacement goal of 520 cubic inches, we called up SCAT Enterprises for a forged, 4.375-inch stroker crank (PN 445426) and a set of Pro Series 6.385-inch connecting rods (PN 26385716). Mahle supplied a set of 1.270-inch compression height, domed pistons (PN BBC270350D18) to complete the rotating assembly.
Next, with all of the puzzle pieces in-hand, it was time to make them work in harmony with the block. We dusted off the die grinder and grabbed a fresh set of stone wheels and carbide bits in preparation for the mess we were about to make. Follow along as we prep our big block for stroker duty and stay tuned, as we’ll be assembling this big-boy soon.
1. There was a time when adding displacement to an engine was a lot more complicated. We are fortunate nowadays to have stroker cranks, such as this SCAT 4.375-inch stroke unit, ready for order.
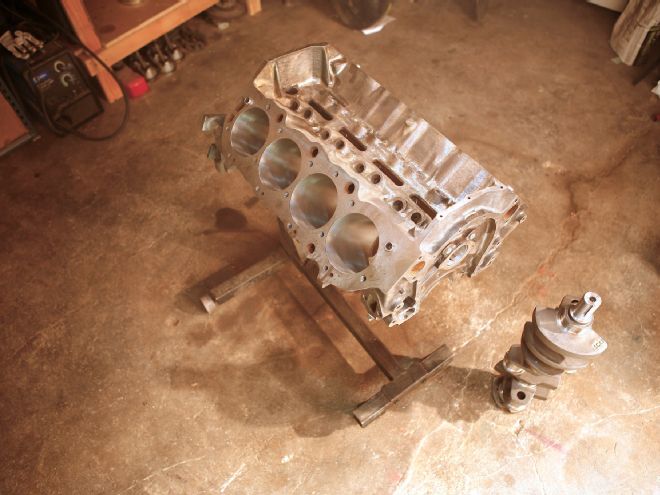
2. Here is our patient, a production 454 big-block bored to 4.350-inches by L&R Engine in Santa Fe Springs, CA, ready to go under the knife.
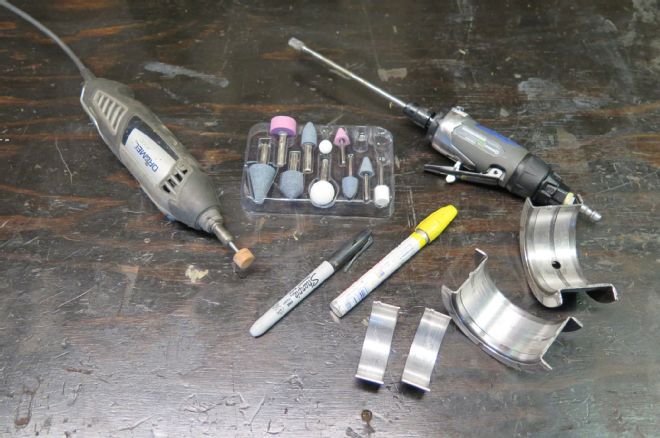
3. Here’s the arsenal of tools anyone building a stroker engine should have at the ready: a reliable air/electric die grinder, with both a carbide and stone bit, a means to mark the block for clearancing (we used a yellow grease pen), and a set of bearings to locate the crank and rods in the block.
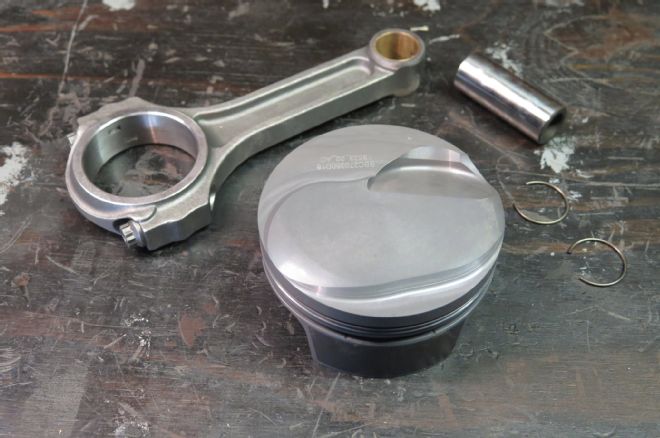
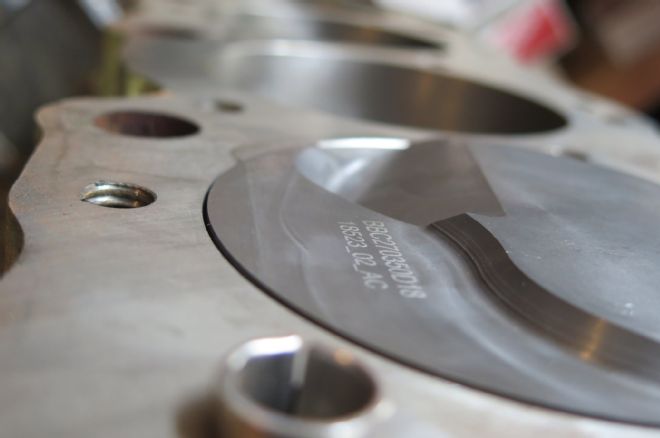
4. Here is the Mahle piston and SCAT connecting rod package that will see duty in our 520ci-soon-to-be. For any stroker engine, you will need to assemble one piston and rod to check block clearance in every cylinder.
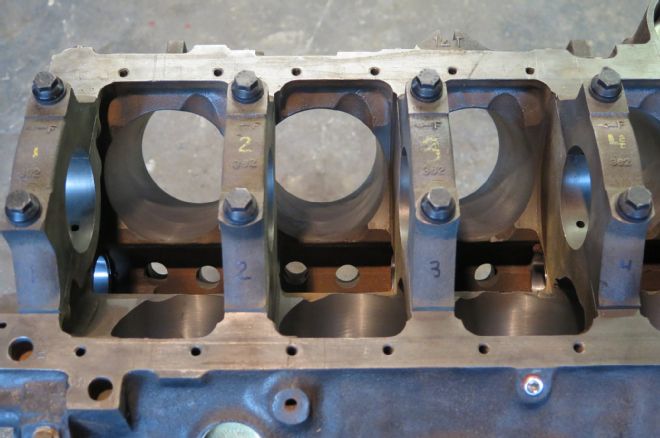
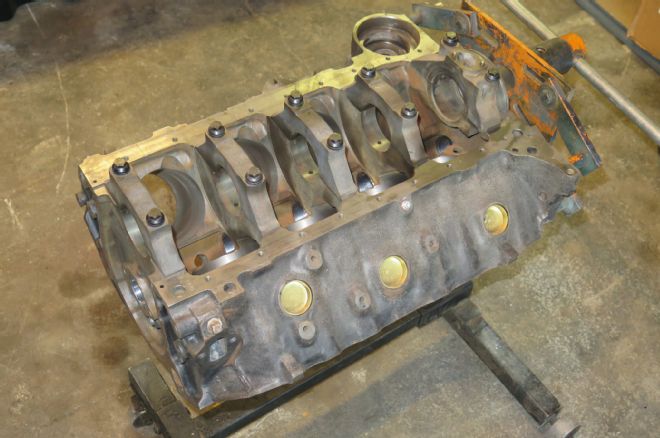
5. L&R Engine line-honed our seasoned block back to perfection. To make sure we didn’t screw up their hard work, we numbered each cap so that it can be reinstalled in the same location as it was machined in.
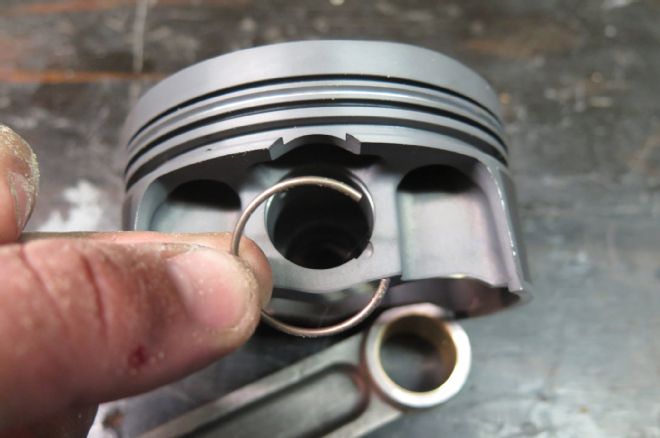
6. Our Mahle 1.270-inch compression height stroker pistons use wire locks to locate the wristpin. From this picture, you can also tell that the pin intersects the oil ring, meaning these pistons will use a support rail in the lowest ring groove.
7. With our piston assembled, it was time to drop it into the block and see what sort of clearance issues we would be working with.
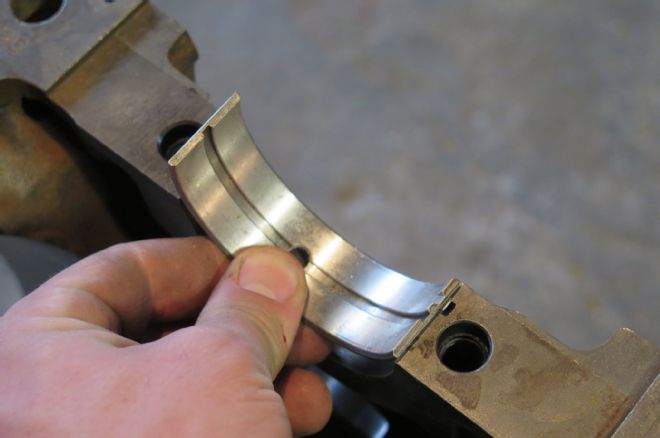
8. A set of scrap main and rod bearings are a great way to clearance a stroker engine. However, it is important to make sure they are the correct size for the crank you will be using.
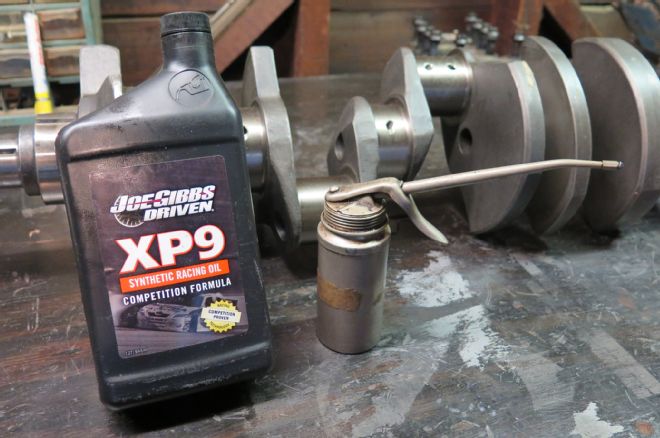
9. We used a set of old bearings, but we didn’t want to scuff the new Scat crank during our clearancing operations. To prevent that, all of the bearings were liberally coated with Driven XP9 oil before installing the crank or rods.
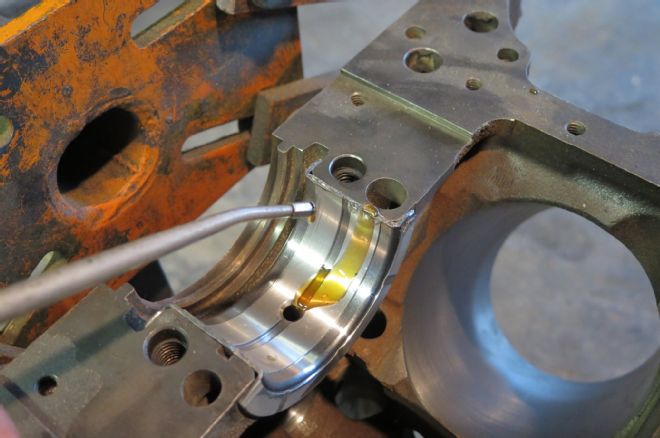
10. It isn’t necessary to install all of the main bearings to clearance for the longer stroke crank, but using the thrust bearing is a must. Without it, the crank will be able to wander back and forth and could cause some confusion as to where clearancing needs to take place.
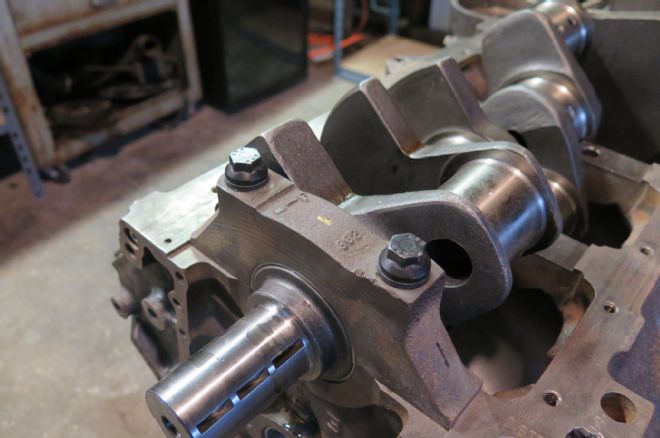
11. With a main bearing on the rear and front caps and plenty of lubrication, we dropped our new stroker crank into the block and reinstalled our ARP bolts to hold the caps in place.
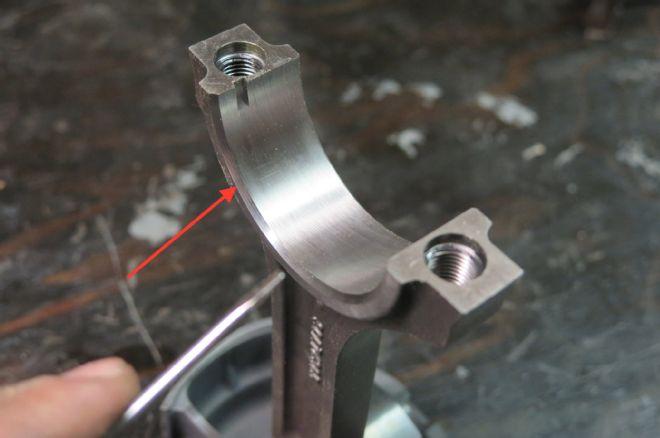
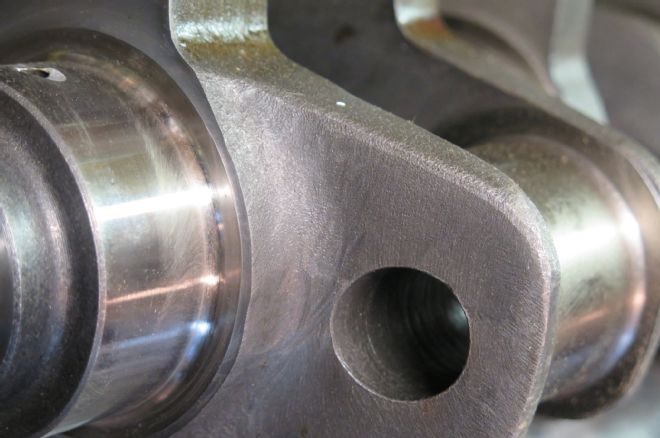
12. When installing the rods and pistons into the block, make sure the chamfer side of the rod faces the filet (outside edge) of the crank journal. Failure to do this will cause the rod cap to ride in the wrong place and may have you grinding the block in an incorrect spot!
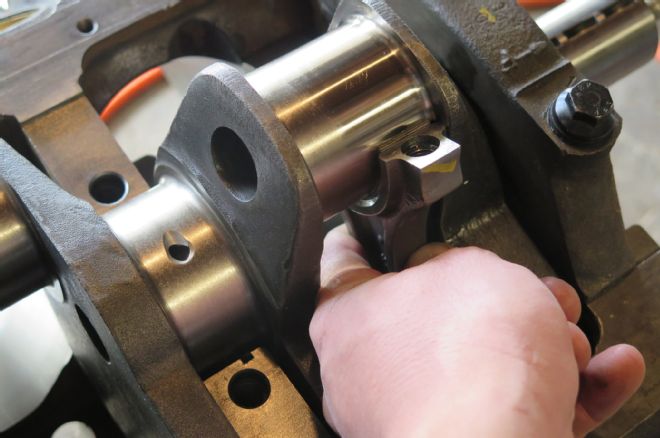
13. With an appropriate rod bearing installed, slip the rod into the first cylinder and install the cap.
14. With the rod in place, we rotated the crank until resistance was felt. We then used a yellow grease pen to mark the block where it was contacting the connecting rod. We pulled the connecting rod and crank out of the block and hit the marked spot with the die grinder.
15. The scallops for the factory rod bolts actually had plenty of clearance already, as did the pan rails. The only spots we needed to clearance were at the bottom of the even bank of cylinders, though all blocks are slightly different.
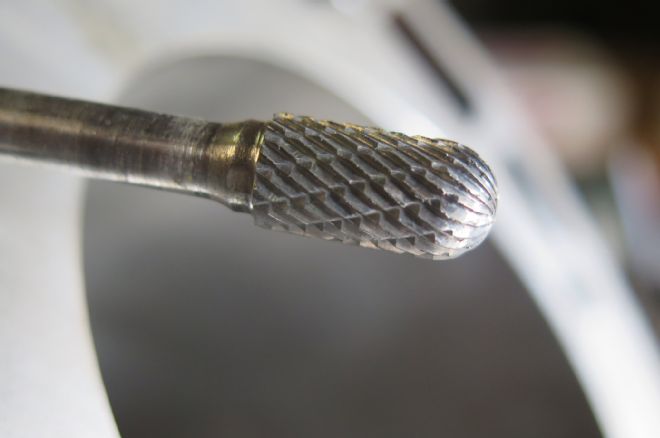
16. This double-cut-style die made short work of the offending cast iron. One of these makes the job of clearancing a block go much quicker. However, don’t go too quick or you could scuff a cylinder wall!
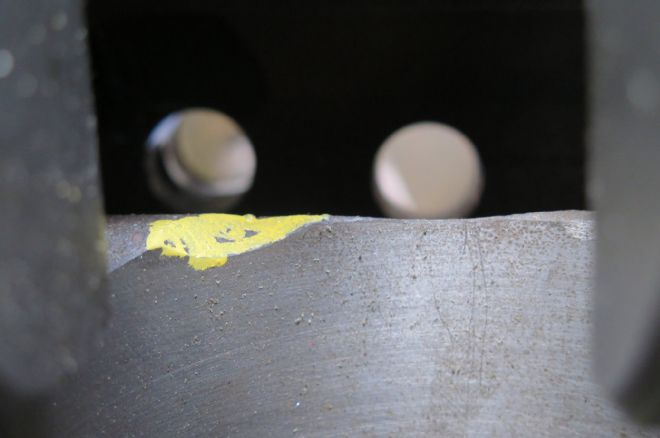
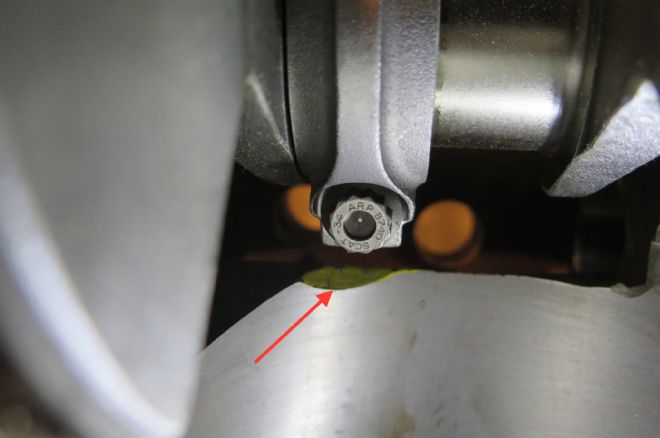
17. This spot on the bottom of the even bank cylinder bores was where most of the clearancing was needed.
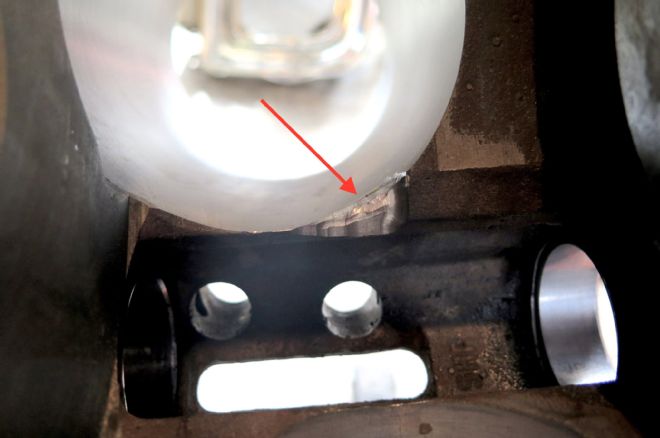
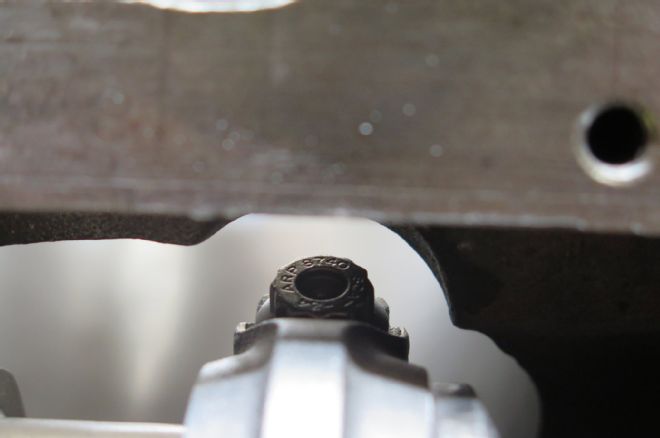
18. Here is a roughed out clearance notch for where the bottom of the connecting rod bolt was clipping the block.
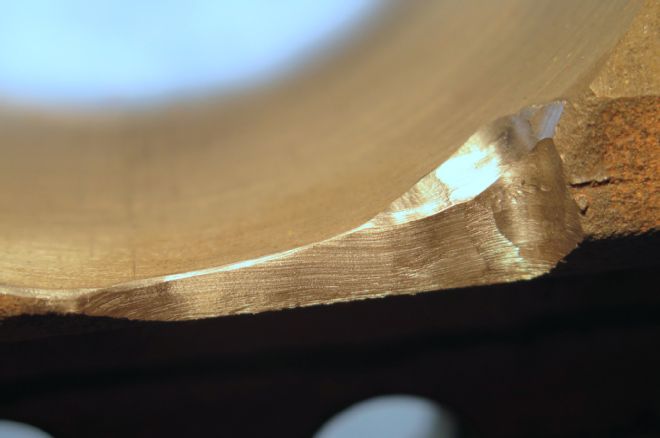
19. We went back over the rough cut from the die grinder bit with a stone wheel to clean it up. We put a slight chamfer on the notch and removed any sharp edges. A sharp edge can catch the thrust side of the piston and cause premature wear.
20. The block will need to be thoroughly cleaned after all of the clearance work has been completed. Just look at the metal shavings hiding out in the rearmost cam bearing. Ideally, have the engine hot tanked one more time before assembly.
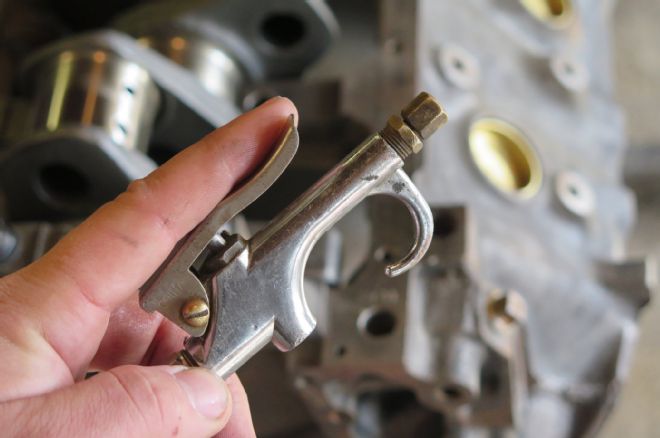
21. If you intend to do the cleaning yourself, a good blowgun is paramount. Also, remove the rear cam plug and oil gallery plugs so they can be blown out and pipe brushed.
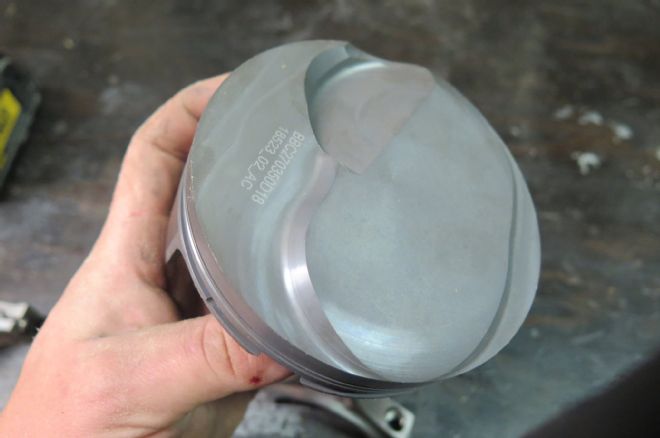
22. Here you can see where our Mahle piston actually comes out of the deck surface 0.042-inches. There’s a method to this madness that we’ll detail when we assemble this monster. Stay tuned!