In the not too distant past, to add fuel injection to your vintage Mustang you had to use OE manifolds, fuel rails, injectors, and wiring to make it all work. A small cottage industry of EFI conversion parts helped make the process a bit easier. However, it was still a rather crude conversion, especially when it came to the fuel system. Anyone who has performed these conversions over the years will roll their eyes and groan at frame-rail mounted fuel pumps that required a quarter tank or more of fuel just so it wouldn’t stall taking a corner at speed. Tuning these early systems was a nightmare, too, oftentimes requiring a custom chip burned for the system to idle with any modicum of stability.
As electronics continue to become smaller and cheaper, EFI conversion solutions have continued to improve. Packaging is now to the point where you can bolt on an EFI conversion that sits on your carbureted intake in place of your old carburetor. And it only needs a scant few wires connected to power the system. This new style of EFI conversion packages most of the important sensors and the control module itself all within the throttle-body casting, allowing a slick and simple installation, void of external control modules. Now it is easy to upgrade your Mustang to EFI during a weekend—or faster—by simply bolting the unit to your intake and connecting a few wires.
Fuel systems designed for EFI conversions have come a long way, as well, keeping pace with the EFI systems themselves. You no longer have to deal with that frame-rail mounted universal fuel pump and unbaffled fuel tanks that cause starvation the second you turn the steering wheel. Today, EFI fuel systems feature modern in-tank fuel pump setups with baffles/sumps just like late-model production cars to prevent fuel starvation during high-G loads, such as cornering, braking, and accelerating. These bolt-in tanks come in a range of materials and price points, but essentially perform the same basic task, making the delivery of high-pressure fuel to an EFI system a bolt-in proposition while allowing for a fuel return to the tank.
Fuel Air Spark Technology, known by their popular acronym as FAST, has been a leader in aftermarket EFI conversions for nearly two decades. When FAST joined the Comp Performance Group (CPG), the parent company of Comp Cams, the FAST engineers had a vastly improved engineering and technical resource to use. As a result, better, more user-friendly EFI systems from FAST began to hit the market, including its award-winning EZ-EFI system. It allows DIY installation of an EFI system simply by answering a few questions on its included keypad with no need for a laptop.
Its latest system is the FAST EZ-EFI 2.0. This carb replacement throttle-body system features a stylish carburetor look for a stealthy upgrade (if that’s your desire), along with electronic control of timing, fuel pressure, nitrous timing retard, return or returnless fuel system options, and a new full-color touch-screen interface. The wiring was made simpler, too. The on-unit sensors are still there for quick connections, but the new unit takes fewer wires to connect to have the system up and running. The standard Holley 4150 flange means it will bolt down to most any carbureted intake and easily connect to both throttle rod and cable systems.
The 1973 Mach 1 you see here has been slowly upgraded with performance suspension, a built 351 Cleveland backed by a Tremec TKO-600 five-speed, and more. That makes it a fun-to-drive, good-handling street machine. The one last nagging issue the car’s owner wanted to check off the list of upgrades was a conversion to EFI due to the car’s tendency to hard start and stall. He wanted his Mach 1 to start with the flick of a key and idle like his daily driver (don’t we all). He didn’t want to play footsie with the gas pedal just to keep it running. He called up FAST and ordered an EZ-EFI 2.0 throttle-body system (PN30400), FAST ignition system (PN 306401), FAST dual sync distributor (PN 305015), and various FAST fuel components like a pressure regulator, hose kit, fittings, and more. Once his credit card had cooled off, he gave the folks at Rick’s Tanks a call to get a stainless steel fuel tank with built-in EFI fuel pump. We followed the installation, camera in hand, and to say the owner is finally happy is an understatement. Check it out.
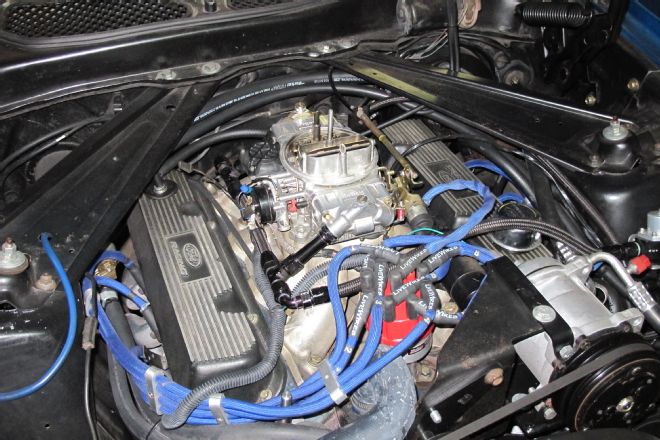
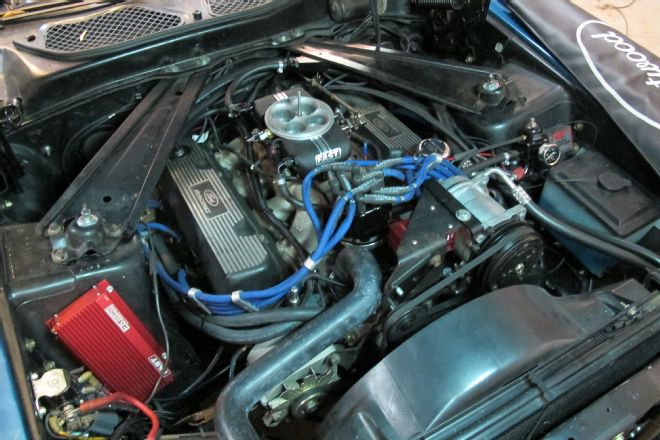
01. The 351 Cleveland has ran this dual-feed Holley since the engine was built, and even with a throttle kicker solenoid for A/C operation. Stalling and hard starts were the owner’s biggest complaint about driving the Mach 1.
02. To prepare for the EFI conversion, you must remove all old fuel system components from the car after disconnecting the battery. That includes the carburetor, fuel feed lines, and any mechanical fuel pump. The kit does not come with a fuel pump block off plate, so be sure to have one in hand before starting the conversion.
03. Drain the fuel from the existing tank. If you’re lucky, you will have a drain plug. If not, you’ll need to siphon it out. Or carefully remove the fuel-sending unit and use a funnel to drain the fuel.

04. Remove the fuel filler neck and associated parts to allow removal of the fuel tank.
05. Disconnect the fuel line and sending unit wiring (if you haven’t already), unbolt the tank, and remove it from the car. The 1971-’73 tanks are strapped to the trunk floor, whereas the 1970 and earlier tanks are removed through the trunk.
06. This particular Mustang had an electric fuel pump mounted on the rear frame rail that was designed for carbureted fuel pressure/volume. EFI works best with an in-tank pump, so these pieces are getting walking papers, too.
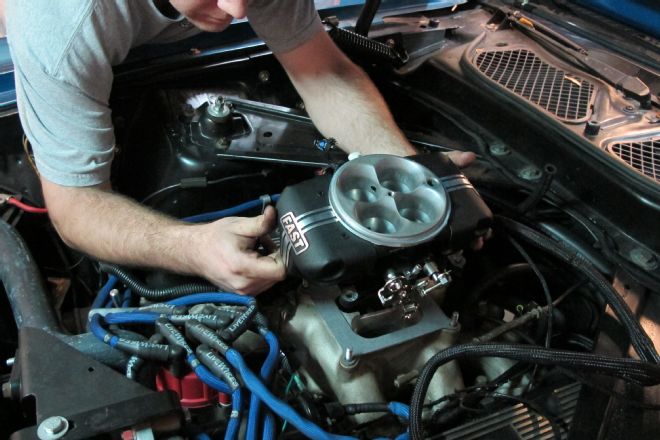
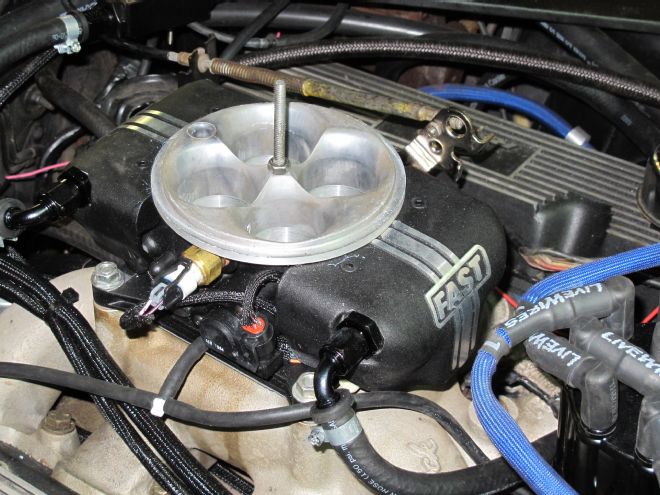
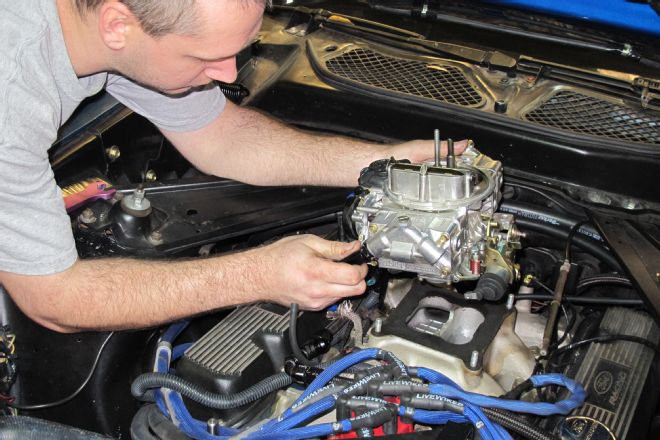
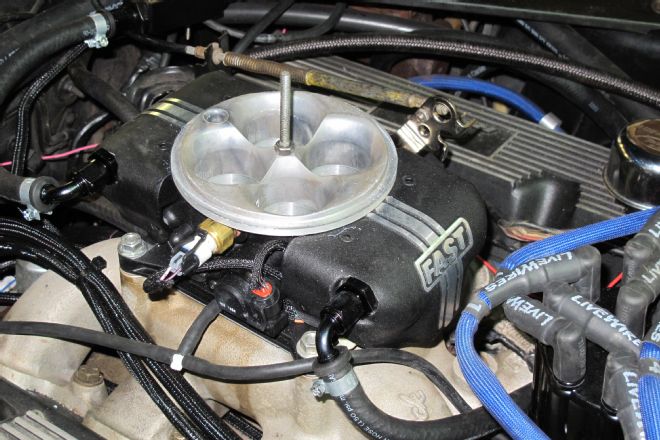
07. The FAST throttle body is bolted down on the 4150 flange intake using a new gasket (included). The throttle body features enough vacuum ports to connect your typical vacuum-fed items like brake booster, PCV, and more.
08. Included with the EFI kit is this aluminum block in which to mount the fuel pressure sensor. This sensor is used to verify fuel pressure within the system. The block was mounted under the driver’s side shock tower brace on the Mach 1 with the fuel feed line running down the frame rail and to the rear of the car.
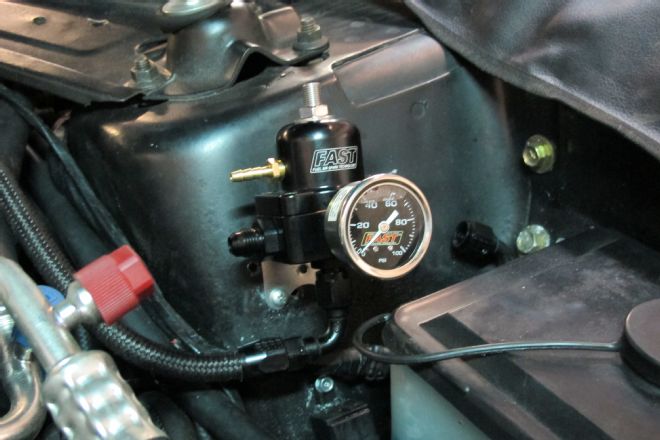
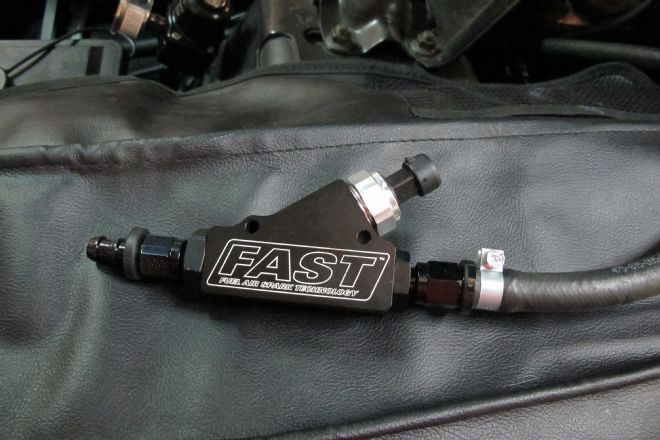
09. We mounted the new FAST regulator in the same location as the old carbureted regulator and even reused the return line to the tank for our installation. For those starting with a mechanical fuel pump setup you’ll need enough fuel line for both pressure and return runs from the engine bay to the tank. Most are fine with the rubber hose with careful routing and protection, but you can run hard line with AN end fittings, if you like, under the car.
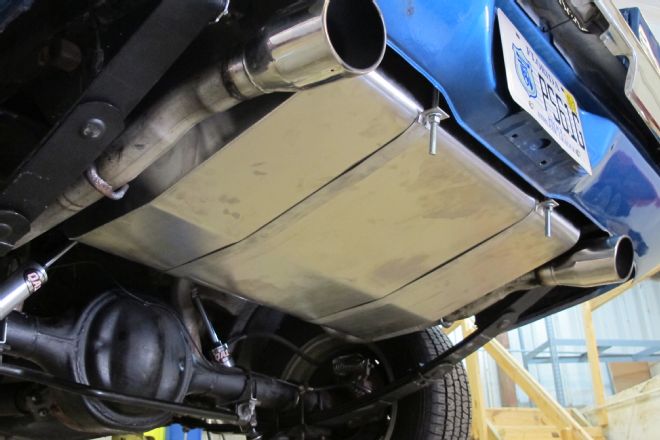
10. The Rick’s Tanks stainless steel tanks for EFI feature an in-tank mounted electric fuel pump rated for 51psi that can deliver 41 gallons of fuel per hour (equivalent to 155LPH). The tanks are built with full baffling to prevent fuel starvation issues, include a vent fitting, and are plumbed with -6 AN pressure and return fittings.
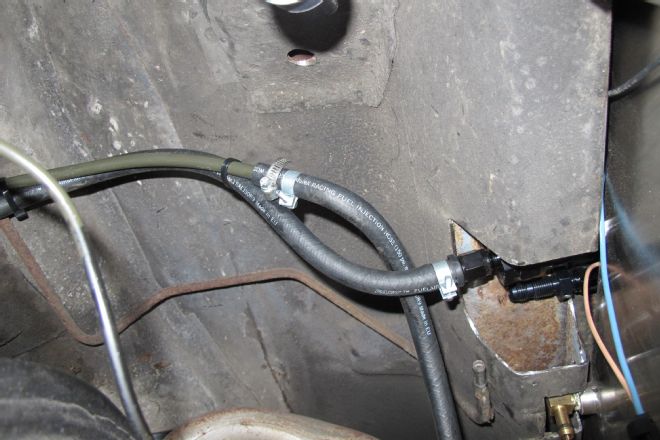
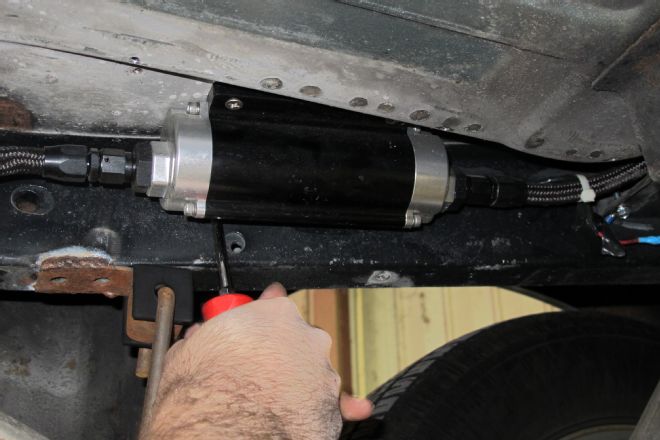
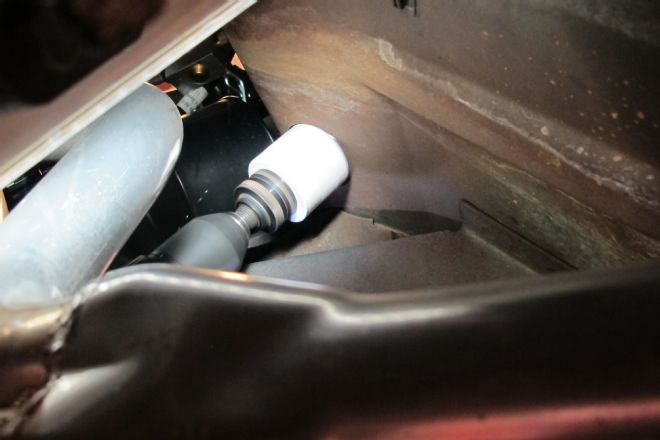
11. As mentioned, we used EFI-rated fuel hose from the engine bay back to the tank and connected it to the FAST inline fuel filter, which we connected directly to the tank’s outlet fitting. The section of hard line visible is the return line installed when the owner converted his carbureted setup to an external electric pump. We retained that line for return use. Finally, due to the tank’s design and the 1971-’73 Mustang tank mounting location, we did have to notch the brace on the trunk floor for clearance of the fittings.
12. In this next photo you can see not only the feed line, but also the return line has been trimmed to length and connected to the tank with AN fittings and EFI hose clamps from FAST.
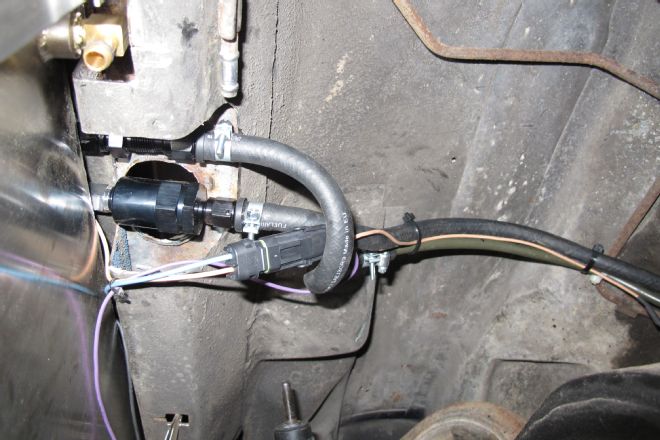
13. Lastly, we have the vent hose connection. The vent fitting is threaded into the tank and rotated to clear any obstructions and connected to the OE vapor line using a piece of standard fuel line. Note, the vent hose doesn’t need the special EFI hose clamps, as there is no liquid fuel or any pressure to speak of in this line.
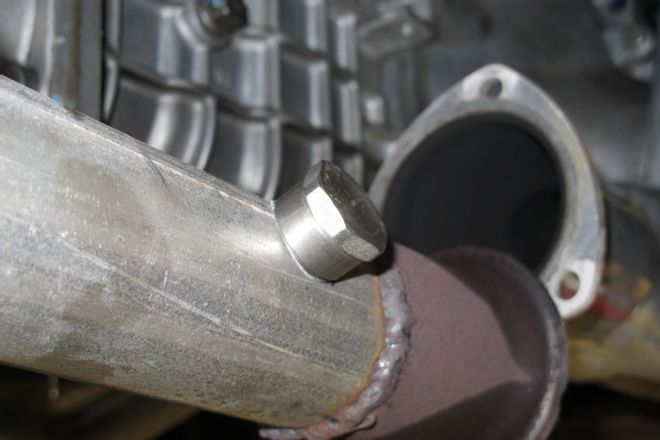
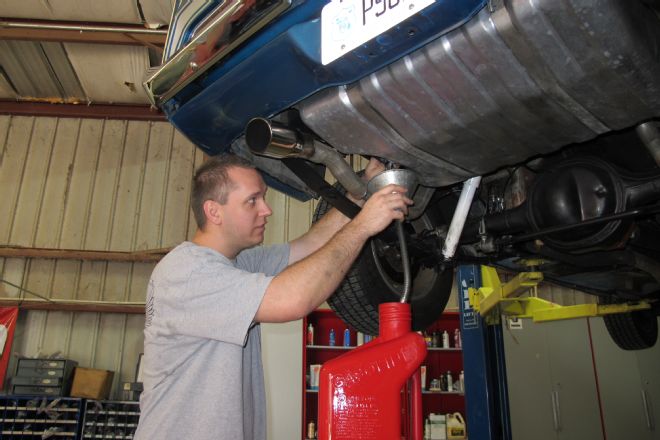
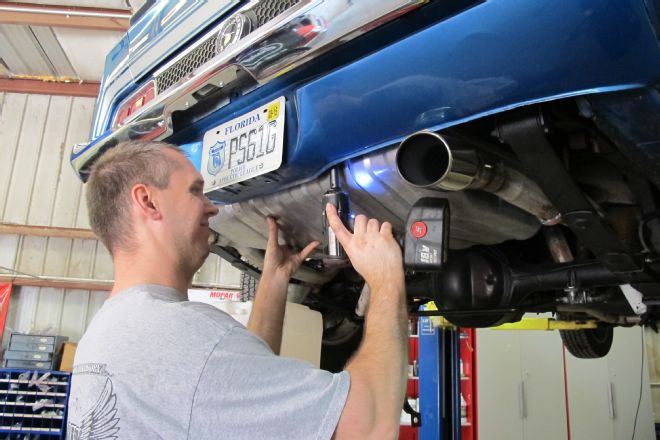
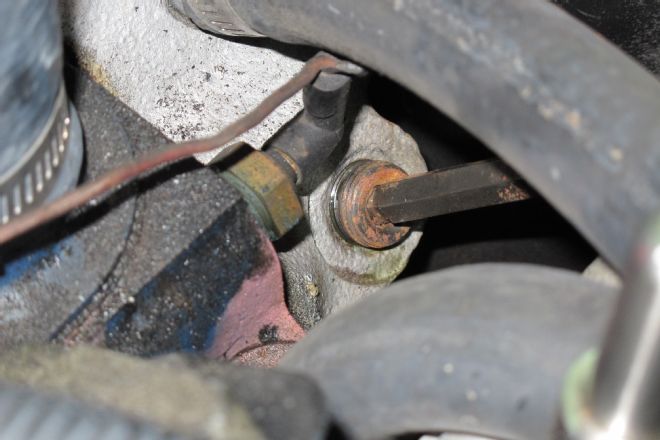
14. One of the ways FAST’s EZ-EFI 2.0 can learn and adjust on the fly is due to the inclusion of a wideband oxygen sensor. These wideband sensors are more sensitive than the old narrowband sensors. Of course, installing one of these sensors means drilling a hole in your exhaust and welding a threaded bung in place for the sensor to thread into. FAST includes the bung and a threaded cap. Drill a 7/8-inch hole for the bung to seat into, as shown here, taking into account the sensor needs to be at a 10 degrees or greater upward angle.
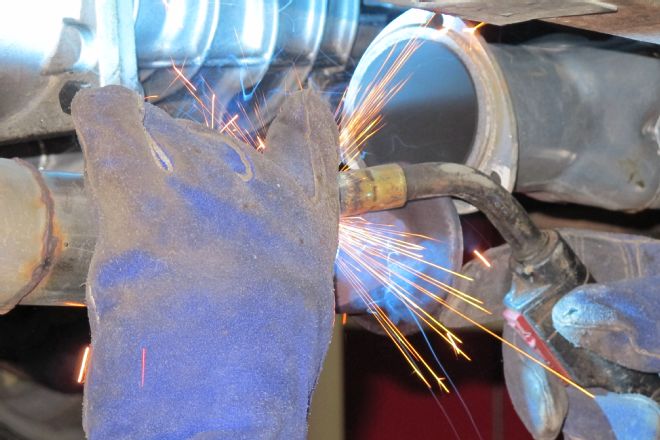
15. When welding the bung into place, it is highly recommended to have the cap installed to prevent distortion of the bung and to prevent thread damage during welding. If you do not have the ability to weld the bung on yourself, have it welded in place by a shop, install the cap, and then drive home to start your EFI upgrade later.
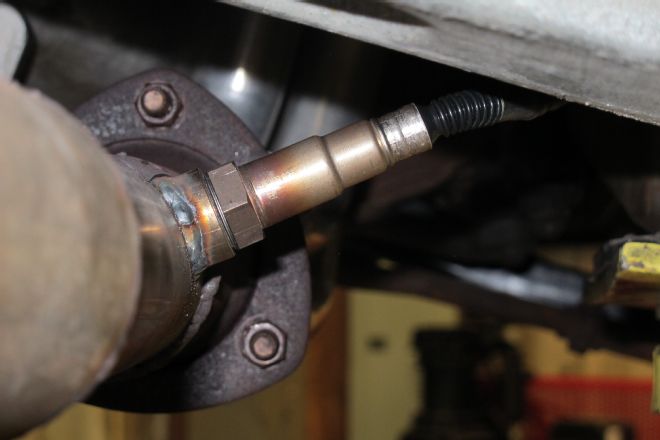
16. Here is the bung welded in with the proper angle, and you’ll notice we did it in the main exhaust pipe after the header collector. The sensor is threaded into the bung and tightened, and the sensor wiring routed away from the exhaust.
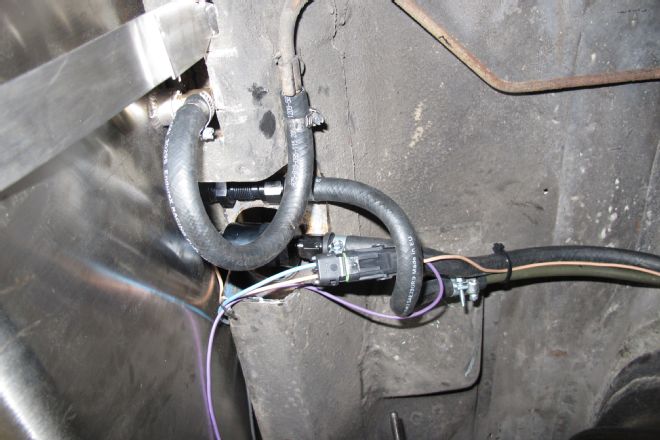
17. The final fuel connections are made at the throttle body itself. We routed the feed line into the rear fitting, and the return line is connected to the front fitting (and then travels over to the pressure regulator on the inner fender). Once the lines were finished, we started on the wiring by laying the harness into place and connecting the harness to the throttle body, fuel pressure sensor, wideband oxygen sensor, and fuel pump wiring.
18. The coolant temperature sensor is the only externally mounted sensor you must find a home for directly on the engine. Often, you will be able to find a second port on your intake manifold to install such a sensor, or you can install a sensor tee in one of your heater hoses. Luckily, this unused port on the water pump was available. We simply removed the Allen plug and threaded the EFI system’s coolant temperature sensor in here.
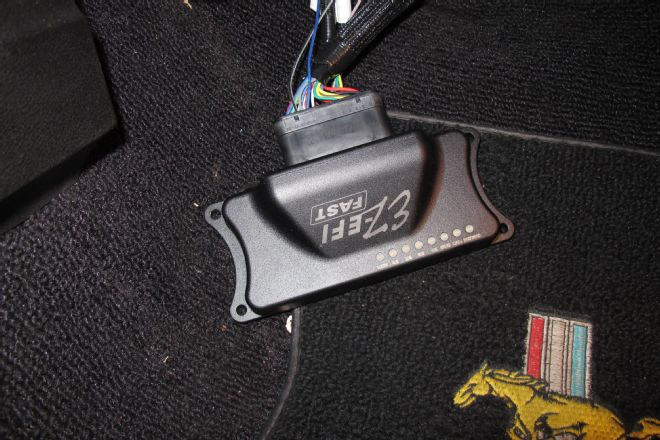
19. If you plan to install the ECU within the passenger compartment a 2-inch hole will need to be made in the firewall to pass the wiring harness through. You can mount it under the hood, but note the ECU is only water resistant and should be kept away from high heat and other electronics like ignition boxes and coils. For that reason, we opted to drill through the top of the passenger toe board and install the ECU under the dash.
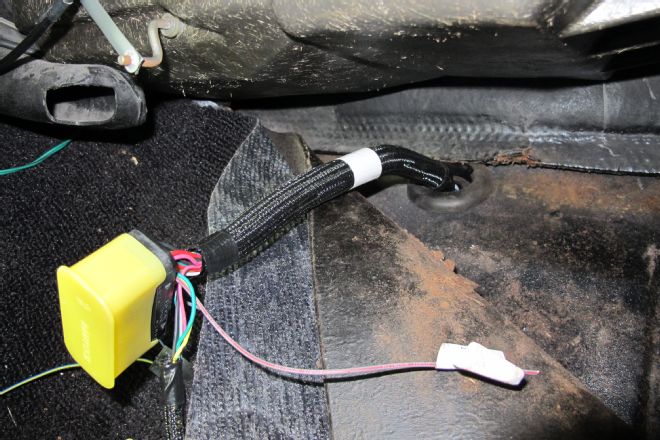
20. After drilling the appropriate hole, the wiring harness is routed through and the rubber seal pre-installed on the harness pressed into place to seal the hole. All loose wires that require connection (12V switched, A/C signal, etc.) are clearly labeled with large paper tags to easily connect to your Mustang’s existing wiring.
21. The ECU connector attaches to the ECU via a threaded retaining bolt in the middle of the wiring connector. Align and start the connector and tighten with the included wrench until the connector is fully seated, as seen here.
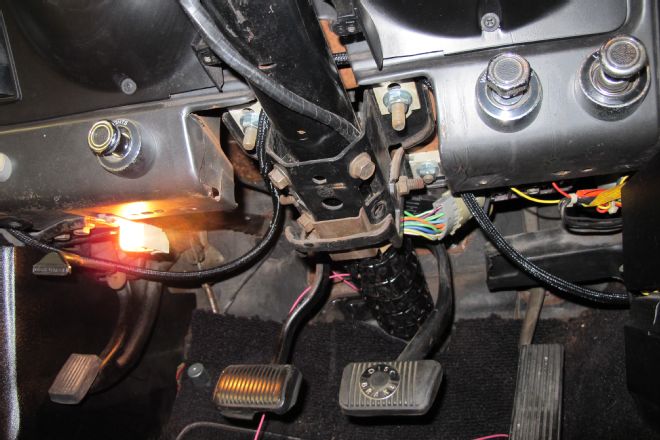
22. The 12V switched wire is connected directly to the ignition switch, as this wire must have power in both “Run” and “Start” positions of the ignition switch. The harness for the hand-held controller is routed up over the steering column to the left kick panel and up to the top of the dash. The included wire ties secure the wiring to under dash braces or wiring harnesses.
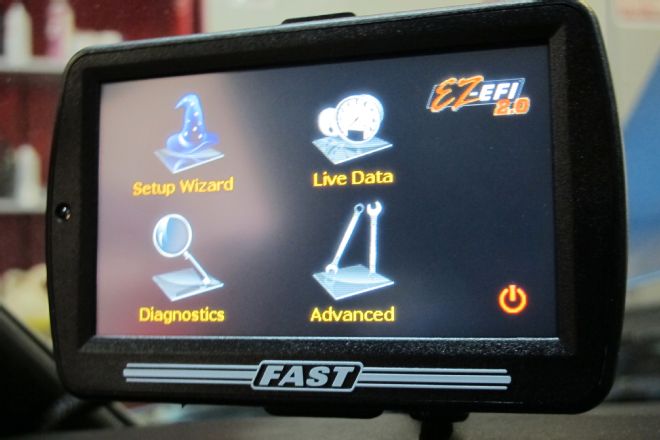
23. The hand-held controller comes with a suction cup windshield bracket to allow use of the touch screen as a secondary dash gauge and allow you to monitor air/fuel ratios, fuel pressure, coolant temperature, inlet air temperature, battery voltage, rpm, and more. When first powered up, you will see the home screen, shown here.
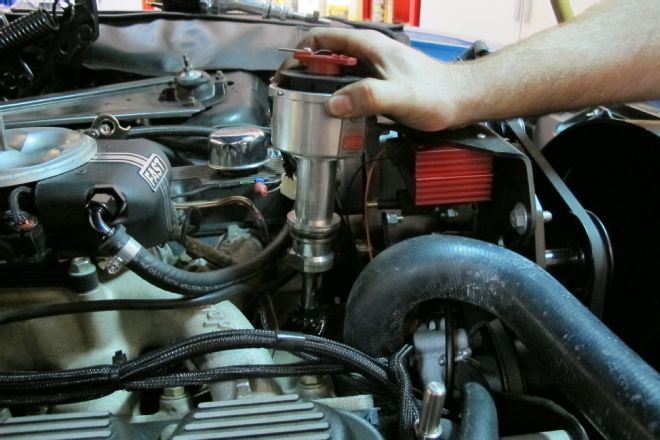
24. Our last step is to upgrade the ignition. The Mallory electronic distributor did a fine job with the carburetor, but we want the FAST EZ-EFI to control the ignition timing, as well. That requires a FAST ignition system and dual sync distributor. So, the engine is rotated to top dead center (TDC) and the Mallory gets the heave-ho.
25. In its place now resides the FAST dual sync distributor, which is plug-and-play with the FAST EZ-EFI harness. We also added the FAST E6 ignition (on the passenger shock tower), and a FAST ignition coil (mounted to the A/C compressor upper bracket).
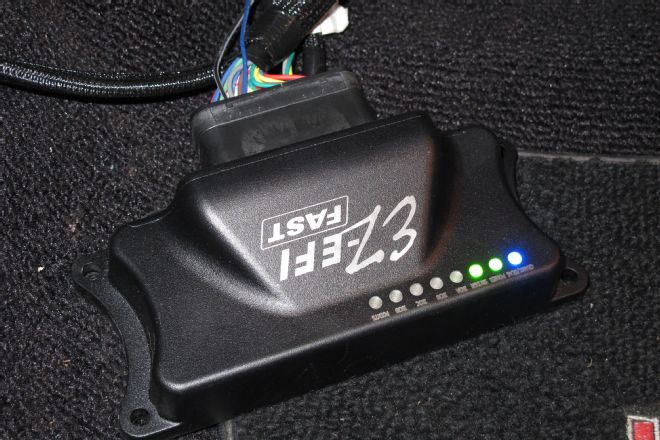
26. With the wiring complete, it’s time to twist the key and put power to the system. Turning the key to “Run” should result in the CRANK/DIAG, POWER, and SWIGN LEDs illuminating. The four injector LEDs will flash as the injectors open and close, once you start the car.

27. Before starting the Mach 1 for the first time, however, there is a small amount of housekeeping and setup you must do through the hand-held touch screen. Setting the type of fuel system (choose return or returnless, gas or E85), adjusting the fuel pressure, setting engine parameters (number of cylinders, cubic inches, and target idle speed), ignition type, and a few select other settings is necessary before you start the engine. Once started, allow the engine to fully warm up to enable self-learning. The FAST instructions are wonderful and show what each tuning screen is capable of (timing control, nitrous, electric cooling fan, and more).