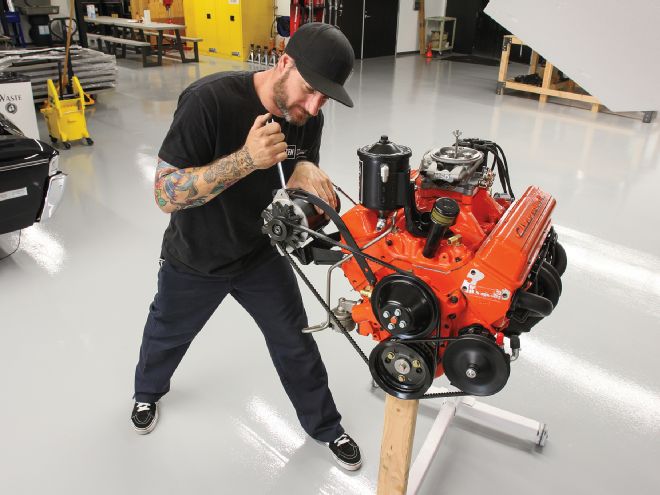
It's pretty exciting when your engine project starts coming together and you've finally got an assembled long-block on your engine stand. For me, it's usually the culmination of months of planning and a few evenings' worth of assembly. This is also the point where anxiety can really start to set in, especially if your plan (like ours) involves expensive dyno testing at the end. A big boom in the dyno cell means not only a day's session down the drain, but a definite hit in the pocketbook when it comes to repairing that damaged mill. And if you've ever goofed something like an engine build up, you know how stressful it can be to get back in the saddle the second time. But you can't let the fear of the possible results keep you from trying new things.
With our engine assembled and our dyno session scheduled, it's time to turn our attention to the ignition, induction, and component selection. As we've alluded to in past issues, our final setup will include a TorqStorm centrifugal supercharger, which we'll cover in full next month. This will be blowing through an MSD Atomic EFI throttle body setup atop the aforementioned Edelbrock Performer RPM intake manifold. We chose to use the MSD Atomic setup for a number of reasons, including packaging and compatibility. As mentioned before, one of our goals with our 383 engine was to build an engine that looked like it came from the early '60s while benefitting from a number of hidden, modern performance pieces. One of these items is the MSD Atomic system.
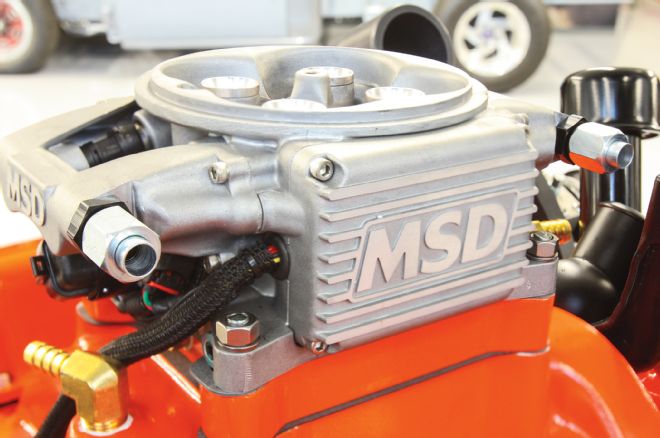
The MSD Atomic throttle body is unique in that the ECU is an integral part of the throttle body as are the 2-Bar MAP, TPS, IAT, and fuel pressure sensors. This translates into a less bulky package, with only a handful of wires exiting the rear of the throttle body, and only two external sensors to connect, coolant temp and O2. Essentially, with the exception of a few wires that will need to be run down the backside of the intake, the Atomic EFI throttle body is similar in installation to that of a standard square-bore carburetor, with right-side fuel fittings and identical linkage. Four 80 lb-hr fuel injectors work in conjunction with the annular rings cast into the throttle body, good for over 600 horsepower. In addition to the throttle body, MSD's Atomic EFI system consists of a Power Module that acts as the communication hub and provides the high current fuel pump circuit and other input/outputs for optional features as well as a handheld monitor, which serves to input information to the ECU regarding cert ain engine parameters. All of the programming is performed via the handheld monitor, negating the needs to connect an external laptop. The monitor connects directly to the Power Module and can be removed following initial setup and engine operation.
One of the neat features of the MSD Atomic system is its ability to not only control fuel, but also timing. This is achieved in conjunction with an MSD 6A or similar ignition control box and a locked-out distributor. Settings for idle timing, total advance, and vacuum advance are available through the Handheld Monitor. The Atomic EFI system requires an rpm/trigger reference signal to operate, which can be triggered when connected to coil negative on breaker points, GM HEI, or Ford TFI inductive based ignition systems. We opted to take control of the ignition system even further, while also satisfying this need by using an MSD Pro-Billet distributor. This CNC machined dizzy contains a precision machined reluctor attached to the distributor's shaft which triggers the magnetic pickup mounted in the housing, making it one of the most accurate ways to trigger the ignition. With no moving parts to wear or adjust, our distributor truly is "set it and forget it."
To feed the fire, we'll be using an Aeromotive Stealth in-tank fuel pump plumbed in the traditional return-style with an Aeromotive EFI regulator on the return side of the system to ensure proper fuel pressure at the injectors.
In addition to the components that will control the fuel and spark on our motor, we also need to choose and mount a couple accessories. For that end, and to further enhance the vintage appeal of our "283 in disguise," we opted to use a Powermaster PowerGEN alternator. Disguised as a vintage generator, the PowerGen unit contains the same modern internal components as its contemporary alternator brethren, capable of providing a total output of 90 amps, with a whopping 60 amps at idle.
The other accessory that we'll need to install is a power steering pump. Our initial idea was to use an early '60s-style Saginaw pump with an integral reservoir. Unfortunately, space constraints as well as belt and pulley alignment issues forced us to shift gears and look for an alternative. Since the TorqStorm supercharger system was designed to utilize a two-groove V-belt pulley, we needed a power steering pump that was compact enough to fit behind the blower's bracketry, while still maintaining proper pulley alignment. A quick perusal through Tuff Stuff's website yielded a later-style Type-II power steering pump that would fit perfectly, though it will require the use of a remote reservoir (more on this a little later). To mount our accessories, an off-the-shelf power steering bracket from Alan Grove Components will be used to mount the Type-II pump while an alternator bracket, also provided by Alan Grove Components, will be modified to mount the PowerGEN. Driving our accessories will be accomplished via Trans Dapt double-groove pulleys on the crank and Weiand water pump. Wrapping up the accessories are a Weiand Action +Plus water pump and MSD DynaForce starter.
Once our accessories were sorted and the necessary components installed, it was time to load our 383 into the back of our work truck and head out to Mira Loma, California, where Steve Brule and the crew at Westech Performance were ready for our test and tune day on their engine dyno. After filling the motor with Comp Cams Break-In Oil and following their break-in procedures, Steve progressively brought our engine up to operating temperature. After a few initial base pulls, the MSD Atomic EFI system had enough operating parameters to allow us to set down a decent set of dyno numbers; 409 lb-ft torque and 364 horsepower. While not that impressive outright, keep in mind our 383 was built and designed with boost in mind, so these results are typical of a low-compression engine. When it comes time to put some boost into our motor, we should see both of those numbers creep up at least another 100 points. Then we'll really have something!
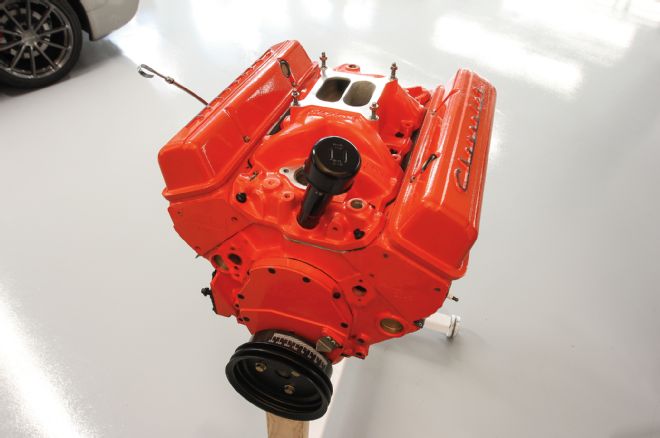
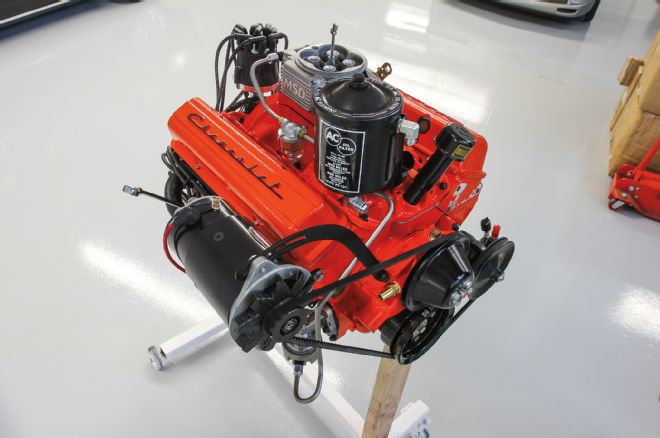
01 Here's where we left off last time; the long-block is assembled and the engine is ready to accept some accessories.
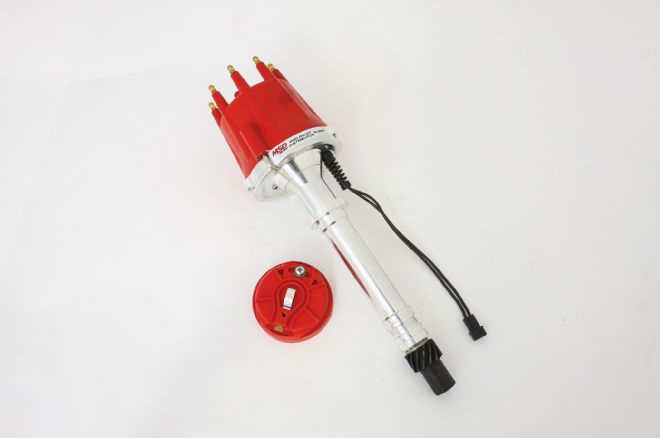
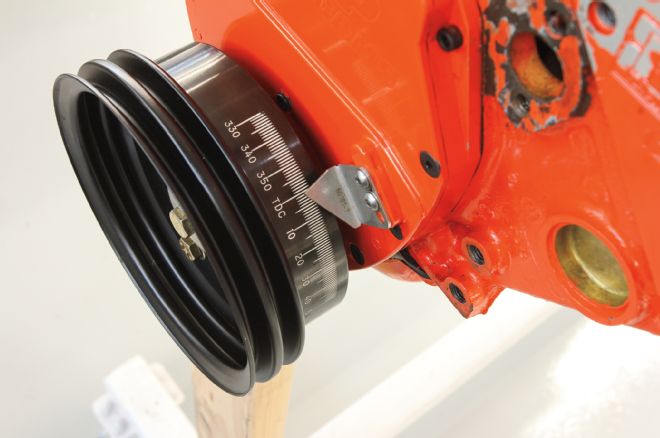
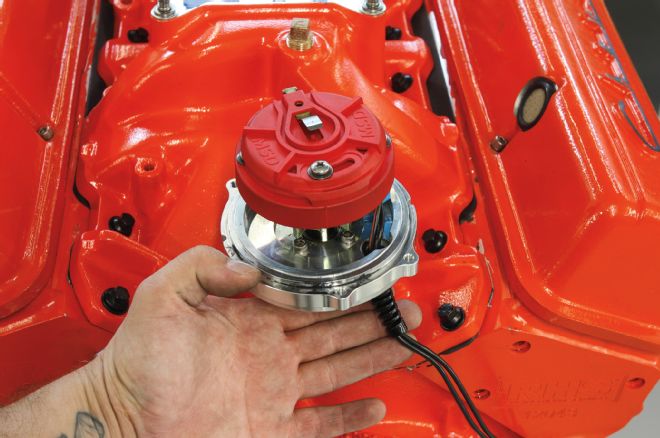
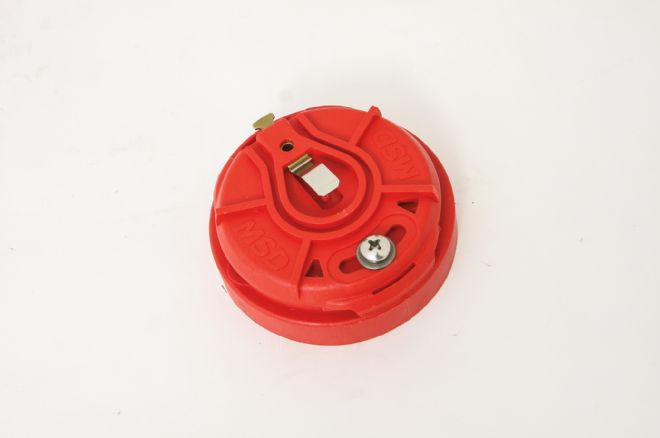
02-05 The first thing we're going to do is install the MSD Pro-Billet distributor (#85551) and make our plug wires. Since we're going to be controlling the timing using MSD's Atomic EFI system, it's necessary to install a Rotor Phasing Kit (#84211), which allows the rotor to be adjusted to ensure perfect rotor phasing. With the adjustable rotor installed, the engine is brought to TDC on cylinder one so that the distributor can be clocked properly. Note that once in place, the rotor is pointing to cylinder No. 1.
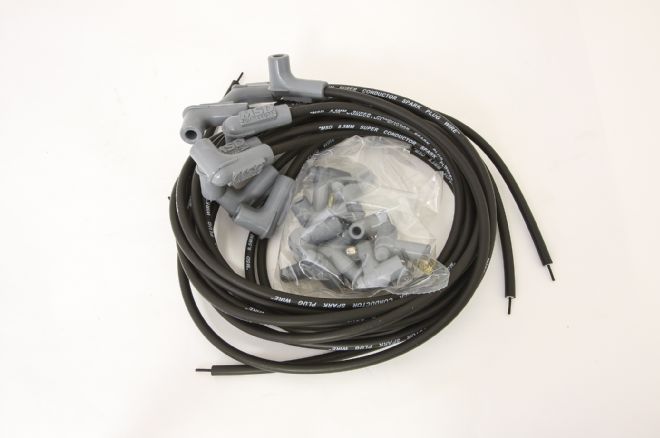
06 To provide the spark, we're going to use MSD 8.5mm Super Conductor plug wires, with plain black ends (not pictured) to better suit our vintage build.
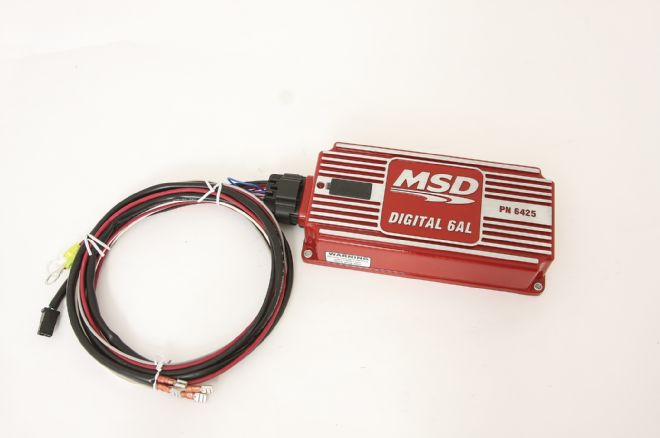
07 To take full advantage of the MSD Atomic EFI's capability, we opted to utilize the internal timing control ability. To do so, we're going to use an MSD 6AL capacitive discharge Ignition Control (#6425). Most stock ignition coils must build up and store voltage between each firing, this is called an inductive ignition. At higher rpm, the coil has less and less time to go through this process, which reduces the amount of energy the coil can produce, causing loss of top end power or misfire. In a capacitive discharge system, the capacitor is quickly charged with 520 to 535 volts and stores this until the ignition is triggered, sending full power to the coil even at high rpm. The MSD system also produces full power multiple sparks for each firing, decreasing as the rpm increases, but always lasting for 20 degrees of crankshaft rotation. A built in rev limiter can be easily set in increments of 100 rpm to save the engine from catastrophe should our lead foot get a little too heavy.

08 Controlling the spark is only half the ignition equation. The other half will be handled by an MSD Blaster SS coil (#8207), capable of producing 300 milliamps with a maximum voltage output of 40,000 volts.
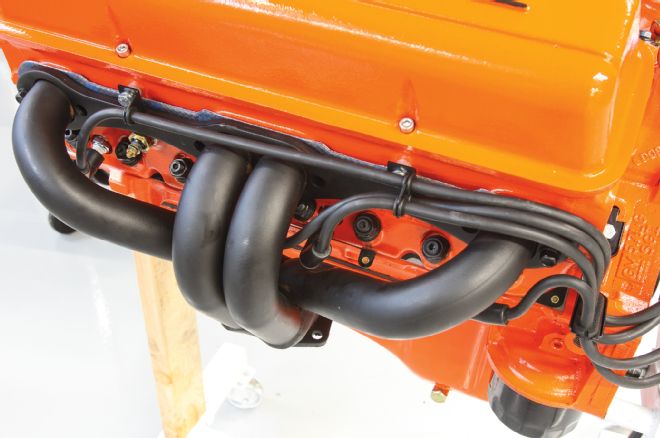
09 Routing the plug wires around the Hooker Block Hugger Headers was made easy via Classic Industries' spark plug wire support set (#TF700448). They also add a bit of authenticity to our early engine build.
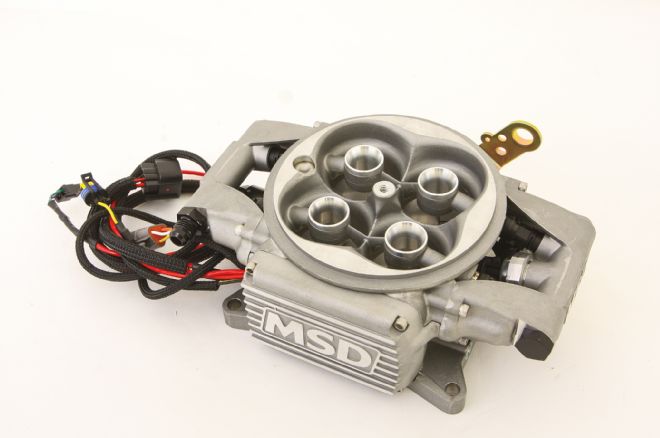
10 The pièce de résistance of our build is MSD's Atomic EFI throttle body. Based on the same rough dimensions as a 4150 carburetor, the Atomic throttle body features built-in fuel rails and four 80 lb-hr injectors. The ECU, TPS, MAP, IAT, and fuel pressure sensors are all packed into the tight confines of the throttle body as well, making external connections minimal. Since the Atomic ships with a 2-Bar MAP sensor as standard, boost ratings up to 14 pounds are supported.
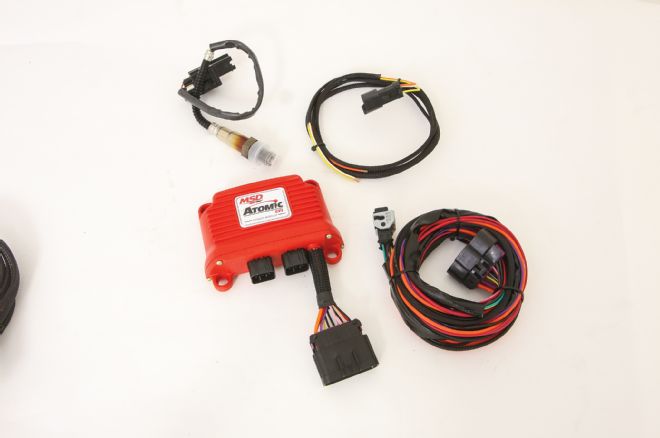
11 In addition to the throttle body, the Atomic EFI kit consists of a Power Module that acts as a communication hub and provides the high-current fuel pump circuit as well as other input/outputs for optional features such as electric fan control. There are connections for the wide-band O2 sensor, the Handheld Monitor, power, and communication to the throttle body.
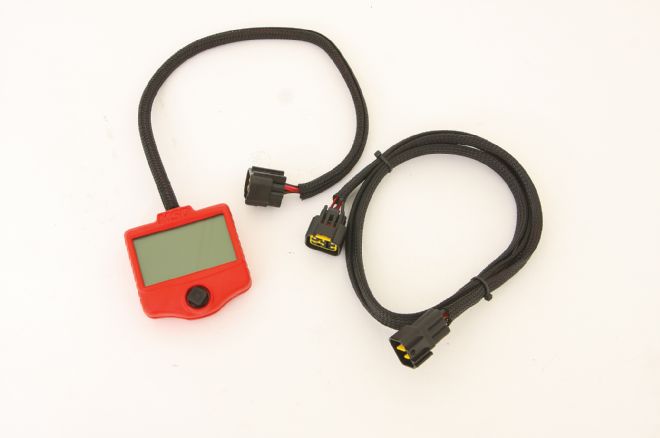
12 Connecting a laptop to program the Atomic EFI system is not only unnecessary, it's not possible. Instead, a self-tuning system, in conjunction with initial inputs programmed via the Handheld Monitor, is used to create a base fuel map. Once the engine is up and running, the self-learning technology will optimize that base map resulting in the best performance possible. Altitude changes, temperature swings, and other factors will be adjusted automatically, on the fly, by the Atomic ECU.
13 The Atomic throttle body features a pair of inlet/outlets that can be plumbed in two ways, using either a return system where one functions as the inlet while the other functions as the outlet, returning to the tank or as a returnless system, which is how we're planning on plumbing our system. This is possible as the throttle body contains an internal fuel pressure sensor that communicates with the ECU, which in turn controls the fuel pump using Pulse Width Modulation. AN-6 fittings and lines will be used from tank to throttle body.
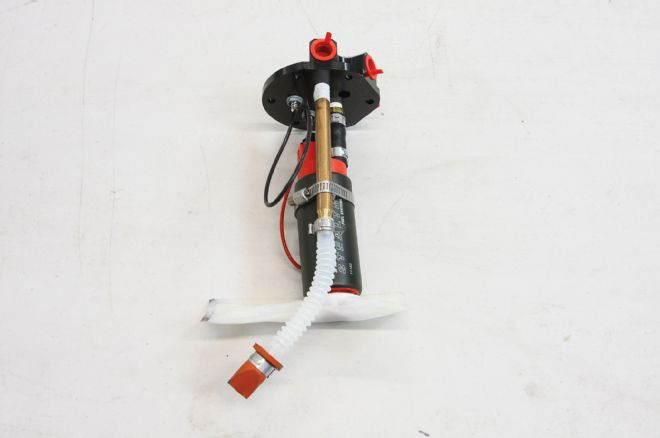
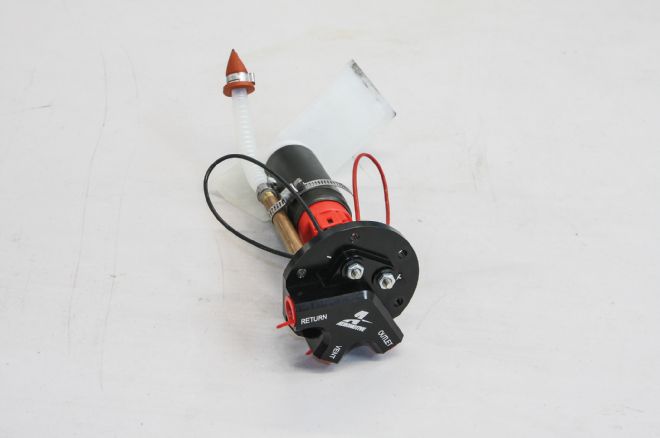
14-15 Feeding the fuel system will be handled by an in-tank Aeromotive 340 Stealth fuel pump, the top of which features an outlet, return, and vent bung.

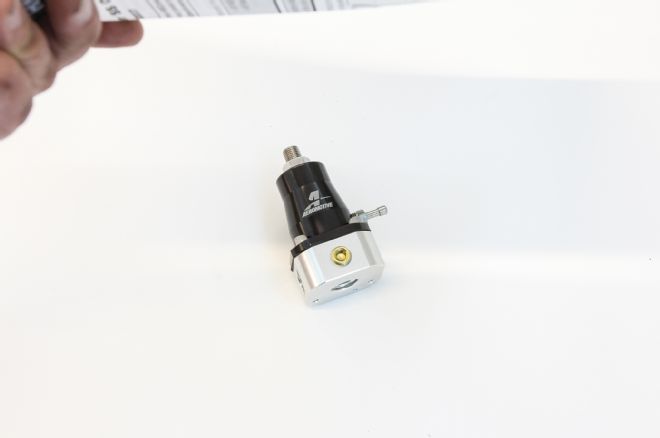
16-17 To ensure that the injectors don't get clogged, an Aeromotive 10 micron fuel filter (#12321) will be used, mounted just before an Aeromotive EFI Bypass Regulator (#13129).
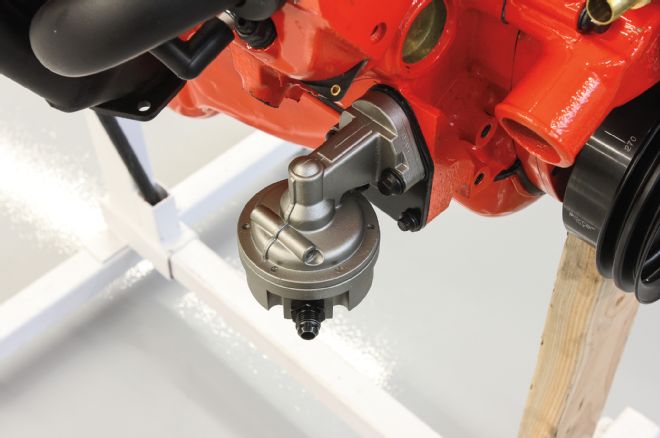
18 To hide the fact that our "vintage" engine is a fuel-injected 383, I wanted to incorporate a few stock items, such as the mechanical fuel pump.
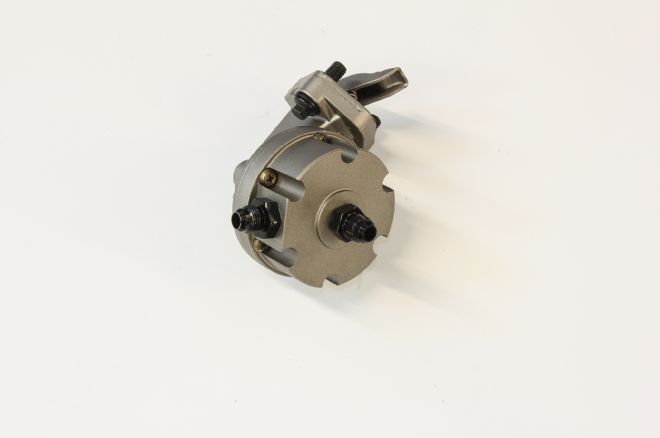
19 To make this work with our EFI setup, I ditched the lower half of a no-name fuel pump and machined a "dummy" lower with a simple inlet/outlet arrangement. Fuel comes up the bottom and exits out the side.
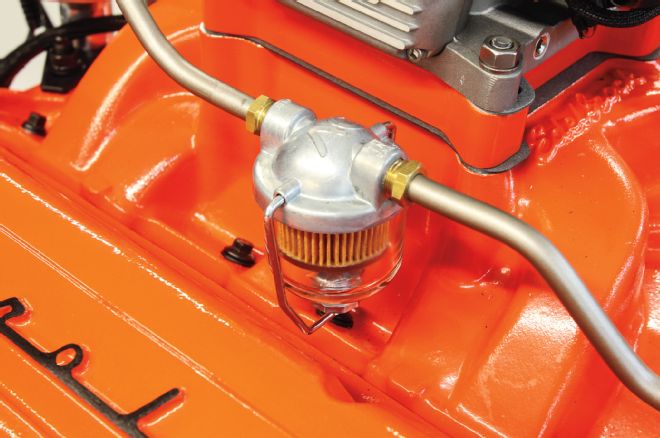
20-21 A hard line was then bent and routed from the "fuel pump" to the Atomic throttle body. A glass AC Delco fuel filter (#TF700600) from Classic Industries was machined so that the hard line passed straight through, further enhancing the period aspect of the build.
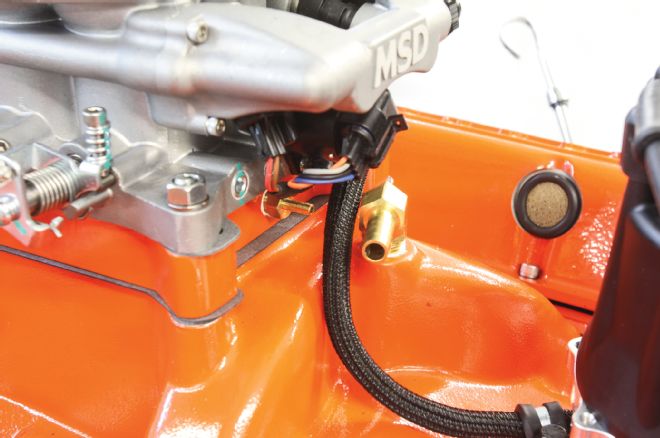
22 Out back, we have two vacuum fittings; the larger manifold vacuum port is for a brake booster while the smaller barb will be attached to a boost gauge and the fuel regulator to give the regulator boost reference.
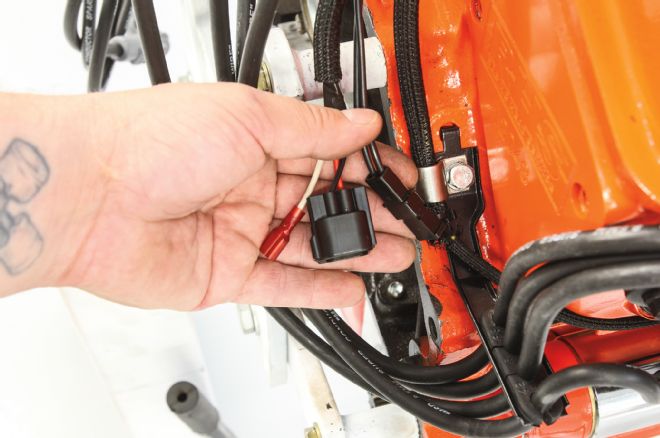
23 Connections for the Atomic throttle body consists of a coolant temp sensor and the two-wire (violet/green) distributor connection, as well as the larger MSD CAN connector that mates to the Power Module. Since we'll be controlling the timing with the Atomic ECU, that single white wire will mate to a similar wire on the 6AL box.

24 To maintain the output and reliability of a modern alternator while retaining our engine's vintage vibe, a Powermaster PowerGEN alternator (#82051) will be used. To further enhance the look, I added a reproduction Delco-Remy tag (#TF700138) from Classic Industries to the body.
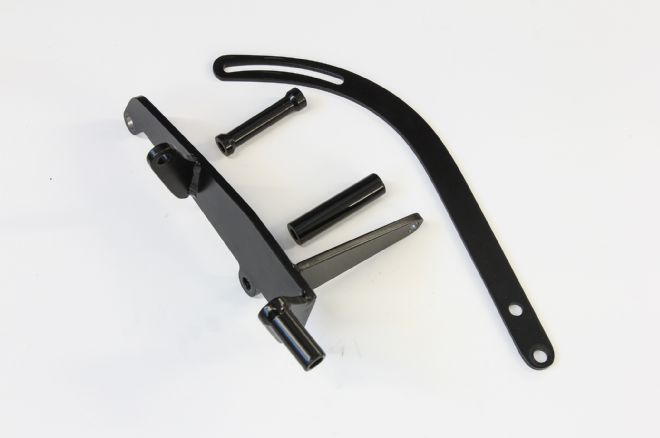
25 Since we were limited to where we could mount the PowerGEN, I had to fabricate a custom set of brackets, using a set from Alan Grove Components (#113L) as a starting point.
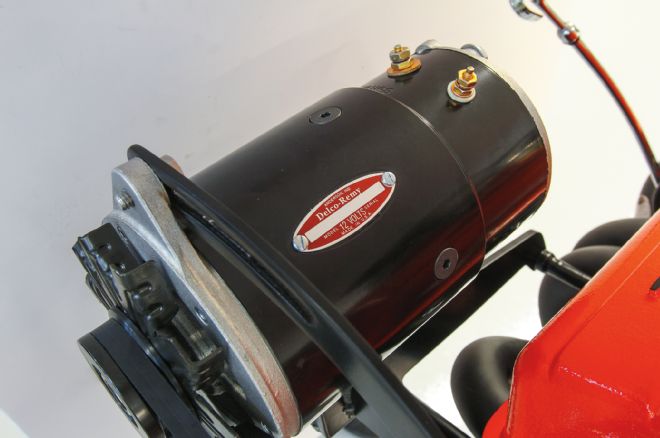
26 This located the PowerGEN in the perfect location on the passenger's side of the engine. Note the extra post on top of the PowerGEN for retaining the stock "Gen" dash light, a neat option to further the original vibe.

27-28 A 10-gauge wire connects to the "BAT" terminal atop the PowerGEN and runs to the battery terminal on the MSD DynaForce starter, while a ground wire is attached to the lower mounting point, an important and oft forgotten addition to ensuring one's alternator is working at its most efficient state.
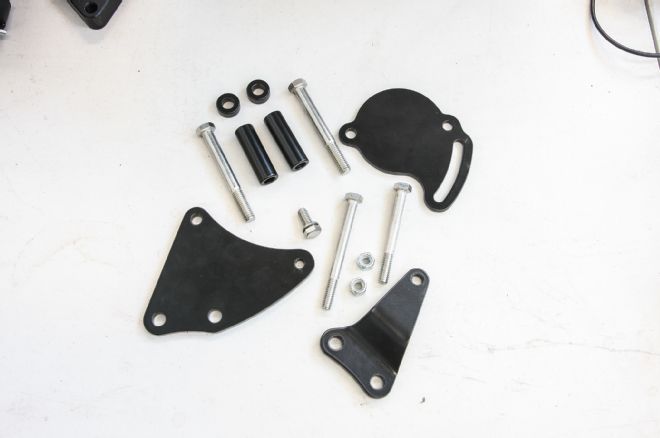
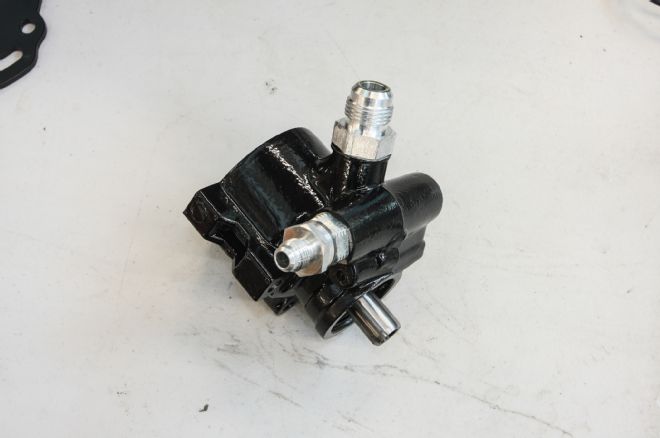
29-30 Typically, the power steering system utilizes the third groove on a small-block Chevy, short water pump setup. Due to blower location constraints, we're limited to a two-groove pulley design, forcing us to slightly modify the power steering pump's location. To do this, we used an Alan Grove power steering pump bracket (#409L) with optional thin rear bracket in conjunction with a Tuff Stuff Type II power steering pump (#6175ALB). This allowed us to locate the pump and pulley further aft than normal, enabling the use of the second groove of the crank pulley to drive the power steering pump.
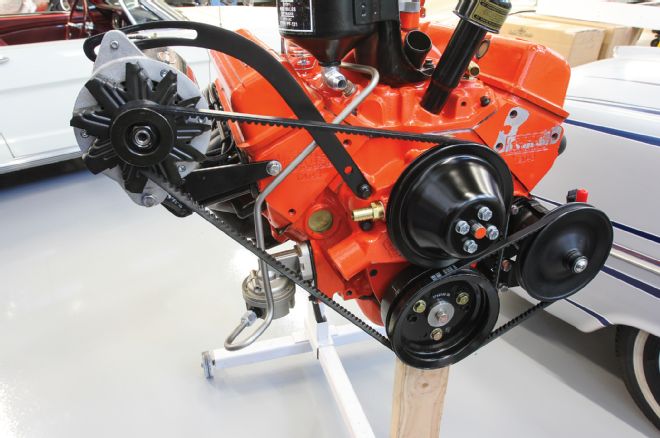
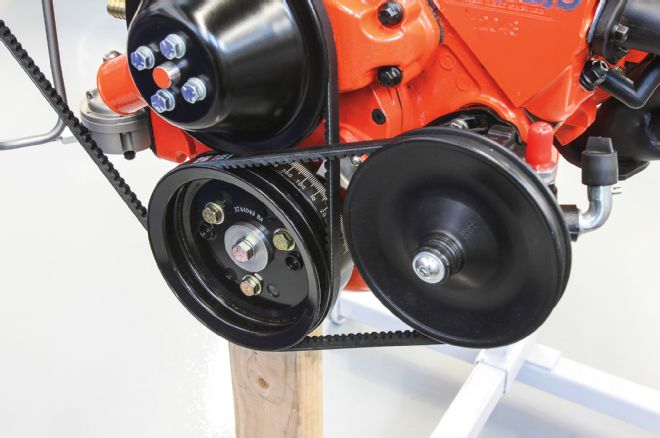
31-32 With pair of Trans Dapt pulleys on the water pump (#8600) and crankshaft (#8603), the power steering and alternator belts can be added, finishing up the install.
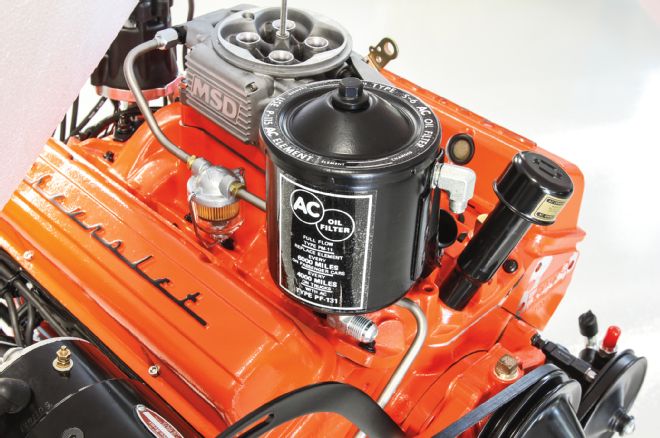
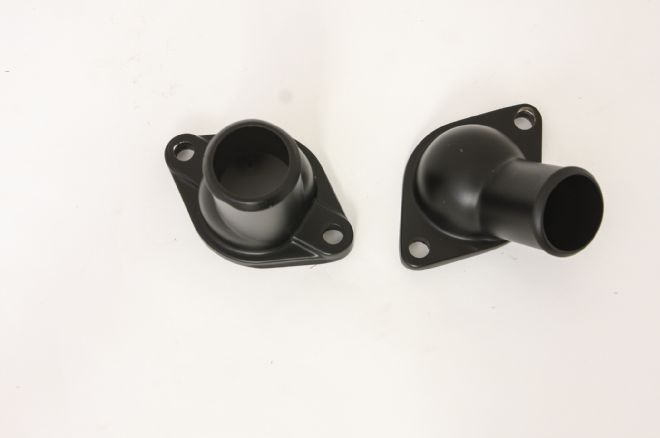
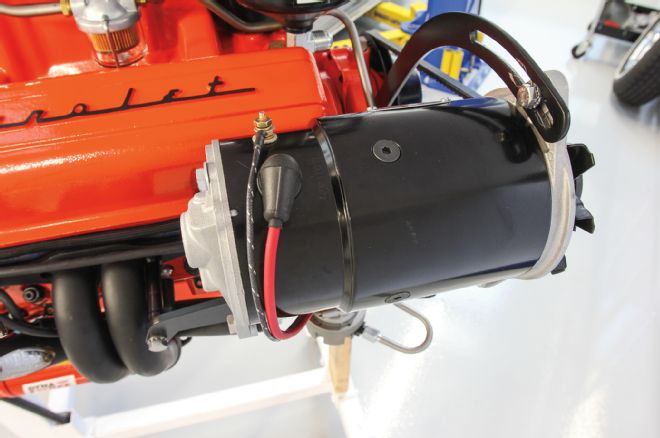
33-34 In the late '50s, an oil filter was not a standard option for most V-8 engines. Oftentimes, it was added later as a dealer option, recognizable by the orange and blue paint scheme. A few rare engines shipped direct from the GM factory with an external filter featuring an all-black housing and lid with white decals. I opted to outfit our engine using this guise, modifying it to work as an external power steering fluid reservoir. A baffle was added inside the canister, while the inlet/outlets were modified to larger AN-6 and AN-10. This factory option upgrade mounts below a Trans Dapt 45-degree water neck (#8633).
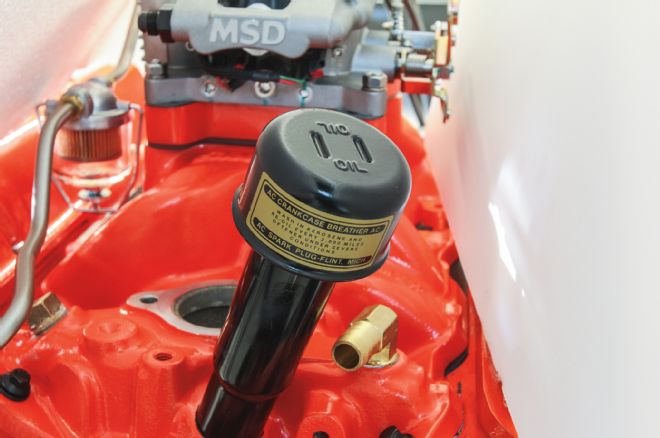
35 Of course, no vintage small-block build would be complete without the traditional oil filler tube at the front of the intake, which we covered being installed last month. The reproduction decal from Classic Industries on the breather cap (#DC29) lends another bit of credibility to the vintage aesthetic.
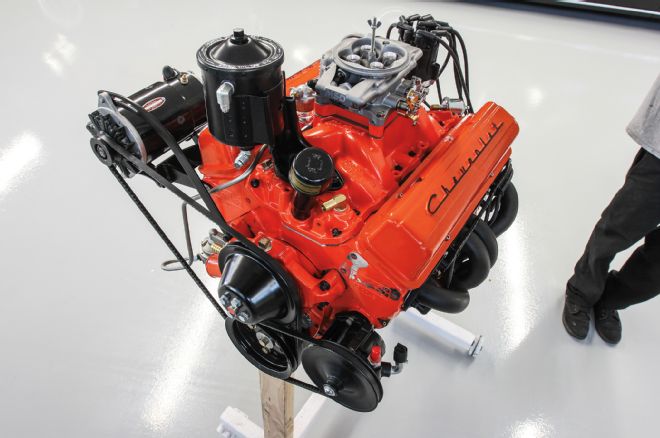
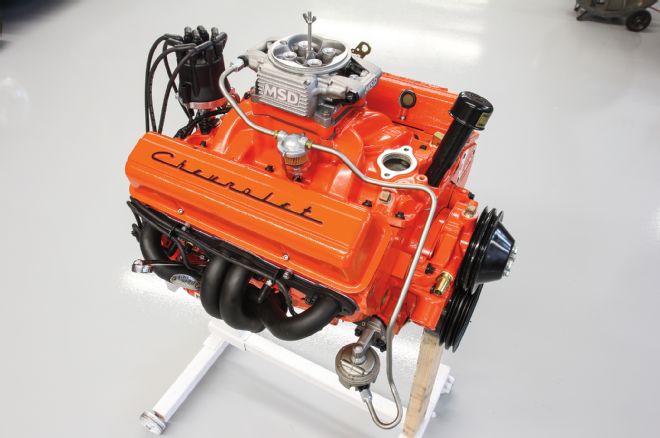
36-37 Here's our 383 stroker engine in full vintage regalia, ready for the final treatment, a centrifugal supercharger. The setup as it sits made 409 lb-ft of torque at 4,000 rpm and 364 hp at 5,300. Not too bad for a low compression, naturally aspirated small-block, but with a little boost, we hope both those number will creep up towards 600.