We could’ve titled this story “lipsticking the pig” but the LS series of engines from Chevrolet are certainly not pigs in terms of performance. But, in regards to looks they can’t hold a candle to older engines we’ve all grown up with. The main problem with LS engines is clutter. All those fuel lines, injectors, coil packs, brackets and such just drag down how good the engine can look with a little work and the right parts.
The other less than attractive aspect of newer GM LS engines is the drive system. To be fair, GM is more concerned with putting out a rock solid and dependable pulley system rather than in how pleasing it is to the eye. Also, most GM cars have the A/C mounted low on the passenger side of the engine, so typically this is where the GM drive kits tend to put it as well. This location proves to be more than just a bit problematic when stuffing LS power into vintage Chevy iron and, besides, the GM-style A/C compressor rarely works with aftermarket A/C kits. Some companies offer bracket kits to work with the GM pulley systems and mount a Sanden A/C compressor high on the passenger side, but that doesn’t address the GM system’s lack of good looks. For that we need to turn to the aftermarket. When you go with a system, like the one we’re trying from Eddie Motorsports, you get a kit designed for our older Chevys and as a bonus, it’s very good looking.
So, follow along as we turn an ugly duckling of an LS engine into something that will slide right into your favorite Chevy and look good as well.
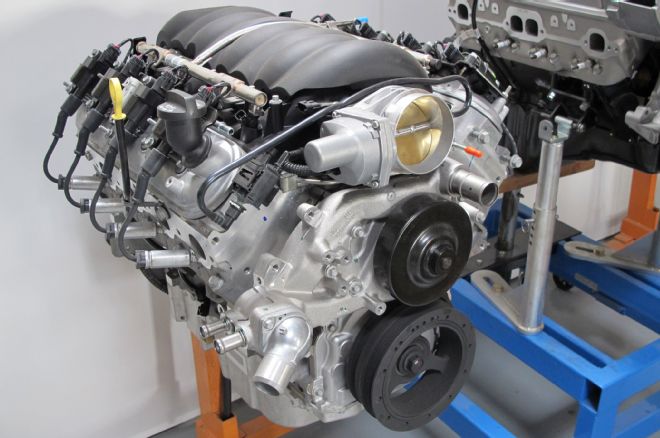
1. The main problem with our shiny new Chevrolet Performance LS3 crate engine (PN 19391326) was that it’s rather homely looking. The other issue was that it needed a pulley system to get it functioning in one of our classic Chevys. Yeah, we could run a GM pulley system, but that doesn’t help us in the looks department. Also, GM always wants to run the A/C unit low on the passenger side, which is typically a no-go deal when doing an engine swap.
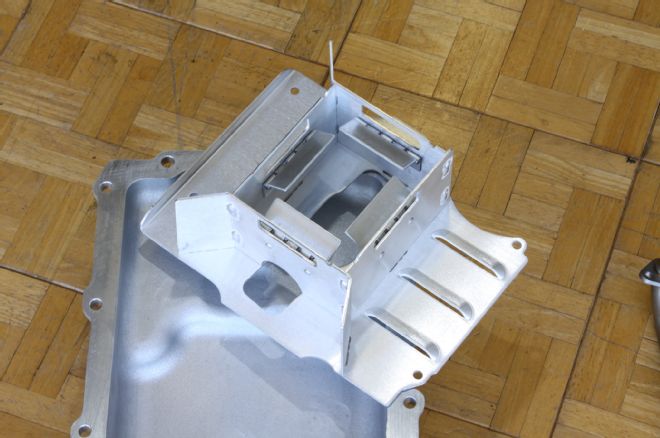
2. Another aspect of an LS3 crate engine is that the oil pan typically isn’t what you need for a swap. For this we picked up a Holley LS-Swap oil pan (PN 302-2). As the name implies, it’s made for shoving modern LS engines in between older Chevy fenders. We also opted to run their sweet trap-door oil pan baffle kit (PN 302-11). This turns the pan into a “ready for the track” deal since it has four anti-slosh doors that will ensure oil stays piled up on the pickup. It simply bolted into the Holley pan with no muss and a complete lack of fuss.
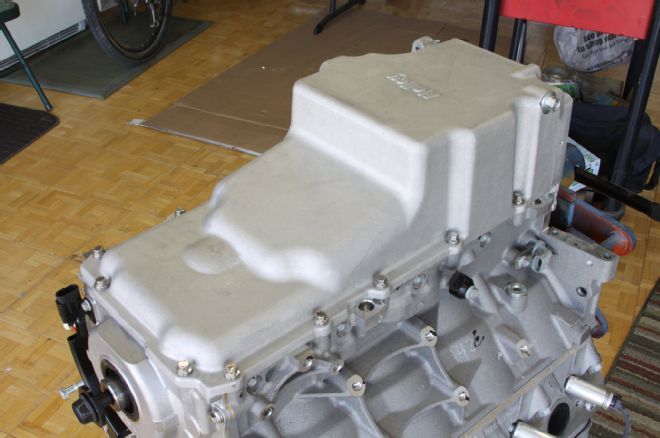
3. The Holley pan is cast aluminum, just like a GM pan. This is important since, on an LS engine, the pan adds to block rigidity. It also used a GM oil pan gasket, but did come with its own pickup tube. To dress things up a bit we used some stainless six-point bolts from our ARP accessory bolt kit. These pans also come in carbon black ceramic for another $40.
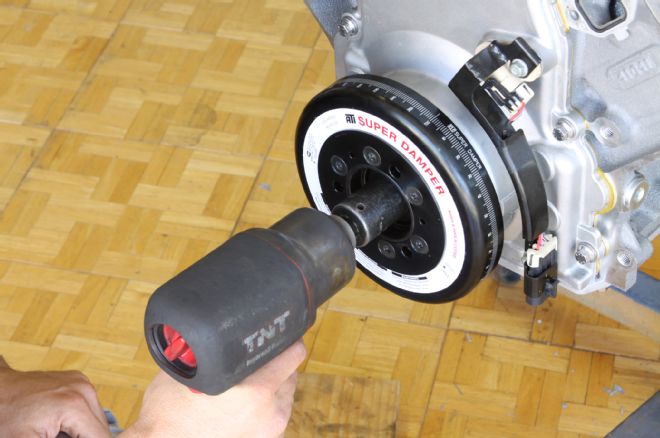
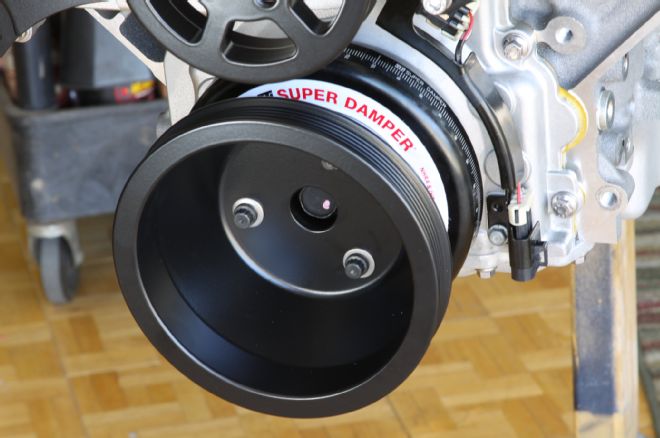
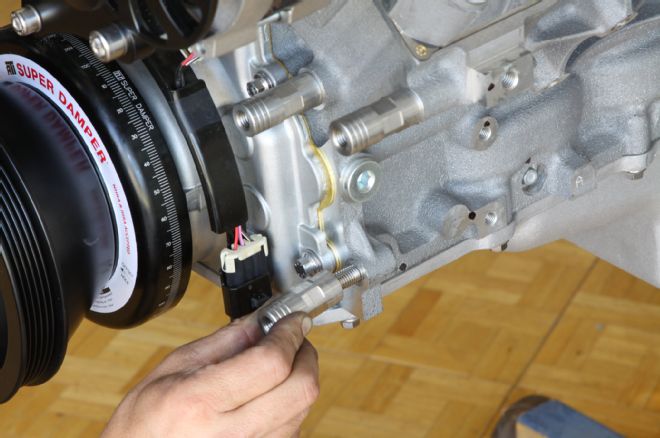
4. With the oil pan done we could flip the engine over and start installing the S-Drive pulley system from Eddie Motorsports. First up was installing the ATI Super Damper that came in the kit. ATI makes some of the nicest dampers on the market, so it was nice to see it in the kit. It also gave us a warm fuzzy feeling knowing that the kit is made in the USA.
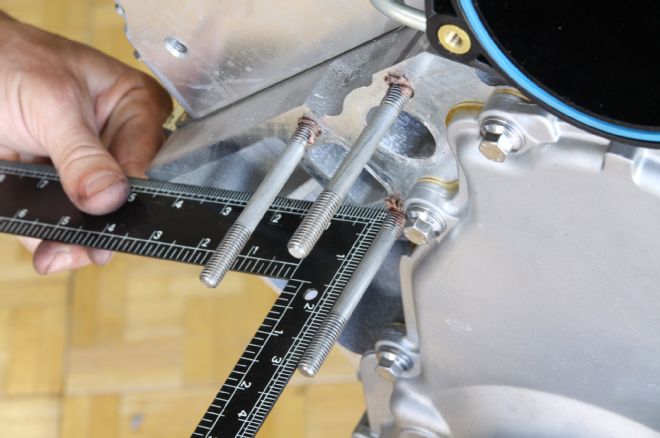
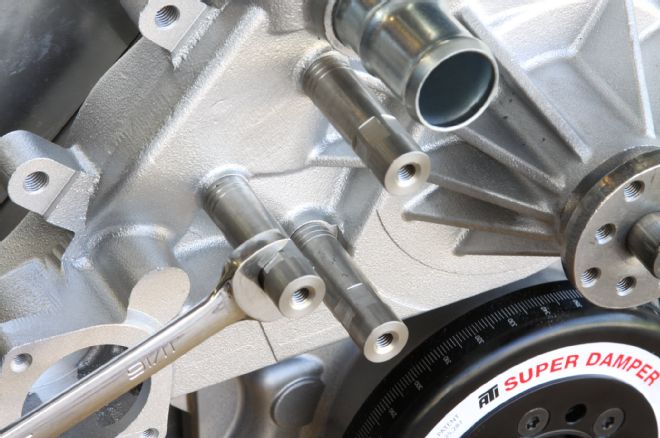
5. We then installed three 92mm-long studs to the passenger side of the block. It’s very important to use antiseize on any steel (especially stainless) bolts going into the aluminum block. The studs were screwed in until they protruded 3 inches.
6. Two 118mm-long studs were installed on the driver side and adjusted until they stuck out 4 inches.
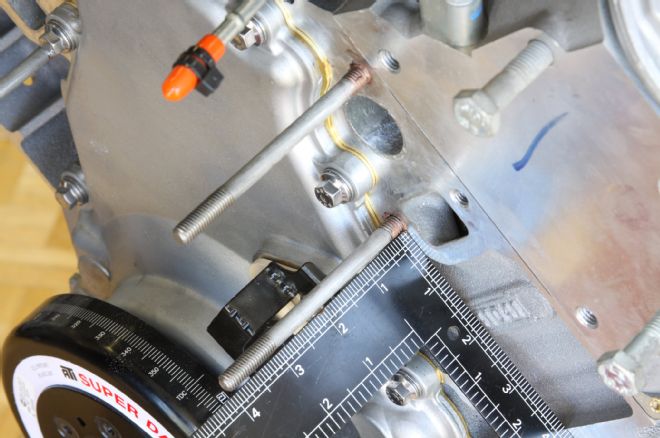
7. After installing the included gaskets we slid on the provided Tuff Stuff water pump.
8. After applying more antiseize, we installed three 3/4x2.55-inch spacer posts to the passenger-side studs.
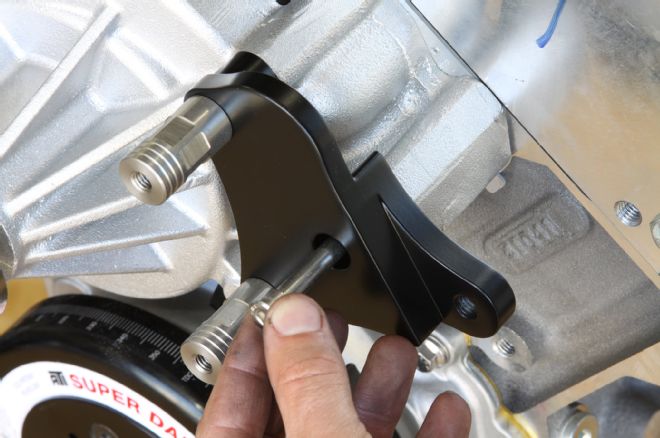
9. The first bracket to go on was for the rear of the alternator. It went over the two long studs on the driver side of the water pump and was secured with two 3/4x1.41-inch spacer posts (yeah, more antiseize) and one 95mm-long cap screw.

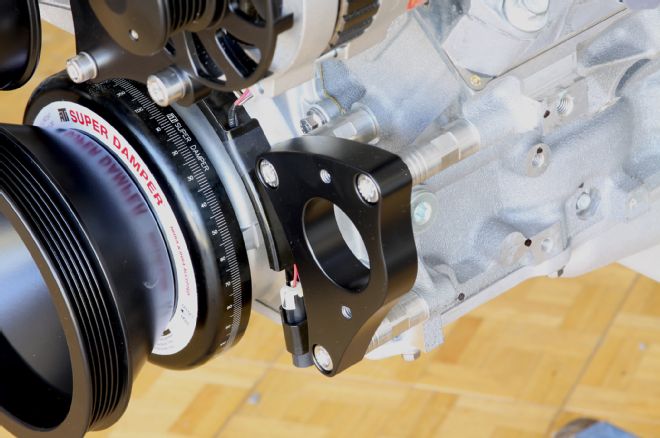
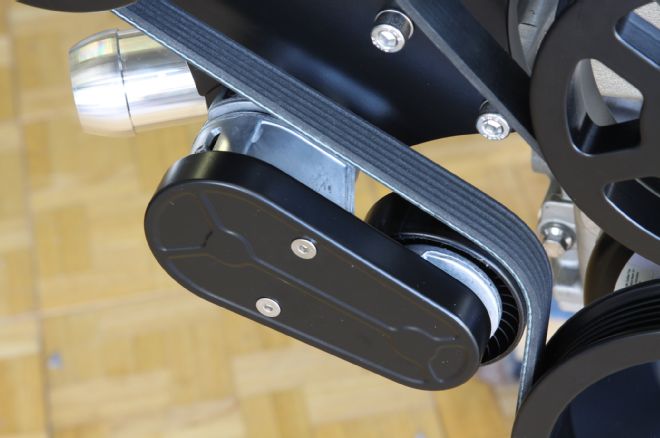
10. The lower A/C compressor bracket was bolted to the passenger head with two 20mm-long cap screws. The S-Drive kit can be ordered with or without A/C and in finishes like black, polished, and satin.
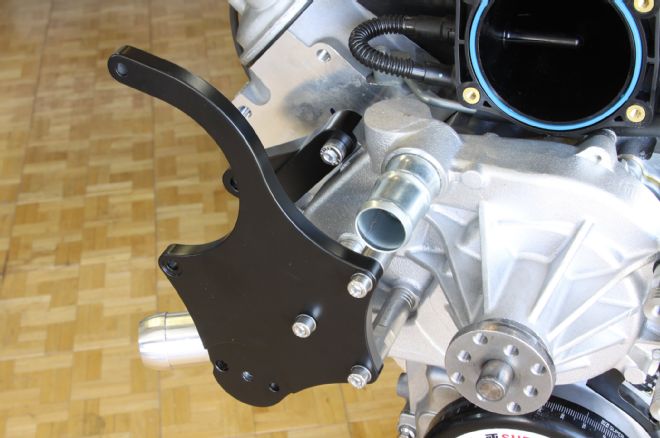
11. After installing the water neck (with thermostat) onto the water pump, the compressor bracket was attached to the three spacer studs on the water pump with three 25mm-long cap screws.

12. The Sanden SD7 A/C compressor from the kit was bolted to the bracket with two 25mm-long cap screws at the 12 and 6 o’clock positions.
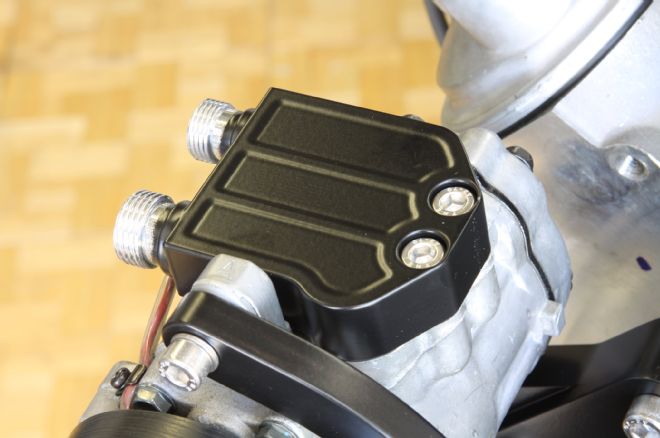
13. The rear of the compressor was secured with a specialized stainless shoulder bolt. Can you guess what we put on the threads first?
14. Three 1/4-20 cap screws were used to install the compressor beauty cover. Be careful here not to over tighten. Blue thread locker was used on the three fasteners.
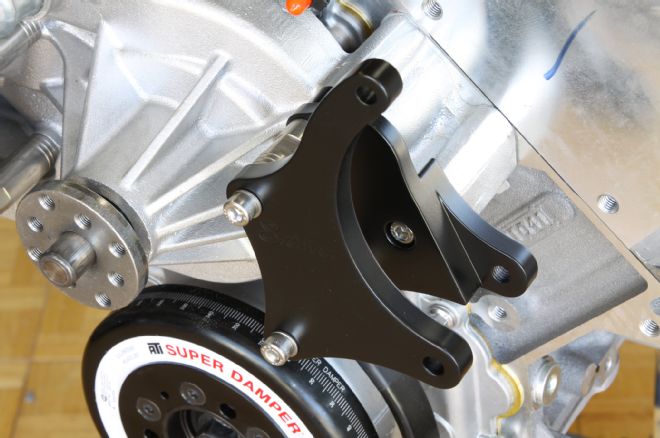
15. Two 25mm-long cap screws, with washers, secured the alternator bracket in place. For now we just finger tightened these.
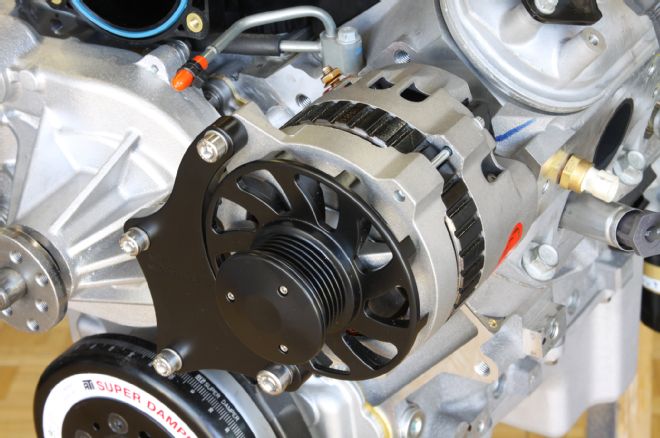
16. The 140-amp Powermaster alternator already had a fancy billet pulley and fan installed so we only had to bolt it to the S-Drive system with one 25mm- and one 80mm-long cap screw. With this installed, we went back and tightened all the other fasteners.
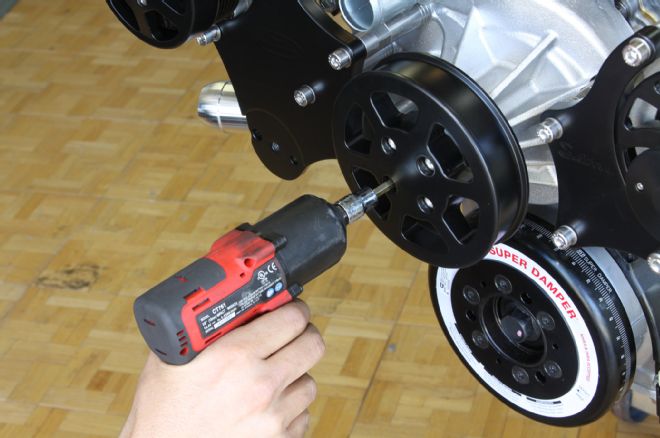
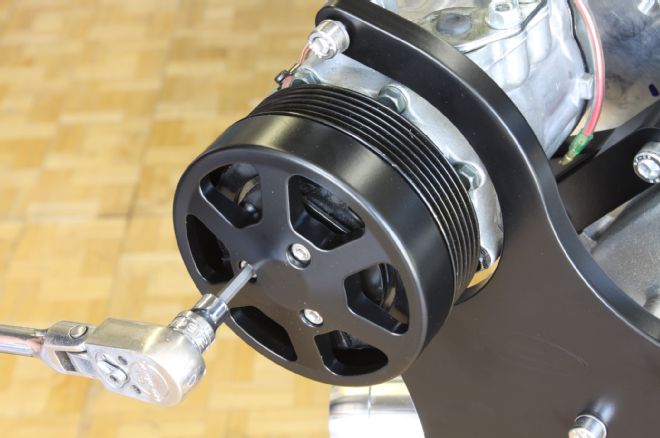
17. Four 5/16x3/4-inch cap screws locked the water pump pulley in place. This time we used a little red thread locker.
18. The three 3/8x1 1/4-inch crank pulley bolts used special Belleville washers. These use a spring action to lock the bolts in place.
19. After installing three 25mm-long set screws (with thread locker) we attached three 3/4x1.75-inch spacer posts (again, with more thread locker) and tightened them all down securely.
20. The power steering bracket was then bolted to the three spacer posts with three 20mm-long cap screws. This is another spot that called for thread locker.
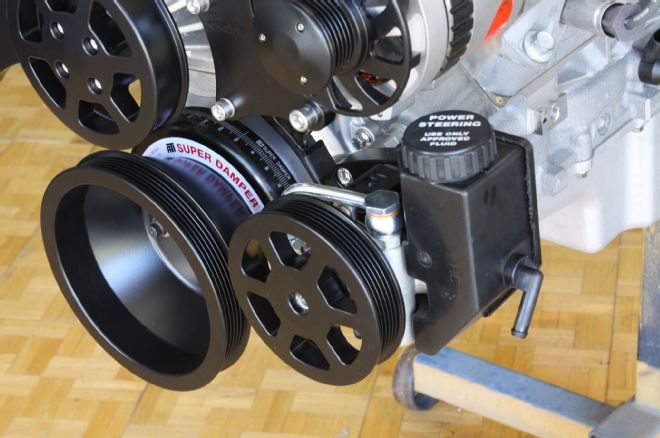
21. The PS pulley was already installed to the Maval pump, so we simply had to bolt it to the bracket using two 5/16x3-inch caps screws and lock washers.
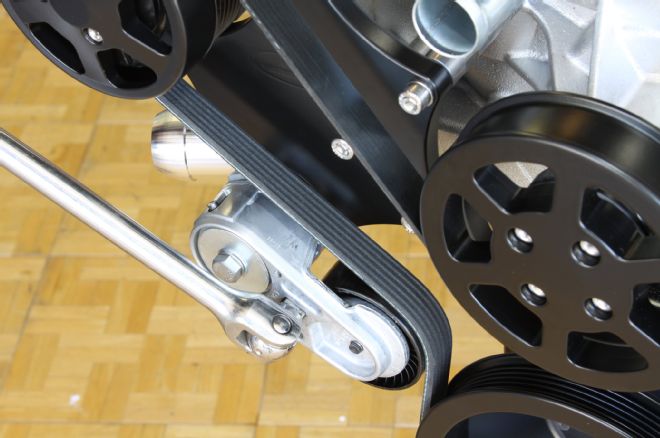
22. After installing the tensioner (3/8x2.25-inch cap screw) we slid on the supplied six-rib serpentine belt. A 1/2-inch drive ratchet makes this job much easier.
23. We could then install the tensioner beauty cover using two 10-32x3/4-inch flat head screws and some thread locker.
24. Do not install the compressor manifold until you’re ready to install the A/C lines and charge the system. But, this is how it will look when you do install it using two 25mm-long cap screws and some antiseize.
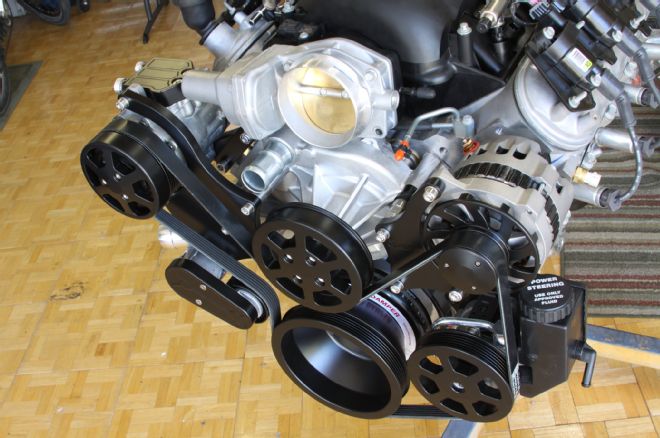
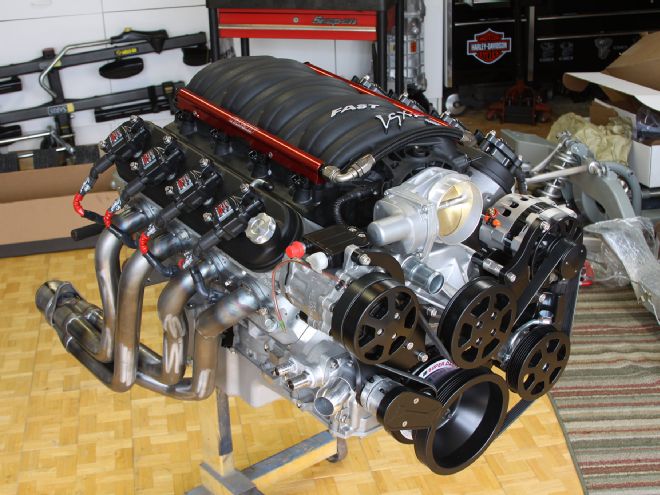
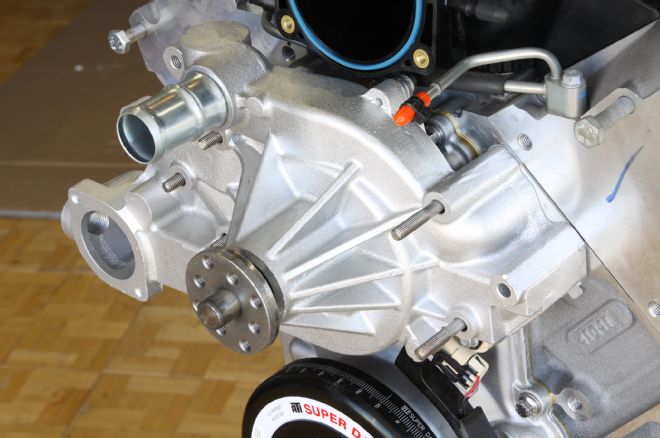
25. The pulley kit only took a couple of hours to install and it made the front of our LS3 look about as good as possible. Best of all, we had an engine that will easily fit into any Chevy we feel needs a shot of modern performance.
26. Back to the looks department, we found these coil packs to be more than just a little aesthetically challenged.

27. Now we could try and hide the coils, but in reality that can create more problems than it solves. Our solution was to install a set of black Holley LS valve covers (PN 241-91). The design of these covers let us ditch the coil brackets and mount the coils directly to the valve cover, which cleaned things up quite a bit. We also swapped over to some Granatelli Xtreme Power LS Series coil packs (PN 28-0513CP) and matching insulated plug wires. They look great and will provide extra spark to our LS3. We attached the coils, and the Art Morrison Enterprises headers, with more stainless bolts from our ARP accessory fastener kit.
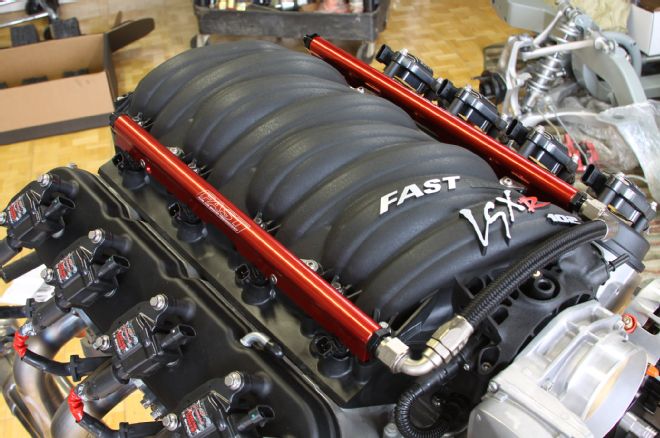
28. The stock LS3 intake manifold is only a little bit ugly, but this FAST 102mm LSXr intake, in their new black color, looks a ton better, especially with the billet red fuel logs instead of the GM deal. Getting rid of even a little clutter on an LS engine goes a long way in the looks department.
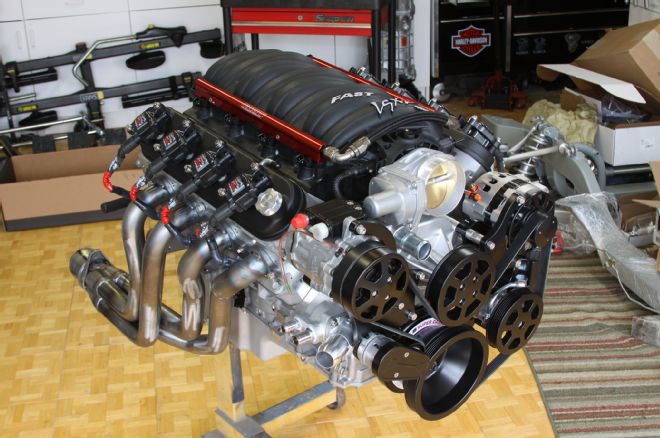
29. We think this looks a ton better than that somewhat ugly LS3 we started with, and as a big bonus all the parts will help us get this into or favorite Chevy and some will even add a few more horsepower to the equation.