
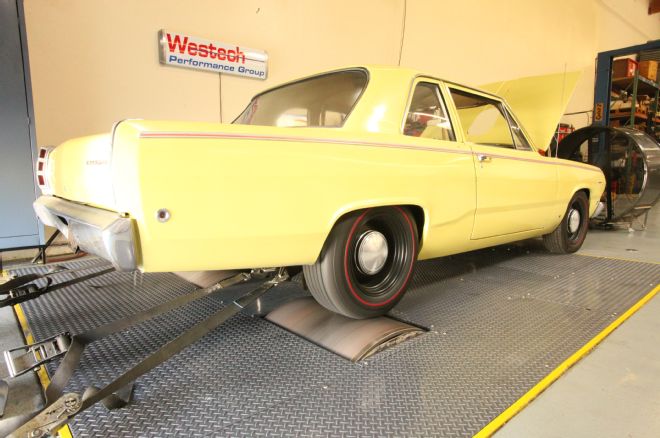
The finer points and details are always what makes the difference when putting a hot street combo into service. We had our Indy low-deck 500-inch wedge nicely snuggled between the fenders of our '68 Plymouth Valiant, but we knew it would take more than just bolting it in to get the most from our all-aluminum powerplant. We see it all the time, combinations that seem to just fall short of the sum of their parts, usually requiring only a few tweaks, adjustments, or tuning changes to dramatically step-up the performance.
Our plan from the start was to dial-in the big wedge with a trip to the Westech chassis dyno to sort out all of the little gremlins that were holding the engine back. Truthfully, the engine had the torque to roast our street radials at will, but it seemed to be short on pull as the rpm climbed. With 657 hp recorded on the engine dyno, we knew this engine had serious quantities of power on tap. Granted, the 727 automatic and Dana 60 rear would soak some of the horses developed on the engine dyno, but there was no question that the engine should just "freight-train" our Valiant through the gears. The chassis dyno would tell the story on exactly how much we had on tap, and the instrumentation would give us direction o what changes were required.
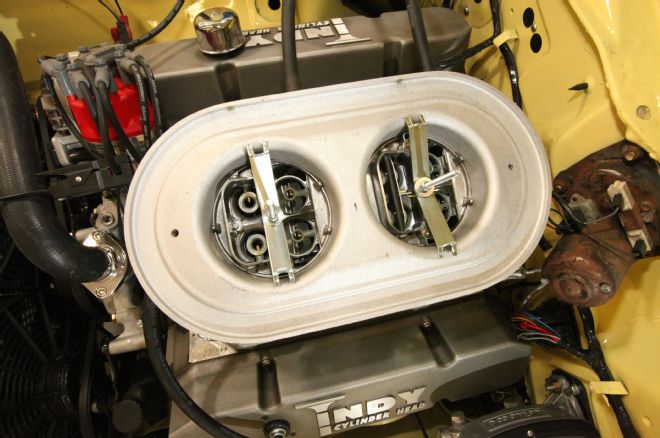
As the crew at Westech strapped the Valiant to the SuperFlow dyno's rollers for the baseline pulls, we had high expectations for the mighty wedge. With a solid flat-tappet cam measuring 245/251 degrees duration at .050, with 0.594/0.612-inch lift, Indy CNC EZ-1 heads, and dual 500cfm Edelbrock Performer (ne AFB) carbs on an Indy Mod Man intake manifold, the parts were there to make power. As the engine labored through the baseline run, we watched the numbers roll past on the monitor. Peak power was 296 at just 4,700 rpm.
Whoa! It looked like we forgot to bring our horsepower with us.
Whoa! It looked like we forgot to bring our horsepower with us. The baseline ignition settings of 12 degrees initial and 30 degrees total timing were conservative, but not so far off optimal to cost that kind of power. The mixture was a little lean, but that wasn't going to be it either. Even though the power was short, the engine pulled cleanly through the rpm range, so there was no evidence of a mechanical problem. Westech's Eric Rhee went straight to the carbs and checked the linkage. We were getting about two-thirds of wide open with the throttle mashed. A quick linkage adjustment later, we tested again and recorded a much more respectable 412 hp to the wheels. According to Eric, mis-adjusted throttle linkages are one of the most common mistakes he sees.
A quick linkage adjustment later, we tested again and recorded a much more respectable 412 hp to the wheels.
Basic Tuning: Timing & Mixture
With the linkage adjustment sorted out, we could begin our real tuning process. Engine tuning comes down to two key areas: ignition timing and air/fuel ratio. We attacked the timing first, raising the total from 30 to 35 degrees—the amount of total timing used by our engine builder, Indy Cylinder Head, when it was originally built. With the timing now set to a more normal range for peak power, the engine responded with a sizable jump to 434 hp at the rear wheels. While even more total timing may have shown a marginal improvement on this number, for street duty on pump gas we were willing to give up the potential for a few more horsepower in favor of a more conservative setting. We could also see that the dual Edelbrock AFB-style carburetors were lean enough to cost power.
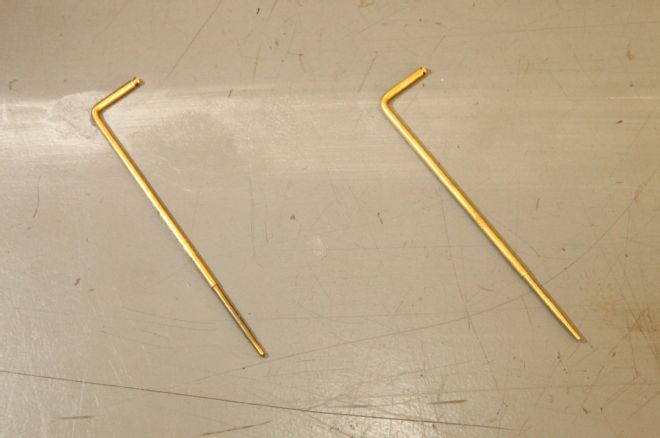
We moved into the carb calibration next. Unlike a Holley carb where simple jet changes will alter the mixture up or down, the AFB uses jets in combination with metering rods to determine the flow area available to the fuel. Our Edelbrock Carburetor Calibration kits (PN 1486, $56.97 each, Summit Racing) included assorted metering rods and jets, but not a full wide array of jets like we normally keep on hand for tuning Holley carbs. We took the easiest stab at a mixture change first, swapping the metering rods from 6552 units to 6347 rods. The rod-numbering system codes the diameter of the two metering steps of the rods, with the first two numbers showing the diameter of the "economy" step—0.065 to 0.063 inch here—while the last two numbers indicate the "power" step—or 0.052 to 0.047 inch with this rod change. At wide-open throttle, the "power" step is the end restricting the jet, and our change reduced the rod restriction in the jet by 0.005 inch. That fattened the mixture and helped output, now at 443 hp, but it wasn't enough. We were still lean, and these were the fattest metering rods we had on hand.
While metering rod changes can be quickly accomplished by simply loosening the upper access plates, jet changes on this style of carb requires removing the upper airhorn assembly to open the carburetor. We upped the jets from 0.086 to 0.098 inch, and in combination with the rich metering rods it proved to be too much. We were down about 10 hp, and showing a rich mixture on Westech's lambda meter. We next went back to the leaner 6755 rods, and regained the lost power, but we had our largest jets in the carb with our leanest rods. We decided to reduce the jet size to put the required metering rod more in the center of our available rod choices to allow more tuning flexibility in the future. We went through several jet and rod changes looking to optimize the combination, finally ending up with 0.092-inch jets, 6852 rods, and a nice fuel curve through the rpm range. Our carb calibration efforts rewarded us with an increase to 451 hp at the rear wheels at an indicated 5,500 rpm.
Our carb calibration efforts rewarded us with an increase to 451 hp at the rear wheels at an indicated 5,500 rpm.
Other Details
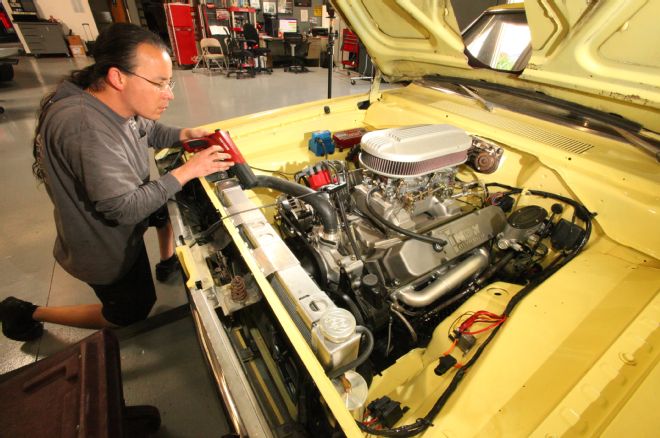
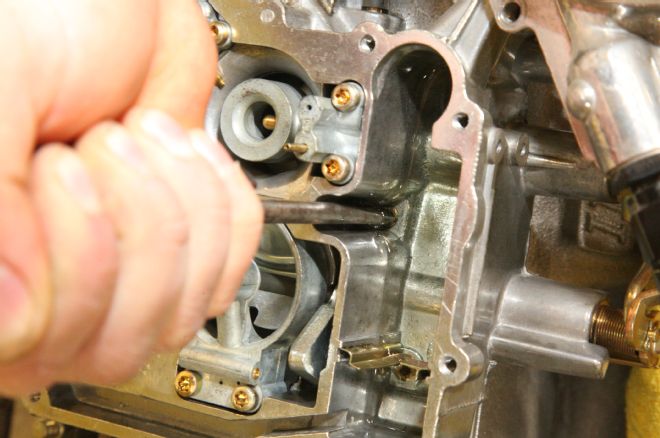
While 451 hp at the rear wheels is enough to make our Valiant scoot, we weren't finished with our fine-tuning program. Since our engine had several hundred street miles since the initial build, we thought we'd follow best practices and check/adjust the valve lash on our solid-lifter cam. Although our valvetrain was not giving any indication of unusual noise or other problems, checking and re-adjusting the lash will head off any developing problems that may have occurred during the break-in period. We set the lash to 0.018 inches hot on both the intake and exhaust, and then went into some higher rpm test runs. Initially, we noticed the engine seeming to clatter and break-up at around 6,000 rpm.
With our good T&D valvetrain and previous high-rpm testing on the engine dyno, we did not suspect valvetrain instability or valve float to be the issue. Our MSD 6AL ignition box is equipped with a rev limiter, and we suspected that the engine was driving into the limiter at the top of our test pulls. We bumped the rotary settings on our MSD 6AL ignition to 7,000 rpm, and were rewarded with a clean pull right to the top of our test range of 6,200 rpm. Peak output was now recorded at 457 wheel horsepower at 6,100 rpm, a heathy number indeed for a street A-Body, and a far cry from the 296 hp we drove in with. What this 161 hp gain proves is that neglecting the details can rob massive amounts of power from the mightiest of engine combinations. A quick jaunt around the block revealed a completely new personality, with the rear tires lighting up with the least bit of provocation in any gear. We had indeed awakened the beast! We're one step closer to our rendezvous with the drag strip with just a few minor details to attend. Stay tuned!
On The DynoA quick jaunt around the block revealed a completely new personality...
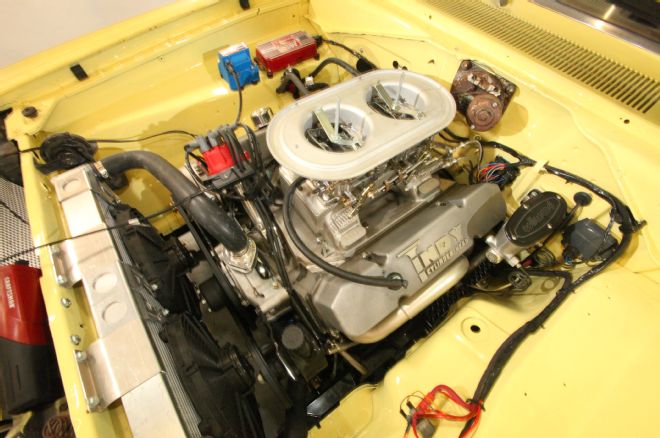
1. Our Valiant had a fresh all-aluminum 500-inch low-deck wedge from Indy Cylinder Heads. With a healthy solid flat-tappet cam, plenty of inches, and free-flowing Indy EZ CNC cylinder heads with dual-quad Mod Man induction, this is a serious street bullet.
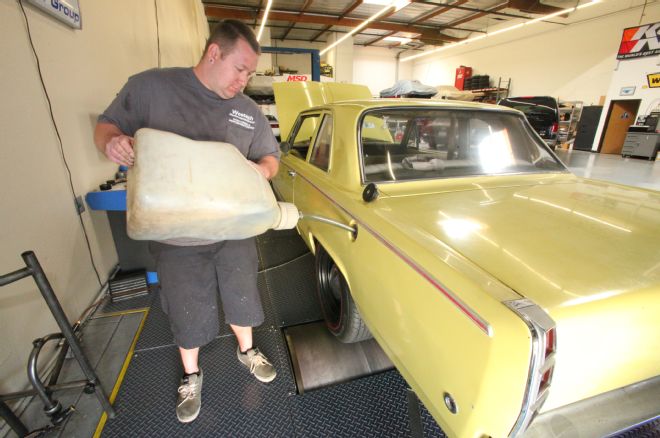
2. To ensure that fuel quality from the various unknown local pump gas blends was not going to be an issue, the tank was given a one-gallon splash of Rockett Brand 100-octane gasoline.
3. Proving that the simplest thing can have a huge effect on power, our first baseline pull only showed 296 hp due to a misadjusted throttle linkage. Our big Indy Wedge was not going make big power at just over half throttle.
4. With the throttle linkage adjusted, we had a real baseline of 412 hp at the wheels, with a very conservative baseline timing setting and a lean mixture showing. A bump in timing from 30 to 35 degrees total boosted output to 434 hp at the wheels.
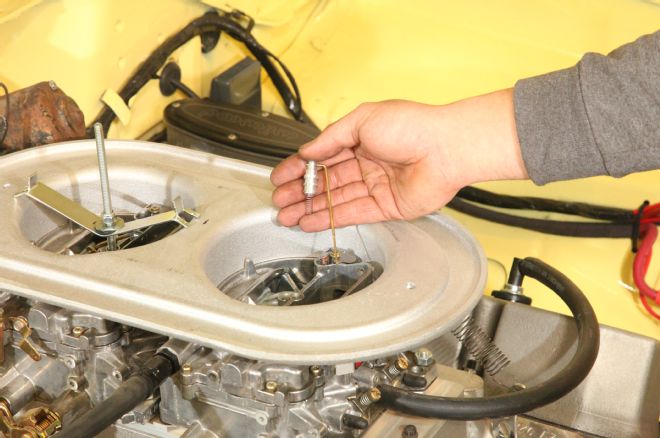
5. Swapping metering rods is the easiest way to adjust the mixture in these Edelbrock Performer carbs, with easy access from beneath the top-mounted covers.
6. Metering rods curb the fuel flow through the primary jets based upon a two-step restriction. The upper step is fatter, restricting fuel more at higher vacuum or cruise conditions, while the lower step is thinner, allowing more fuel under higher demand.
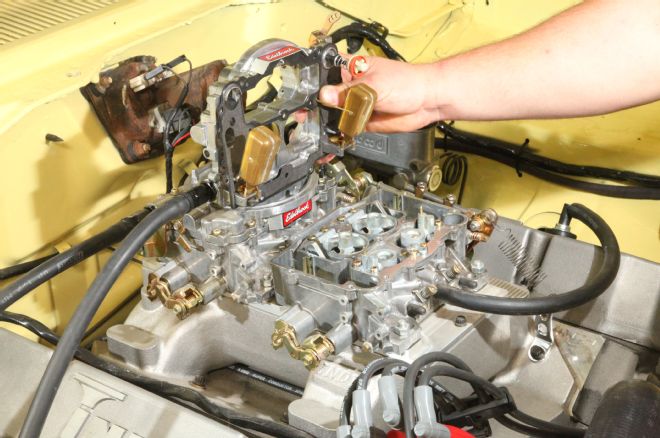
7. Our metering rod change improved power, but even with the thinnest rods we were still too lean. This meant a jet change was required for even more fuel flow. Changing jets on the Edelbrock carbs requires removing the carbs' upper air horns for access.
8. We went through several jet and metering rod changes, studying the air/fuel ratio readout on the dyno to zero-in on the optimal combination with the limited number of jets and rods we had available.
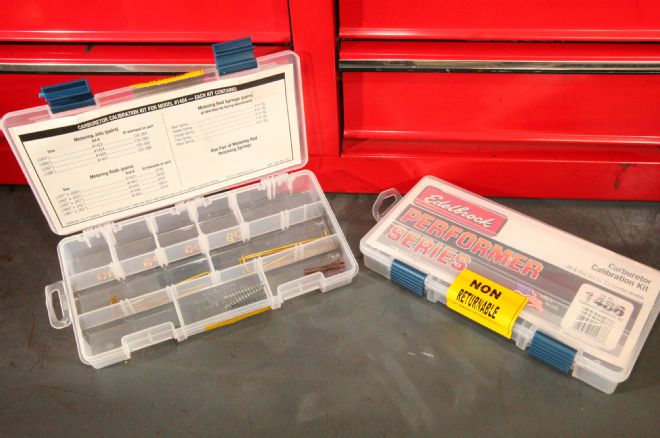
9. The Edelbrock Carb Calibration Kit provides a reference of the number stamped on the calibration parts, and their dimensions. We set the jetting into a range where it worked in combination with a midrange metering rod, giving us future flexibility in tuning with simple metering rod changes alone. The carb work paid off, with rear wheel power now at 452 hp.

10. Since our engine had seen some street miles since the build, a valve lash adjustment seemed like the correct way to conclude our dyno tuning session. Steve "lightning-Lash" Brule quickly had our valves set to 0.018/0.018-inch hot specified by Indy.
11. Even the valve lash was worth some power. Raising the rev limiter on our MSD ignition box and letting the engine run to 6,600 rpm, we concluded the day with a peak of 457 hp at the wheels.
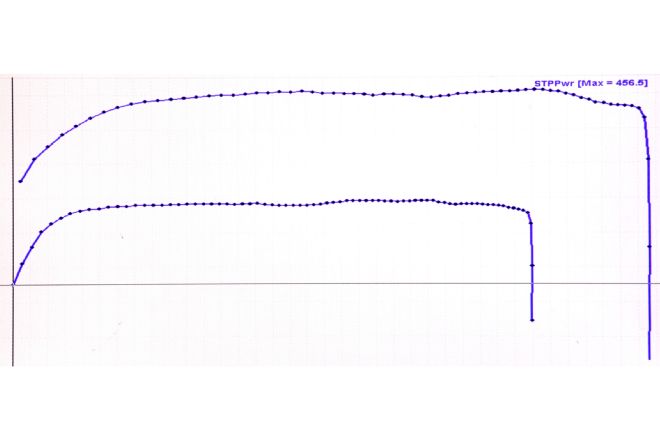
12. The before-and-after results are impressive, with much of the improvement coming from an adjustment to the throttle linkage. Jet and metering rod changes, ignition timing, engine redline, and valve lash adjustments accounted for the rest of the 161hp increase.