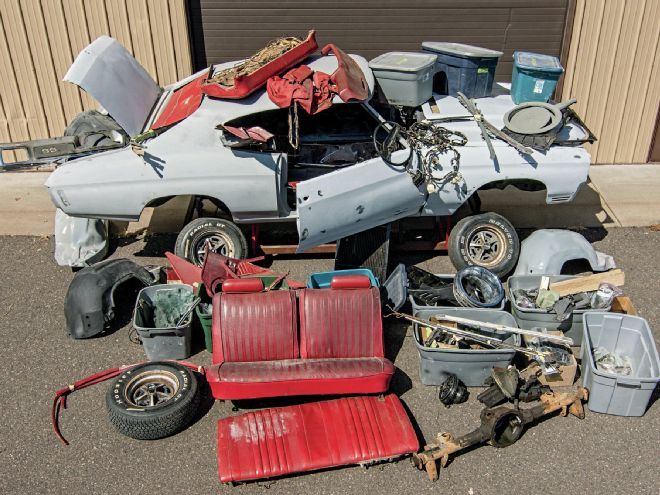
No doubt about it. Our Basket Case project, the 1970 Chevelle SS, is really starting to come together. With the sound of a strong and reliable powerplant still ringing in our ears, it's time to begin to button this thing up.
The Chevelle's restoration is being handled by Muscle Car Restorations of Chippewa Falls, Wisconsin. You'll notice that their techs have not yet installed any sheetmetal on the front of the car. Even though the body parts have been painted and polished and have been ready to go for some time, they are stored safely away for now.
Why? Because during the course of a restoration it can be a really good idea to delay assembling certain parts if it makes it easier to install others. At this point in any project, it's perfectly normal to be tempted to do anything you can to keep the build moving forward. Watch out, though, that you don't let your enthusiasm to finish create other problems. Bolting up the engine and trans is almost effortless without the front-end sheetmetal in the way. So is bolting on the carb and its linkage, installing the headers, and screwing in the spark plugs.
Bolting up the engine and trans is almost effortless without the front-end sheetmetal in the way
But build efficiency is just one reason Muscle Car Restorations is keeping the sheetmetal tucked away. A bigger factor is protecting all those newly restored panels from any chance of damage. An engine and trans can be shoehorned into place with the front clip installed, but there is always the risk of scratching something. Blankets are routinely draped over fenders, and belt buckles are forbidden, but accidents can happen. No one wants to repaint a fender if there is any way to prevent it.
Before we can drop the engine into the frame, we need to sort out the clutch, bellhousing, and transmission situations. No bellhousing came with the car, and though a used stock one would work fine, a bulletproof McLeod Racing scattershield and clutch kit were chosen instead to handle the 550 lb-ft of torque that our big-block can generate. The Muncie M21 wide-ratio transmission that was included in the pile of parts looked OK, but given the condition the engine was in when it arrived, it was decided not to trust it. So off it went to Anaheim Gear for a thorough inspection and rebuild.
The only exhaust parts that came with the car were a pair of cast iron exhaust manifolds. Muscle Car Restorations didn't even bother to check these for correctness, as a pair of Doug's Headers and a premium free-flowing Flowmaster exhaust system were planned from the start. It makes no sense at all to build a great-running, 500-plus-horsepower big-block and then choke it off with a stock exhaust.
A bulletproof scattershield and clutch were chosen to handle the 550 lb-ft of torque
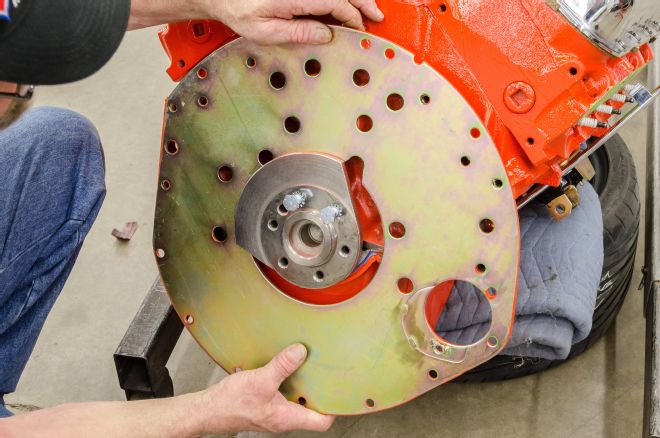
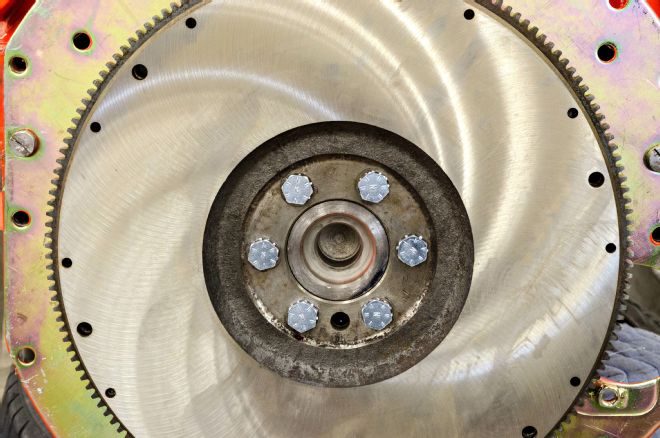
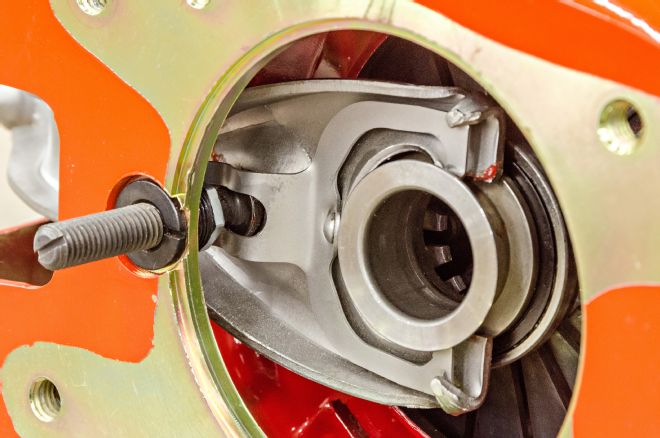
1 Installing a scattershield—the one we're using is from McLeod Racing—is different from bolting on a stock bellhousing. Before the flywheel is bolted in place, a backing plate is slipped over the crank flange. The locating pins will have to be punched out to allow enough clearance to get the plate behind the crank.
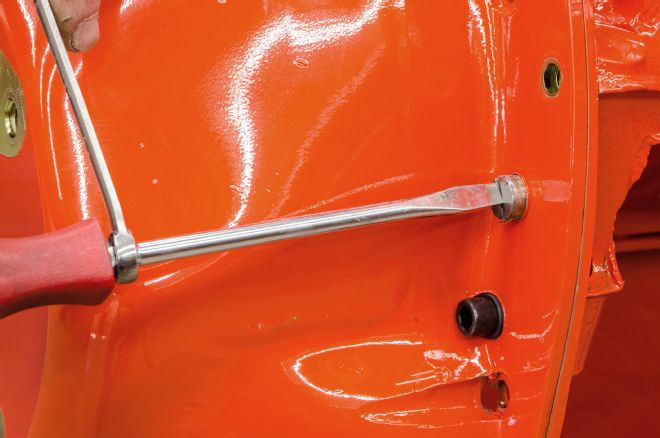
2 Offset locating pins are generally needed to position a scattershield on the crank centerline. It will be easier to rotate them as adjustments are made if they are not tapped all the way in until the end.
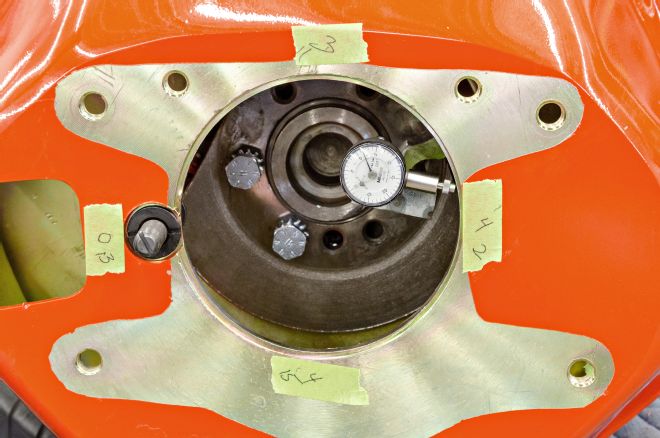
3 Attach a dial indicator to the crank to measure the bellhousing position. Max run out should be about 0.005 inch. All the bellhousing bolts need to be tightened between each pin adjustment before measurements are taken.
4 If not using a new flywheel, have the existing one checked and resurfaced. Muscle Car Restorations typically has even new flywheels lightly dressed just to be sure they are perfectly flat. Use high-strength red Loctite on the bolts and tighten to 55-65 lb-ft.
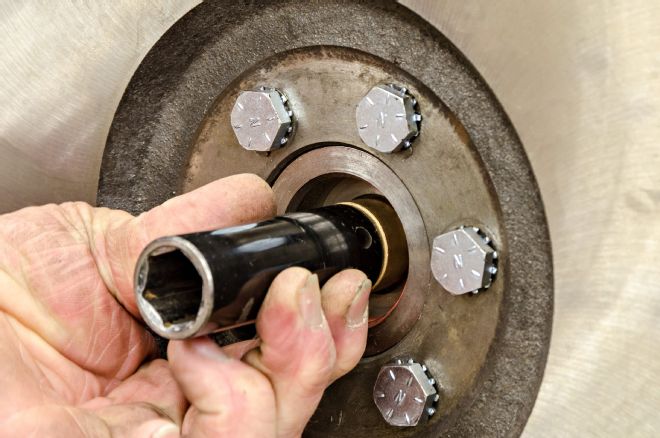
5 Since the rebuilt engine has a new crankshaft, there is no pilot bushing installed to hold the input shaft of the manual trans. An old socket can be used to tap a new one in place.
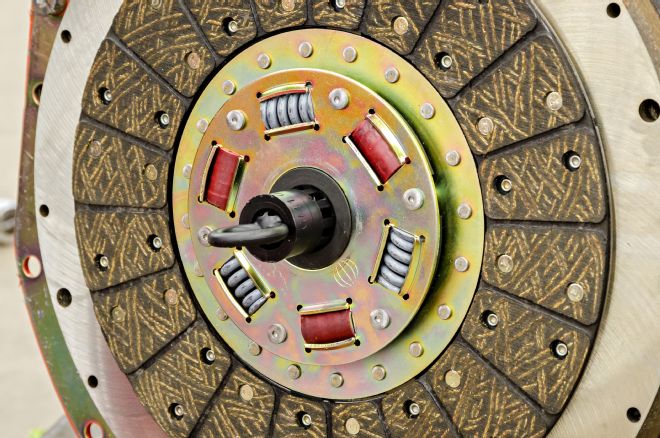
6 The McLeod clutch kit comes with a clutch alignment tool that fits into the pilot bushing and will center the clutch disc with the bushing so the transmission input shaft can slide through the clutch disc and then cleanly into the pilot bushing.
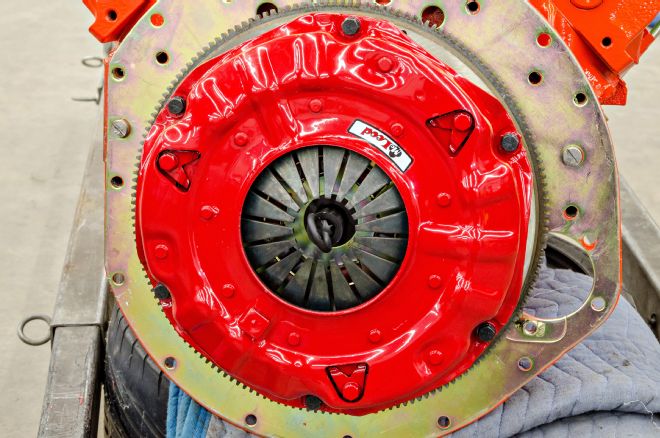
7 Once the clutch disc is aligned, torque the pressure plate bolts to 25 lb-ft.
8 The McLeod kit uses an adjustable clutch arm pivot ball. Set it so there is about a quarter-inch of clearance at the throwout bearing.
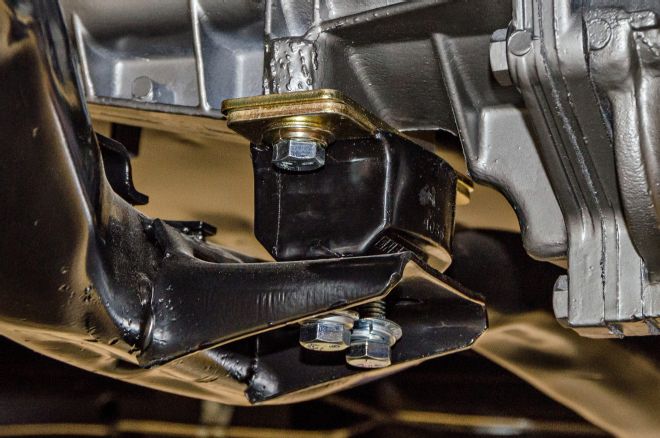
9 Stock (and 40-plus-year-old) engine and transmission mounts are throwaway items. These mounts from Energy Suspension will stand up to big-block torque and will likely outlast the restoration.
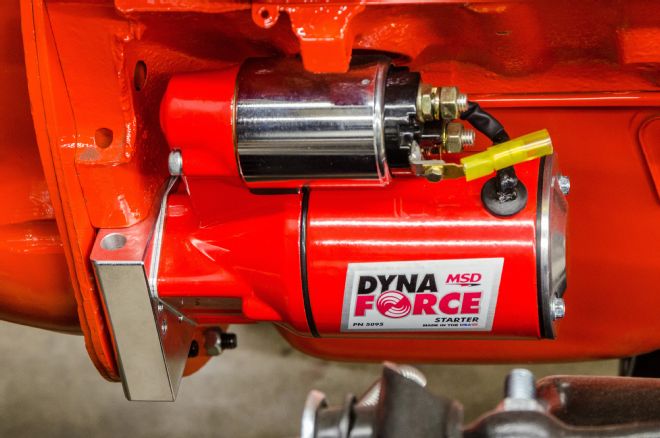
10 The starter is another one of those items where it may be false economy to rebuild the old one instead of installing new. This Dyna Force from MSD is smaller (offering more header clearance), lighter, tougher, and more powerful than a stock Chevy unit. If you do decide to go stock, be sure you use the high-torque version over the standard starter that was used on most small-blocks.
It makes no sense at all to build a great-running, 500-plus-horsepower big-block and then choke it off with a stock exhaust
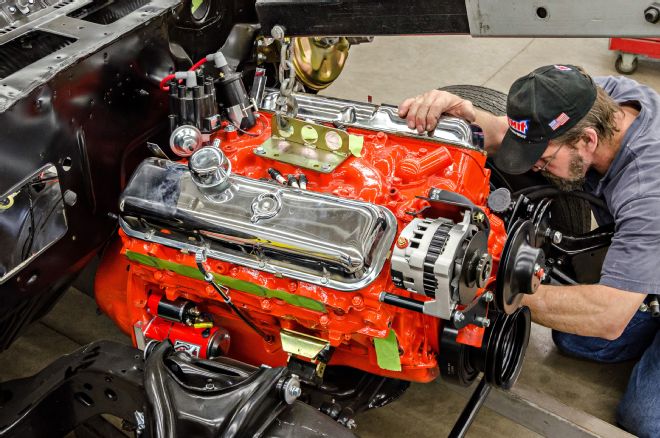
11 With no front sheetmetal in the way, it's pretty easy to slip the engine and transmission into place as a unit.
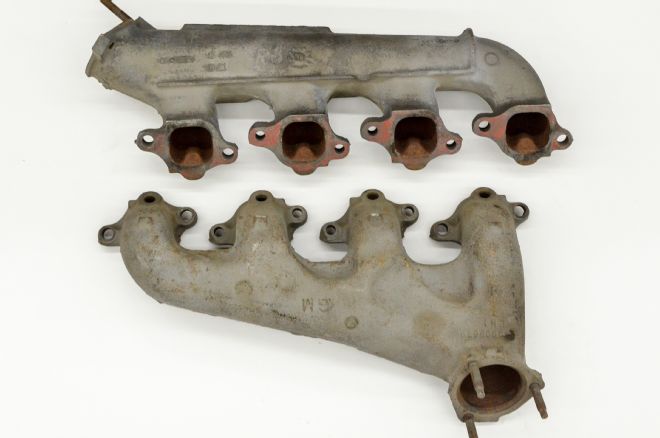
12 Unless you are planning a totally stock resto, there isn't much sense in using stock exhaust manifolds. They are heavy and restrictive and will rob power. Big-blocks are heavy enough as it is without hanging on a pair of these.
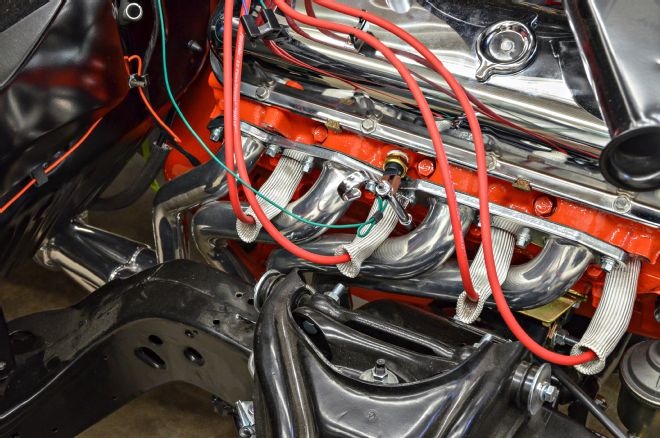
13 A good set of headers not only saves a lot of weight but really opens up the exhaust side of the engine, allowing it to reach its full power potential. This pair from Doug's Headers (PN D313), with their 1 3/4-inch mandrel-bent tubes and metallic ceramic coating, fits beautifully, looks great, and will contribute to the engine's torque production.
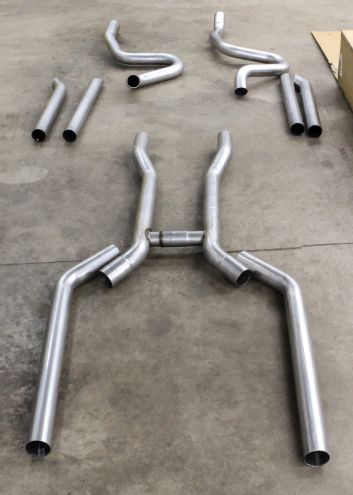
14 The Flowmaster American Thunder 2-1/2 inch exhaust system comes in kit form, so it can be custom fit for this exact application.
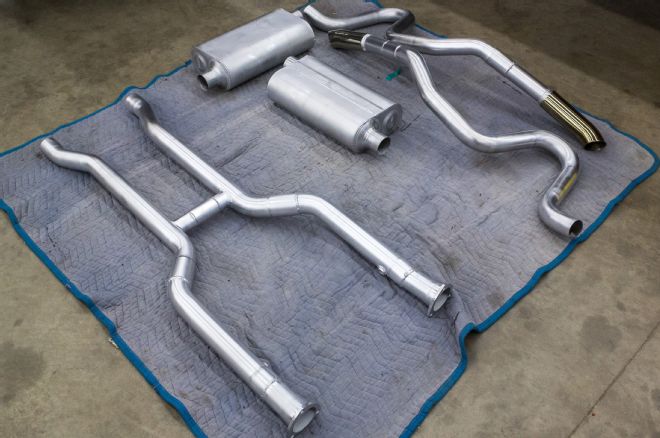
15 After the techs at Muscle Car Restorations mock up and fit the entire exhaust system under the car, they weld it up, add the header flanges, and send the whole thing, including mufflers, out to Premiere Powder Coating to be powdercoated. This prevents rust, of course, but also keeps the system clean and looking new.
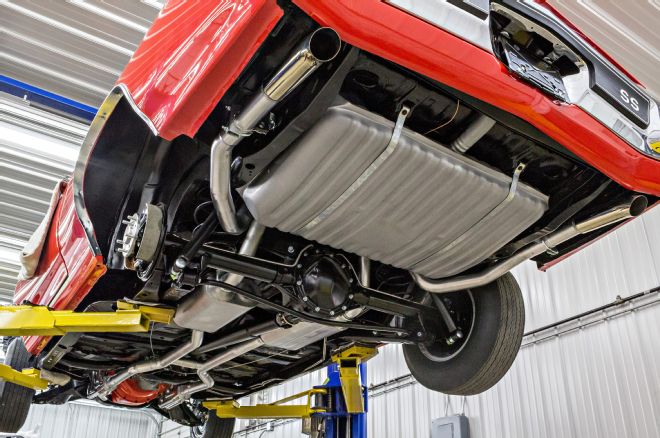
16 The Flowmaster kit provides an exhaust system that looks like it was designed and installed at the factory. In this photo you can also see the rear suspension pieces provided by PST that were installed in Part 7 of the buildup, as well as a teaser look at the rear axle, the rebuild of which by Moser will be covered in an upcoming story.
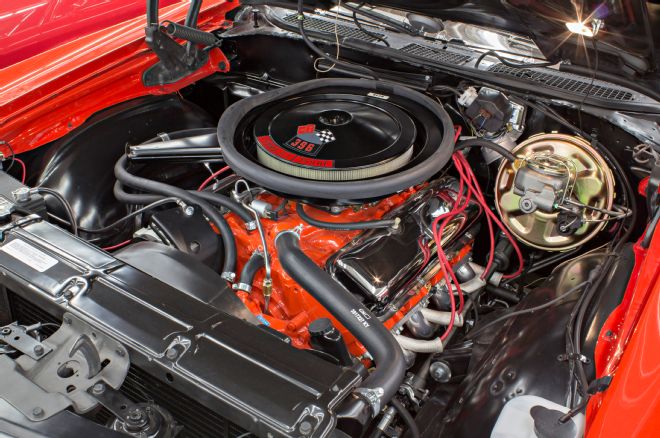
17 Here's a beauty shot of our "396" (now 434 cubes) as it appears in the finished Chevelle. It looks mostly stock and has a mild idle that will be great for cruising, and yet doesn't let on about the 500-plus-horsepower hiding inside.