Most of us agree the 4300/4350 carburetor can be a real toilet bowl, especially when you consider how terrific its predecessor, the Autolite 4100 “shoebox,” was and still is. The 4100 possessed the demeanor of a Holley with an easy to tune and maintain attitude. The 4300 that followed has been anything but easy to maintain and tune.
To understand how the 4300 came about, you must first understand the tightening of federal emission standards in the late ’60s. The Autolite 4300 carburetor was introduced for 1967 as an immediate replacement for the 4100. Nearly all Ford V-8s except the 289 High Performance, 428 Police Interceptor, 390 GT, and the Shelby Mustangs got the 4300. In its first couple of years of production the 4300 had more than its share of teething problems. In 1967, there was one size available—441 cfm. For those with the 289-4V engine, 441 cfm was right sized for the application. However, if you had a big-block, it was stifled to a point of suffocation.
Ford got the message about its new emissions-inspired 4300 carburetor from dealer service departments and frustrated car buyers. In 1968, Ford grew the 4300 to 600 cfm, placing it on not only the 302 and 390, but also the new for 1968 385-series 429ci and 460ci V-8s. Because the 4300 was such a temperamental atomizer, Ford had its hands full with running changes and refinements. For 1969, the 441-cfm 4300 was available on the new 351W-4V engine. Big-blocks got the 600-cfm box. By 1970, Ford understood there was little value in the 441-cfm 4300 and dropped it from the lineup. The 600-cfm 4300 worked very well on the 351C-4V, as well as big-block derivatives. Because the 4300 required continuing refinement, there were many variations produced. In 1974, the 4300 was replaced with the 4350.
If you study a good cross section of 4300 carburetors from 1967-’73, you will find there are significant engineering changes every year. In 1967 only, the 4300 had a large idle air adjustment screw at the back of the main carburetor body, which was gone by 1968. By 1973, it had become a vacuum port.
 The Autolite/Motorcraft 4300 four-barrel carburetor arrived in the 1967 model year as a 441-cfm atomizer. The 4300 was developed primarily for cleaner emissions and to some degree of fuel economy, but it did neither. Ted Grainger of Ted’s Carburetor in Lancaster, California, is going to show you how to get this troublesome carburetor to perform.
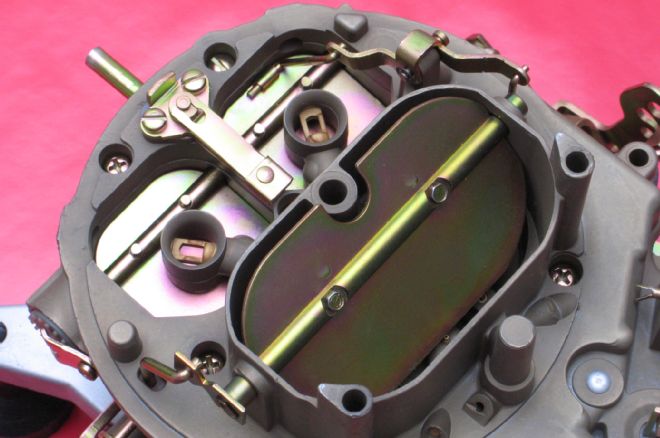 Butterfly secondary air valves open when mechanical secondaries are wide open and there’s adequate intake manifold vacuum to open them, which is on par with the Quadrajet. The purpose of air valves is to reduce emissions and smooth the transition from primaries to secondaries when you mash the throttle.
The 4300D
Easily the rarest 4300 is the 4300D, 715 cfm, conceived for the 351C-4V Cobra Jet and the Boss 351. What made the 4300D different was its spread-bore design with huge “big gulp” secondary bores like GM’s Quadrajet. Because the 4300D was very problematic, performance buffs ditched them for the Holley spread bore. For those who wanted conventional Holley flanges, 4300D spread bore intake manifolds had to be swapped out for the square-flange Holley style. In fact, Ford went with the Rochester Quadrajet on its own 429ci big-block engines because the 4300D would not pass emissions and was so troublesome. Aside from the obvious, what makes the 4300D different than the 4300 is the absence of a hot idle compensator and decidedly different secondary air valves. When you compare the 4300D to the 4300, it really is a different carburetor and must be addressed as a different animal.
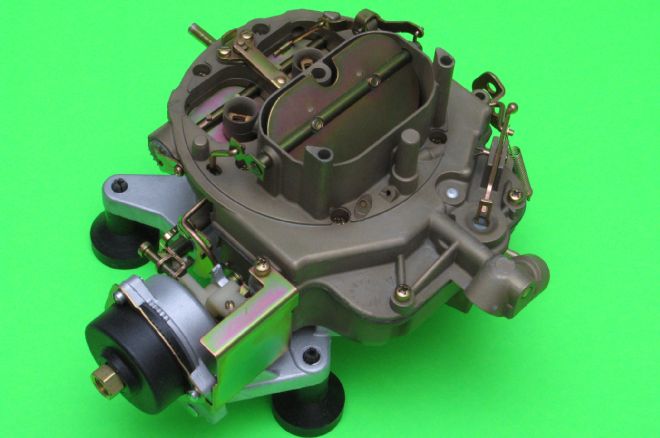
 This is the 715-cfm 4300D spread bore carburetor for the Boss 351, 351C-4V High Output, and the 351C-4V Cobra Jet. This is the 4300D on a 1973 351C-4V Cobra Jet. The 4300D is very hard to find because they didn’t build many to begin with and a lot of them were thrown away. This 351C is also fitted with EGR (exhaust gas recirculation) and electric choke.
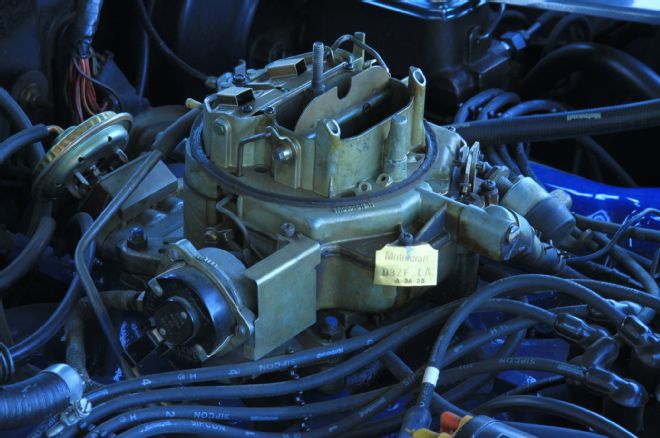
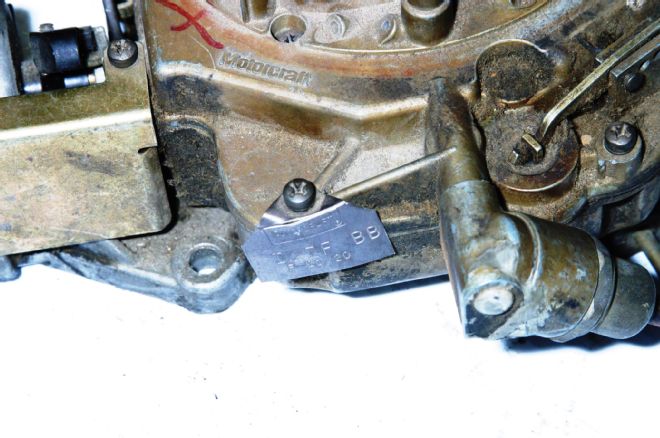 Most carburetor identification tags have been carelessly lost to mass-production rebuilds and careless technicians through the decades, which makes identification more challenging. This tag indicates a D2ZF-BB, which is a 4300D for a 1972 351C-4V Cobra Jet engine. If you want to know primary throttle bore sizing, check the underside of the main carburetor body. Throttle bore size will be cast into the body.
How The 4300 Works
The Autolite 4300/4300D carburetor functions like the Quadrajet. It is nothing like the traditional 2100/4100. The 4300 has a single float bowl, which feeds both the primary and secondary fuel circuits. According to the late Jon Enyeart, a great fuel system expert and friend who founded Pony Carburetors, the 4300 was engineered for reduced hydrocarbon emissions and improvement in fuel economy. Enyeart had his own approach to improving the 4300, yet very little is known today what his approach was. We do know the 4300 was also modeled after the Rochester Quadrajet carburetor with sizable secondaries and small primaries. Secondary operation is similar to the Quadrajet with mechanical function and vacuum-operated air valves, which make the transition from primary to secondary crisp and smooth when properly tuned. When secondaries are fully opened, overwhelming manifold vacuum opens the air valves.
How far the secondary air valves open depends on how deep into the throttle your foot is. Air valves reduce hesitation by allowing fuel to be drawn into the secondaries before wide-open throttle. They prevent a transitional lean condition where the engine falls on its face when you’re going for the gusto. The trick to getting a smooth transition is getting air valve adjustment right to where they don’t open too quickly.
It can be considered ironic Ford never completely cured the 4300’s woes. Like the Rochester Quadrajet (also known as the “Quadrabog”), the 4300 and 4300D suffered from hesitation and stumble because Ford just never could correct the transition from idle to wide-open throttle. There were flat spots, surging, and stumble that drove people crazy. What’s more, hot start issues due to improper float calibration kept hoods open.
Hot starting problems are rooted in what happens to fuel as it sits in a hot fuel bowl. Heat causes fuel to expand in the bowl to where it dribbles into the throttle bores and floods the intake manifold plenum. In theory, you can lower the float level and cure this problem, then, adding insult to injury with lean conditions. Lowering the float level only makes the lean out problem worse. This hot start condition and lean-out problem only gets worse with the 4300D carburetor.
Rebuilding and Tuning The 4300
The 4300 isn’t a difficult carburetor to understand and rebuild. The best advice we can offer is to follow the path of Ted’s Carburetor Shop in Lancaster, California, and take good, well-focused pictures as your 4300 comes apart. Ideally, you will have a Ford shop manual to help you along. Ted Grainger of Ted’s Carburetor suggests taking your time and paying close attention to what you are doing. Ted adds the great challenge for 4300 tuners is to get jetting and float level to a happy compromise where you have enough fuel to avoid hesitation and stumble, yet can avoid hot weather percolation and hard starting. Ted adds factory float level specifications rarely work as suggested. You have to keep removing the air horn and adjusting float levels until you get what you want.
Once you have your 4300 complete and installed, knowledgeable engine tuning must ensue. Before you start the engine, ascertain proper choke adjustment. The choke plate should be closed, yet partially open to allow some air passage. When the engine is started, adjust fast idle speed while it is on the choke. When the engine reaches operating temperature, the choke should be completely off.
The tuning process should begin when the engine is at operating temperature, meaning at least 180-190 degrees F coolant temperature. When you fire the engine, let it run at 2,000-2,500 rpm for 15-30 minutes for a good warm-up. At idle speed, adjust the idle air/fuel mixture to where you get a steady idle. Turn the idle/air adjustment clockwise until the engine begins to stall, then, slowly back out until a steady idle is achieved. You may have to go back and forth from side to side until you get a smooth idle.
Set static ignition timing at idle per your Ford shop manual with the vacuum advance disconnected. Then, dial in total ignition timing. Connect the vacuum advance and raise rpm to 3,500 and hold it there. Total ignition timing should be no more than 36 degrees BTDC. Goose the throttle and observe how the timing mark moves. It should never jump beyond 36 degrees BTDC.
Of course you should not conduct this process without a road test. Do your initial tuning, and then perform a shakedown road test. When you punch the throttle, there should be a crisp response without spark knock (detonation). There are a lot of misconceptions about spark knock, pinging, pre-ignition, and detonation. Spark knock happens only under acceleration. It can occur during starting as the engine fires. If you experience spark knock under hard acceleration, ignition timing needs to be retarded one degree at a time total timing until spark knock is gone. One alternative is a can of octane enhancer. Also make sure your engine’s harmonic damper is properly indexed and reads correctly.
It can safely be said the 351C, in all its forms, is prone to spark knock and hard starting hot. The 351C with open chamber heads is the worst culprit for detonation and spark knock due to poor combustion chamber design. This is a dynamic you’ve little choice but to live with. Get ignition timing where it belongs (36 degrees BTDC total timing at 3,500 rpm) and use the highest octane you can buy. Keep in mind the 4300 carburetor, in all its forms, will keep you busy under hood because it is an ongoing maintenance process.
01. Carburetor kits are available from a number of aftermarket sources, including Ted’s Carburetor for your 4300 project. The best kit in our opinion is the Federal Mogul Zip Kit if you can find one. You will find carburetor kits are not what they used to be. Items like power valves, vacuum pistons, floats, springs, and the like have to be special ordered.
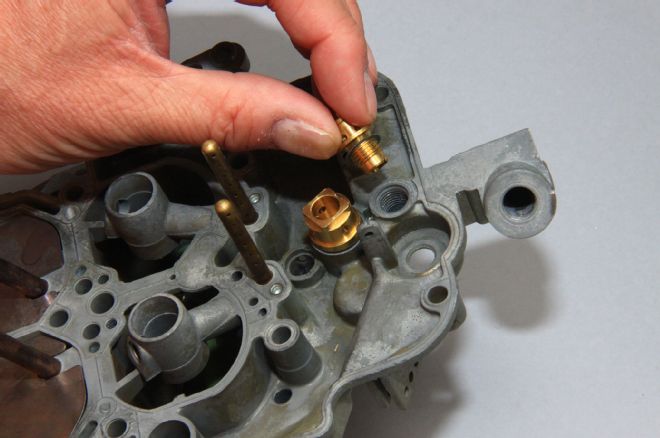
02. Carburetor assembly begins with the air horn and the primary float needle valve fitting and gasket, which tightens with a 7/16-inch open end wrench.
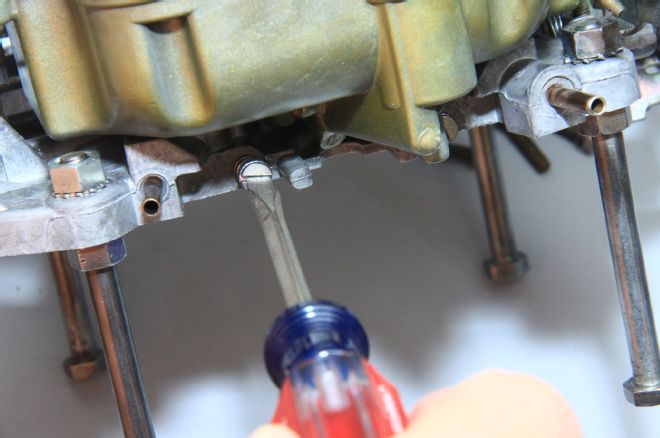
03. This is the secondary float needle valve assembly, which goes in with a common screwdriver. We’re convinced there’s a special tool for this purpose. If you do a lot of 4300/4350 carburetors, you can make a special installation tool using a common cross slot #3 screwdriver.
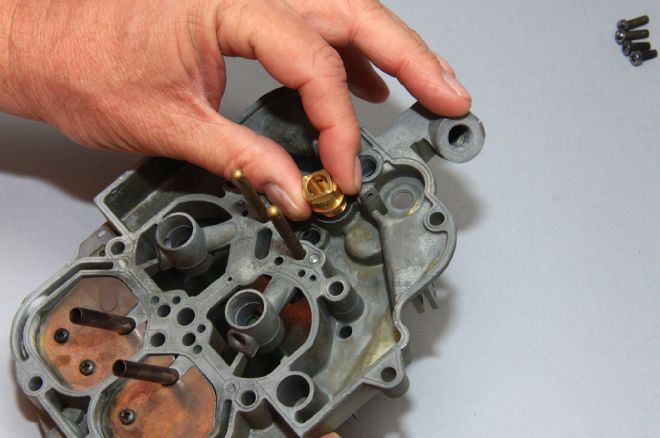
04. The primary float needle valve drops in like this. It is not attached to the float assembly.
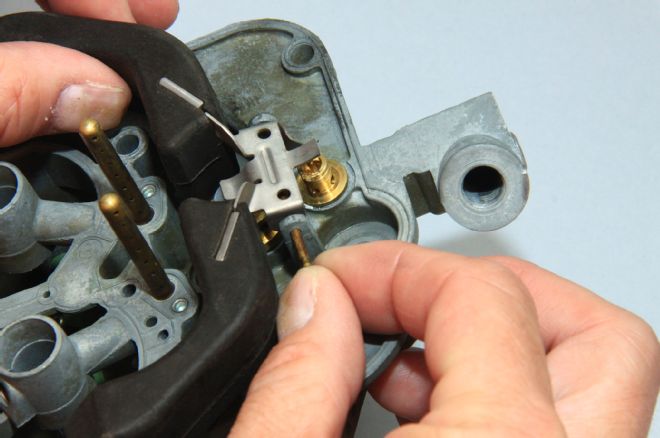
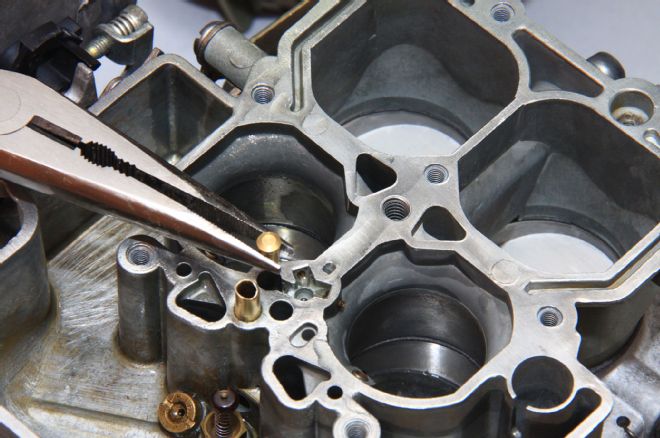
05. Float assembly is installed as shown and pivots on this brass pin. We were surprised to discover there was no retaining clip with this float pivot pin.
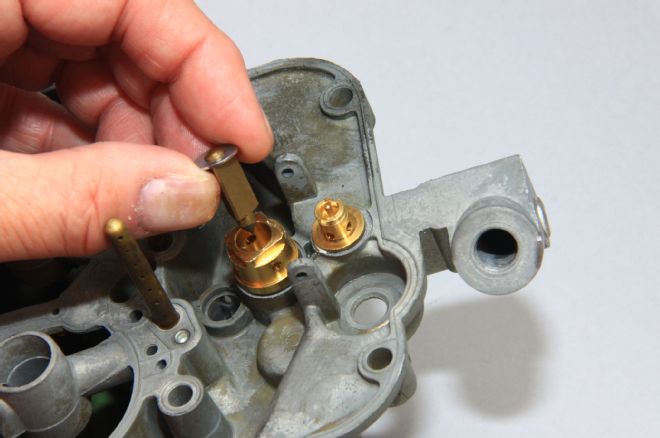
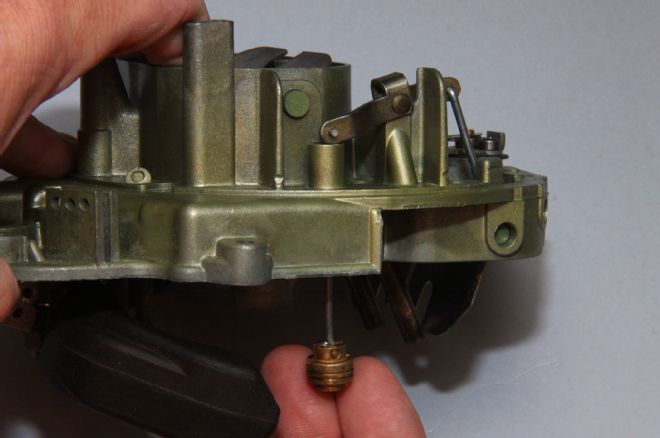
06. Next is the 4300’s power valve assembly, which is quite petite, compared to the Holley and Autolite 4100 power valve. There’s a vacuum piston installed in the air horn (not pictured), which moves the power valve based on engine load and throttle position.
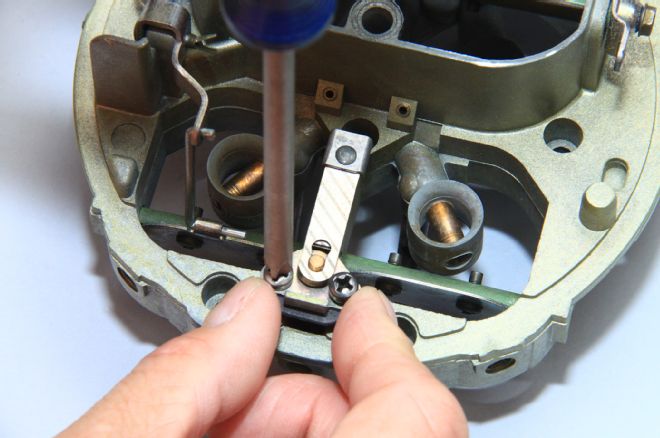
07. This is the hot idle compensator, which gets a gasket and two fine-thread Phillips head screws.
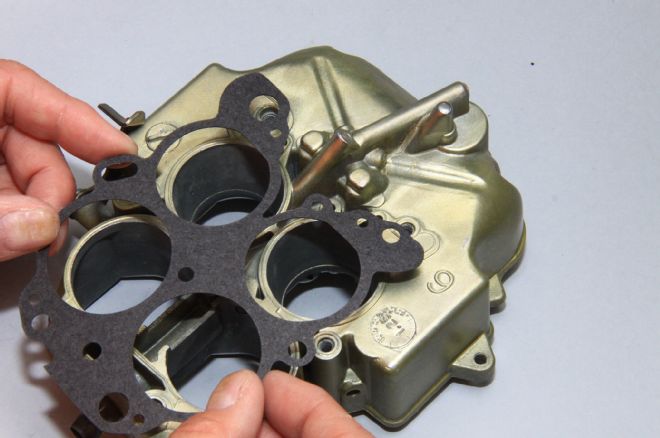
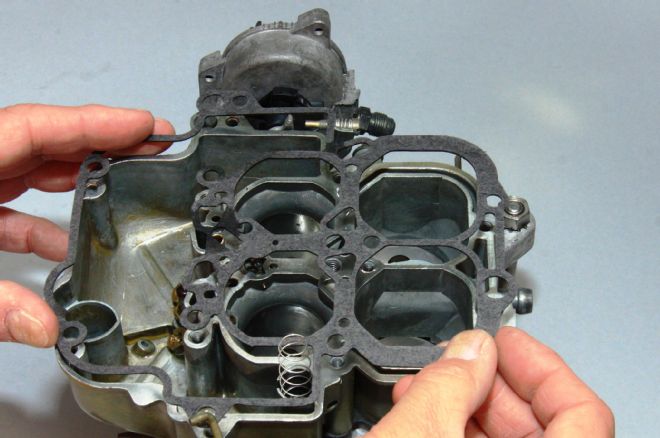
08. This is the main body to base gasket. There were two types in our kit. All we had to do was match the gasket to our 4300’s main body.
09. Main body and throttle base are assembled as shown. Ted’s Carburetor suggests using a lubricant on screws to prevent thread damage. And when you have thread damage, it is suggested you chase threads or install inserts as necessary.
10. Idle mixture screws are next. Lubricate the threads with a lightweight lubricant like WD-40 and gently screw these guys in. Never over tighten. Seat each mixture screw, then, back them out 1½ turns to get a predictable start idle mixture.
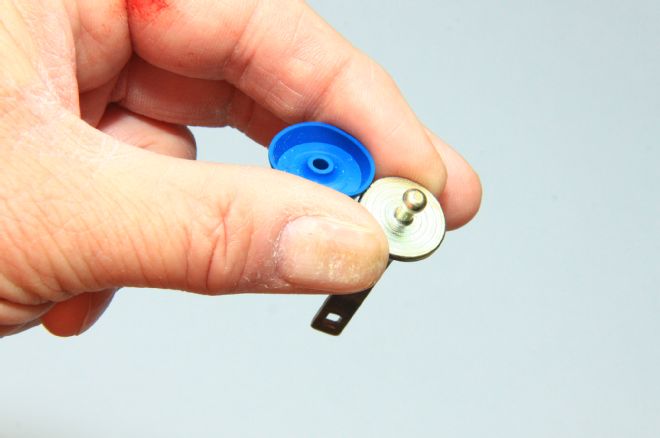
11. The accelerator pump piston gets a new urethane seal cup, which pops over this pin. If you’re having a tough time seating this cup, lube the pin with WD-40. Point the lip of the cup away from the pin.
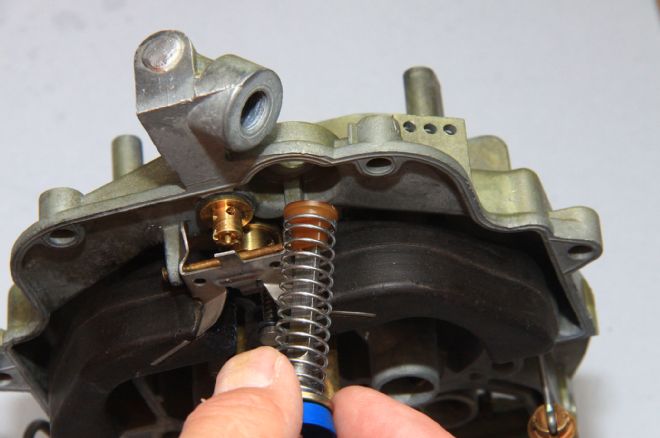
12. This is the air valve vacuum piston and linkage. It is spring loaded to keep the secondary air valves closed. When you mash the throttle and the secondary throttle plates open intake manifold vacuum acts on this piston, opening the air valves in synch with the secondaries. These air valves reduce the likelihood of hesitation and stumble.
13. This is the accelerator pump piston with a new cup, spring, and retainer. The piston rod extends through the air horn and attaches to the actuating linkage. As throttles are opened, the accelerator pump linkage acts on this piston, which draws fuel into the pump bore. A check ball closes, allowing fuel to be forced through accelerator pump nozzles into primary throttle bores.
14. This is the accelerator pump needle valve, which is a check valve that allows the flow of fuel one way only through discharge nozzles.
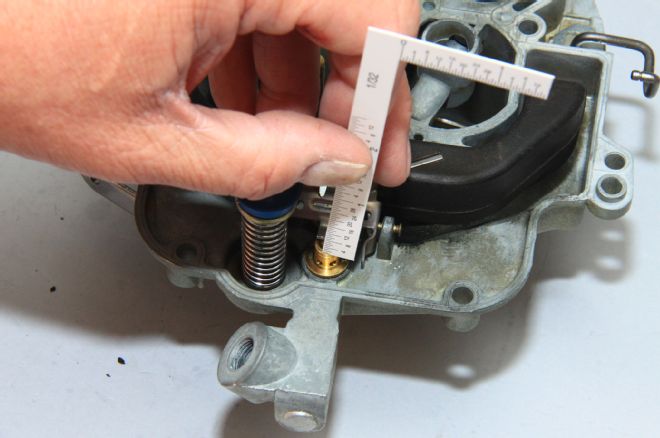
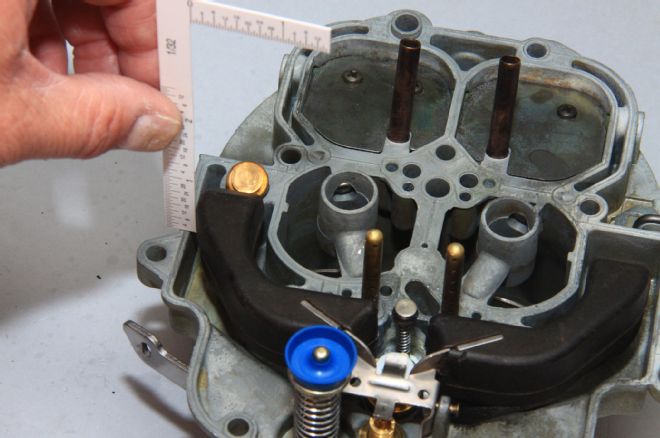
15. Float level is checked two ways—at the float elements themselves and at the secondary float needle valve. The correct float level adjustment can be found in your carburetor kit instructions, depending upon your application.
16. Air horn gasket is installed next. Make sure it clears the air valve vacuum piston spring when you’re installing the air horn.
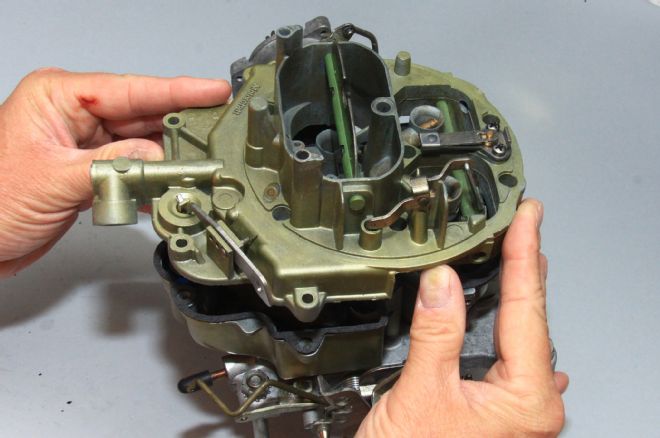
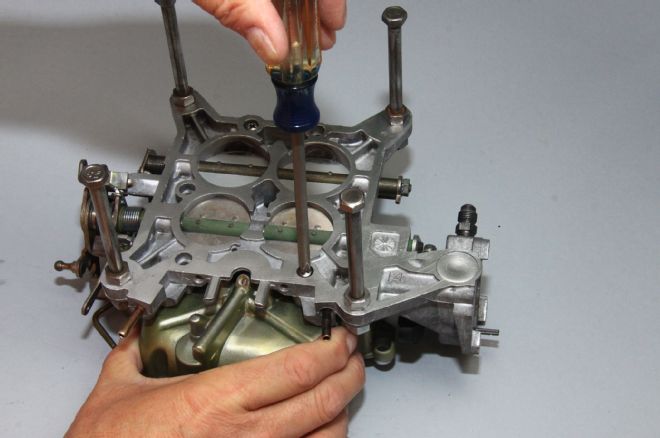
17. The air horn is installed next, paying very close attention to the accelerator pump and air valve vacuum pistons. Make sure both piston assemblies are lubricated and move freely once the air horn is seated.
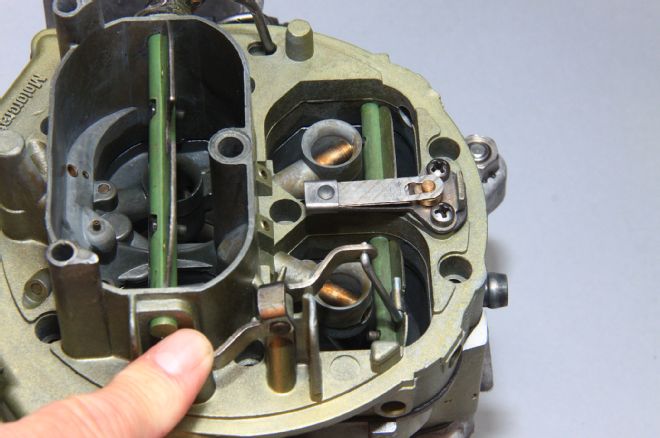
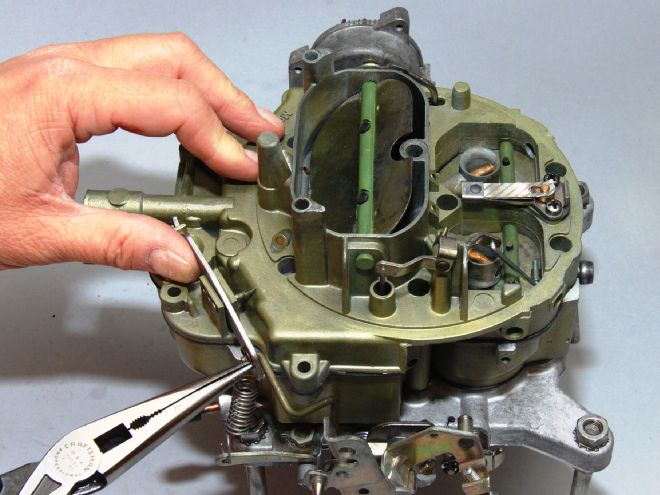
18. This is the secondary air valve linkage, which is connected as shown. Check this linkage for freedom of movement before tightening air horn screws.

19. Automatic choke adjustment is accomplished by turning this thermostatic choke coil slowly clockwise with the throttles open until the choke plate closes. You don’t want the automatic choke fully closed. The fast idle cam should be against the fast idle adjustment screw with the choke plate most of the way closed. Final adjustments are accomplished with the carburetor installed and engine running.