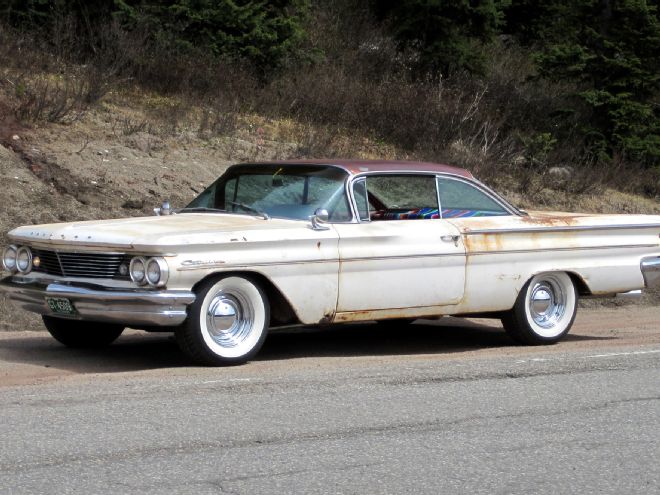
It all started a couple of years ago when I ran across a pretty solid '60 Catalina at a car show I was covering up in Colorado. At the time my wife, Candy, had tired of the uncompromising buggy-sprung suspension, old-school solid axle steering, and wind-in-the-hair ride of her '27 T roadster and was pining for the comfort of her old '63 Riviera. Well, I thought the Pontiac I had stumbled upon was a perfect candidate to replace her roadster so (after a quick call home along with an emailed picture of the car in question) I got the OK and struck a fair deal with the Pontiac's owner. With keys in hand I made a call to the airline, canceled my flight back to SoCal and climbed behind the wheel. To make a long story short, the Catalina made the trip without a hiccup and my straight-through dash placed me back in my driveway the following day. Unfortunately, or maybe fortunately, the next morning the Pontiac's transmission ended up letting go. It had worked fine all the way home but I guess that final trip was all the old tranny had left in it.
Because the Catalina had been treated to an engine rebuild as well as new brakes, shocks, tires, and exhaust just prior to purchase, Candy and I had planned on bodywork, paint, and upholstery—but not so much in the way of mechanical work. Oh well, it seemed a tranny rebuild was in the car's future now as well. As we soon found out, the vintage Jet-Away automatic was not a tranny many of our local transmission shops were familiar with, and after the one and only shop up to the challenge quoted us a price that was well beyond what we thought was fair we stepped back and weighed our options. We could go ahead with the rebuild and utilize early ‘60s technology or investigate swapping the old tranny for a newer more advanced offering.
Swapping out an early automatic for a more modern one is a bit more difficult as the venerable TH-series (350 and 400) and their overdrive brethren won't just bolt up to early B-P-O (Buick, Olds, Pontiac) engines as they do the good old small-block Chevy. At least that was what I'd been led to believe, up until that point anyway. Come to find out my concern was unfounded as it was brought to my attention that there was a source for high-quality engine/transmission adapters but a phone call, or mouse click away. The Wilcap Company (wilcap.com) has been manufacturing speed and performance equipment since 1946 and one popular segment of their wares is a large selection of engine to transmission adapters for GM, Ford, Mopar, and other makes. They also have the expertise to produce adapters for custom applications as well. Upon learning of Wilcap I immediately contacted them and was informed that they did indeed make an adapter kit that allows the use of TH350, TH400, 700R4, or 4L60 series transmissions behind '55-60 Pontiac/GMC 287, 316, 347, 370, and 389ci engines. It was at that point that I decided if I was going to have to drop a chunk of unexpected cash on the Catalina it'd be only logical to upgrade the car with a later model trans rather than to have the old Jet-Away rebuilt. I went ahead and placed my order for the adapter kit and followed that up with a call to the folks at Phoenix Transmission (phoenixtrans.com) (who I've dealt with in the past and know from personal experience offer high-quality, high-performance assemblies that are darned near bulletproof) and ordered a fresh TH400 to go along with the aforementioned Wilcap adapter kit. Within a matter of days both items arrived and what you'll see here is the culmination of my search and the installation of the trans utilizing the adapter kit. I'd highly recommend checking out both Wilcap and Phoenix if you're considering upgrading an early drivetrain, I'm sure you'll be every bit as happy with the conversion as I. Check it out.
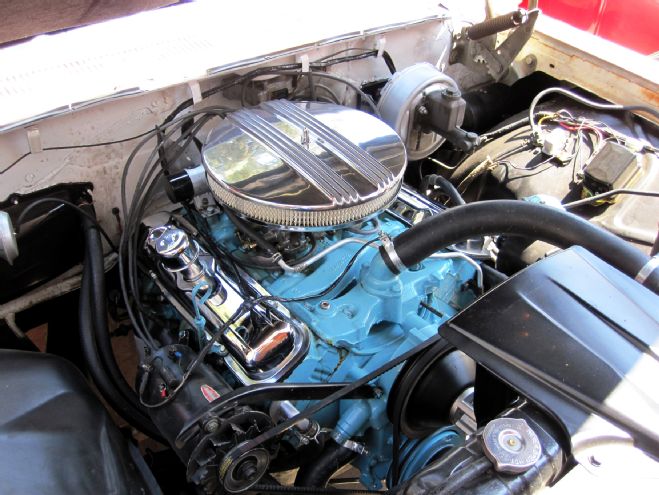
As it sits, the Catalina is equipped with a 303hp, 389ci V-8 backed by a fatally wounded Jet-Away Hydromatic transmission. The 303hp four-barrel–equipped 389 had been rebuilt in the recent past and will benefit from the new Turbo Hydromatic in its future.
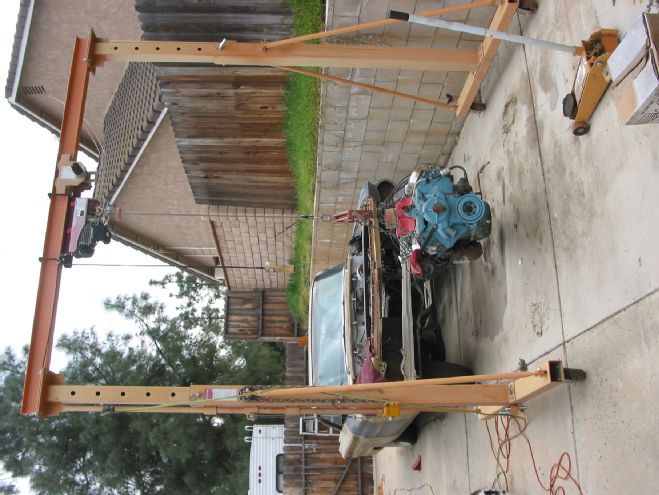
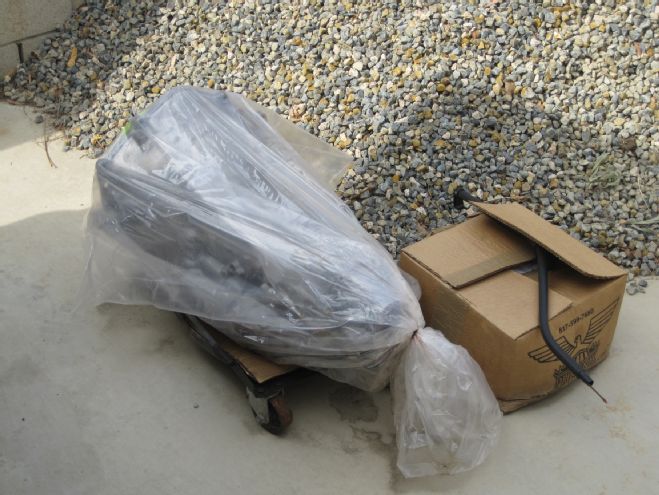
Beginning work on my freshly vacated RV pad I pulled the engine/trans combo out of the car using my Harbor Freight gantry and electric hoist (a life saver for decrepit old men like me).
Here you can see the engine/trans combo moments after being lifted out of the engine compartment. By looking at the positioning of the engine tilter you can see just how heavy the old cast-iron Jet-Away transmission is (giving the weight of the big old 389). The weight savings gained by swapping it for the much lighter TH400 will be an advantage in itself.
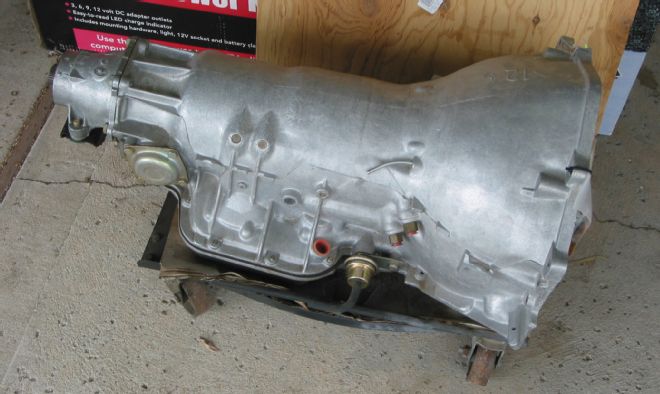
The freshly unpacked Phoenix Transmission heavy-duty TH400 (PN PTP400SS ) I chose for the swap came equipped with higher capacity clutch packs, Kevlar band, high-capacity 34-element sprag race, and a semi-automatic valvebody, which will allow us to select gears manually, or leave it in drive for full automatic shifting. This trans included a Phoenix 2,000-2,200-rpm stall converter, a dipstick and tube, and a speedo drive gear chosen to match my rearend gearing and tire diameter. Phoenix suggested PN P400SS as a great choice for the weekend warrior with up to 600 hp and a heavy foot (my wife qualifies in the heavy-foot department for sure) so it should perform great behind our 389.
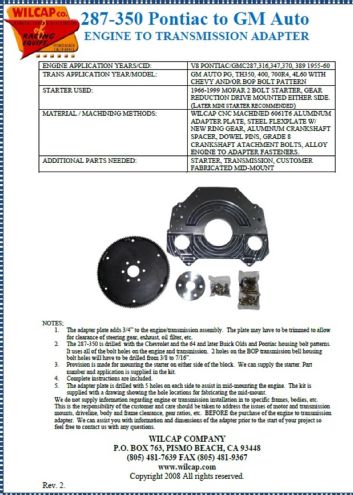
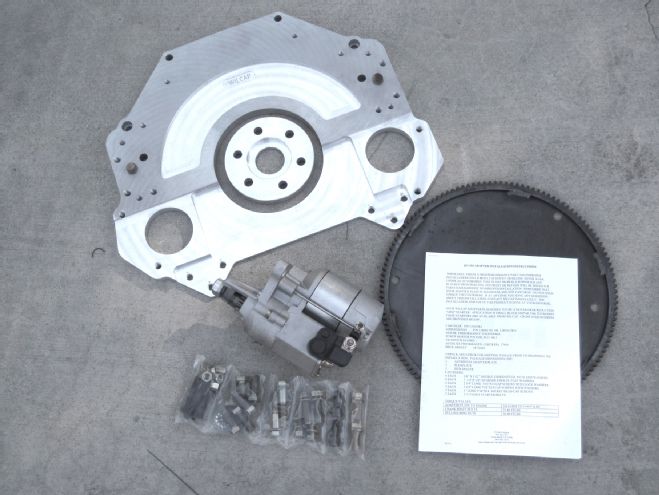
The Wilcap Pontiac to GM auto engine to transmission adapter kit comes with Wilcap designed and machined 6061-T6 billet aluminum adapter plate, a new steel flexplate with ring gear, an aluminum crankshaft spacer, Grade 8 crank attachment bolts, and all the alloy adapter hardware needed to attach the adapter to our engine. The kit is designed to use a '66-99 Mopar two-bolt gear reduction drive starter that can be mounted on either side. (I chose to keep the starter on the left side of the engine like the stock one was.) The only item needed beyond what is supplied in the kit is a transmission crossmember (something I'll address shortly).
As I stated earlier, the folks at Phoenix Transmission know their stuff and consistently build some of the best performance automatic transmissions in the aftermarket—and great prior experience was all the motivation I needed to stick with a proven product for this project as well.
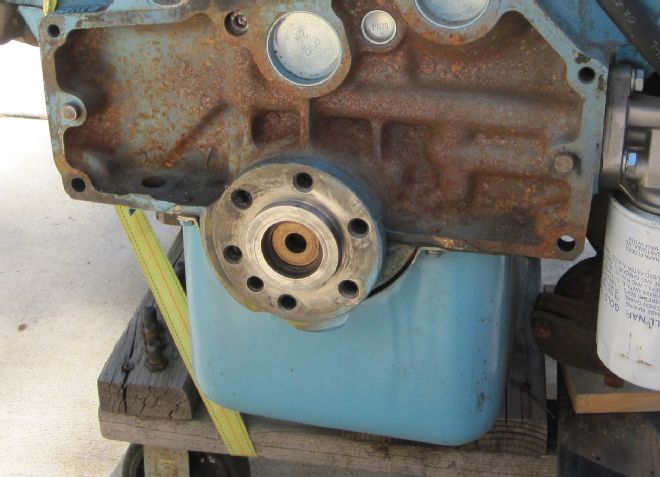
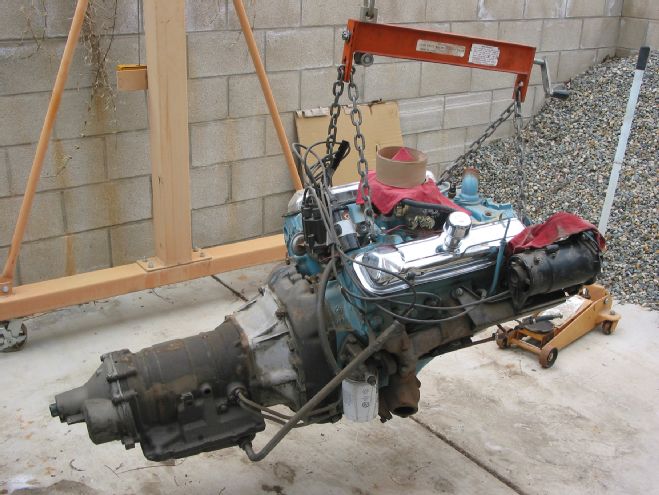
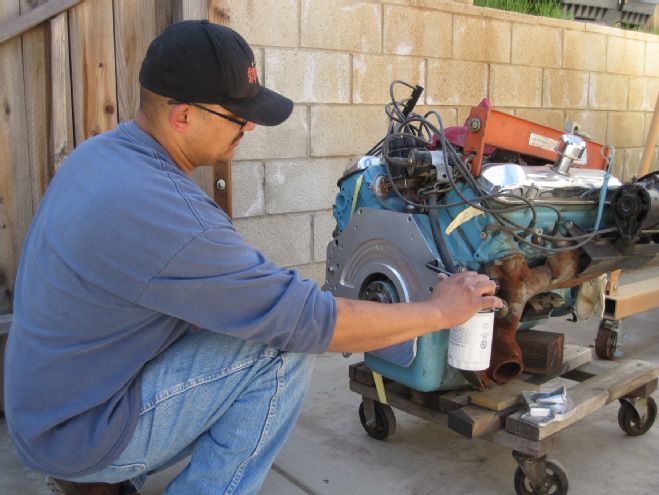
After unbolting and removing the original trans, converter, and flexplate I was ready to begin readying the engine for the new components. I first inspected the crank face for cracks or damage and chased the threads, just in case.
Now that I was ready to begin the first thing I did was to test-fit the adapter plate to the back of the engine. As you may notice there are starter provisions on either side of the adapter plate. In our case the original starter was located on the left (driver side) of the engine/transmission and the oil filter on the right, so obviously the starter will remain on the left.
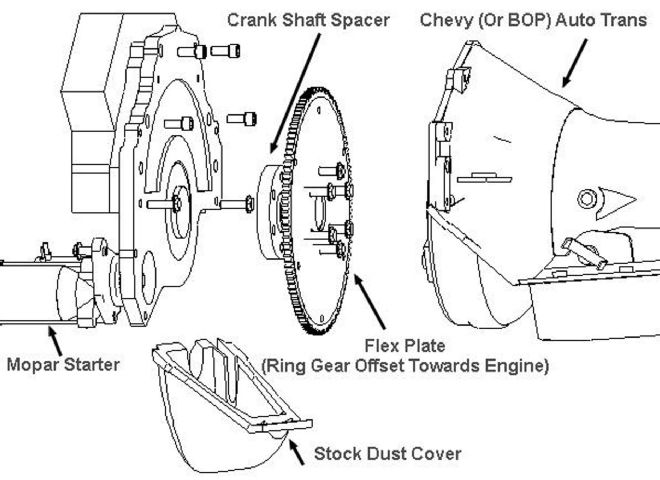
The installation instructions contain a diagram, which helps by giving the installer a quick idea of how the adapter components are utilized. Ah, but don't fail to read the full instructions though—as there are some very particular guidelines that need to be followed for everything to work correctly.
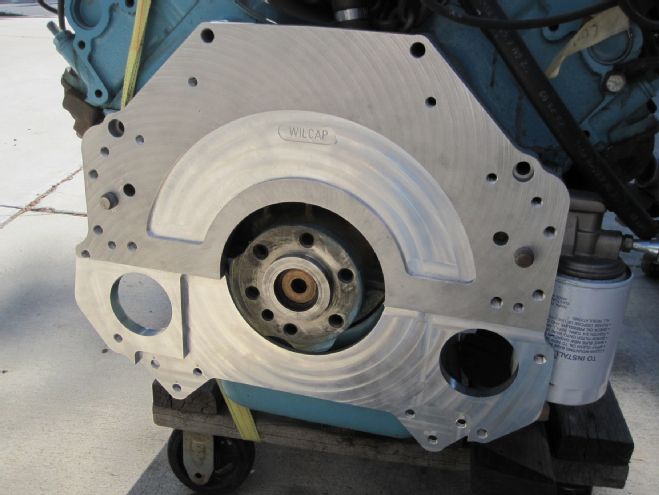
I also test-fit the crank shaft spacer for fit and bolt hole alignment as well. The spacer should fit snuggly over the crankshaft and converter hub, if there's excessive play with either stop there and give the guys at Wilcap a call before proceeding.
It just so happened that my good pal Johnny Esquivel stopped by and offered me a hand with the assembly. Esquivel began to help by inspecting and cleaning the crankshaft hub, the back of the engine block, the front of the transmission bell housing, and the torque converter hub. He also chased all the bolt holes in the block with the correct size tap to make sure they were all serviceable. He next attached the adapter plate to the engine, making sure it fit nice and flush with no rocking.
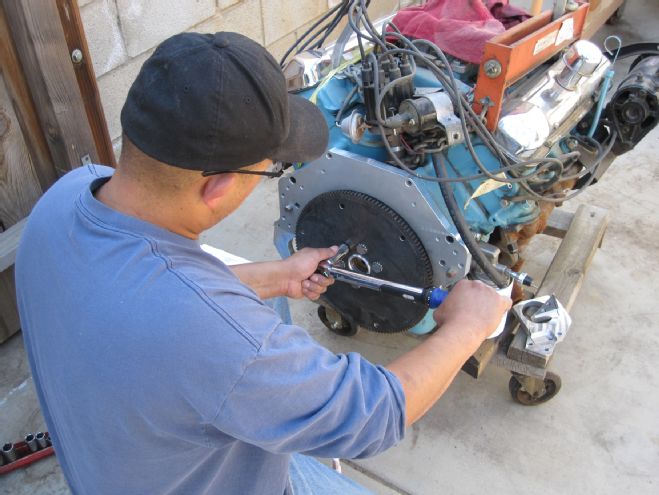
With the adapter mounted to the block and the hub spacer in place on the crank Johnny then mounted and torqued the flexplate/crank bolts to spec in a criss-cross pattern.
Rather than muscling the trans we used the hoist to cradle the trans while giving it a final wipe down prior to moving it into place for attachment.
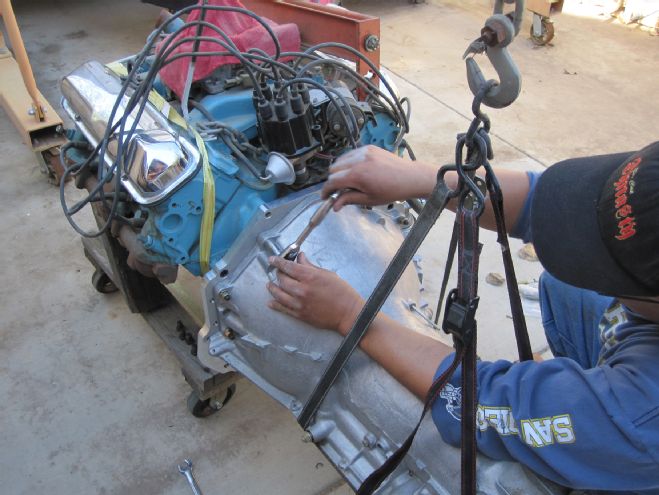
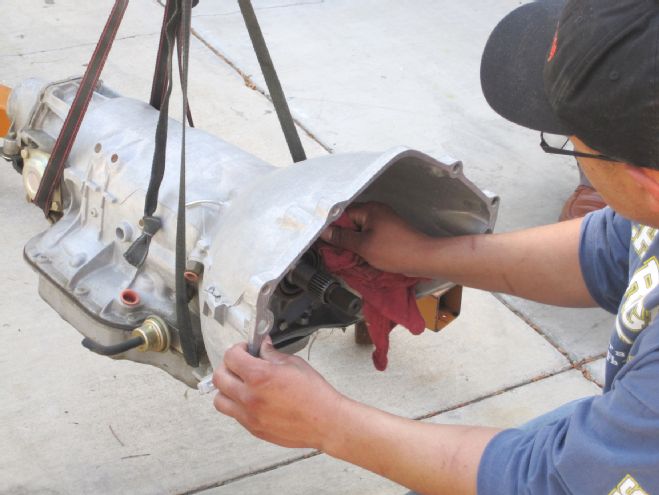
After lubricating the transmission input converter seal the converter was slid into place and the transmission attached to the engine.
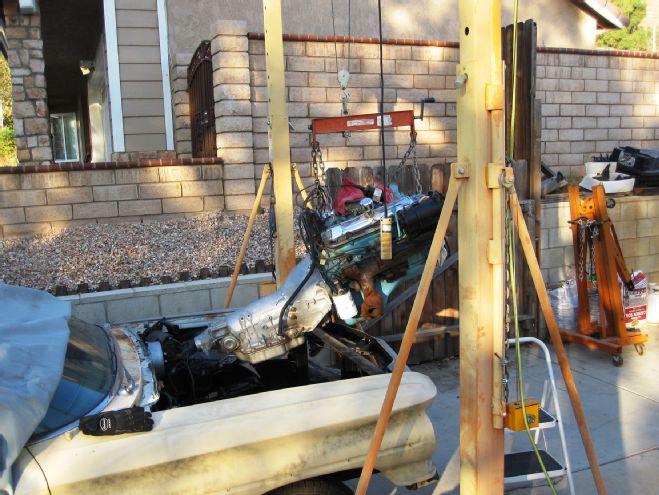
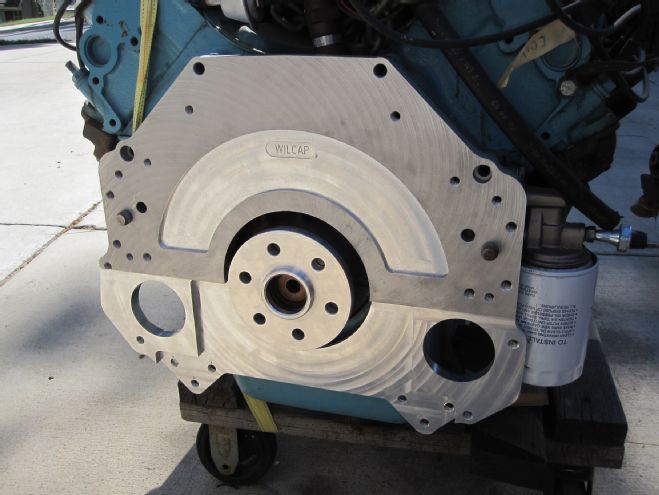
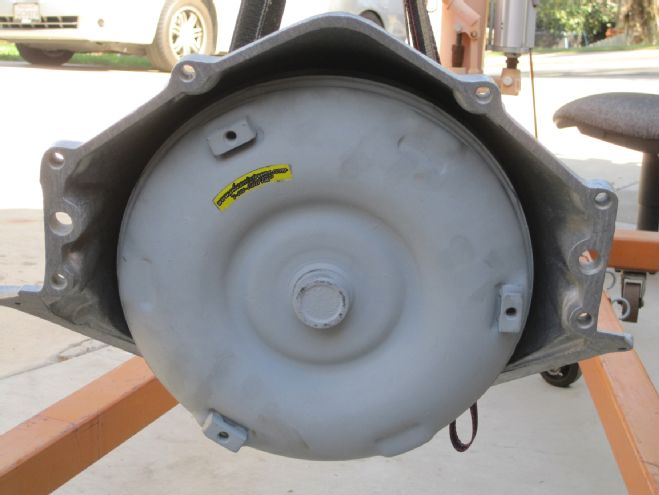
Once the transmission and engine were mated we checked a few specific measurements/specifications, which Wilcap specifies in relation to this particular trans/engine combo for successful operation of the adaption, which may or may not be the same in other applications. Once satisfied that everything was within Wilcap specs, the engine and transmission were then slid back into place in the Pontiac's engine bay.
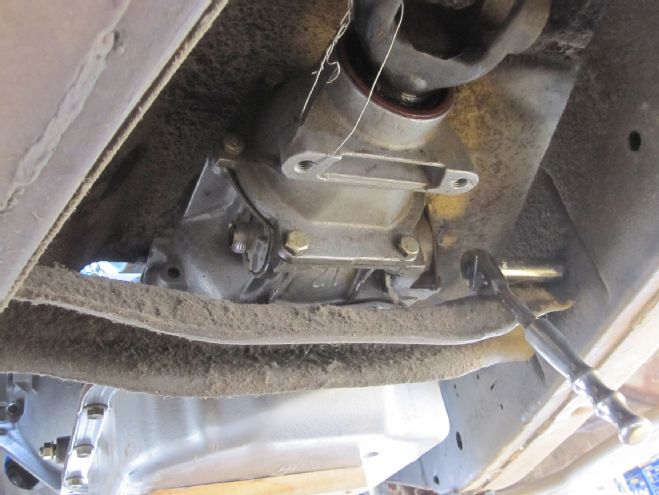
Once in place we saw just how much difference there is between the original mounting point and the mounting point with the new TH400. The new transmission mounting point ended up to be well rearward of the original. Since I preferred to keep the original crossmember and its original mounting points there were some modifications needed to accomplish that aim.
To begin the crossmember modification a few critical measurements were taken and the crossmember removed and cleaned up.
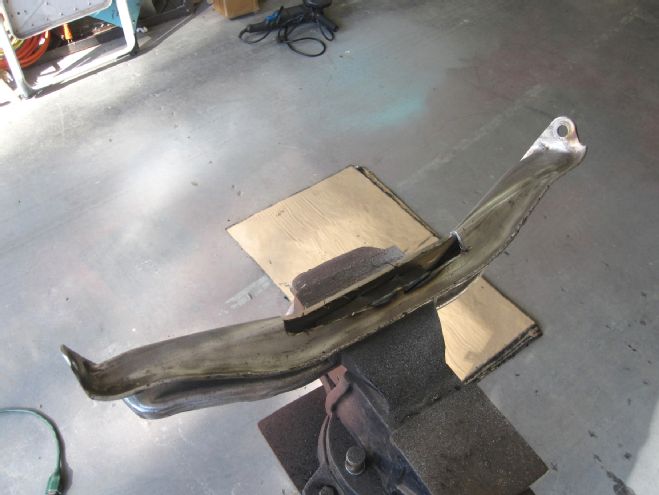
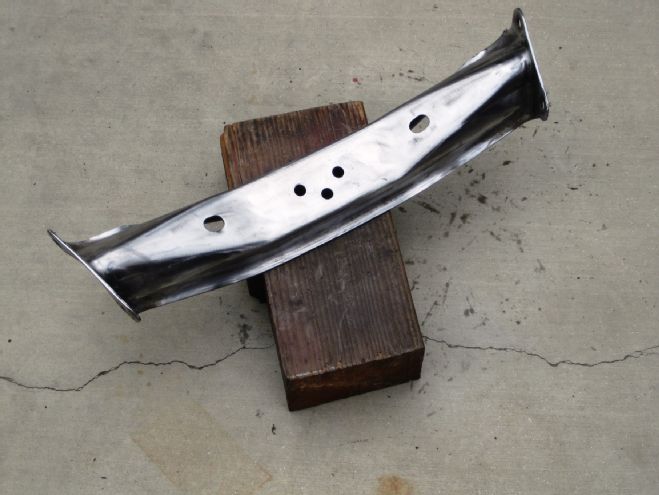
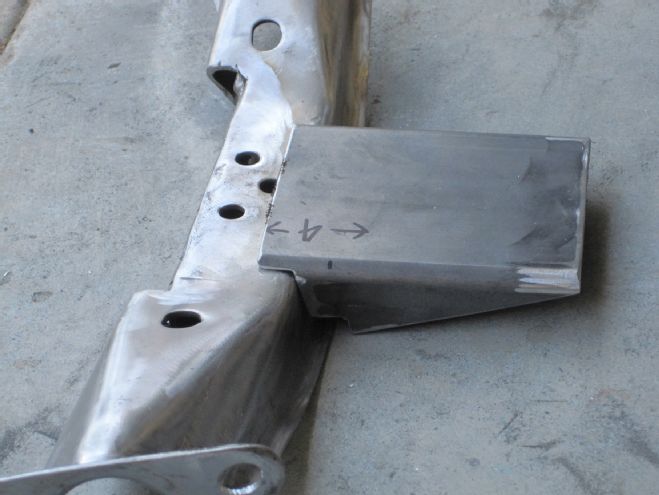
There were two modifications I needed to make. The first was to trim back the forward edge of the crossmember that was touching the transmission pan when in its original mounting position, and second, to extend the actual mounting surface rearward of the original. (In this image the left end of the crossmember is actually the right-side mounting point when in the car.)
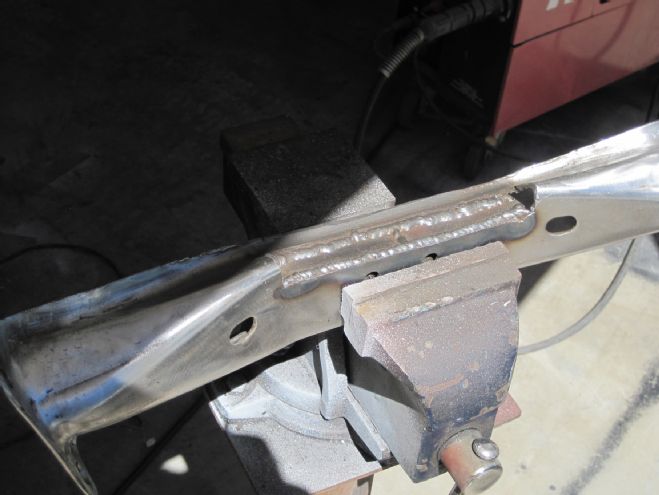
Here you can see where I trimmed back the leading edge of the crossmember and welded in a plate to reinforce that edge.
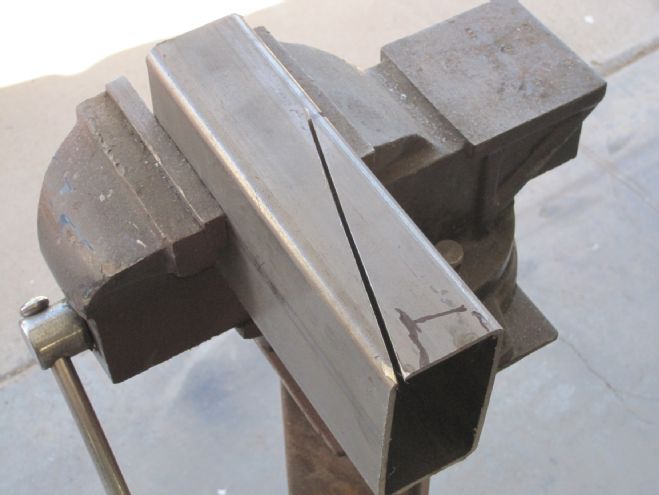
In order to extend the actual mounting surface rearward I decided to use a section of rectangular tube to fabricate the needed mounting point.
I cut the tube diagonally forming a wedge-shaped mount that would be used to extend the mounting point rearward to the transmission mounting flange.
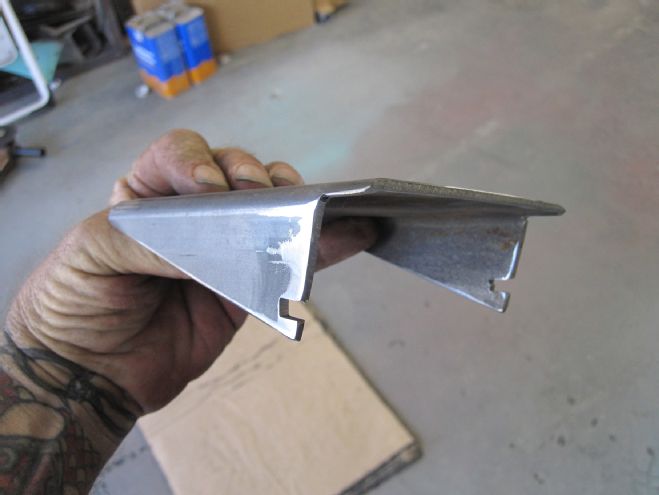
The mount was then test-fitted to the crossmember to make sure I formed it correctly. Luckily I did it on the first try for once.
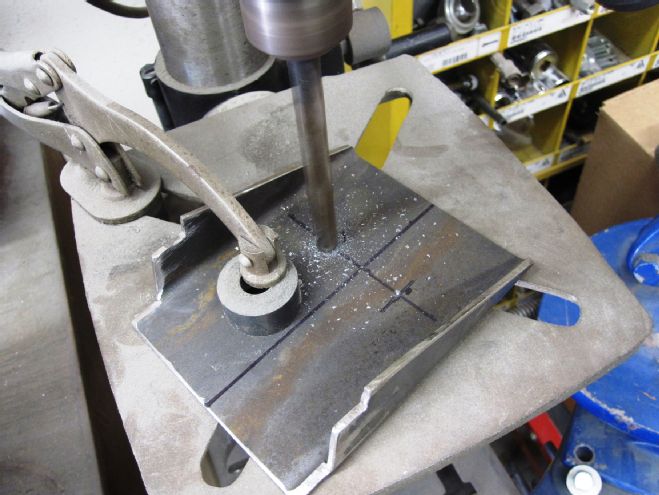
I then moved over to the drill press and drilled the attaching holes for the trans mount cushion.
Once the holes had been drilled the mount extension it was welded to the modified crossmember.

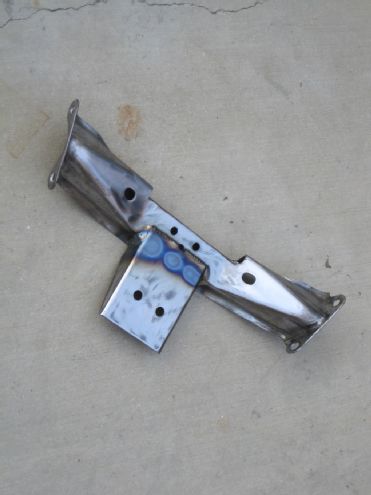
The final steps were priming and painting the completed crossmember, reinstalling it in the car, locating the mount cushion, and bolting it to both the crossmember and transmission. At this point the job is complete and thanks to the miracle of the modern aftermarket our '60 Catalina has been upgraded with a more modern and better performing transmission.