Last month we had so much fun with our small-block Great Crate engine that we just had to keep going. If you recall, in Part I, we started with the basic 290hp 350ci crate engine from Chevrolet Performance and added a few bolt-ons. We changed the intake, added headers, slipped in a very streetable hydraulic flat-tappet cam, and the small-block responded with 334 hp and 370 lb-ft of torque. This added nearly 60 lb-ft of torque and a solid 44 hp. We also realized we had run into the classic limitation of the stock iron heads. It was time for a major change. Head Games
It was clear we needed a better set of cylinder heads. While some guys might opt for a monster set of intake ports to really flow some killer air, we wanted something that fit a more conservative and street-friendly agenda. The plan for this engine has always been to build an affordable small-block that will deliver excellent street manners while still delivering good power. The plan is for this engine to power a nearly daily driven street rod so it was important that we not go overboard on the camshaft, induction, or the cylinder heads.
That direction firmly defined our search pattern along with an eye toward not depleting our meager horsepower war chest. Among the more affordable aluminum heads we could choose, we bypassed the off-shore knock-offs in favor of a Made in America set of Edelbrock Performer RPM castings. These heads feature a 185cc intake port, which offers a nice combination of good airflow with excellent mixture velocity that helps make this street head really responsive to throttle inputs. We also spec'd a 64cc combustion chamber because we were well aware of this crate engine's conservative static compression. Just changing the combustion chamber size was worth almost a full point in compression from 8:1 to 8.93:1, so we were definitely headed in the right direction.
Of course, the RPM heads also improve the airflow by a significant amount. Edelbrock rates the 185cc intake port on the RPM head at 250 cfm at 0.500 valve lift while a typical 76cc iron production head will do well to exceed 200 cfm at this same valve lift. The iron Vortec heads are closer at around 235 cfm. This is where most enthusiasts stop their evaluation, but the sharp ones also look at the exhaust side. Here, the rpm head has a clear advantage with 158 cfm at 0.500 lift while the production iron head is doing well to generate 136 cfm at this same lift. That's a 14 percent improvement in exhaust flow for the RPM and it's been our experience that exhaust port flow on these medium-sized, small-block heads that contributes to good horsepower numbers between peak torque and peak horsepower.
As expected, the dyno chart reveals that the head swap made a significant gain in power throughout the entire curve. For street engines, I prefer to study the torque curve rather than look at the peak numbers as any change that improves the torque across the entire curve is the best you can expect. Looking at the dyno curve, notice how the torque below 3,700 jumped by nearly 30 lb-ft of torque. This is the area where most street engines spend a majority of their time, so among all the improvements we've made this is where it all comes together. As far as peaks are concerned, the Great Crate made 397 lb-ft of torque at 4,300 with horsepower peaking at 376 at 5,700 rpm. We thought the peak horsepower would be closer to 6,000 rpm, but as it is the spread between peak torque at 4,300 and peak horsepower at 5,700 is a decent 1,400 rpm. The curve after peak horsepower also looked stable, which allows you to spin the engine up to perhaps 6,200 for a better shift recovery rpm. This is important since most transmissions experience roughly a 30 percent drop in rpm, which would bring a 6,200-rpm shift down to 4,340. This would place the shift recovery point well within the power curve between peak torque and peak horsepower. That's when the car will run the best in a quarter-mile contest.
This is as good a place as any to point out something that is rarely mentioned in the midst of multiple-component dyno testing. For want of a better term, let's call this the synergistic effect. Synergy is defined as working together or the combined effects of components. This is a critical factor with engines because even though the parts we chose came from different manufacturers, it was their combined effort that we were looking to create. A case in point could be made about the Performer RPM intake that we chose in Part I. If you recall, the intake was the second component that we changed. At the time, the engine was nearly totally stock with just headers and a Holley carb as the two major changes. Compared to the original intake, the rpm didn't look like it was worth much at that point. But on an engine where the airflow potential is much greater, this is a good manifold. In a giant intake manifold test we performed in Car Craft in the Sept. '13 issue, we found that rpm manifold was worth 14 lb-ft of torque over that exact same factory-based intake using a 406ci small-block making over 500 lb-ft of torque.
The point of this is that once we combine all the components together to increase airflow with the cylinder heads, intake manifold, camshaft, headers, and carburetor—all these components combined are worth more power than if the parts were tested individually. So as you will see, because we saved the heads for last—they will appear to be worth an amazing amount of power. Had we tested the heads first—without the benefit of a better cam and waited to add the cam last—then the cam would have appeared to be worth a tremendous amount of power. So this synergistic effect is something to think about whenever you read engine testing stories. Sometimes it's the way the test is run that is as important as the parts that are tested.
Rocker Ratio Tricks
With our small-block now making respectable horsepower, the rocker ratio was still at 1.5:1 with a max valve lift of around 0.480-inch lift. Since Edelbrock's flow data reports that these heads will flow decently right up to 0.600, we thought that a set of 1.6:1 rocker arms would help the cause. In theory, this should take the valve lift from 0.480 to 0.512. So we installed a set of COMP's 1.6:1 roller-tipped Magnum rockers and pulled the dyno handle. Right away the power dropped off suspiciously and it really sounded like the engine wasn't happy. There were no overt noises, but dyno operator Steve Brule suspected something in our swap wasn't quite right. We pulled the valve covers and realized that the increased rocker ratio places the pushrod cup closer to the rocker arm fulcrum. This pulled the pushrod closer to the fulcrum and near peak lift this change bottomed the pushrod into the pushrod guideplate. All we had to do was loosen the rocker studs, shift the pushrod guideplates away from the pushrods (the holes in the plates are larger for just this reason), and re-torque the guideplates and the binding issue disappeared. Later we read the Edelbrock instruction sheet that comes with the heads and Edelbrock expressly mentions this as a possibility that should be checked when the heads are installed. It's our bad for not reading the instructions! (Editor's note: Read the instructions!)
With that little bump in the road avoided, we ran the test again and were rewarded with a measurable gain in power nearly all the way across the entire rpm band with a 10 lb-ft of torque improvement at 3,300, which was pleasantly surprising. However, the power rewards didn't extend past 5,500 rpm. At that rpm the rocker swap made a decent 381 hp. But looking at the HP7 curve, you can see how after this rpm, the power abruptly suffers all the way out to 6,000 rpm. At 5,800, the taller rocker ratio change made less power than the 1.5:1 rockers. Clearly, this is an indication that the engine needs some attention in the valvespring department. With the 1.6:1 rocker ratio, we are now accelerating the valves much more quickly, which has to happen because we're asking the valve to open farther within the same time period—measured in engine rpm. What usually happens in cases like this is the spring seat pressure is unable to keep the valve from bouncing off the seat on the closing side. When the valve bounces, it allows cylinder pressure to escape, which is why the power drops off.
There are several ways to improve this situation. The most common fix is to increase the spring pressure. Edelbrock's instructions list the valvespring seat pressure at 120 pounds with an installed height of 1.800 inches. We could decrease the installed height to increase the load, or we could install stiffer springs to achieve the same result with the original installed height, or we could try lighter, tool steel valvespring retainers. Lighter components are usually the best way to solve this problem since higher seat and open loads on a flat-tappet cam can create wear issues. This is the main reason why we chose to run the high-zinc oil from AMSOIL, to ensure that the cam (once it was properly broken in) continues to work without undue wear.
When we go back up on the dyno in a future story, we will want to address this issue because projecting the shape of an ideal horsepower curve, it's entirely possible that our Great Crate engine could have achieved horsepower numbers well into the 390hp range. Making 400 hp might have been a challenge, but solid 390-plus horsepower would certainly be achievable. Of course, another avenue would be to jump to a hydraulic roller cam that would give us much more lift with the same duration—and make more power. That just might be what we plan to do in a future story.
Overall, our little small-block has delivered on every improvement we've made. It's important to remember that we started with 290 hp and 311 lb-ft of torque and now this same small-block is making 381 hp and 403 lb-ft of torque. That's an improvement of over 30 percent—or 90 lb-ft of torque and 90 hp. Plus, our conservative motor still looks like a simple small-block—no blower, nitrous, or tunnel ram—just a simple small-block that really gets with the program.
Cam Specs Camshaft Adv. Duration Duration at 0.050 Lift (inches) Lobe Sep. Angle Stock Intake N/A 222 0.450 114 Stock Exhaust N/A 222 0.460 --- XE-268 Intake 268 224 0.477 110 XE-268 Exhaust 280 231 0.480 ---Compression Ratio
Chevrolet Performance lists the original 290hp 350 crate engine as having an 8:1 compression ratio using dished, four-eyebrow pistons and 76cc combustion chambers. We estimated the piston chamber in the original story at 10 cc but it really comes closer to around 13 cc along with a 0.024 deck, and an 0.041-inch-thick head gasket computes to 8.0:1. Just by changing to the 64cc combustion chamber in the Edelbrock head improves the compression to 8.9:1 using a Fel-Pro 1003 head gasket that is the same thickness. Rather than milling the head, we cheated a little and used a Fel-Pro 1094 gasket that bumped the compression to 9.43:1. That's a 1.4:1 increase in the static compression ratio. One reason the power improved with the head swap was because of this bump in compression. Conventional wisdom holds that power will increase by 3 percent for every full point increase in compression. Just increasing the compression this much should be worth roughly 13 hp from the 334hp baseline.
The Power Curve
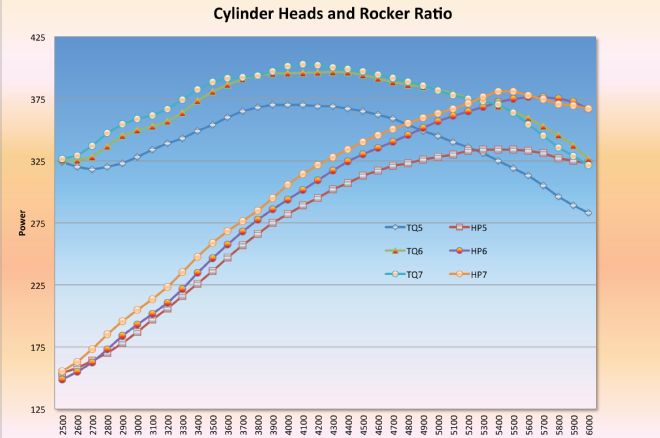
The graph for Part II starts with a baseline curve, which is the best power run from Part I listed as TQ5/HP5 with a peak torque of 370 lb-ft at 4,000 rpm and a best horsepower of 334 at 5,500 rpm. The only change for the second test (TQ6/HP6) was to the Edelbrock Performer RPM heads and a thinner Fel-Pro head gasket. As you can see that was worth a bunch of power. Average torque improved by nearly 30 lb-ft across the entire curve while average horsepower also increased by 19. Peak torque also increased by 27 lb-ft to a peak of 397 lb-ft while best horsepower leaped 42 hp to 376.
Our final effort focused on a set of 1.6:1 roller rockers. Interestingly, the torque picked up below 4,200 rpm and was clearly worth the effort. But at peak horsepower, the horsepower above 5,500 rpm dropped. We'll go into that in the main part of the story. Overall, the engine responded very well to all of our changes.
Power Chart
This is a condensation of the entire testing on our Great Crate small-block combining the testing from Parts I and II. There are some interesting things going on here if you study the numbers. The greatest average torque gain was the head swap–no surprise there. But the second greatest torque gain was the headers with an impressive 25.9 lb-ft. That just shows you how important the exhaust system is to engine performance. The cam improved average torque by nearly 15 lb-ft, which is also a significant improvement. Finally, if the valvesprings had held on for another 300 rpm, the average horsepower gain on the rocker swap would have been really strong.
 Test
Peak TQ
Peak HQ
TQ Gain
HP Gain
Avg. TQ
Avg. HP
TQ Gain
HP Gain
Base
311
290
---
---
293.2
224.4
---
---
Headers
348
320
37
30
319.1
257.6
25.9
33.2
Intake
349
326
1
6
321.1
260.1
2.0
2.5
Camshaft
368
330
19
4
335.9
270.3
14.8
10.2
Valvesprings
370
334
2
4
339.7
273.4
3.8
3.1
Heads
397
376
27
42
369.2
292.6
29.5
19.2
1.6 Rockers
403
381
4
5
371.5
300.8
2.3
8.2
Test
Peak TQ
Peak HQ
TQ Gain
HP Gain
Avg. TQ
Avg. HP
TQ Gain
HP Gain
Base
311
290
---
---
293.2
224.4
---
---
Headers
348
320
37
30
319.1
257.6
25.9
33.2
Intake
349
326
1
6
321.1
260.1
2.0
2.5
Camshaft
368
330
19
4
335.9
270.3
14.8
10.2
Valvesprings
370
334
2
4
339.7
273.4
3.8
3.1
Heads
397
376
27
42
369.2
292.6
29.5
19.2
1.6 Rockers
403
381
4
5
371.5
300.8
2.3
8.2
1. We've only made one major change to our Great Crate small-block, but a set of Edelbrock bolt-on aluminum cylinder heads and a rocker ratio swap was worth nearly 50 hp.
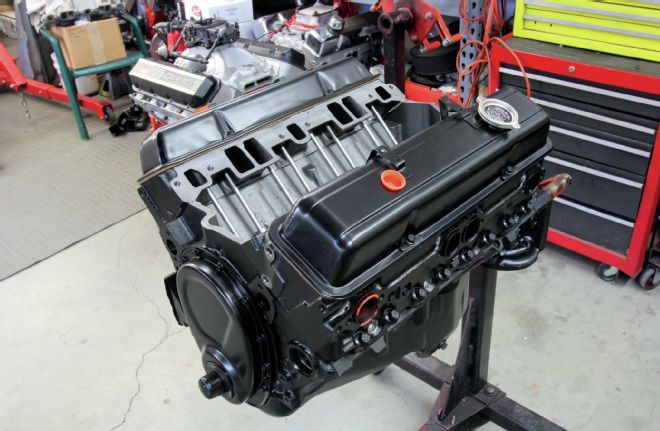
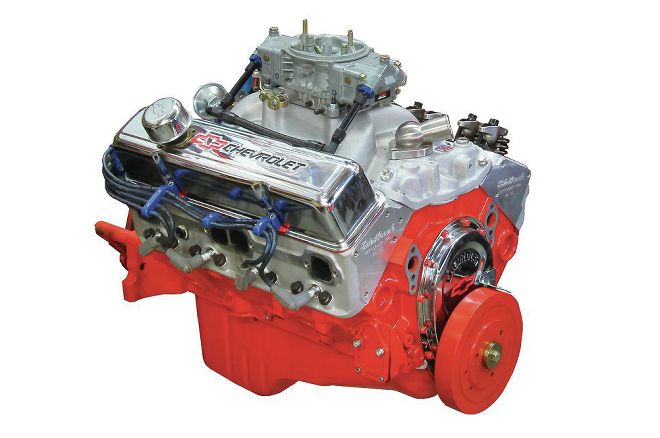
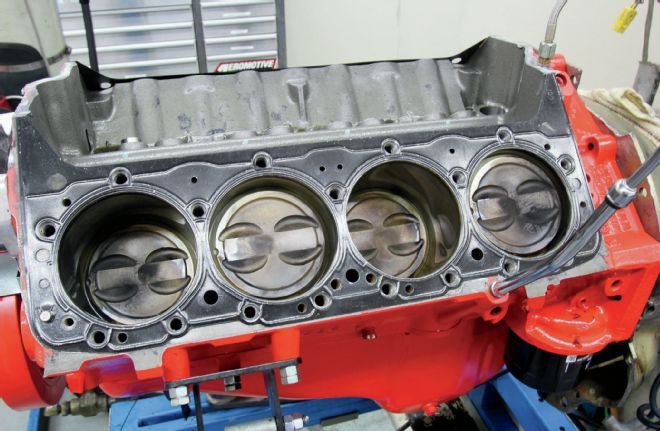
2. In Part I, this buildup started with this 290hp 350 small-block Chevy crate engine from Chevrolet Performance. With 8:1 compression and a mild flat-tappet hydraulic cam, it gave us a great starting point for a street rod powerplant.
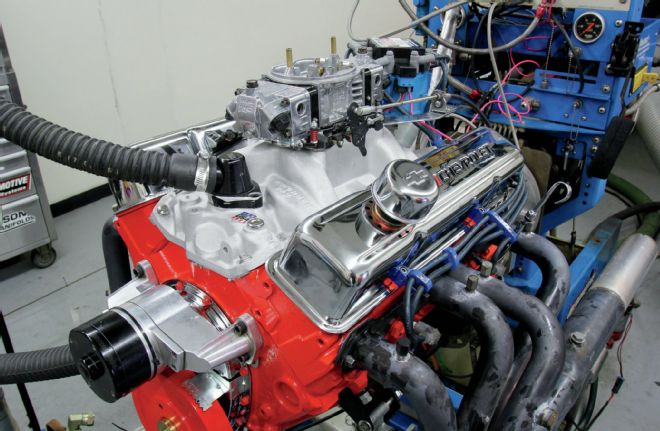
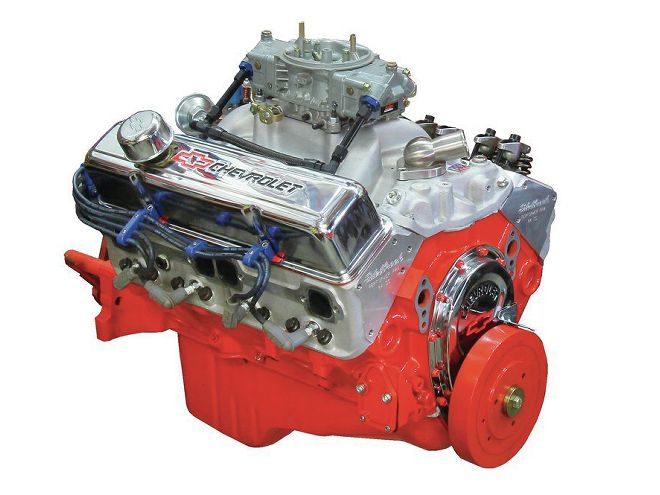
3. The first thing we did besides paint the engine orange is stick it on the dyno and add headers, an Edelbrock Performer RPM intake, and a COMP Cams flat-tappet hydraulic cam that combined to deliver 44 hp for a 334hp peak.
4. This month's plan was to bolt on a set of Edelbrock Performer RPM aluminum heads to evaluate their potential. If nothing else, we were trimming a solid 40 pounds off the weight of the engine. That's something we can't evaluate on the dyno—but it's still worthwhile in terms of acceleration. Light makes might.
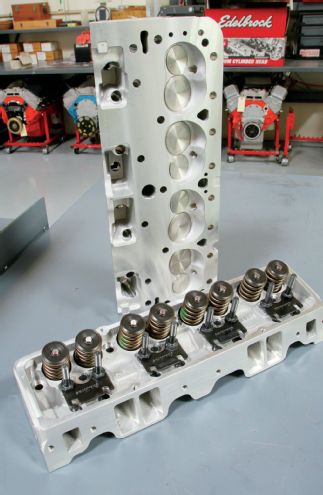
5. We spec'd these Edelbrock heads with 64cc chambers to push the static compression ratio to 8.9:1. The tighter chambers are worth nearly one full point in compression. Combine this with stainless 2.02/1.60-inch valves and a 185cc intake port and you have a recipe for power.
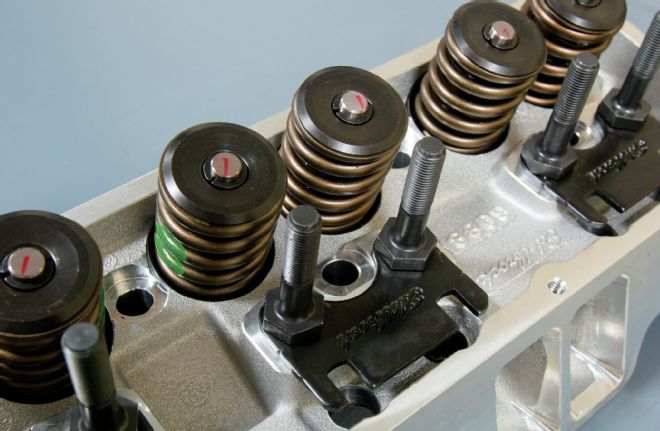
6. The Edelbrock heads come complete and ready to bolt on for a flat-tappet camshaft. The valvesprings are 1.43 inch in diameter and have a 120-pound seat load, which is a good number for a flat-tappet camshaft.
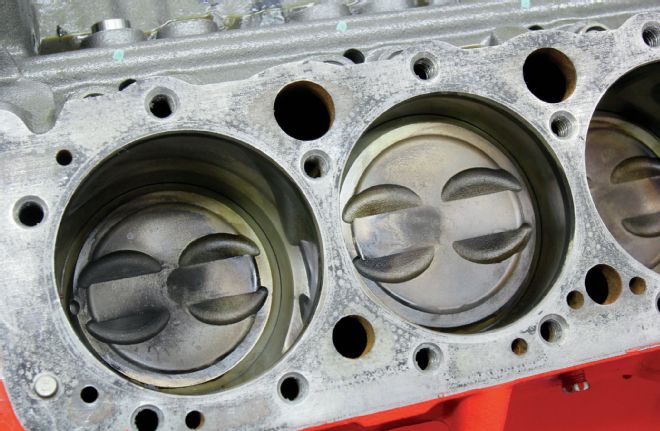
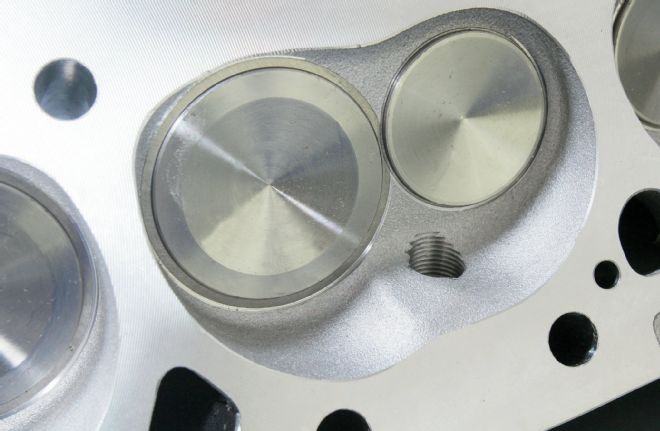
7. This is nowhere near an optimal piston design. The full dish is roughly 13 cc and could really use a flat quench area to promote combustion efficiency. This is perhaps the engine's most obvious weak point.
8. To bump the compression, we used a set of Fel-Pro steel shim head gaskets (PN 1094) that are only 0.015-inch thick, compared to composition gaskets that are 0.039 thick. This squeezed the compression up to 9.4:1.
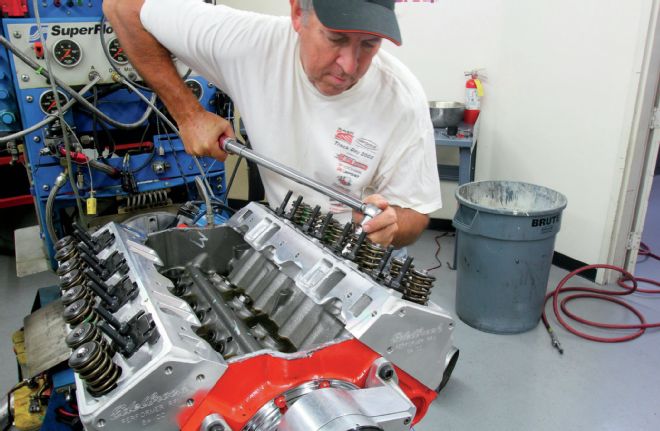
9. We bolted the heads on using a set of ARP head bolts and a three-sequence torque pattern starting at 40 lb-ft, increasing it to 50 then 65 lb-ft. We also used ARP's Ultra-Torque lubricant on the head bolt washer on both sides.

10. After resetting the lifter preload with the COMP 1.52:1 roller-tipped rocker arms, we buttoned the engine back up and ran it up to see how much the power improved.
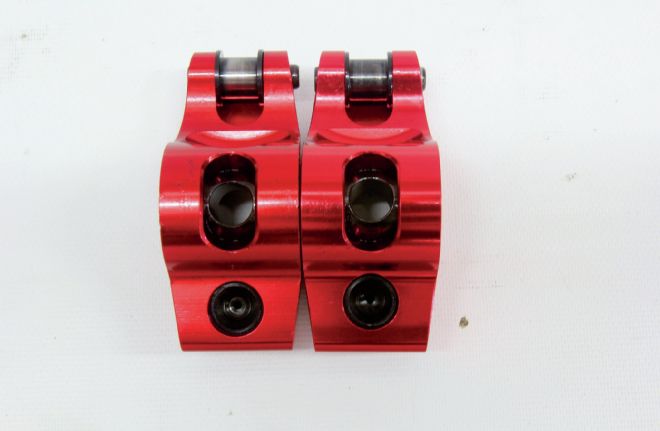
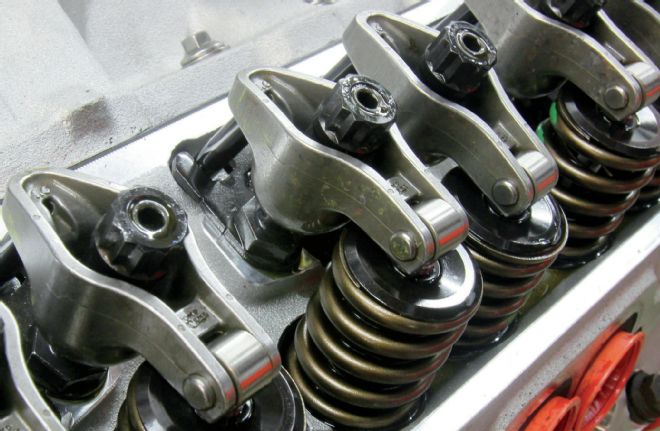
11. We wanted to try a set of 1.6:1 roller rockers to help valve lift. Note how the 1.6:1 version rocker (right) moves the pushrod cup closer to the fulcrum. This is how you increase the ratio. But this caused a minor problem.
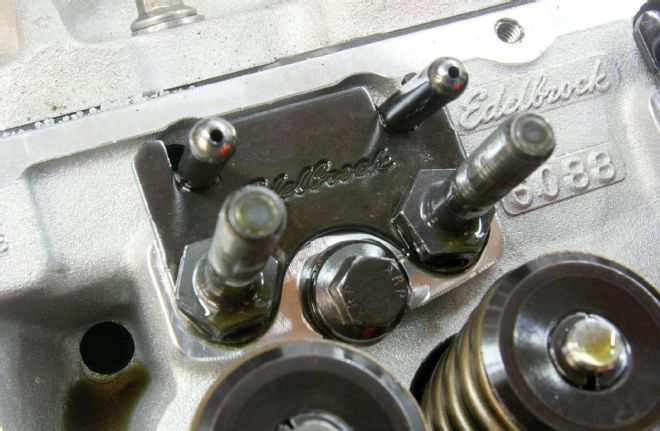
12. We checked pushrod length to make sure it didn't change with the higher ratio rockers and then installed these Magnum roller-tipped rockers. These rockers come with pinch nuts, which tend to gall the rocker studs, so we used a set of ARP poly locks that are deeper to accommodate these rockers. Shorter poly locks don't allow enough depth for the lock setscrew.
13. After the rocker swap power dropped, which wasn't supposed to happen, we discovered that changing the rocker ratio caused the pushrods to bind in the guideplates. All we had to do was loosen the rocker studs and move the guideplates outboard slightly to alleviate the problem.
How to Set Lash
Setting the preload on a set of hydraulic lifters is often viewed as a challenge by some rodders. Some think that the engine has to be running to perform this task, which ends up spraying oil all over the engine compartment. While that does get the job done, there's a much simpler and far cleaner way to set lash or hydraulic preload on an engine. All you have to remember is Exhaust Opening and Intake Closing or EO-IC intake preload.
Here's how the procedure works. The first step is to remove the valve covers and the spark plugs. Removing the plugs isn't completely necessary, but it makes it easier to turn the engine over by hand. You can also turn it over with the starter motor if you prefer. If you choose to go this route, disable the ignition so the engine won't start.
We like to begin with front cylinder on the driver side and work our way down that side of the engine. This way, you don't get lost trying to remember the firing order. Start by bumping the engine over until the exhaust valve on the first cylinder begins to open (Exhaust Open, EO). If you're not sure which valve is the exhaust, just line up the valve with the exhaust port. Do the same for the intake valve lined up with the intake port. Now, with the exhaust valve just opening, the intake lobe for that cylinder is on its base circle. This allows you to set the preload on the intake rocker. First, you need to determine zero lash. The easiest way to do this is by carefully tightening the adjustment nut on the rocker while twisting the pushrod between your fingers. When you feel the pushrod tighten up, you have achieved zero lash. Cam companies vary on their recommendation for preload, but anywhere from a 1/4 to 1/2 turn tighter than zero lash is a good place to start.
If you are setting clearance on a mechanical camshaft, the procedure is exactly the same except you will measure the lash between the rocker arm and the valve stem with a feeler gauge. Except for that change, the procedure is the same.
Now that you've set the intake preload, turn the engine over until the intake rocker runs past full lift and is about halfway on its closing side (Intake Closing, IC). Stop there and adjust the exhaust rocker. Find zero lash, set the preload, and you're ready to move onto the next cylinder. Perform this adjustment for all 16 rocker arms and you're all set. We like to go over each poly lock to make sure we didn't miss one. Replace the spark plugs and valve covers and you're ready to run. This may sound a bit complicated but once you've run through this a couple of times it will become like second nature. The beauty of this procedure is that it will work on any four-stroke internal combustion engine.
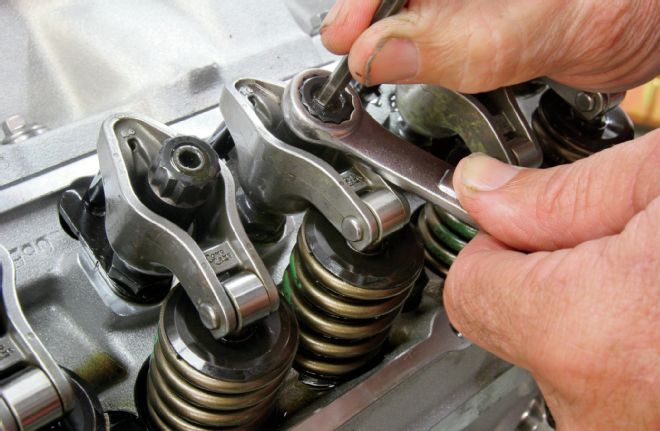
Turn the engine over until you see the exhaust valve begin to open (EO). Place the intake lobe on its base circle and you can now set the intake preload.
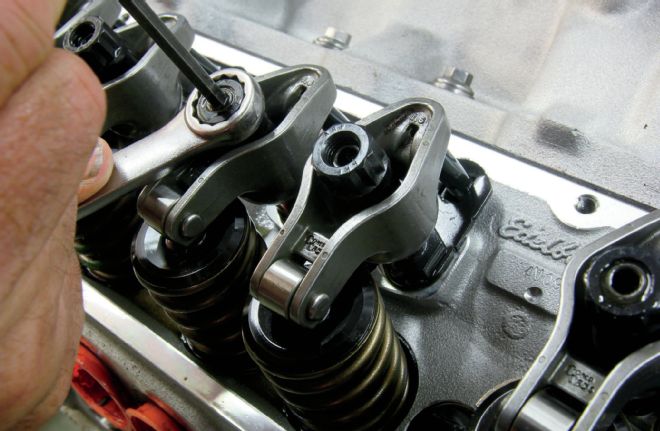
With the intake lobe adjusted, rotate the engine until the intake valve is past full lift and is halfway closed. At this point, the exhaust lobe is on its base circle, so you can now set the exhaust valve preload. Once both the intake and exhaust valves are set, you can move onto the next cylinder.