As a serial freelancer, yours truly tends to favor tech over features. Lately I've been thinkin' it'd be good fun to write a detailed and intriguing tech article about—nothing. This won't be it, but at first the cosmetic refinishing of a good-used engine may seem fairly simplistic. If you'll give us a chance, however, we'll make this as complicated as possible as the job at hand also presents an opportunity to try out a new, warm-weather respirator — an idea I've been toying with.
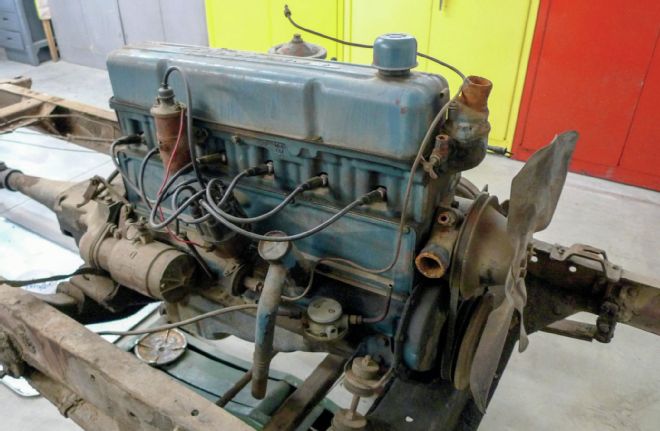
Our customer friend Danny Stinson's 1955 Chevrolet second series, ½-ton shorty truck has provided subjects for tech before, as the stories keep pace with the frame-off project. But what y'all should have seen, back in the very beginning, was the priceless looks of astonishment on the faces of our ace-in-the-hole mechanics (Mike Ferguson and "Guardrail" Willie Martin) from Riverside, California's Ed Martin Garage. Mike and Willie made a rare house call to our home-based shop to perform a cylinder leak-down test on the ol' truck's questionable 235ci six. Once the test results were in, they concluded that the cute, little mill had been overhauled somewhere along the line, but not driven much afterward. Drivetrain components, however, were as expected. The three-speed standard transmission was in dire need of a rebuild and upon exploratory surgery; the truck's original rearend was pronounced "junk" as well.
At times like these, it's tempting to order up crate components, but this time, for two good reasons, we just can't take that road. Firstly, this ol' truck is a sentimental tribute, once belonging to current owner Danny's father who unfortunately passed on before he could complete his project. Danny intends to finish this truck in his father's honor, with the mild custom modifications he might have made had he been allowed the time. Secondly, we do have a perfectly healthy 235 to begin with. We'll degrease her good, prep her proper, and apply a durable urethane finish. Afterward we'll make good use of aftermarket dress-up goodies. This much we can do with a clear conscience, while preserving the ol' truck's soul.
01 Here's our starting point, still within the 'rails. By this time the engine has already been pressure washed along with the still-rolling chassis. Even so, it's nowhere close to clean enough for paint preparations to begin.
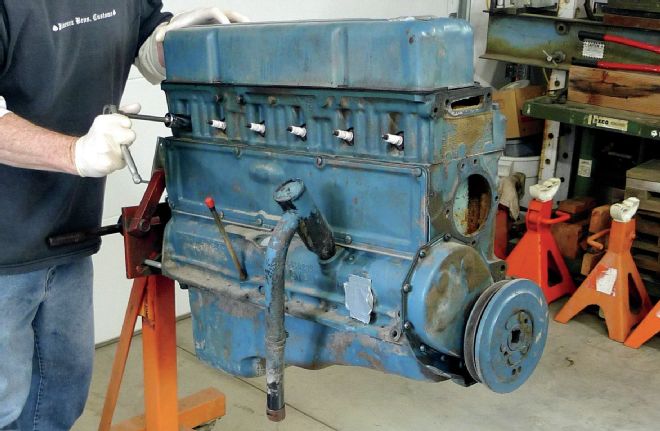
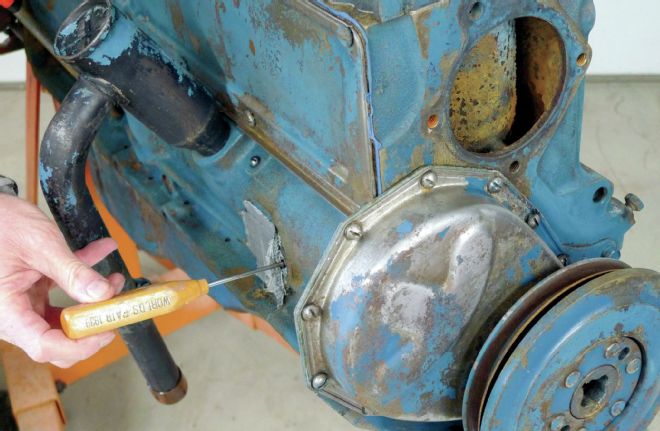
02 Once secured to an engine stand, steps are taken to ensure the engine is sealed and watertight. Since the spark plugs had been pulled during the cylinder leak-down test, my niggling stunt double insists on checking their tightness—and they're fine.
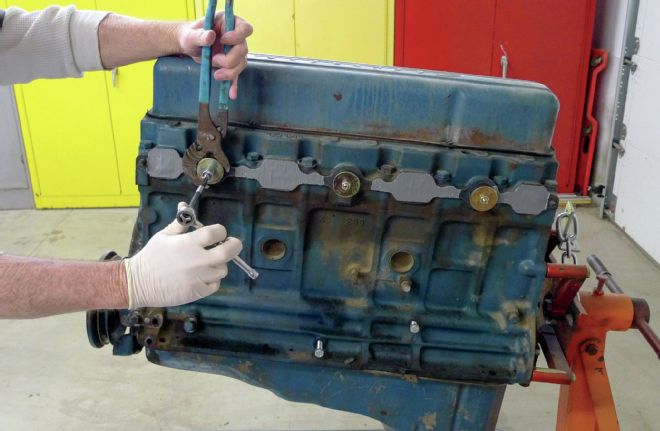
03 For this second round of pressure washing, the exhaust and intake manifolds are now removed and rubber expansion plugs are snugged into the round intake ports. The odd-shaped exhaust ports will be stuffed with paper toweling, then duct-taped and trimmed as necessary.
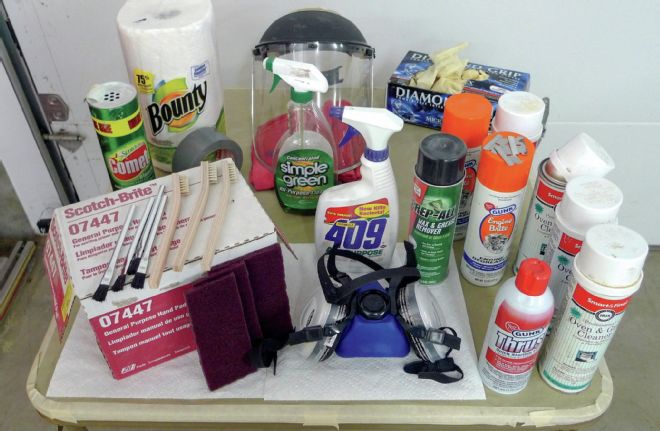
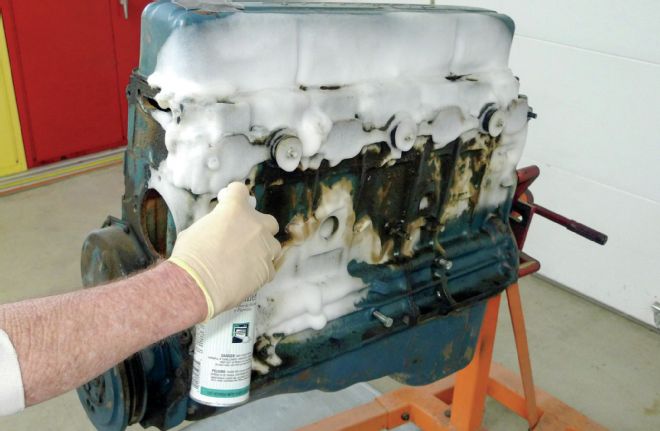
04-05 Before and after pressure washing, common household cleaning products will be employed. With our engine stand straddling drip pans, cleaning commences with a generic-brand oven cleaner, which honestly works about as well as the popular parts store products we've tried.
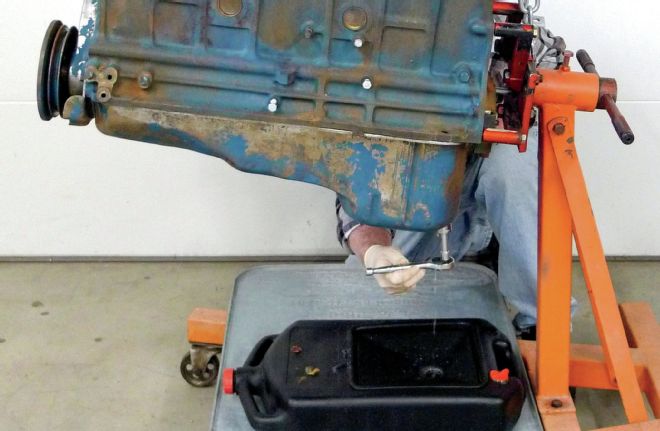
06 By this time, the final pressure washing is completed, and sorry, no pictures. With hot water flyin', I'm pretty protective of my new 124 Instamatic. Anyway, after drip-dry, it's a good idea to drain oil, just in case water has penetrated our protection. Sure enough, the first thing through the bunghole is—water.

07 Now where do y'all suppose that bit of water came from? Taking it from the top, we're suspicious of our makeshift port protection, but upon inspection it all checks out watertight.
08 Down a little lower on the opposite side of the block, we discover the entryway. A tiny section of duct tape has lifted under pressure. While the fuel pump's mating surface is still for the most part covered, one bolt hole goes all the way through, and this is the culprit.
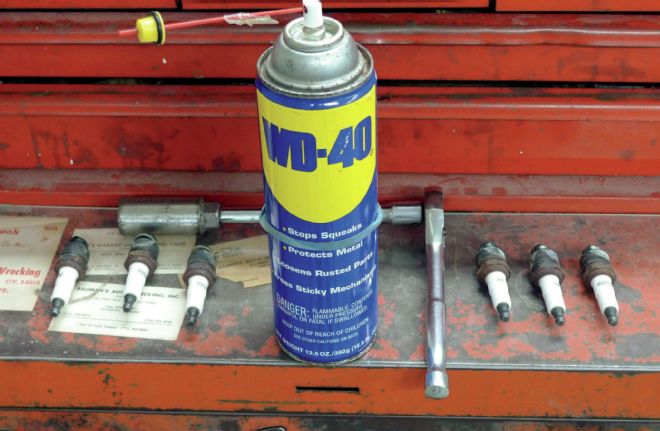
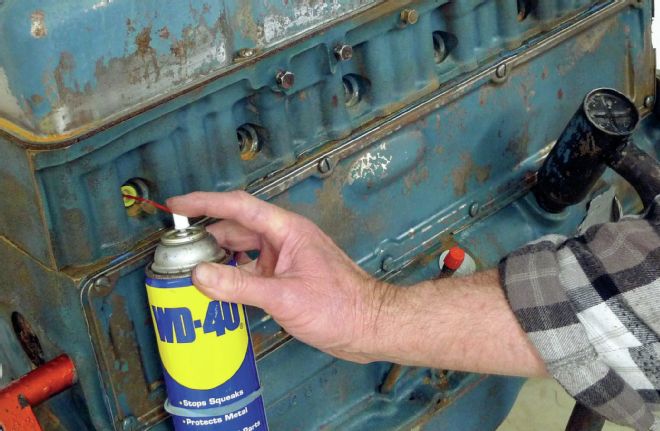
09-10 If this engine was slated to run again soon, we'd add fresh oil and go. Since it'll be on its stand for a while or two longer, WD-40 seems like a good call, but it's not welcome outside of the soon-to-be-painted engine. A rubber O-ring on a plastic doo-dad makes a cool tool for this job, and I'll keep it all handy for next time.
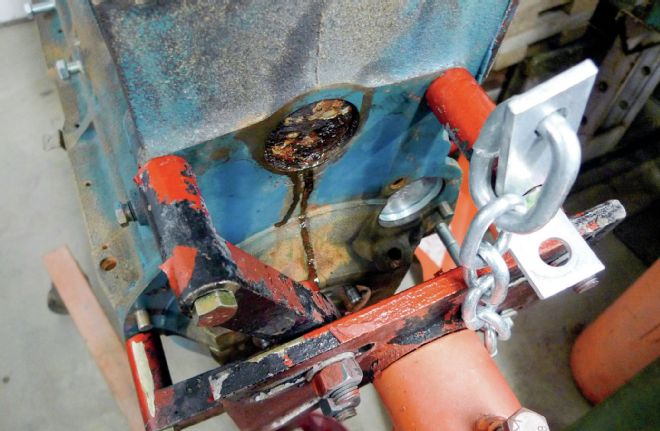
11 This is kind of interesting. This overhauled engine has new freeze plugs everywhere but here. Beneath the bellhousing, the back of the block exhibits fairly fresh paint, so we'll assume this was not an in-frame overhaul. Somehow the most difficult plug to access has been overlooked, and it's a goner.
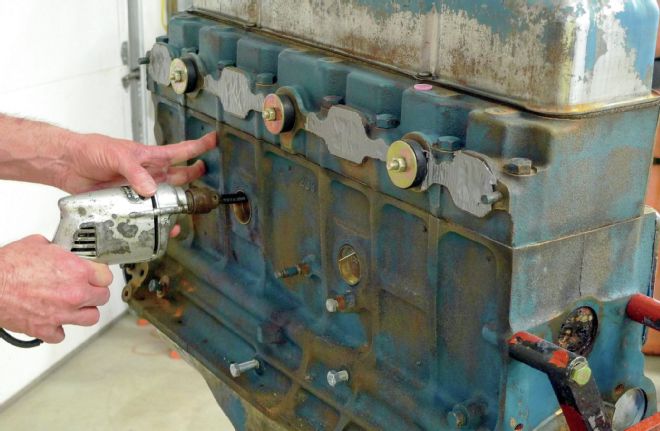
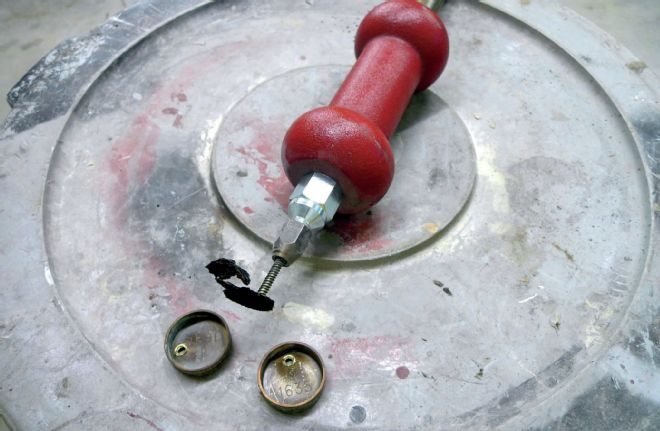
12-13 Let's yank 'em all and be done with it. As an ounce of prevention, a rubber hose section makes an OK drill stop, but it seems as though we've talked about that before. Here in a nutshell, a 1⁄8-inch hole is drilled in each freeze plug. Then, sure, a full-size Morgan Nokker-brand slide-hammer is overkill, but for a dramatic effect it's hard to beat.
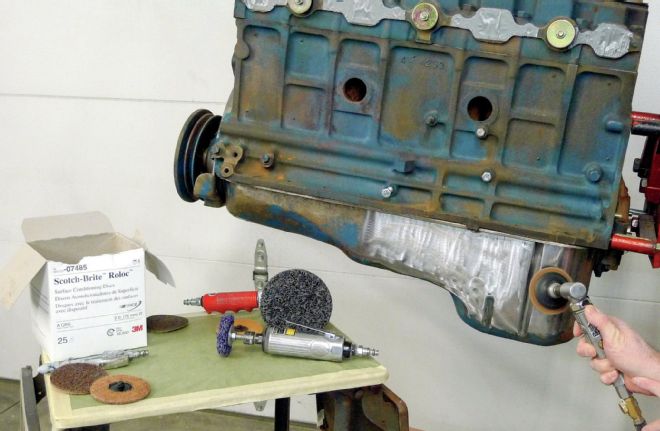
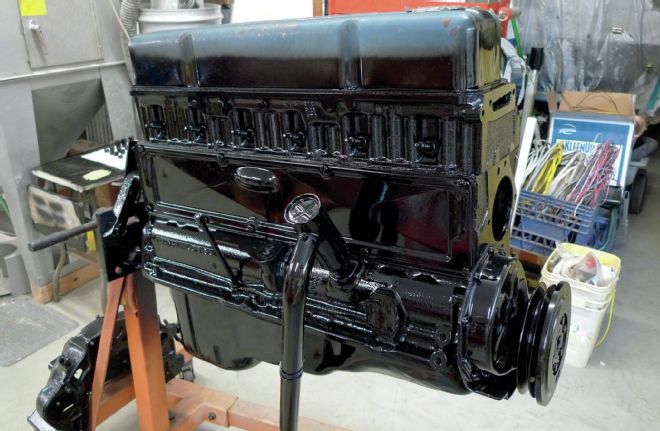
14 At this point the engine is clean, but of course, its remaining rattle-can engine enamel has not adhered well enough to be trusted. Around here we'd like our efforts to last as long, or longer than we will, so paint prep begins with strippin', just as it would for body parts.
Since this truck will eventually be its stock color, Forest Green, a stock-colored Blue Flame blue engine would surely clash, so we've decided on a neutral shade o' black. We already have a fair selection of engine enamels. These are familiar brands—you know; the types that do not cure on their own, or at least not till the assembled engine is warmed up to operating temperature. This engine won't be started anytime soon and hands will be all over it during final assembly and dress-up procedures. Accidentally dribbling gasket goo would surely make a mess of vulnerable, uncured engine enamel; therefore we have a preferred Plan B.
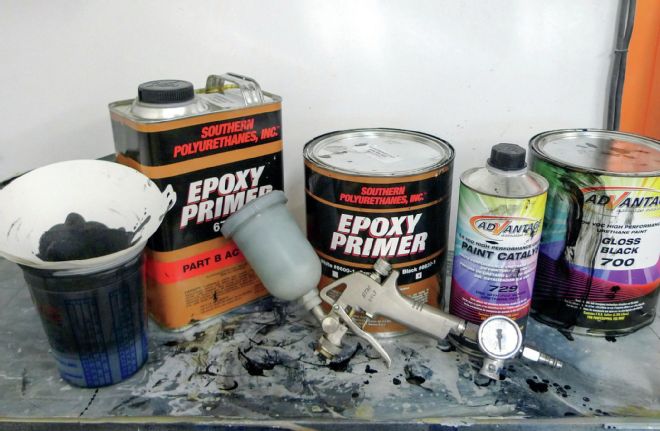
01 Now before we proceed, let's acknowledge that there's more than one way to paint an engine. What we'll share is only our personal preference. With that said; we do prefer a durable catalyzed coating. For the job at hand, we've chosen to apply an affordable single-stage urethane over epoxy primer.
02 In accordance with their manufacturer's instructions, a single coat of black epoxy primer is applied and followed by two coats of single-stage, black urethane, which we know from experience will tolerate engine heat. This engine's true hotspot—the exhaust manifold—will be addressed differently, but that'll be another story soon enough.
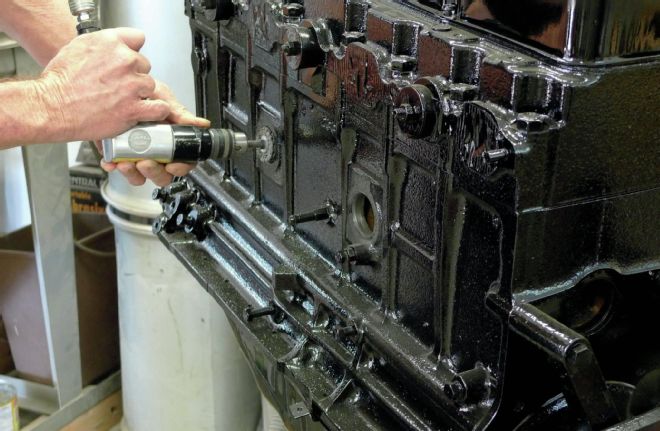
03 Once the new coating is cured, a worn-to-fit 3M Clean 'n' Strip disc is chucked into a Harbor Freight Central Pneumatic reversible drill for a quick cleanout of these freeze plug holes. Following additional chemical cleaning (lacquer thinner), shiny-new plugs will be installed using small amounts of hard-setting gasket sealant like Permatex #1A.
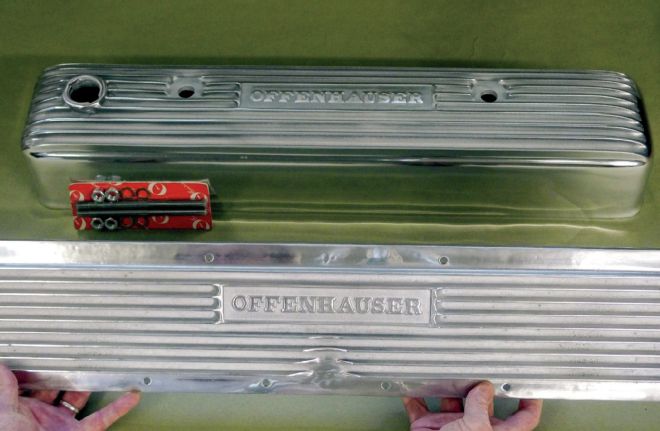
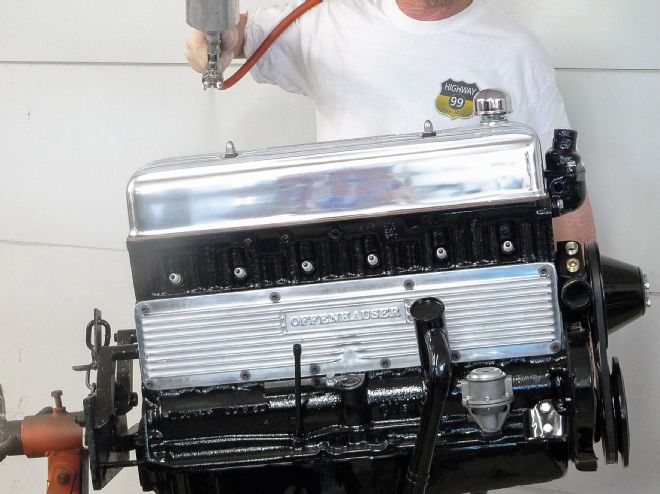
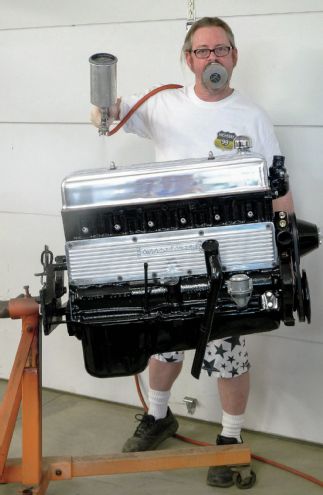
04 Now this part might be fun, as we're about to install the first of this little engine's dress-up goodies. The valve cover is a genuine Offenhauser item, purchased from Exeter Auto Supply of Exeter, California. Offenhauser never made a matching side cover, but this type is available elsewhere, outside of Exeter, for those who're easily pleased.
05 We'll work with the finish and far-rougher backside, but this piece is noticeably curved and here an actual-size pinkie makes its point. Granted, I'm particularly particular. That's a given, but I do have a question for the part's manufacturer. I'm sure he'll eventually return my call—someday.
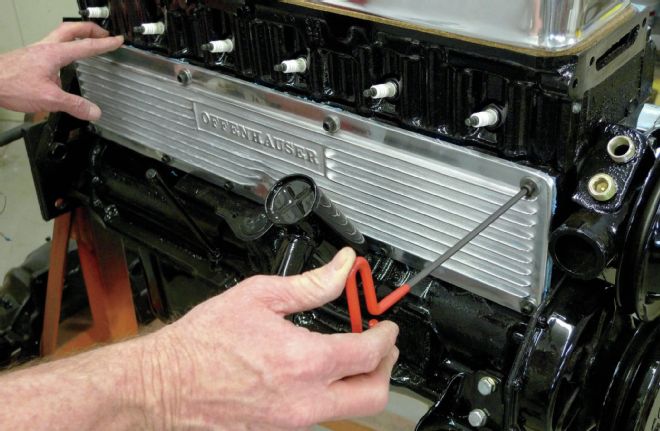
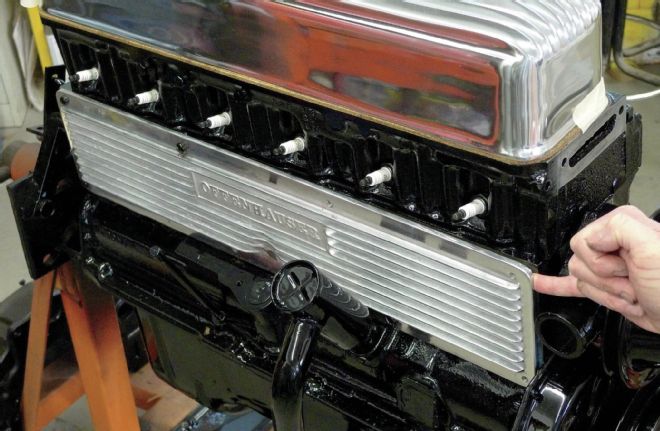
06 When life gives you lemons, make a drink, then grab a tube of RTV silicone gasket maker like Permatex #77B, and try not to make a big mess. We're using more goop than usual, but at least the side cover's curve is more to our advantage than it would be if it curved the other direction. Could it be this is by design?
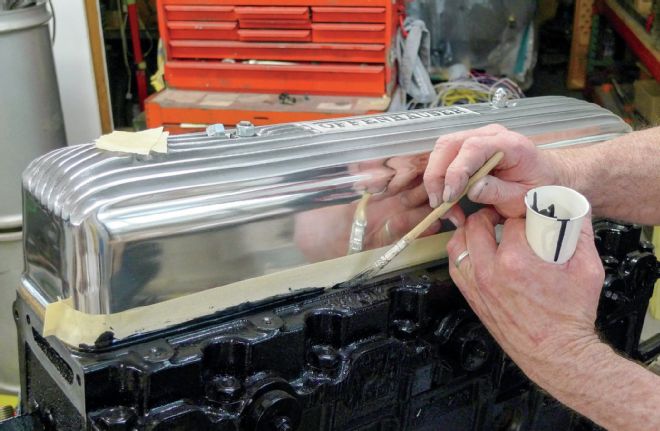
07 Up top, the genuine Offenhauser valve cover fits. Its opposing gasket surface is stripped of fresh paint, so now this bare metal area could benefit from a little touchup. It seems to me that a #4 lettering quill would fit the bill, but for solid color touchup on an engine, this household brush works fine. So fine in fact, that I'll actually clean it after use.
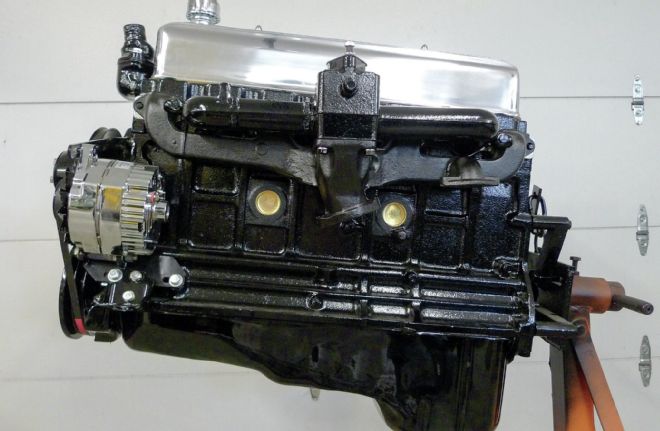
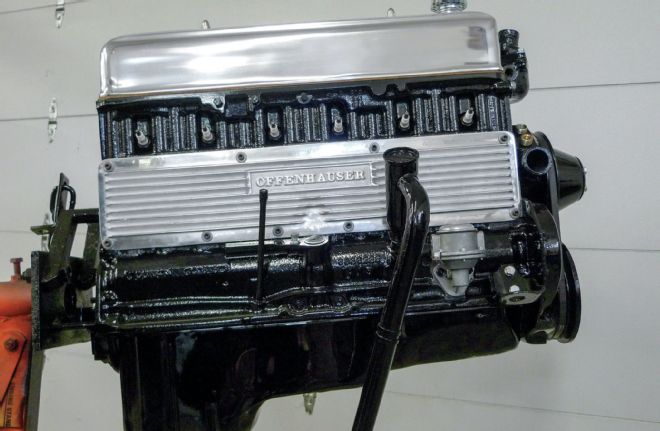
08-09 Now resplendent in glossy black, the overall picture seems to improve with every bolt-on component. By the time this good-used engine reassumes its rightful position between the 'rails, it'll surely get the nod from the truck's owner, Danny. And when he hears the "rap-cackle-pop" of his freshly split exhaust manifold—well, that'll be another story.