In the muscle car era, high-performance ignitions went from single points to dual points (for an extended dwell period), back to single points (simpler and still effective), and then to transistorized (though early electronic ignitions were not much better than single points). In other words, not much happened in the way of true performance ignition systems back then. In 1970, a group of engineers looking for a solution to igniting lean air-fuel mixtures invented an ignition system that created a multiple spark using capacitive discharge. It was marketed as Multiple Spark Discharge (MSD), and by the mid '70s MSD was the hottest name in ignitions.
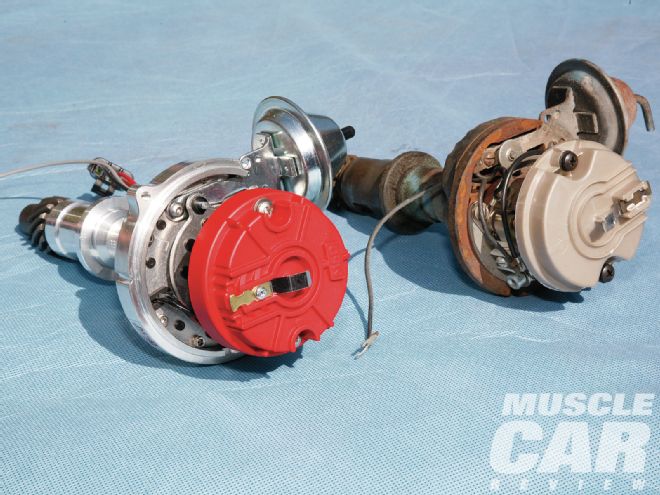
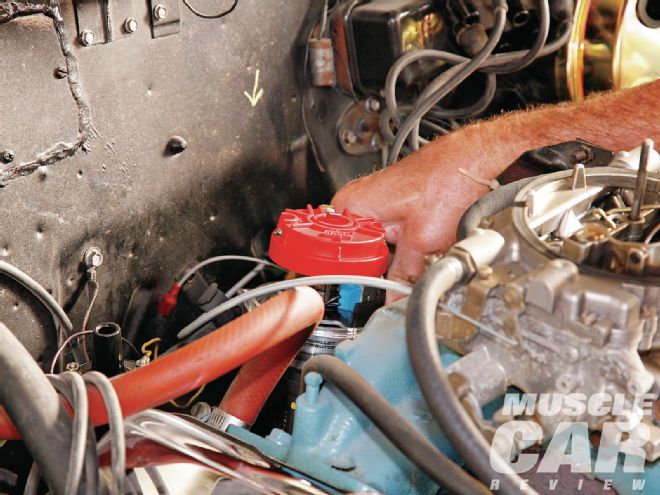
Those interested in having an MSD ignition in a restored muscle car can now turn to MSD's new Pro-Billet units. These ready-to-run distributors have the same external dimensions as the original factory units and include an internal rev limiter. We installed one in a 1965 Pontiac GTO along with an MSD Blaster 2 coil and MSD 8.5mm wires. To further retain the original look of the engine compartment, we added a black GM-style distributor cap.
It's easy to get confused when removing and replacing a distributor and ignition wires, so it's best to have a starting point that can be used as an anchor if things go awry. Bringing the engine to top dead center (TDC) on the No. 1 cylinder creates the most logical starting place. With the timing pointer on the harmonic balancer mark, we removed the distributor cap to see that the contact on the rotor was pointing to the No. 1 wire. We placed a chalk mark on the firewall where the rotor contact pointed, and then another mark where the rotor pointed when the original distributor came out. This will allow us to easily install the new distributor. It's also important to check the firing order and the direction of the distributor's rotation (most production intake manifolds have the engine's firing order cast into the manifold).
Prior to installing the new distributor, we placed it on a distributor machine to set a curve that will match the style of driving done with this car (see sidebar). Following the trail of marks left on the firewall, the new distributor fell into place.
 MSD’s newest Pro-Billet ready-to-run distributors are the same size as the factory distributor but filled with modern technology, including an internal rev limiter. A standard factory distributor cap will even fit to keep the engine compartment looking stock.
Incorrectly wiring a distributor cap is one of the most frequent errors made when adding new wires or a new distributor cap. Initially, we removed only the 2-8 wires from the distributor cap and then moved it off to the right with the 1-7 wires still attached. We placed the new black GM-style cap on the distributor and began making the wires from the MSD 8.5mm Super Conductor wiring kit. The kit we selected has black wires with molded straight spark plug connectors. Using the original wires as templates, we cut the new wires to length and slipped on the 90-degree boot. MSD has a slick tool to cut the wires properly for the connector. It also solidly crimps the connector to the wire, saving the home installer from buying a crimping tool that may only be used once or twice. With the connector in place, we gently bent it 90 degrees and slipped the boot down over the connector. The new connector then snapped positively into the distributor cap. To ensure the wires were located correctly, we checked, double-checked, and then checked again.
With the distributor installed and wires in place, we dropped in the MSD Blaster 2 coil. It's the same size and shape as the GTO's original. Wiring the MSD distributor is a simple three-wire connection: The orange wire connects to the negative terminal on the coil, the red to the positive terminal, and the black to ground. It's essential to use a good ground on the engine instead of the body. From the positive side of the coil a wire is run to a switched 12V lead. It's important that this connection gets a full 12 volts with the key in the "run" and "start" positions (not "acc"). If the installer shortcuts this process and uses the factory resistance wire, the results will disappoint. When wiring this 12V lead, it's very easy to install a hidden toggle switch that will act as a theft deterrent.
The last wire to connect is the gray tach wire. In addition to being the tach lead, this wire also programs the internal rev limiter. The crafty engineers at MSD created an elegant and simple process to set the rev limiter. The engine in our GTO was originally rated at 5,000 rpm, a prudent speed to set as our limit. To set the internal rev limiter, we brought the engine rpm up to half the speed of the desired limit (2,500) and grounded the tach lead for one second. Once the lead was taken off the ground, the tach displayed the rev limit setting for two seconds. The rev limit also displays for two seconds when the key is first turned on. Simple, effective, and the rpm limit can be changed at any time. In fact, a switch could be wired in to allow the driver to change the limit from the driver's seat.
Our driving impressions were all positive. With the new distributor, the GTO started on the first crank instead of grinding away for three or four seconds before firing. The idle is now smoother, and the engine seems to sing along effortlessly in the 3,000- to 5,000-rpm range, where before it was sluggish. This was an easy morning upgrade that left the afternoon for cruising.
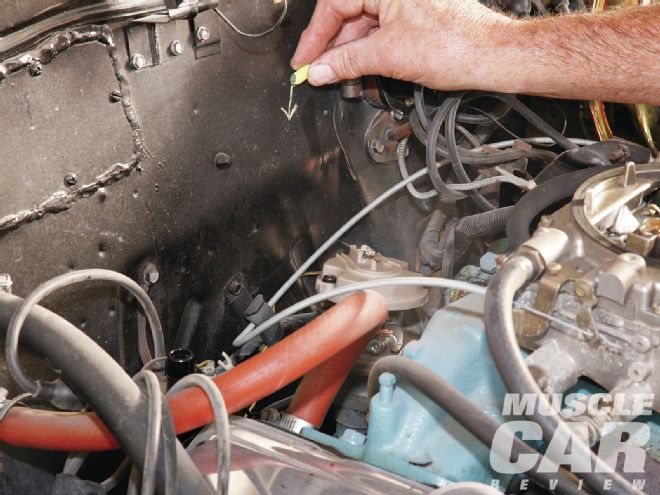
1 With the engine brought to top dead center on the No. 1 cylinder, we removed the distributor cap, checked to see that the rotor was on the No. 1 cylinder, and marked the firewall where the rotor contact was pointing. This will give us a constant reference point throughout the installation.
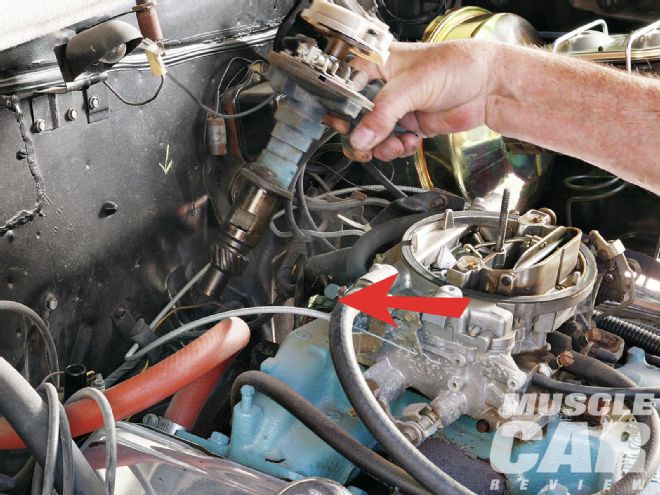
2 As the distributor is lifted out, the shaft twists with the helix of the gear. It's important to mark the location of the rotor when it stops rotating upon disengaging the cam gear. The red arrow is pointing to the small yellow mark that indicates where the rotor contact was pointing as it cleared the cam gear.
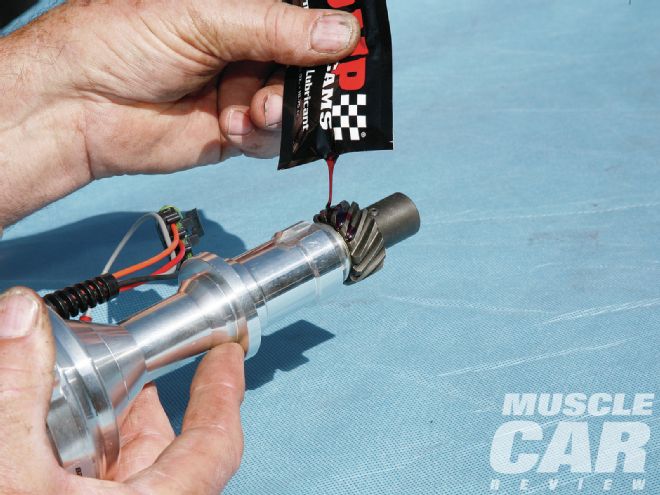
3 Prior to installing the new MSD distributor, we used the enclosed pack of lubricant to coat the distributor drive gear.
4 The MSD distributor slides in using the two marks we left on the firewall.
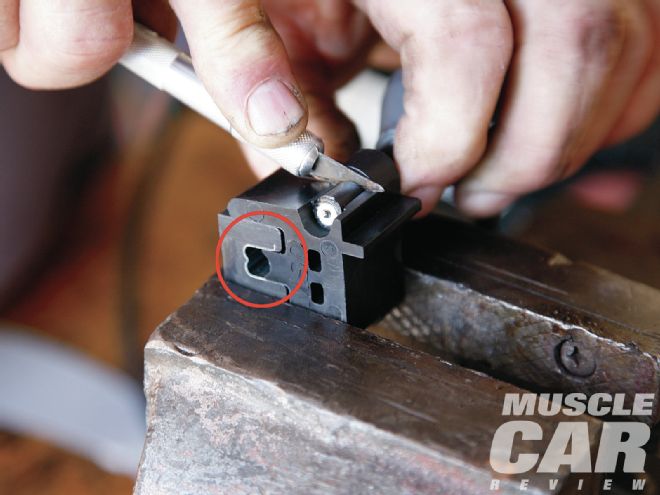
5 MSD has freed the weekend mechanic from having to buy a special ignition wire crimping tool with the addition of this ingenious two-piece fixture. It has a guide for measuring and cutting the insulator on the end of the wire and a die (red circle) for positive crimping of the connector to the wire.

6 Prior to crimping on the connector, we slid the 90-degree boot onto the wire (with the help of a little WD-40). The connector is designed with a relief to easily bend to 90 degrees with the help of a pair of needle-nose pliers. Then the boot slid down over the connector and pushed into the appropriate contact on top of the distributor cap.
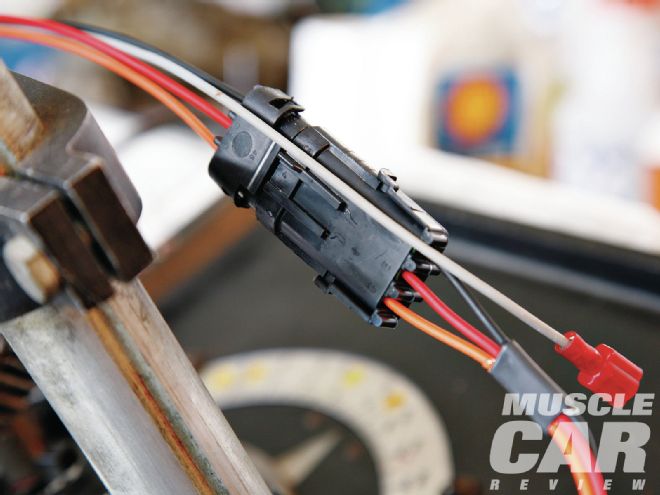
7 Connecting the MSD Pro-Billet distributor is as simple as connecting four wires. The red (switched 12V positive), orange (negative side of the coil), and black (ground) are grouped into one waterproof connector. The single gray wire is for the tach; it's also the wire used to program the internal rev limiter.
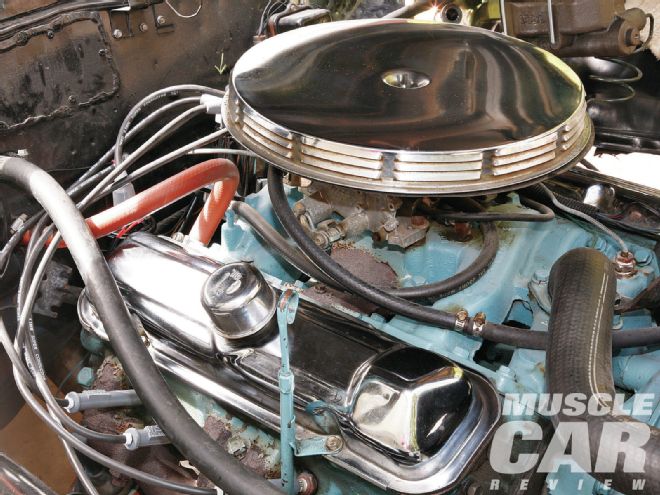
8 After the new distributor was in place and connected, we checked and set the initial timing. Its stealthy, stock look belies its performance potential. MCR
Resetting the Curve
Prior to setting the curve on our new MSD distributor, we thought we'd check the GTO's original single-point distributor on an Allen syncrograph distributor machine. We found that at higher rpm, the original distributor had a pronounced miss in certain cylinders. We also noticed arcing from the points. The points and condenser had been in for a long time and obviously were not up to spec. This is most likely the reason for the GTO's sluggish road performance.
MSD has taken the mystery out of the process of changing a distributor curve with its distributor installation instructions. The kit includes four extra color-coded springs and three extra bushings to make these changes. The springs determine the rate of advance, while the bushing determines the total amount of advance. We used the Allen syncrograph to verify the factory advance curve before we started making changes.
MSD ships its distributors set with the most conservative advance curve possible; it increases steadily to a maximum of 21 degrees at 4,000 rpm. We changed the bushing to give us a maximum of 25 degrees and the spring combination to bring that maximum in at 3,500 rpm. This setup is still conservative and was confirmed on the syncrograph to match the curve in MSD's instructions. The combination of springs and bushings MSD includes gives the average installer the easy option of tailoring an advance curve to a specific engine and style of driving.
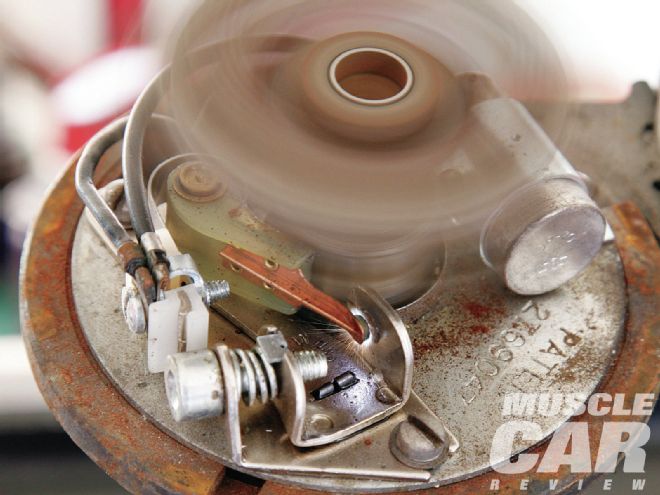
A close look at the original distributor at high speed revealed some pronounced point sparking. This is a result of point bounce and a tired capacitor.

We were interested in seeing how the old GTO's original single-point distributor measured up on the Allen syncrograph. At 2,000 rpm (what would be 4,000-rpm crank speed) the strobes became erratic, as there should be eight solid triangles of red light around the base. This is the same rpm range where the car felt sluggish.
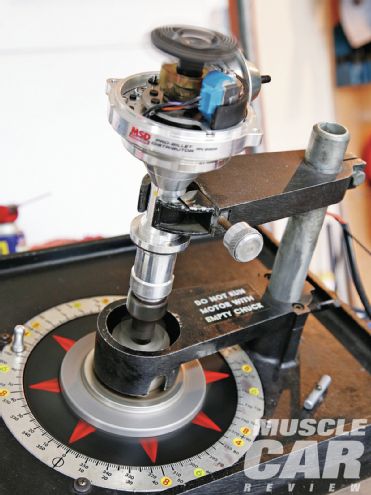
We checked the curve of the new MSD on the Allen syncrograph and found the factory curve to be spot on, then followed the instructions to change the total amount of mechanical advance and the rate of advance with the included bushings and springs. We checked the distributor again with the new components, and the curve matched the example graph in the instructions perfectly. This allows the end user to fine-tune the advance curve without a syncrograph.