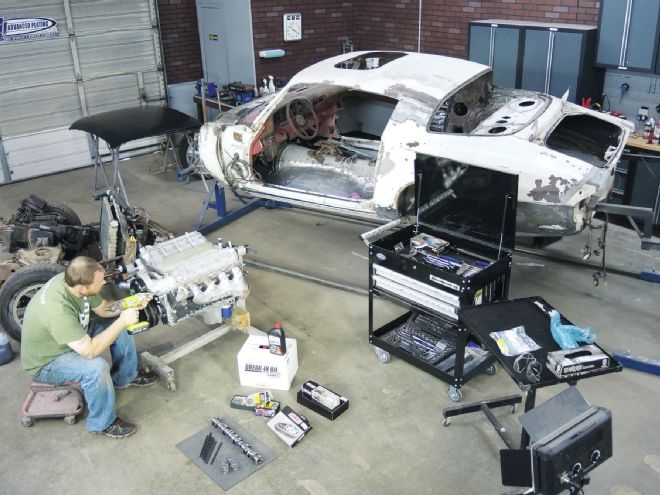
ZedSled, our project 1978 Chevrolet Camaro is receiving an LS conversion, specifically a 6.0 LQ4 truck engine, an iron-block version of the LS2. The six-bolt main block is stronger, but it's 70 pounds heavier than a comparable aluminum block. They've been standard equipment in Chevrolet and GMC trucks since 1999, so there are thousands available. ZedSled's 6.0L came from a wrecked, low-mileage 2013 Sierra truck. An overzealous disassembler stripped out the lower crank bolt while tearing the truck down, so the engine was going to be parted out. We talked them into selling the long-block to us with no warranty or guarantees and scored this fresh engine for a very low price. Now, it was our task to either fix the crank or tear the engine down and replace it.
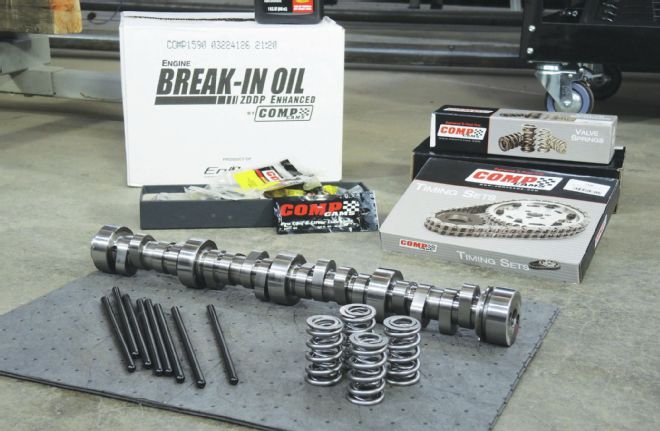
1. Here's what Comp sent us: a roller cam, a double roller timing set, captured roller bearing rocker arm trunions, dual springs, new pushrods, and a case of break-in oil to seat all the mating surfaces. But while we do this cam swap, we've got to address the bigger problem: stripped crankshaft threads.
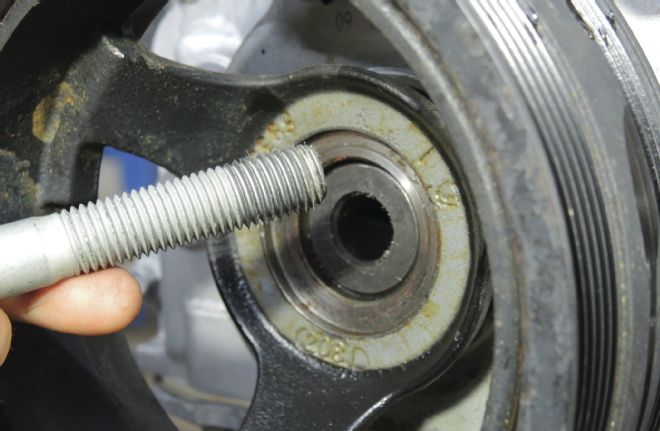
2. The metal shavings are clear evidence of damaged threads. It is so bad in our case that the bolt turns freely in the crankshaft snout.
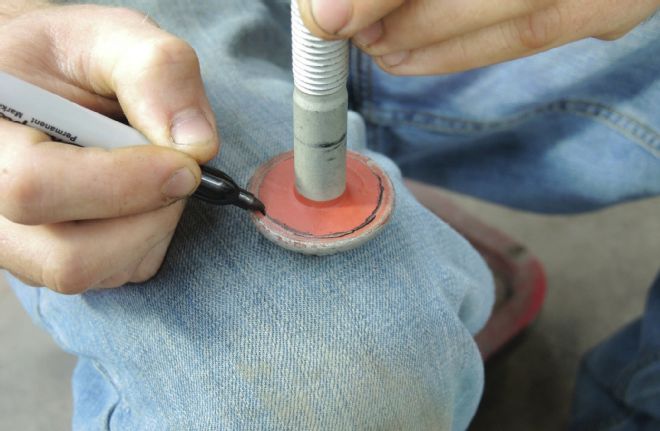
3. You'll obviously have to replace the bolt since they're torque-to-yield (one-time use only) design. We didn't throw it away just yet, though. Using the witness mark on the mating surface, Bouchard traces a guide to grind down the bolt for its new job in removing the lower pulley.
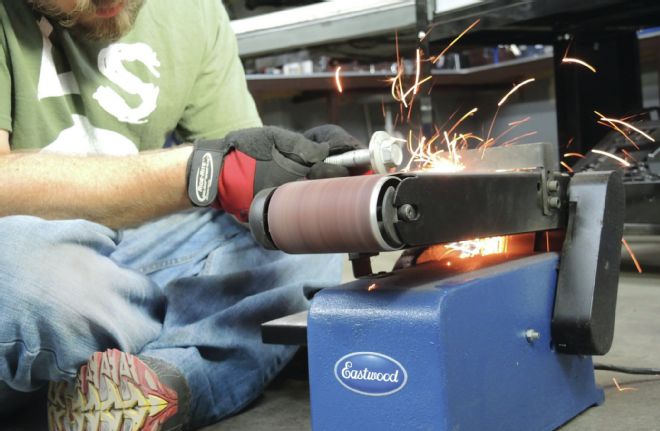
4. Using our Eastwood belt sander, Bouchard grinds the shoulder off the bolt, making it a smaller diameter than the ID of the damper.
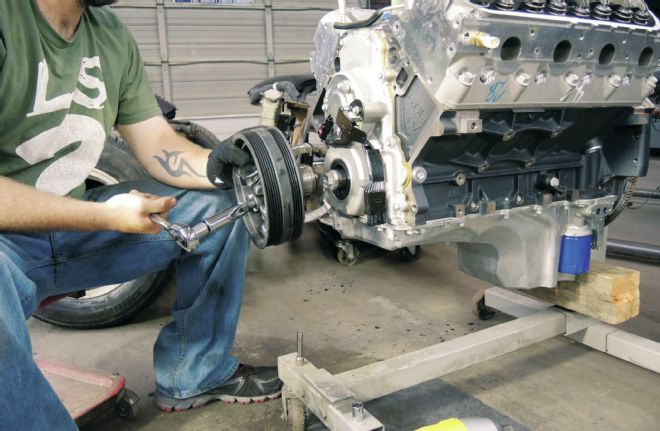
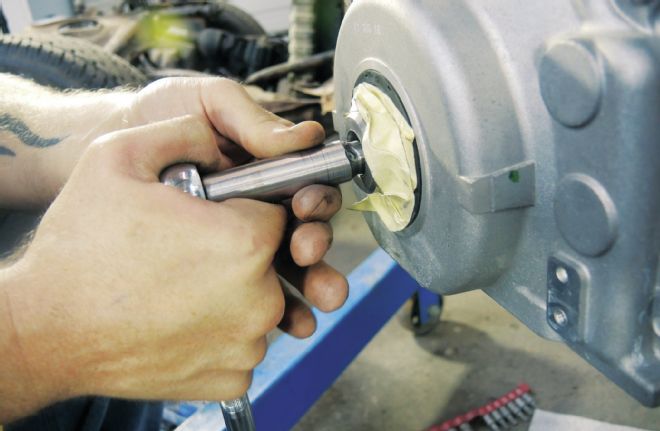
5. With the shoulder of the bolts ground, we can use it to push against the crank snout and the balancer will slip off past it. Using it, a regular three-jaw puller is all that's needed to quickly remove the damper—not a specialized tool.
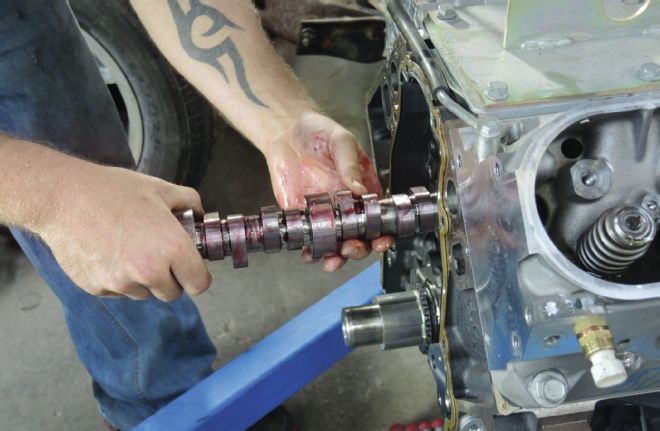
6. The new Comp Cam gets stabbed in. It sports a gross lift of 0.617/0.623, 231/239 degrees duration at 0.050, and a 114-degree lobe-separation angle. This is followed by the double roller timing set, modified oil pump drainback, and a non-VVT timing cover. Eliminating the variable-valve timing simplifies the engine management and allows for a more aggressive cam profile.
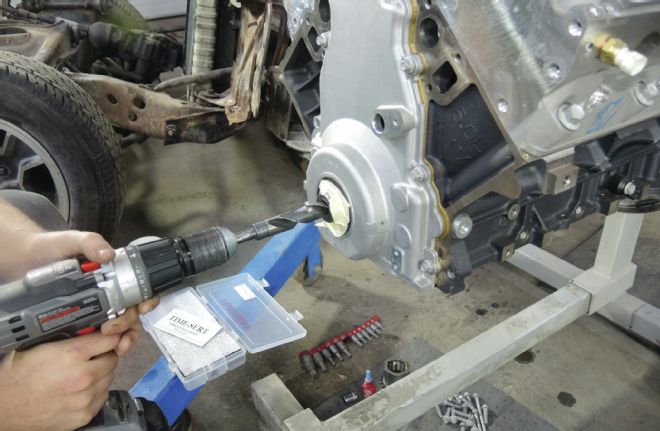
7. Bouchard uses a modified TrimeSert kit from Silver Seal, a thread-repair system that is many times stronger than a Helicoil and will withstand the 230–lb-ft balancer bolt torque spec. The first step in the repair is to enlarge the bolt hole with a 25⁄32-inch drill bit, making room for the larger shoulder of the new threaded insert tool. We checked our progress often, and stopped when we hit the top of the threads.
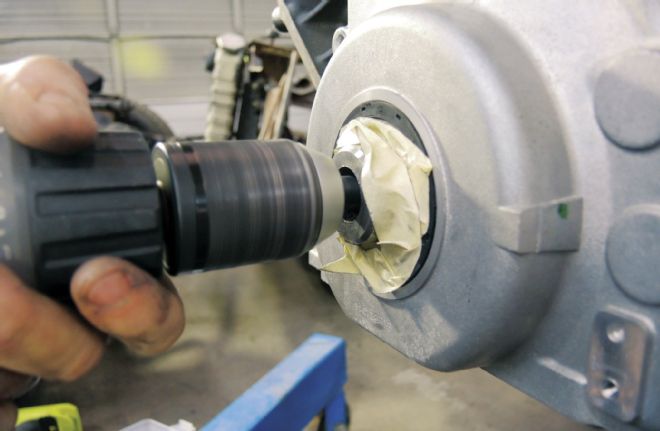
8. Bouchard used a 21/32 bit next to clean out the stripped OE threads. He drilled approximately 5 inches in, stopping when he felt the bit reach solid metal. We've taped the new timing cover seal to keep shavings out of the engine.
John Bouchard (JohnBouchardEngines.com) has been an engine builder in many capacities, including on Horsepower TV, and has seen his share of LS buildups. He got on the horn with Comp Cams and spec'd out a complete valvetrain designed to pull an estimated 100 extra horsepower out of this already stout engine. First, we needed to repair the threads in the crank snout, because left like it is, reassembly is impossible. The damper bolt is long and thread engagement is at the back of the bore, rather than at the front, so thread engagement is minimal from the factory. Combine that with a torque-to-yield bolt on a keyless crankshaft, and it's easy to see why broken crank threads are becoming a common problem. John Bouchard came up with a fix that uses good old-fashioned American ingenuity and homemade tools to permanently repair the threads without having to remove the crankshaft. Now, this once-doomed 6.0L can continue to deliver great performance for a long time to come!
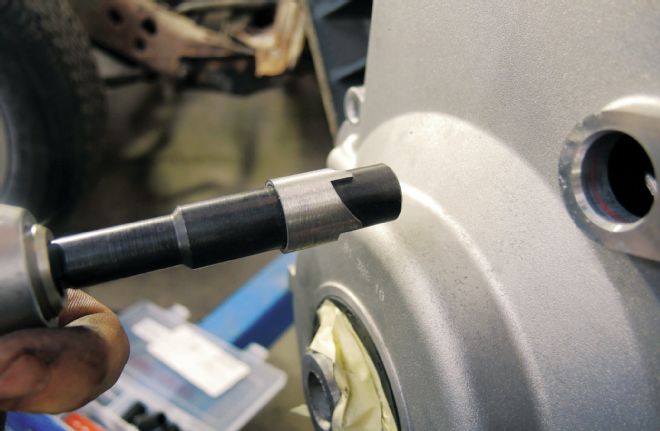
9. Step three in the fix is to cut a bevel at the top of the threads for the edge of the TimeSert to bottom out against.
10. This tool cuts a 0.030 bevel, and the nose of the bit acts as a pilot to make sure your cut is straight. Take your time and make sure your drill is parallel to the crankshaft.
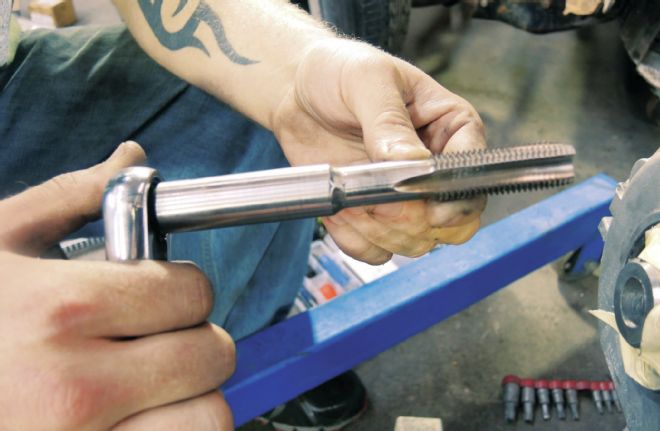
11. This is the second homemade tool Bouchard made. He TIG-welded a tap to a socket to accommodate the deep snout on our LQ4. Care was taken so there was almost zero runout during welding.
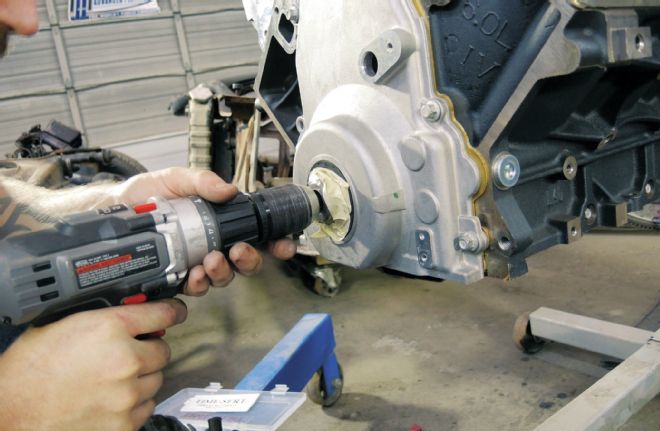
12. After lubricating the tap, threads are cut as deep as the tap will go. We stopped about every two turns to blow the shavings out and re-lube the tap. Make sure the tap is straight.
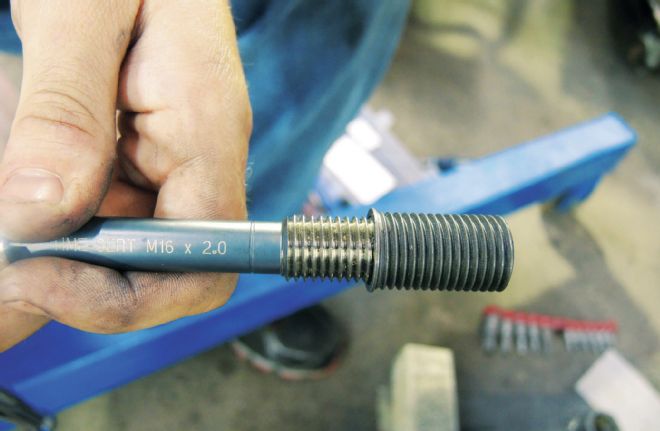
13. The TimeSert Installer holds the new threaded insert. The threads on the insert work in concert with the new threads in the bore and are offset to each other, which compounds the strength of the dissimilar thread pitch and metals. Note the thread insert's ID is the same size and pitch as the factory threads.

14. The TimeSert is installed until it bottoms in the crank.
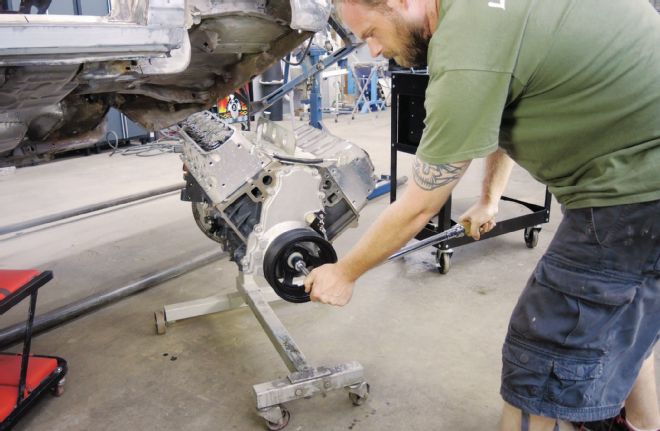
15. To verify the repair, Bouchard reefs down to the required 230 lb-ft, and it worked fine. We like this repair, especially in a situation where the engine is still in the car. This procedure can be done without removing the engine and eliminates the need to disassemble an engine to repair the crankshaft. We'll report numbers from the cam upgrade in a future issue, but we're anticipating a 100hp gain over stock. Not bad for an afternoon's work. End