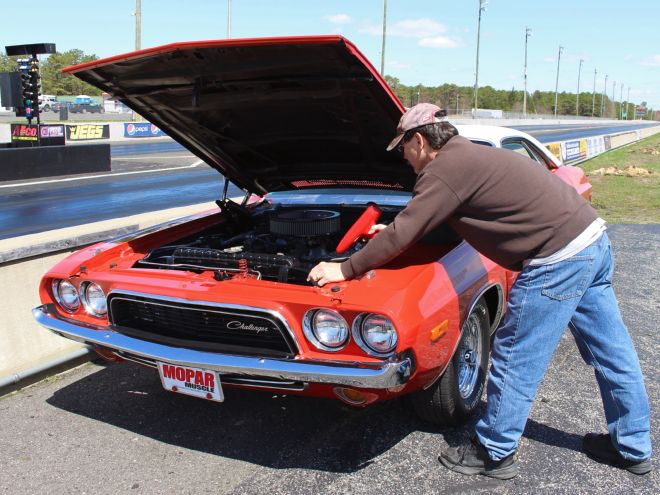
It takes a good game plan to get any barn-find project ready to roll the streets once again, and our 1973 Dodge Challenger E-Body project is a perfect example. The Slick Challenger sat in a garage with a wounded engine and hadn't been street-driven since 1988. Before firing it up, we focused our attention on the basics of the engine, drivetrain, rolling stock, brake, fuel, cooling, electrical, and exhaust systems. We've wrestled with most of this elsewhere on the "virtual" super highway, so our focus today is to get both new components and old to work together reliably, safely, and most importantly, powerfully on this thing called the real super highway.
Our goal for the factory 340 four-speed A/C car is to be a pleasurable street driver with tons of Camaro-crushing power. The LA stroker 340/416 we built delivers a dyno-tested 577 hp that we can't wait to enjoy. These impressive peak dyno numbers came from using a large Holley Ultra HP 850 carb, which will take a few good tuning tricks to enhance driveabilty.
Our engine combination was left the dyno with 34 degrees of total advance, all in by 2,800 rpm. Experience tells us the advance curve is too slow for use with a long-duration cam (248/254 degrees at .050) and low vacuum (10 inches) at idle. Combined with the big Holley Ultra HP 850 and our manual gearbox, we knew we had our work cut out for us in the tuning department if we didn't want to stumble and die from a dead stop.
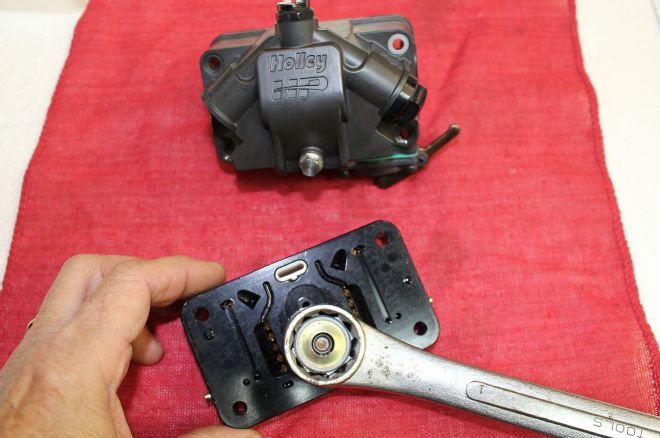
First on our tuning agenda was an HEI timing advance curve kit from Summit (PN 8428, $21.95). Our Performance Distributors DUI distributor uses a robust HEI design for ease of tuning, plenty of ignition power, and long life, so getting it dialed for the street would be easy and simple. From the kit we used the lightest springs for the quickest advance curve (total advance in before 2,000 rpm). This also raised the initial timing from 15 to 25 degrees at the desired 1,200-rpm idle. We also used the bushings and weights from the curve kit to shorten the duration of the advance curve by 10 degrees. After installation there was noticeably better off-idle and low-speed throttle response and another inch of vacuum at idle (now at 11 inches). The added initial timing raised the idle to 1,500 rpm, so we set the curb idle screw back a half turn to keep the 1,200 rpm. The curve kit swap didn't affect the total timing and it remained at 34 degrees.
Next, the carb for our street-driver would receive tuning attention. The Holley Ultra HP 850 is a gem with nearly infinite tuning capabilities. After installing the timing re-curve kit we readjusted the four corner idle mixture screws. It was running better, but some off-idle stumble was still present. Upon opening the brand-new carb, we found 4.0 power valves on both the primary and secondary side. Moving to 6.5 power valves aided in earlier enrichment of the idle to high-speed circuit for smoother low-speed throttle response—just what we wanted.
It's important to remember here that the number on a power valve indicates the vacuum at which the power valve restriction channel opens to allow additional fuel enrichment, not the amount of fuel itself. The number corresponds to the spring pressure of the power valve, which is the vacuum in inches where the enrichment channel opens. So as we push down on the throttle pedal and watch the vacuum go from 11 inches to a theoretical of zero at WOT, we're going to see the enrichment happen much sooner with a PV of 6.5 than at 4.0. And by the way, the amount of enrichment corresponds roughly to six jet sizes for the applicable bowl.
Now our driver felt ready to hit the road after two dozen shakedown runs up and down a long driveway. For safety's sake, the stock disc/drum brakes received a new master cylinder and brake lines. No fluid leaks were present and all fasteners were re-torqued. The dried-out, flat-spotted tires were replaced with fresh ones, and the Slick Challenger's first road-trip would be strait to Shore Wheels (Tuckerton, New Jersey) to align its new QA1 tubular K-member front suspension. A test-drive revealed steering that felt better than any torsion-bar equipped classic Mopar we've driven. Also, the rumble from the 3-inch TTI exhaust was sweet music! Here's the highlights from our preparation.
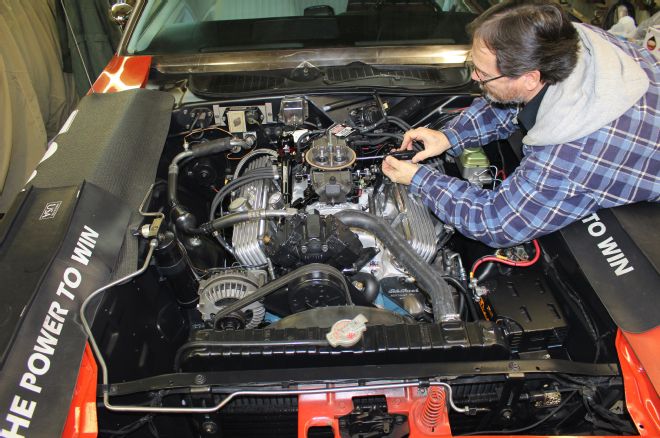
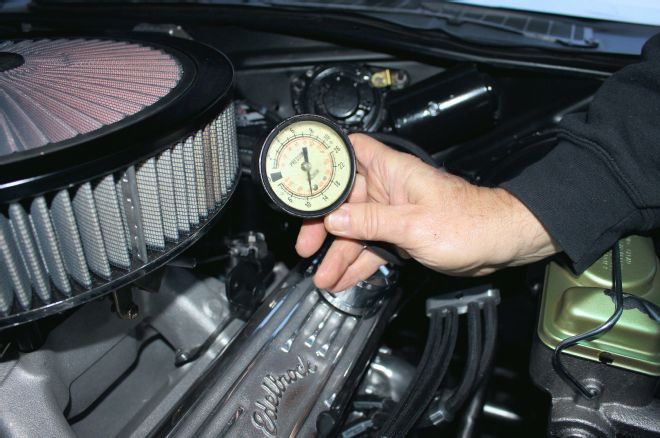
1. Once the 416-cube LA small-block was installed and running, initial tuning started with dialing-in the four-corner idle circuit screws. Holley's new 850 Ultra HP helped our combo crank 577 hp on the engine dyno, but its large size made it a challenge to tune for the street with our stick. We were up for it though! Be sure the idle mixture is one of the first settings made. It can affect the tune during the entire rpm range.
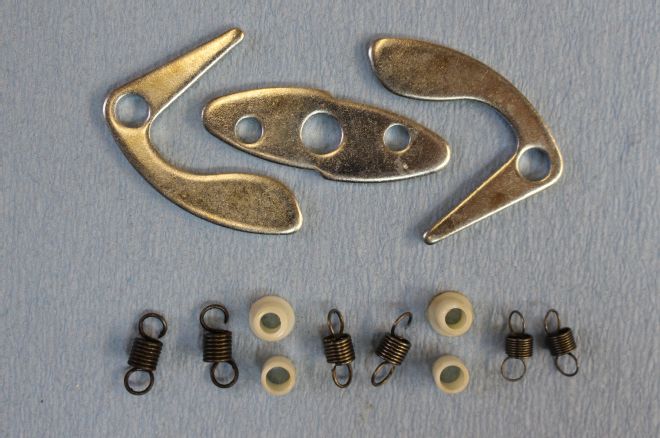
2. For $21, a distributor timing re-curve kit is a great bang-for-the-buck performance part. Our Performance Distributors DUI distributor converted our 340 to HEI, which proved beneficial for power, longevity, and maintenance. If your engine has a long-duration cam with low idle vacuum (under 14 inches) a re-curve kit will allow you to wake it up on the street with a quicker advance curve.
3. Before the timing re-curve kit, off-idle and low-speed throttle response suffered. We used the lighter weights and the weakest springs for total timing (34 degrees) to hit before 2,000 rpm. The initial timing at 1,200 rpm went from 15 to 26 degrees while adding an inch of vacuum (10 to 11 inches). Total timing didn't change, but a dramatic gain in low-rpm throttle response was realized. If tweaked correctly, you'll see your idle vacuum creep up, as we did here.
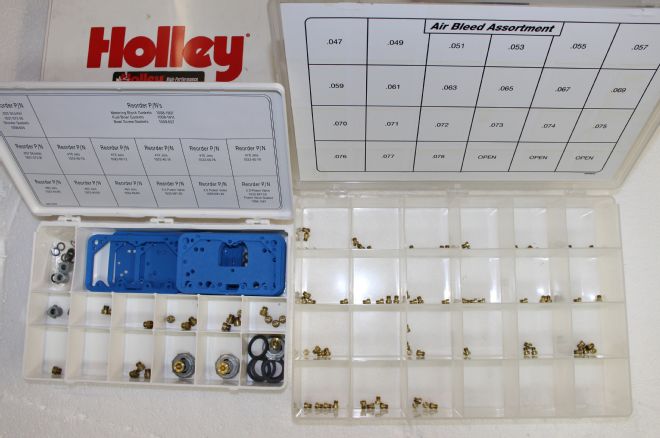
4. For years, Holley tuning kits have been handy for tuning on the dyno and on the street. Holley HP carbs feature changeable air bleeds to richen or lean the carb without removing the fuel bowls. During engine dyno testing, the air/fuel ratio showed 12.6 to 12.8, but the engine dyno doesn't tell about low rpm. We knew the poor off-idle response meant there was a lean condition between the idle and high-speed circuit.
5. The poor off-idle response prompted us to remove the bowls. We found the standard 4.0 power valves installed from the factory, and swapped them to 6.5 power valves on both the primary and secondary side. This quickened the timing of the fuel enrichment, as the stiffer PV spring will now push the enrichment valve off the seat a lot sooner. The tip-in improved, and it makes street drivability more enjoyable.
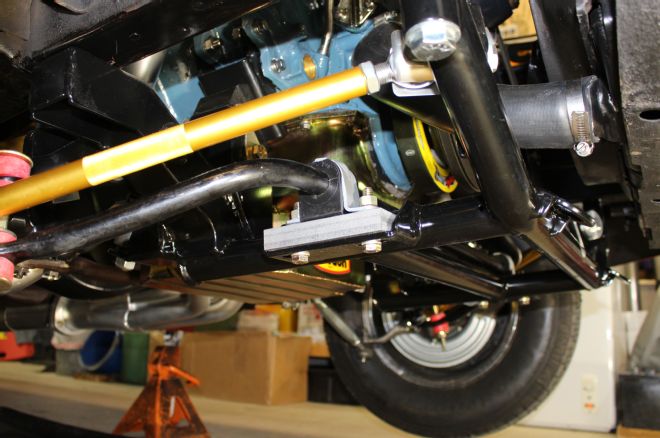
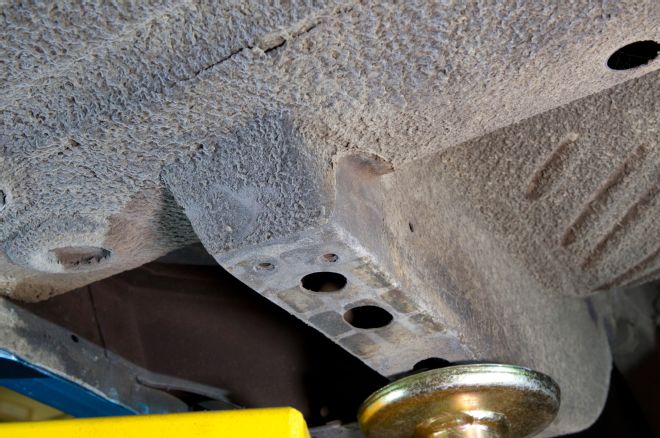
6. The QA1 K-member is designed to use the E-body sway bar. We cleaned-up our factory 7/8-inch sway bar and bracket and applied a few coats of Eastwood Chassis Black (PN 10025Z, $14.99) and Detail Gray (PN 10036Z, $14.99) for added protection and looks. Normally, the sway bar is mounted below the K-member, but we felt there wasn't sufficient ground clearance, so we switched it around to the top. Notice the 3/4-inch aluminum spacer our local machine cut and drilled to give us the needed clearance between the sway bar and K-member.
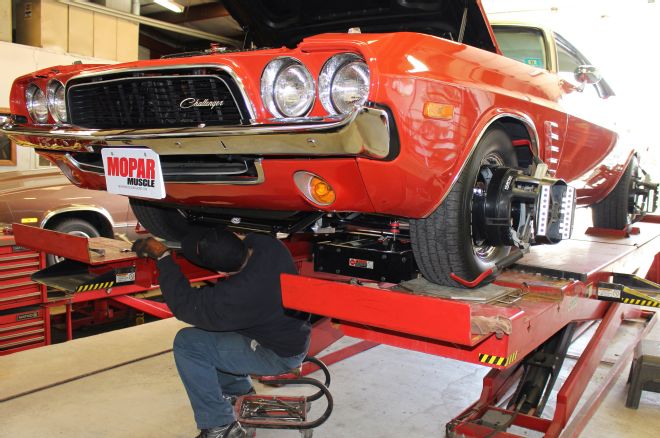
7. After many safety checks and rides down the driveway, we felt the car was roadworthy enough to drive a few miles for a front-end alignment. Shore Wheels did the alignment, and our QA1 suspension drove better than any torsion-bar equipped car the author has ever driven.
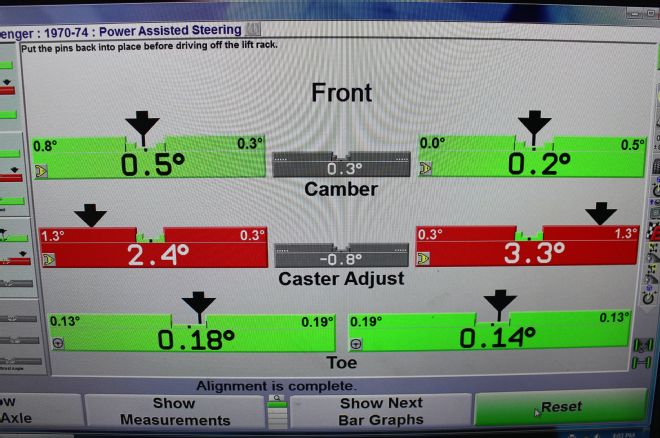
8. Here are the alignment specs for our '73 Challenger. QA1 designed their upper control arms with an extra 2 to 4 degrees of caster for better high-speed stability. Toe and camber, however, gets set to the factory specs. Our final caster specs were 2.5 degrees left and 3.0 degrees right positive caster. A half-degree (0.5) more caster on the right makes up for driver weight and "road crown" for straight no-wander steering. The extra caster provides a more modern self-centering feel.
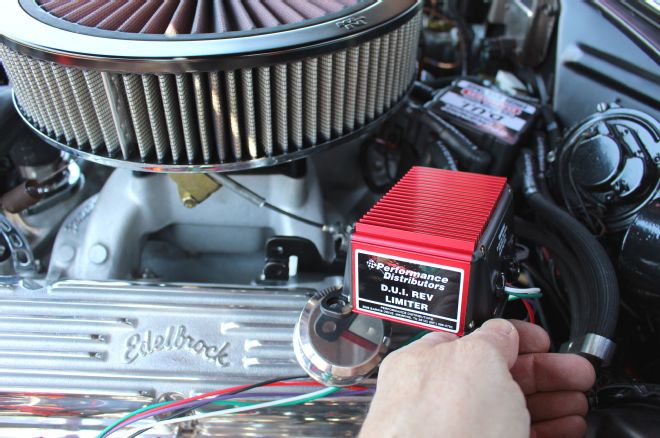
9. Before we go banging gears with full-throttle upshifts, we wanted to install Performance Distributors DUI rev limiter (PN 380777, $145). For now, we'll drive it easy until the McLeod Street Twin clutch is properly broken-in with over 500 miles or 1,200 shifts.
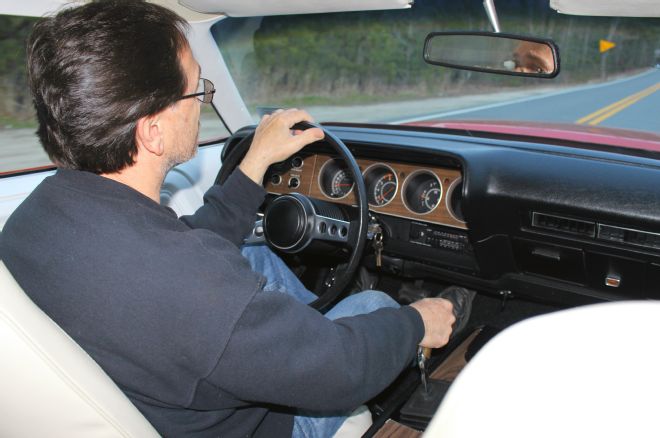
10. The '73 Challenger drives like a dream. We can't begin to tell you how great it feels to be back in the four-speed saddle again. The car drives almost as good as a new one!