Hey, we love carburetors as much as the next gas monkey, but it's hard to beat the driveability advantages of electronic fuel injection. Even if an EFI system doesn't necessarily deliver a performance advantage, it pays dividends when it comes to starting, idling, and efficiency. That's particularly true for cars that aren't driven daily.
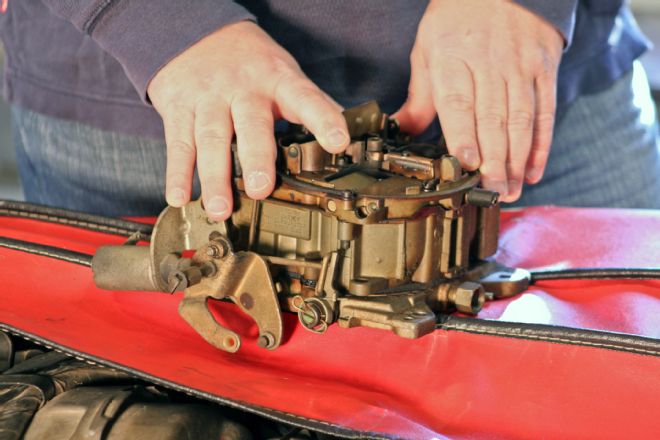
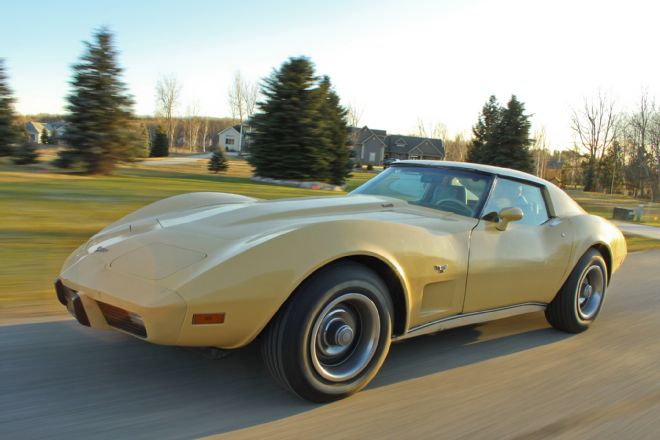
Such was the case with our buddy Leonard Slebodnik's 1977 Corvette, which was a fair-weather car that was stored during the winter months at his Michigan home. The Quadrajet was gummed up, making even a quick drive a trying, smelly affair, and one that his wife understandably wanted no part of. He briefly considered having the Q-jet rebuilt, but realized he wanted fuel injection. "I really wanted the assurance that, when I jumped behind the wheel, that the engine would fire up and idle correctly every time," he told us. "A new or rebuilt carb seemed only like a temporary fix for me."
While there are various injection conversion systems on the market, Slebodnik is the do-it-yourself kind of guy and wanted to see if he could do it from scratch for less than $1,500 (a Q-Jet rebuild is typically $400–$500). It would involve some parts scrounging, an electronic controller for the system, and a bit of welding. Slebodnik is in no way a professional tuner, and this project represented his first time ever tackling air/fuel tables on a laptop, but he is blessed with a diagnostically inclined brain, which proved to be a big help. "If I could do it, just about anyone could," he says. "[Swapping] the parts is pretty straightforward, but you have to be really careful and diligent with setting up the tables with the controller software, and you should have a basic understanding of what the engine needs for proper operation."
The homemade system is directed by the venerable MegaSquirt EFI controller, which we've seen on everything from budget conversions, such as Slebodnik's, to mega-dollar drag-race combinations. It's designed for stand-alone systems, driving only the engine's injection system. It is also designed to be used with a speed-density air metering system, which is what the GM TBI units used anyway.
And here's the project's kicker: It was done for only about $900. Seriously.
We should note, too, that while this project was performed on a wheezy, smog-era Corvette that was painted the worst color ever (no wonder he didn't want to spend big money on it), the basics apply not only apply to any old GM vehicle but also to just about anything equipped with a carburetor.
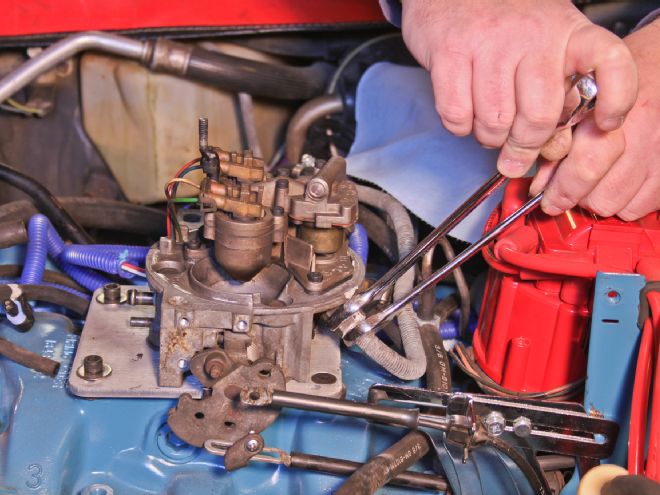
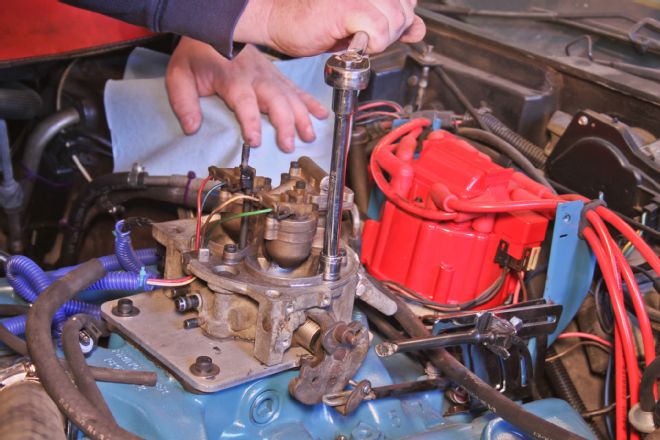
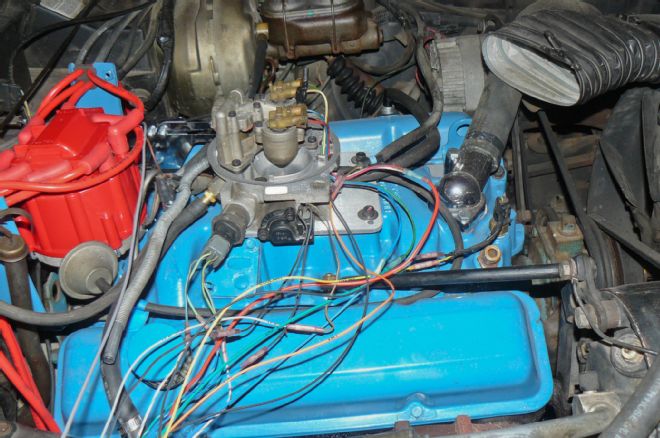
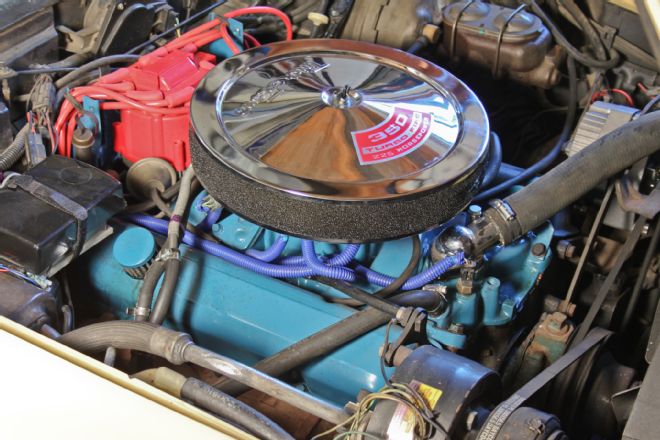
Let's dive right in with the removal of the Quadrajet on the original 350 engine. As is the case with many enthusiasts who don't use their "hobby" car as daily transportation—and store it during the winter—driveability suffered for the owner.
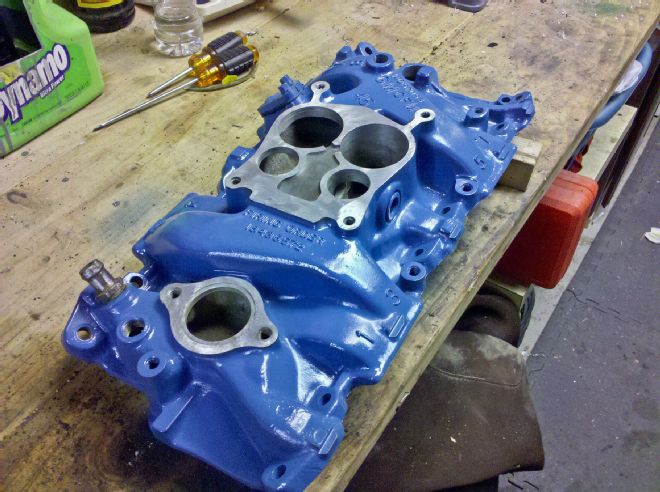
While the project car's cast-iron intake manifold was suitable for adapting the throttle-body injection system, owner Leonard Slebodnik picked an aluminum intake from a 1980s-vintage Monte Carlo SS off the shelf of a buddy's garage, where it had been collecting dust for 20 years. A quick clean-up and rattle-can re-spray to match the 1977 engine color delivered an undetectable enhancement that took about 10 pounds off the top of the engine. Nice.
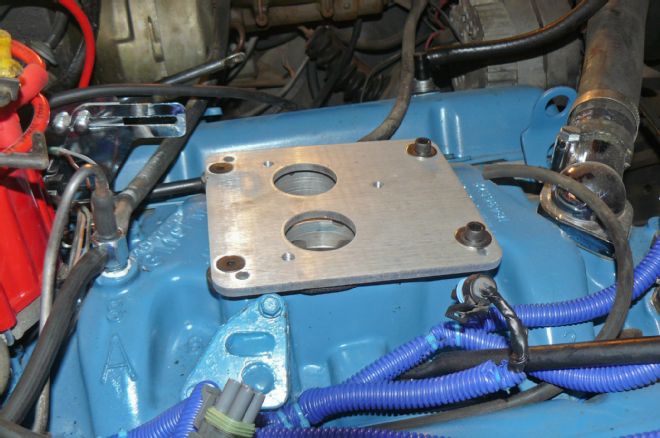
An adapter plate is required to mount the two-barrel-type throttle-body injection unit to the four-barrel manifold—and that's a requirement whether you're working with the stock Q-jet-type spreadbore design or an aftermarket intake with a Holley-style square-bore design. Note the counter-sunk fasteners at the rear of the adapter plate. They're necessary for adequate clearance of the TBI unit. This plate is easy to make, but aftermarket plates are available for about $50–$75.
The TBI unit used for the project is simply a salvage-yard part scavenged from any of the millions of GM trucks built from the mid-1980s through the mid-1990s, including the 4.3L V6, 5.0L and 5.7L small-blocks, and even the 7.4L big-block (the 7.4L units require larger-bore adapter plates). This one came from a 4.3L S-10 (with a pair of 45-lb/hr injectors) and was purchased at a pull-your-own junkyard for only $35. It's important to make sure the TBI unit still has the throttle position sensor (TPS) and idle air control valve (IAC). In addition, a couple of coolant temperature sensors are required, so they should be grabbed from the same donor engine. For safety's sake, it's a good idea to replace the TBI unit's gaskets and seals. It's cheap and easy insurance.
A 3/8-inch fuel line rated for high-pressure fuel injection is required to feed the TBI unit. That means running an all-new fuel line from the tank to the TBI. Slebodnik also grabbed some of the flexible hardline shielding for the fuel line from the salvage-yard engine.
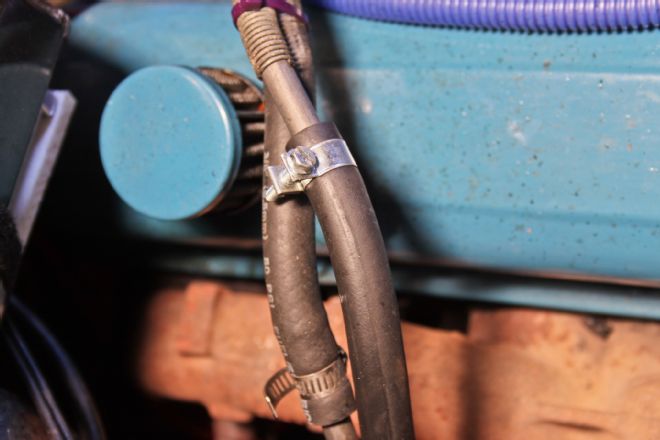
An EFI system requires a return fuel line that's at least as large in diameter as the feed line, which in this case, meant another 3/8-inch line. But here's a cheapskate tip: The original feed line is 3/8-inch and isn't under the pressure of the feed line, so if the original feed line is still in good shape, it can be used for the return line.
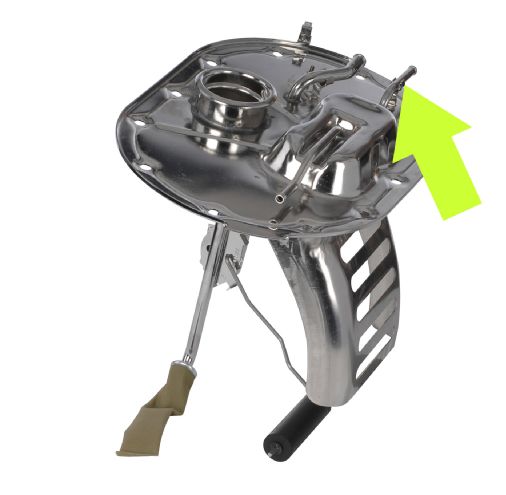
To accommodate the larger-diameter fuel return line, this 5/16-inch fitting (arrow) on the fuel-tank sender unit (located at the top of the fuel tank) must be cut off and replaced with a 3/8-inch fitting that is TIG-welded to the sender. The sender is easy to unbolt from the tank, but can get a bit grungy after about 35 years. An alternative is starting with a clean, all-new replacement. This one for the Corvette cost about $170.
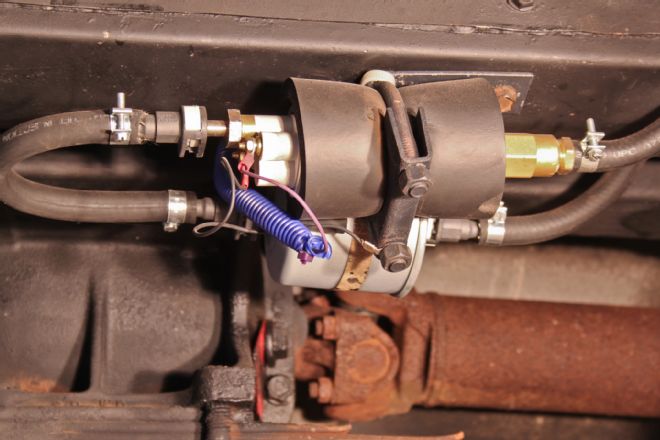
When it comes to sending fuel to the engine, the original block-mounted mechanical pump must be replaced with a high-pressure electric pump—and don't forget the block-off plate for the original pump on the engine. There are a couple of options here: An in-tank pump or an external pump. The easiest path is what Slebodnik took: an external pump (and filter) for a late-1980s/early 1990s Ford F-250 with a throttle-body-fed 7.5L (460) engine. Compared to contemporary port-injection engines that run fuel pressure of about 60 psi, the GM TBI runs with about 12 to 15 psi and the TBI unit features an internal pressure regulator, which is great. But even with this electric pump, it still needs gravity feed, so the pump must be mounted below the tank. Wiring for it must also run to a relay under the hood, but care should be taken, of course, to keep that wiring away from the exhaust system.
Collecting Parts and Getting Dirty
Before diving into this project, Slebodnik spent considerable time on the Internet researching the project. He found sites and forums, specifically MegaManual.com and Mesfi.com, where others had attempted the same basic conversion and offered advice on the necessary parts, installation, and tuning. With a materials list in hand, he started scouring auto-parts stores, the Web, and a few salvage yards for the components. The basics included:
•MegaSquirt controller, relay board, pre-built cable, and labeled wiring from www.DIYautotune.com.
•Throttle-body fuel injection from a 1988–1993 GM truck.
•Adapter plate for the intake manifold.
•High-pressure external fuel pump and fuel filter from a late-1980s Ford F250.
•Fuel lines and clamps rated for high-pressure fuel injection.
•LC1 wideband oxygen sensor from Innovate Motorsports.
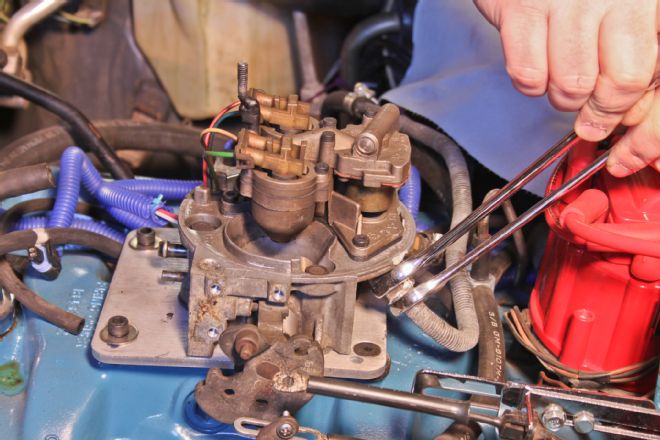
Removing the original Q-jet and replacing it with the throttle-body apparatus is a comparative snap. The project gets more involved when it comes to routing and connecting the necessary fuel-return line from the throttle-body system to the fuel tank. Although the tank itself doesn't necessarily require modification, the removable section that contains the fuel fill inlet and sending unit does, including a bit of welding. It also means removing the fuel tank, as well as bolting on the new high-pressure fuel pump beneath the reinstalled tank. The wideband oxygen sensor was essential for tuning, too, but also required welding, as the bung for it was inserted in the exhaust system. The MegaSquirt controller found a home beneath the forward portion of the center console, which provided reasonably easy access for plugging in a laptop for tuning. Room under the hood must also be made for the relay box that supports the injectors and fuel pump.
Tuning Trials and Tribulations
Slebodnik had never attempted tuning on a car before, but he is an IT guy by profession, so he knows his way around a keyboard. "Having never attempted anything like tuning for fuel injection before, it was a challenge," he says. "Even though I knew how an engine worked and the basics of air/fuel ratios, I was still starting from zero when it came to getting the car started." Slebodnik points to www.MegaManual.com and associated forums as invaluable resources. They provide the basics to program the system enough to get the engine started and idling. And those are the biggest steps. After that, the trial-and-error, fine-tuning process begins.
"One of the hardest things to learn at the beginning was setting the 'constants,' things like the required fuel-injector flow rate, required fuel under acceleration, and the targeted stoichiometric values [optimal air/fuel ratio]," he says. "With those set, you can get the car running, but the variables are almost infinite, so for the first-timer, there's a lot of trial and error. Fortunately, you can save each tune-up as they are created. If it doesn't work as well as a previous one, it's easy to switch back." As we were heading toward the deadline on this story, Slebodnik admitted he was still working on the the cold-start enrichment setting, which ensures a cold engine has more fuel until the coolant reaches a set temperature. "Yeah, it's still a bit cold-blooded at start-up, but I'm working on it," he says. "Once that's nailed, it will all be good. As it stands, it already runs much better than with the old carburetor."
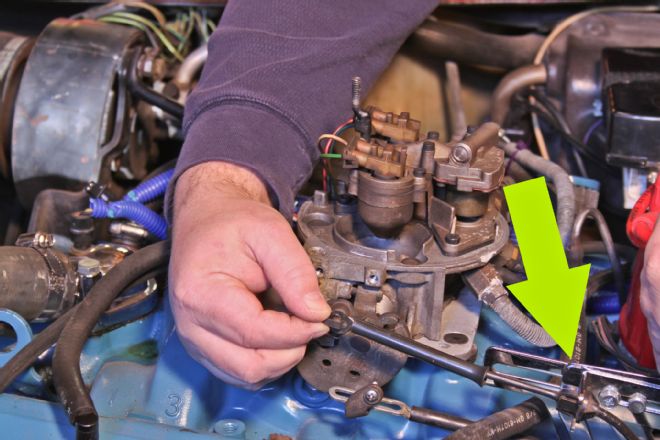
The TBI unit's throttle mechanism is positioned closer to the firewall, necessitating a new, adjustable linkage bracket (arrow). It's available from the likes of Jegs and Summit Racing for only a few bucks, and it simply mounts to the intake manifold.
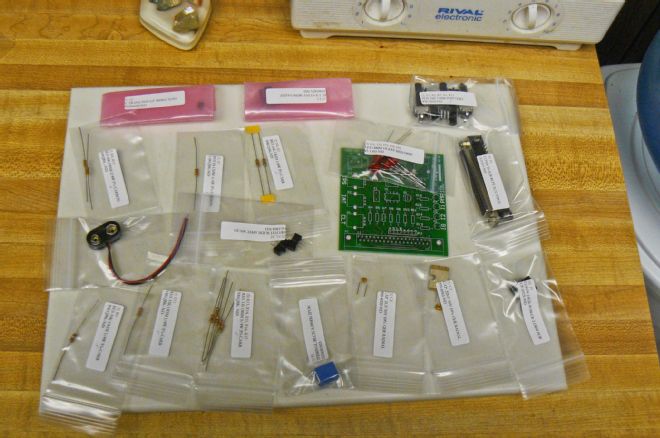
The MegaSquirt components came from DIYautotune.com, the primary manufacturer and distributor for them. While some very basic, stripped-down components for the system are available for a few dollars less, purchasing a pre-assembled relay cable and pre-labeled wiring kit proved to be a better value, especially for a first-timer. All together, the ECM, stimulator board, relay board, relay cable, and wiring kit cost a mere $387.
The stimulator board must be carefully assembled by soldering the connections. It's important to check the connections periodically during the assembly process to make tracing problems easier.
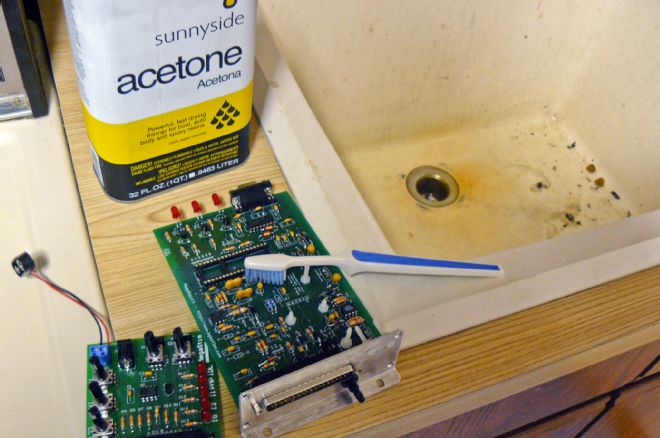
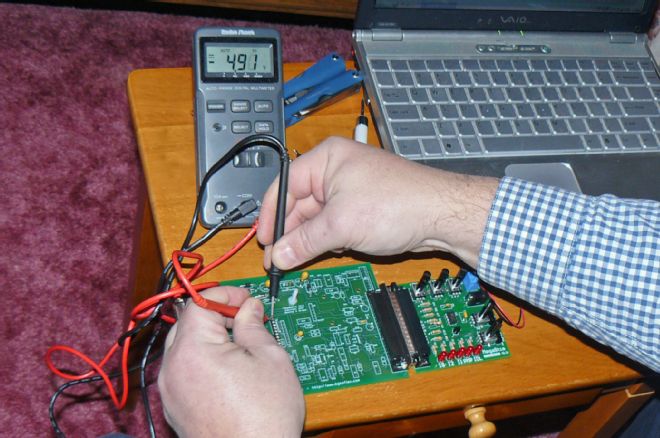
After assembling the board, it must be washed with acetone to remove soldering flux that could cause "bridging" problems. Then, the board should be sprayed with a clear lacquer to seal it. That will make it more reliable.
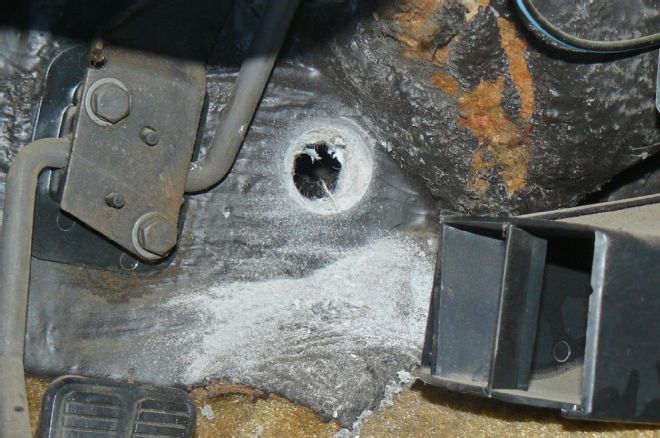
There's no getting around drilling a 1-inch hole in the firewall, because the harness for the controller, which is mounted inside the car, must be connected to the relay board under the hood. There's also a vacuum line to the MegaSquirt controller for the MAP sensor that's mounted on its board.
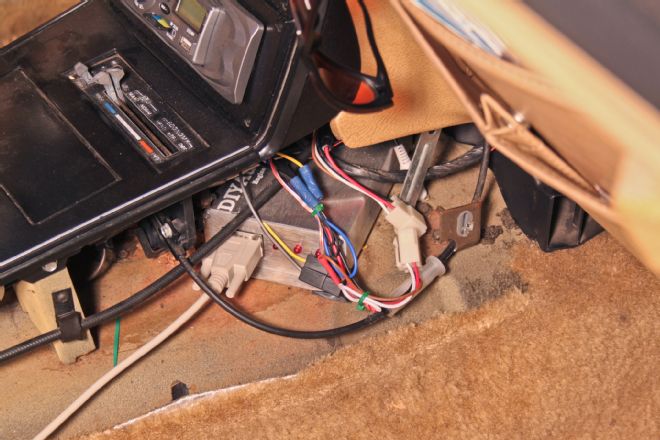
When it comes to mounting the controller, it should be positioned so that the serial port for the laptop hookup is on the outside for easy access, although it is also easy to run a length of cable from the controller under the console to a discreet location near the rear of the seats for an easier plug-in. The MegaSquirt II and other controllers now incorporate USB ports too.
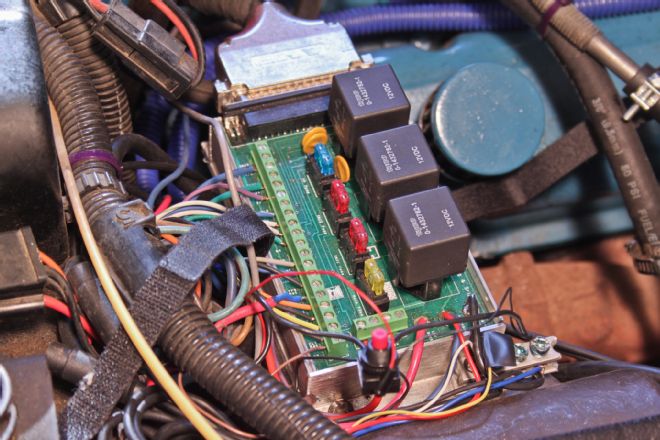
The complementing relay board for the control system mounts under the hood. By the way, the three large relays mounted on the board are for the fuel pump (top), injector No. 2 (center), and injector No. 1 (bottom). The injectors used separate relays because they're pulsed (triggered) separately.
The Bottom Line
Although Slebodnik is still revising his tune to nail down the cold-start performance, he's done spending money for parts on the system. The total—itemized in the accompanying chart—came to $904. That, of course, doesn't include the sweat equity of doing the installation and tuning himself, but the satisfaction of the project suggests the labor wasn't much of a factor for this project. "There would be a couple things I'd do differently, but I'd definitely do this again on another vehicle," he says. "Even with the couple of tuning issues I'm still working on, the driveability of the car is already much better than with the carburetor. I wouldn't go back to that again for anything." Slebodnik says the experience has also give him a new appreciation and greater understanding for the complexities of modern engines and why tuning is such a painstaking, specialized process. Spoken like a true convert.
Greater Power and MPG, Right? Not So Fast…
Achieving huge gains in performance and fuel economy are common misperceptions with an EFI conversion. Generally speaking, don't expect huge increases in either on an otherwise stock engine. The injection system may foster more-efficient combustion, but it doesn't necessarily translate into noticeably more horsepower. You're looking at maybe a 5 percent increase in horsepower, tops. There are a couple reasons for this: the most notable being the fact that changing to fuel injection doesn't alter the airflow aspects of the intake manifold or cylinder heads. In this car, we are dealing with low-flowing components typical of 1970s-era small-blocks, so adding EFI to the stock intake and heads won't show much of an increase in power. That's one of the reasons this project uses a "two-barrel"-style throttle-body injection system rather than a "four-barrel"-style. There's simply no need for it on an engine rated at only 180 hp. As for the fuel economy, again, the car's stock configuration is the compromise: this time it's due to the nature of the three-speed automatic transmission, be it a Turbo 350 or Turbo 400. With the top-gear ratio of 1.00:1 combined that with the typical 3.55 rear axle of the day—in the Corvette, at least—and the highway cruising speed is around 2,500 rpm or greater. Regardless of whether the engine is fuel injected, it's still going to suck gas pretty fiercely on the open road at that engine speed. So if maximizing fuel ecomony is your goal, go for the overdrive transmission swap after installing EFI.
DIY Fuel Injection by the Numbers MegaSquirt ECM$147 MegaSquirt stimulator board$45 MegaSquirt relay board$64 MegaSquirt pre-assembled relay cable$85 MegaSquirt sensor wiring kit$46 Innovate Motorsports LC1 wideband O2 kit$199 TBI unit and sensors (salvage yard)$35 TBI-to-four-barrel intake adapter (homemade)$0 TBI gasket kit$30 Fuel pump$60 Fuel filter$13 EFI fuel hose and fittings$60 Air filter assembly and element$30 Exhaust adapter and gaskets$40 Throttle and kick-down adapter brackets$50 Total$904
One of the recommended options with the MegaSquirt system is paying for the pre-labeled wiring kit, which includes automotive-grade wiring tagged with where each wire should go. It makes installation infinitely easier and a lot faster. But even with that, plan on at least six hours or more to wire-up the engine. Use heat-shrink connectors, too, to ensure weatherproof connections.
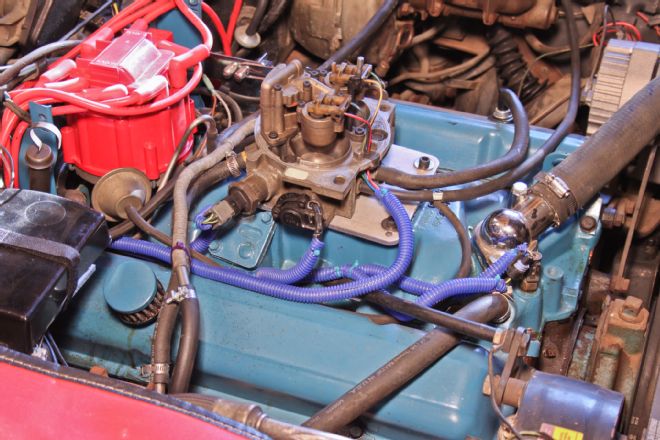
With the wiring completed and tucked inside an admittedly cheap-o wire loom, the appearance of the system is tidy and straightforward. As seen here, the TPS, IAC, and coolant temp sensors are connected. What's not visible is the necessary air intake sensor that mounts to the bottom of the air cleaner. A coolant temp sensor can be used for this (that's why two were grabbed at the salvage yard) and installation is as simple as drilling a small hole in the base of the air cleaner and threading in the sensor.
The final sensor to install for the system is a wideband oxygen sensor, which provides specific feedback to the engine controller on the oxygen content of the exhaust gas, rather than the simple lean-or-rich feedback of a narrowband sensor. This enables the engine controller to adjust fuel and—on the MegaSquirt II and other controllers—ignition timing more precisely (the basic MegaSquirt used on this project doesn't allow for easy timing adjustment).
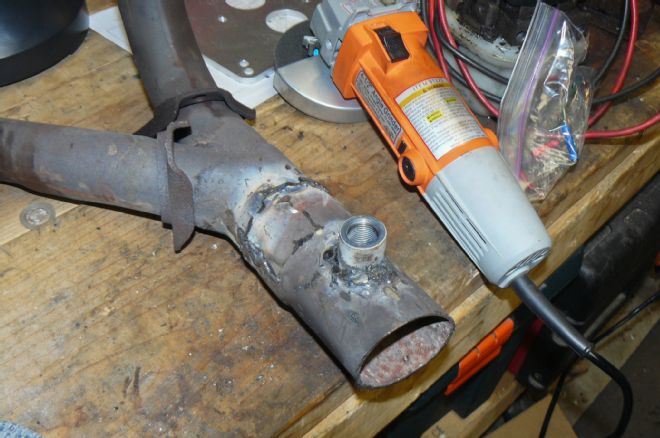
After drilling a pilot hole and the corresponding large hole, a bung for the oxygen sensor is welded to the Y-pipe. The homemade welding job isn't pretty, but it's all that's needed to mount the sensor and connect it to the wiring harness. Ideally, the sensor should be mounted at the top of the exhaust—and ahead of the catalytic converter. Wiring for the sensor is routed to the controller.
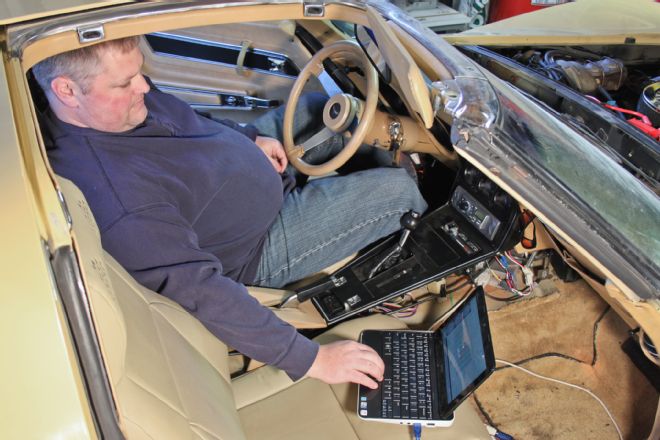
Although the installation of the TBI system was relatively straightforward, the most daunting task for the uninitiated comes with actual "tuning" of it. There's no two ways about it: There's going to be trial-and-error adjustments after a baseline program is established. Owner/builder Leonard Slebodnik reports the most difficult aspect is nailing the cold-start enrichment, but patience and incremental revisions will produce the desired results.
The adapter plate and TBI unit combine for a taller installed height than the original Q-Jet, so hood clearance could be an issue on some vehicles. This setup uses an aftermarket air cleaner—with the base offset forward—to mount the air temperature sensor.
The lack of a nearby chassis-dyno facility in Slebodnik's rural hometown prevented us from securing before-and-after testing of the project car, but the seat-of-the-pants evaluation demonstrated excellent drivability, with crisp throttle response and no hesitation, stumbling, or other issues experienced with the tired original carburetor. Better still was the total cost: $904.