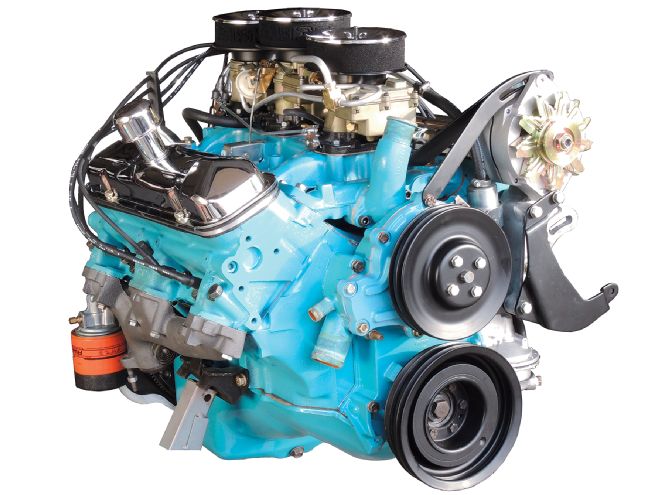
Our salvage-yard Pontiac mill is almost complete. If you’ve been following this buildup series since we kicked it off in the Mar. ’14 issue, you’ve seen how we tore the motor down, machined the block, rebuilt the heads and valves, rebuilt the reciprocating assembly, and put together the long-block. Now it’s time to add the proper components to dress our 421 as though it originally appeared in 1964.
For a majority of the components required to detail this engine, we turned to Ames Performance Engineering, a company that specializes in Pontiacs. Ames has a complete line of the hard-to-find parts that will give our 421 that “fresh out of the (50-year-old) box” look we need, plus a few modern components that will be hidden from view but will add reliability and performance.
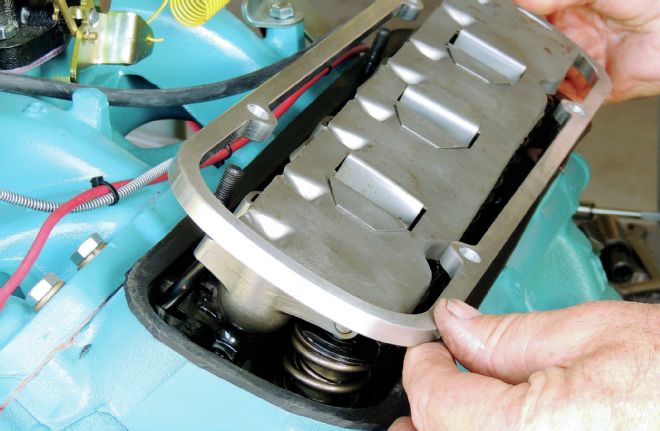
Since the assembly of our long-block last month, we have added the oil pan and valley cover. The oil pan was a straightforward installation. There were two factors to check before we installed the valley pan: lifter clearance and intake manifold clearance. Occasionally, when roller lifters are installed on a Pontiac V-8, they may slightly contact the bottom of the valley pan. To solve this one can buy an aftermarket valley pan that is designed for clearance in that area, or carefully use a ball-peen hammer on the inside surface to add a little clearance. We didn’t have to do either because the Comp Cams hydraulic roller lifters didn’t make contact with the pan. The other area of concern with the valley pan is the area around the intake ports when installing a Tri-power intake. With the valley cover on, the intake is lowered in place; interference, if any, will be obvious around the ports. It is resolved by trimming the valley pan. Luckily, we didn’t have any interference.
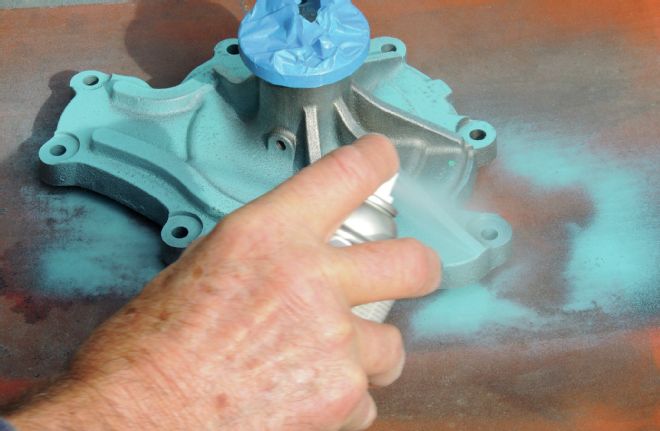 Muscle cars of the ’60s each had a clearly identifiable engine color. Pontiacs through 1966 were a baby blue–green. After each component was cleaned with solvent to remove any oil, it received several coats of paint. Because of the smaller spray pattern, a spray can is a much better choice to paint an engine than a spray gun.
Painting is the first project. Pontiac used two different shades of blue during the muscle car era, a baby blue–green from 1959 to 1966 and a metallic blue from 1967 on. Ames provided us with two cans of the correct color to cover the engine. Before painting, we wiped down the engine with solvent to remove all traces of oil.
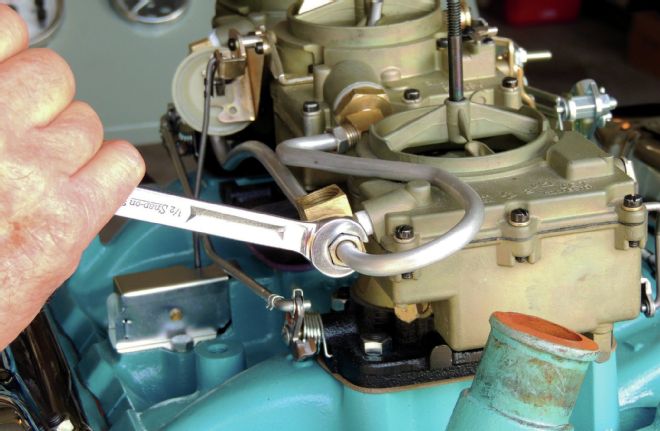 Pontiac’s engineers must have been paid by the amount of bends they put in their Tri-power fuel lines. The Ames reproduction fuel lines fit our setup perfectly. Just like the originals, they are made from aluminum. Since they are softer than steel lines they require less torque to secure, but we still used flare nut wrenches to protect the fittings.
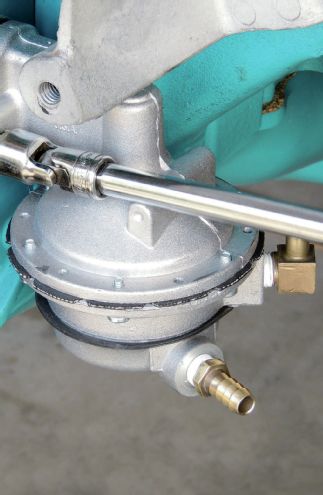 To keep up with the demand when the three Rochesters are working at full song, we added a Carter high-volume fuel pump. It is always easier to install a fuel pump when the engine is at top dead center because the pump’s arm will be on the low spot of the eccentric.
The owner of the car this engine will go into had delivered to us a complete Tri-power setup. All three carburetors had been rebuilt and dipped to restore their original gold tones. Pontiac offered several Tri-power intakes for its engines in the ’60s. The one we have is an aluminum reproduction of a ’66 intake, the last year for Tri-power Pontiacs. It is a slightly higher rise than the earlier version, it features a divorced choke, and the center carburetor has the same larger 111/16-inch bores as the end carburetors.
With the intake and carburetors installed, we added Ames progressive linkage and fuel lines. Both sets are designed to be exact reproductions of Pontiac pieces and fit perfectly. Topping off the carburetors is a set of reproduction Pontiac air cleaners with the A193C foam elements also from Ames.
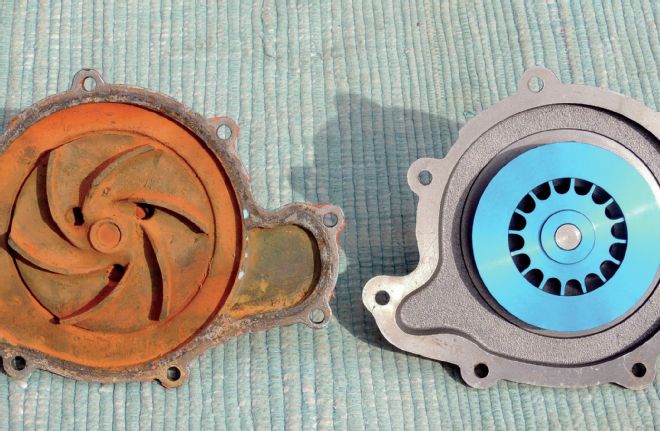 FlowKooler’s Pontiac water pump incorporates a CNC-machined impeller that’s designed to increase water flow at lower engine speeds. Here is a side-by-side comparison with the original Pontiac water pump.
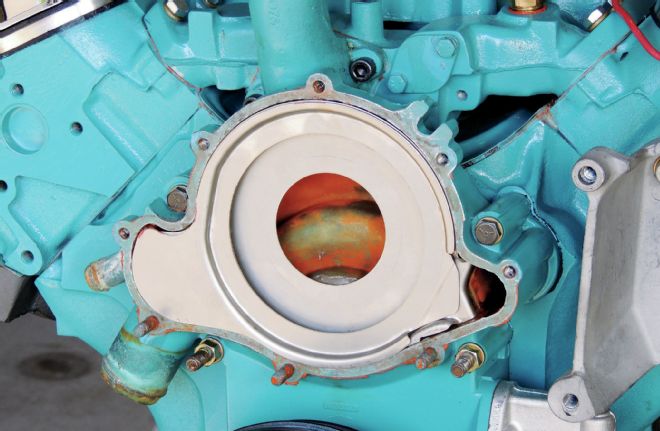 Prior to mounting the new water pump, we added this stainless divider plate from Ames. Pontiac originally installed a cold rolled steel divider that had a penchant to rust.
Any time internal improvements can be made to a vintage engine we are all for it. Following this principle, we added a FlowKooler high-flow water pump. The FlowKooler folks have redesigned the pump’s impeller to provide higher water flow at lower speeds, and it is beautifully CNC machined and anodized.
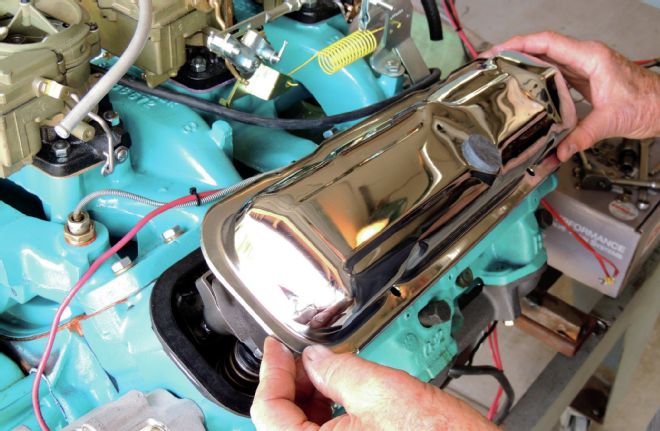
Our original chrome valve covers were dinged and pitted. While they could have been repaired and replated, we ordered a set from Ames that included the proper oil fill cap. Because of the changes to the valvetrain, we also added an Ames ¼-inch valve cover spacers. Once these nicely machined pieces were in place, the small change in valve cover height was barely perceptible.
 The changes in the valvetrain required a ¼-inch spacer to ensure clearance to the oil control baffle that fits under the valve cover. Ames also makes a ½-inch spacer.
 In the muscle car era, Pontiac’s engineers had their collective ear to the ground and knew that those individuals who were looking to buy a high-performance car wanted some flash under the hood as well as horsepower. They added chrome valve covers, and progressive linkage was made available as a dealer-added option. The link from the center carburetor going to the rear is adjustable, allowing a change in the tip-in point of the end carbs.
As delivered from the salvage yard, this engine was equipped with a GM HEI distributor. This unit will not fit with Pontiac’s Tri-power intake installed. We opted for a PerTronix Flame Thrower distributor, which has the look and fit of the original unit but packs a boatload of spark. It also comes with additional weights and springs, making changing the advance curve easy. From Ames, we added a set of date-coded 1964 Packard ignition wiring.
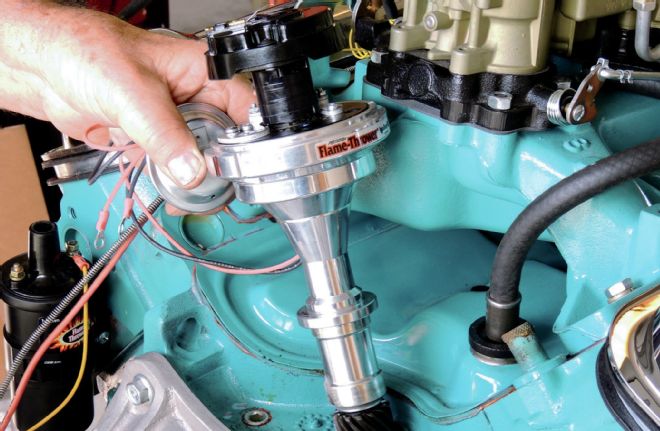 We installed a PerTronix Flame Thrower distributor in our 421. This compact, high-energy unit with retro looks fits perfectly behind the three Rochester carburetors. We added a set of Ames 1964 date-coded wires to transfer the spark and complete the retro look.
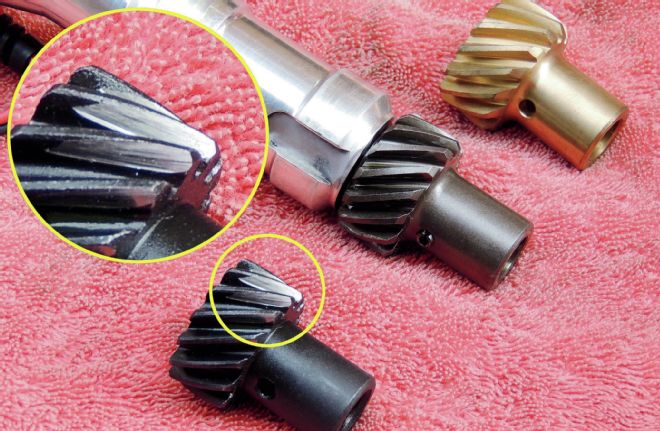 Roller camshafts and standard distributor gears do not get along well. The enlarged gear, in the yellow circle, is the original steel gear after 20 minutes of running. The options for those who install a roller cam are a bronze gear (on the right) or a melonite-coated gear like the one we have installed on our Pertronix distributor.
One modification required to the new distributor was the cam gear. Billet roller camshafts and cast distributor gears cannot coexist. The go at each other with chains and switchblades, with the distributor gear always losing. The torque required to spin the high-volume oil pump creates the gear-to-gear resistance. We fired our 421 on a test stand for about 20 minutes with the original gear. When we pulled the distributor to check the gear we immediately saw severe tooth wear.
There is a solution. For years the drag racing guys who run roller cams have been using bronze distributor gears. The bronze material is designed to be sacrificial, as the filings that are ground off are less harmful to the engine than steel filings. Also, race car engine oil is frequently changed, and the gears are also changed when worn. Our engine is destined for a street cruiser that may rack up a thousand miles a year. The owner would not find changing distributor gears entertaining. The solution is MSD’s new melonite-coated gear. We put this gear on the distributor and ran it for 20 minutes with no appreciable wear.
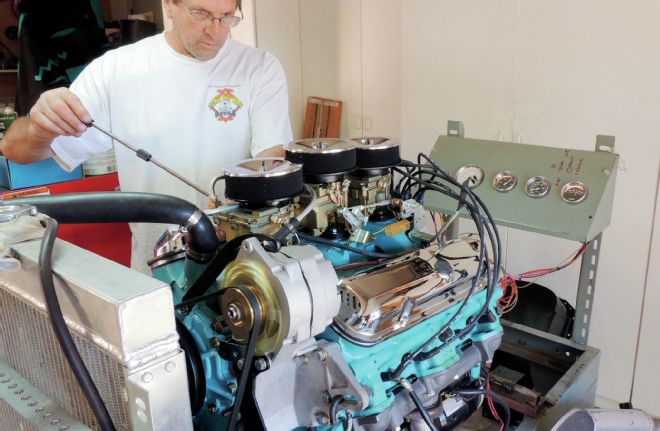 We broke in the 421 on a homebuilt test stand. If there’s an issue, it’s always easier to resolve with the engine out of the car. Here engine builder Ralph Straesser is doing a little final carburetor adjustment before we pack it up for the dyno.
As mentioned, we ran the 421 on an engine test stand. These are not difficult to construct (or buy) and can make solving any issues much easier than after the engine is installed in the car. The nice part is that once you get the basic stand built, it can be easily modified for almost any engine. We used it to get the engine dialed in for the upcoming dyno pulls.