Cracked block? There aren't many two-word combinations that send a shiver up a car guy's spine. In most cases that means the block is DOA, and it's worth its weight in scrap only. Sometimes there is hope, though. It all depends on where the crack is, what caused it, and how extensive the damage. It is just metal after all, and metal can be welded.
We should preface this by saying that it's not always possible or advisable to repair a cracked block. If the specimen is common and affordable, replacing it with a solid block may be the smartest route. Where the effort to repair really makes sense is on the rare, out of production, or original numbers-matching stuff. Maybe a replacement block isn't an option, or maybe it's a date-coded original piece to the car. In that case, it's time to consider the options.
Cast iron is a fickle mistress. It's quite strong, but also quite porous and brittle. With carbon content typically in the 2 to 6 percent range, that's roughly 10 times as much as most steels. The high carbon content of cast iron causes flakes of graphite to form, which does not respond well to uneven heating. That's exactly what happens during welding, though. Whereas mild steel is more fluid and will flex and move with the heat or shrinkage during cooling, when the weld metal shrinks the stresses can easily be enough to crack brittle cast iron. Sometimes you'll hear the dreaded "ping" in an area that's not even connected to the repair.
While the explanation of the operation is pretty simple to understand, it's a delicate operation and is definitely best left to those with healthy amounts of welding experience. That's not us, unfortunately, so we turned to our friends at Miller Electric and asked for expertise. Miller Electric has quite a few welding gurus on staff who have a deep understanding of metallurgy and loads of field experience atop it, so if anyone could make it happen, it's them. For our cast-iron engine block repair, we were put in touch with Josh Sprinkle, Industrial District Manager and expert welder, whom we were told could handle it, if anyone could. Sprinkle was game and made a special order for the welding rod needed.
Sprinkle did mention something to always keep mind with any cast iron repair; even the very best planned ones with all the right materials and knowledge come with zero guarantee of success. But here we sit with a cracked 351 Cleveland that's teetering on the edge of scrappage. What have we got to lose?
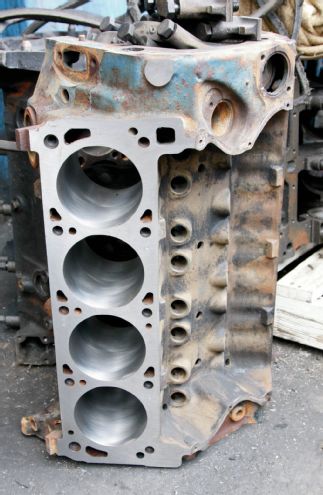
Here's our patient: a virgin bore 1970 date code 4V 351C. It has been machined and fully prepped for a build, so we do have high hopes. Good Cleveland cores can be hard to find since they don't tolerate large overbores well, thanks to core shift during production and thinly cast walls. That translates into .030-.040 overbore for most blocks to minimize the risk of overheating.
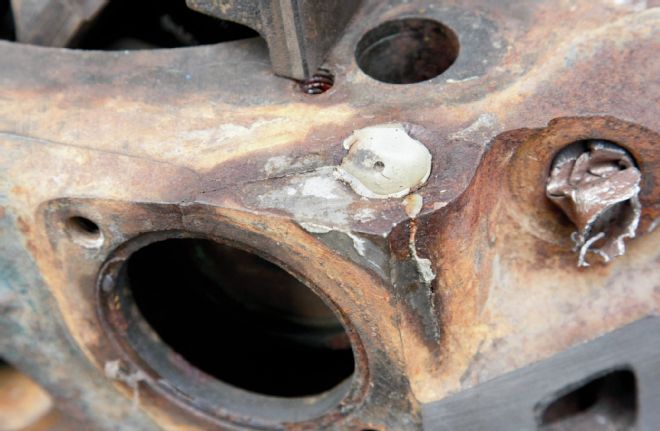
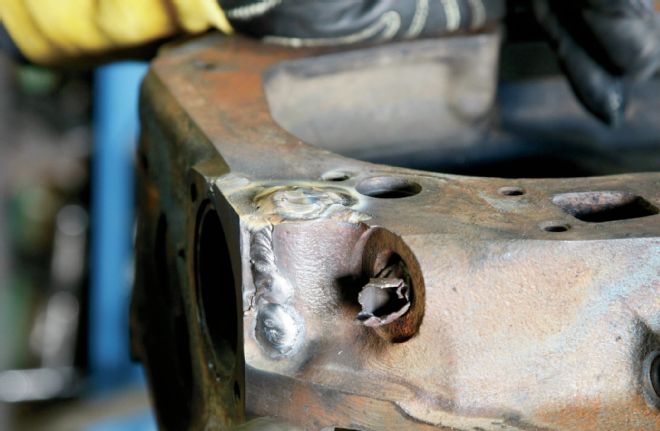
We didn't even notice this epoxied crack under the paint and grime. We're not even sure how it could have happened—perhaps extreme over tightening of a bolt. Before Sprinkle can get a clear picture of the extent of the damage and assess the possibility of welding, all the goo needs to be removed.
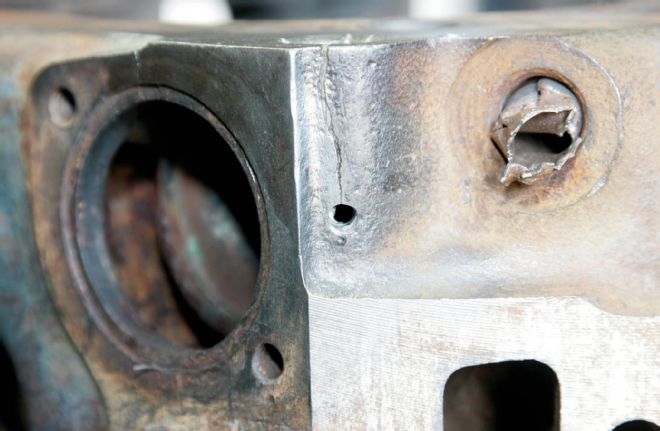
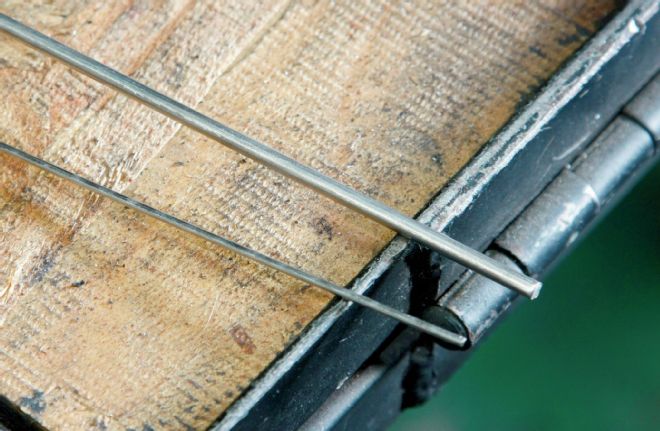
While the side of the crack crossing into the water neck passed all the way through, we were pleasantly surprised to find that the epoxy was very superficial and easy to clean out with a burr bit. Note the hole drilled at the end of the crack; this is done to “end” the crack and prevent it from spreading further when welding. Without doing this, the crack will spread right in front of the weld pool.

The crack passes all the way across the water neck, so we can't do anything there, but Sprinkle points out the two critical arms of the crack that we have to prevent from worsening to make the repair possible.
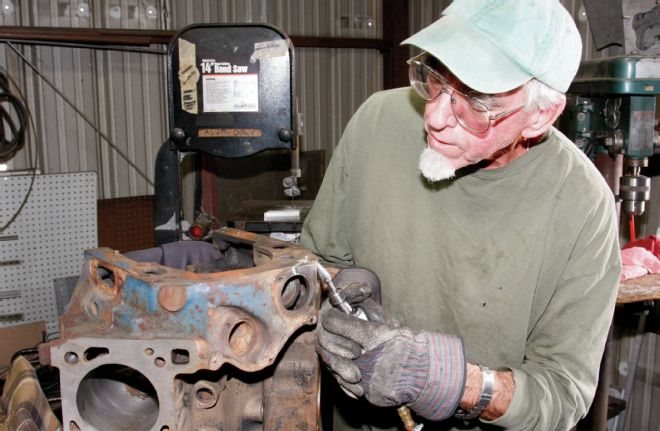
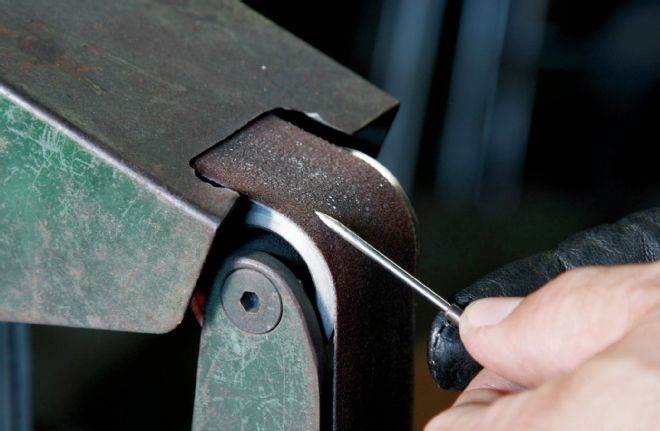
To ensure all the contaminants from the epoxy are gone and to leave a patch of clean cast iron to fill, Larry Anderson of FPS carves out a V-channel along the crack.
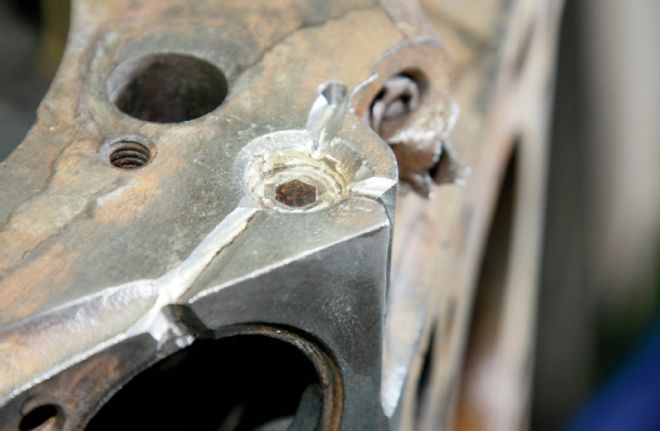
More good news: The cracks were shallow on two of the three sides, which means there is still decent strength there to withstand the stress of welding. The one completely cracked side may actually work in our favor and provide a place for slight movement of the brittle cast iron during heating.
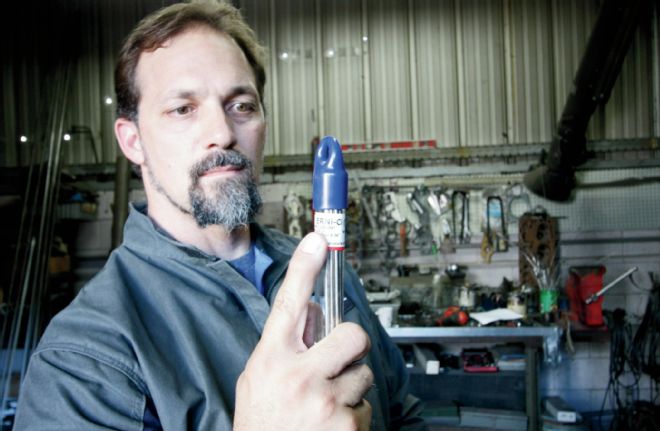
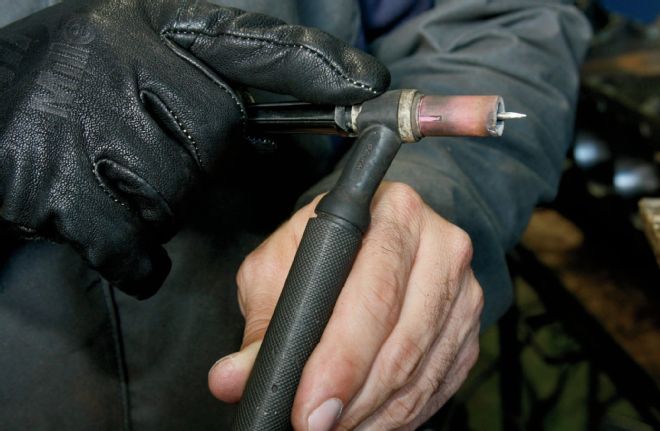
This is Miller expert welder Josh Sprinkle and his weapon of choice for this repair: ERNi-Ci. Known colloquially as "Nickel 99," this rod is designed for TIG welding various types of cast iron. It can also be used for overlay, buildup, and repair, where easily machinable welds are required. That's important considering where our crack is located.
Sprinkle brought along two diameters of Nickel 99. The 1/16-inch diameter rod will be used for most of the welding, while the ⅛-inch rod will be used for filling the bolthole the crack surrounds.
Just like with any TIG weld, a sharp, clean tungsten electrode is required. Tungsten electrode geometry has an effect on the arc shape, and therefore the weld bead size and shape. Always grind lengthwise and make the length of the pointed cone about two times the diameter of the electrode. Most importantly, only grind tungsten on a dedicated belt or wheel. If you use one that is shared by other metals, there is high risk of embedding contaminants in the tungsten that will affect the welding quality.
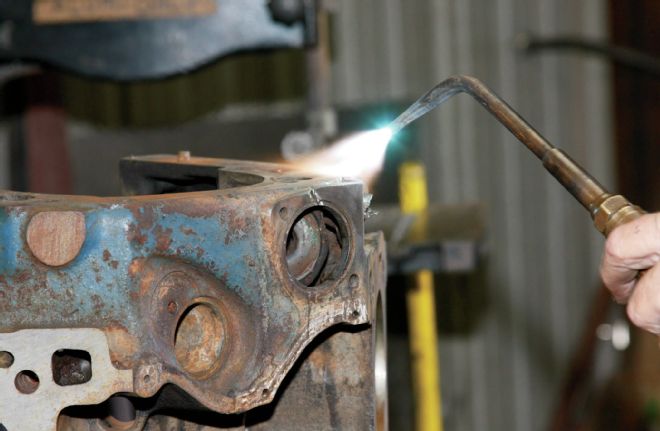
TIG welding cast iron requires significant preheating of the area with a torch to avoid shocking the material and possibly worsening the crack. A preheat and inter-pass temperature of 500 degrees F is the minimum recommended during welding, but keep it under 1,000 degrees F. Take your time here and check the temp with an infrared heat gun if possible.
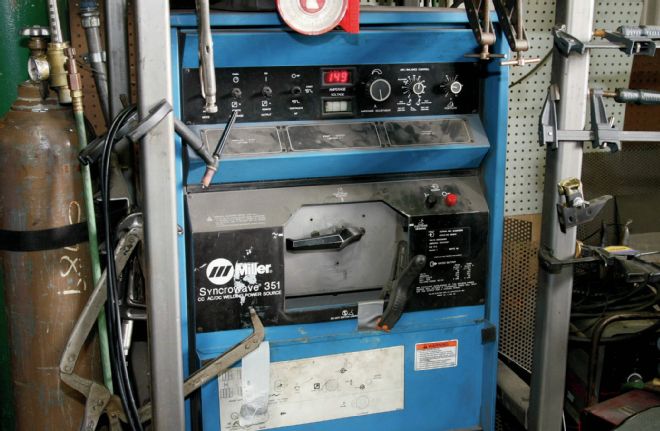
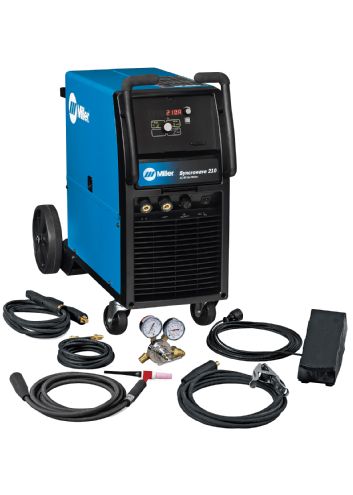
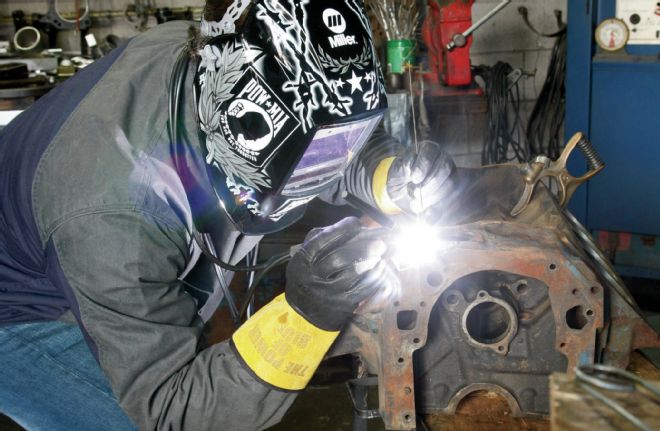
Our welding machine is a reliable old Miller Syncrowave 351. New machines are more powerful and efficient (see the sidebar on Miller's new Syncrowave 210), but all Miller welders last for freaking ever! This Syncrowave has been in steady use since the mid-1980s and still does fantastic work with very little maintenance. We love that it just so happens to be a "351" repairing our 351C. Sprinkle set the amperage for 149.
The torch and gas cap that Sprinkle will be using is a standard Weldcraft WP-20 that is used on many Miller platforms. A gas lens would perhaps work best, but Sprinkle did not think it was a necessity. Miller now owns Weldcraft, so upgrades and new parts can be found through their website.
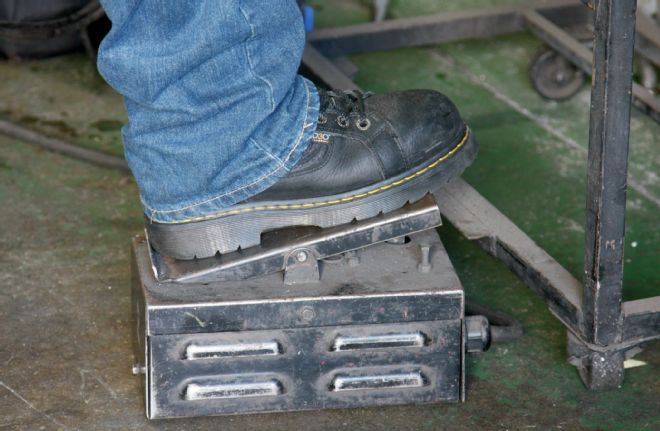
TIG welding requires two hands at all times, so a foot pedal is mandatory. It's quite a bit less ergonomic than the modern Miller stuff, but this old crate-shaped foot pedal proved to work just fine for our repair despite thousands of hours of use.
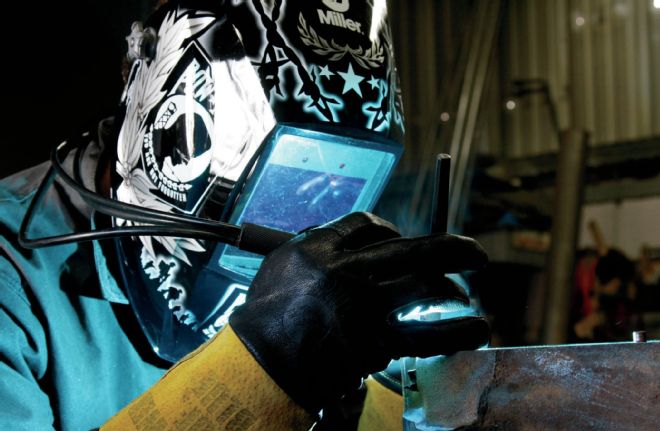
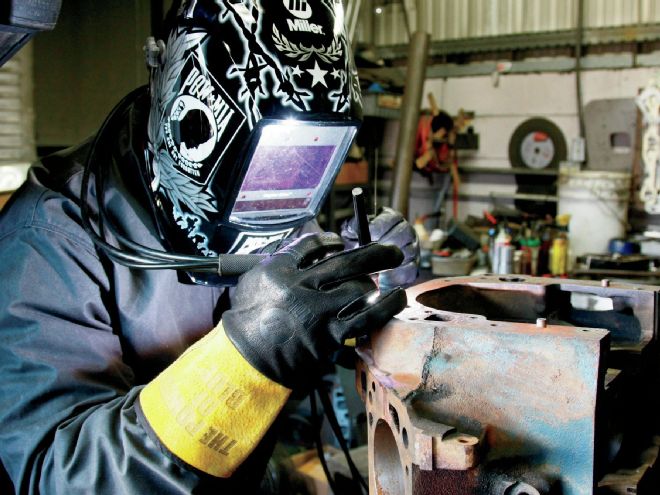
Once the block was sufficiently heat soaked in the area, Sprinkle was ready to don his favorite Miller hood and lay the first, and perhaps most critical, weld. This reaction of the cast iron here would tell him a lot about the potential success of the repair. Plus, he would immediately know whether the crack had been sufficiently cleaned.
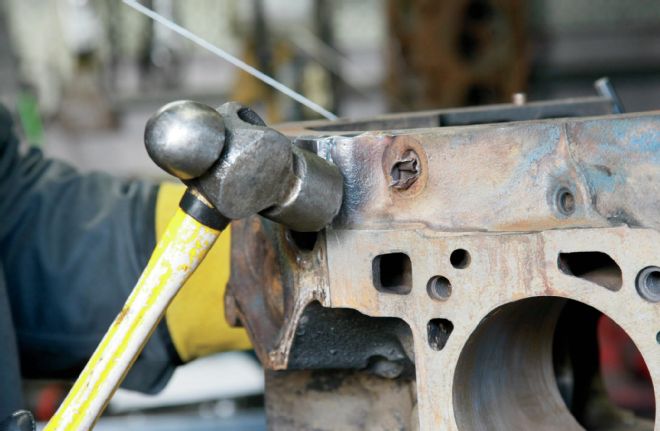
Peening the weld bead is also highly recommended to help relieve the stress. This is done by lightly tapping the bead with a moderately heavy hammer, like this ball-peen.
So far so good! The crack was extremely clean, and the high nickel content of the early Cleveland block took the weld very well. It's a good idea on complex cracks like this to restrict the welds to small, approximately 1-inch-long segments to prevent the buildup of residual stress.
Some prefer to be seated, but Sprinkle doesn't like to make himself too comfortable. This last pass is very critical since each pass has put a little more stress into the material
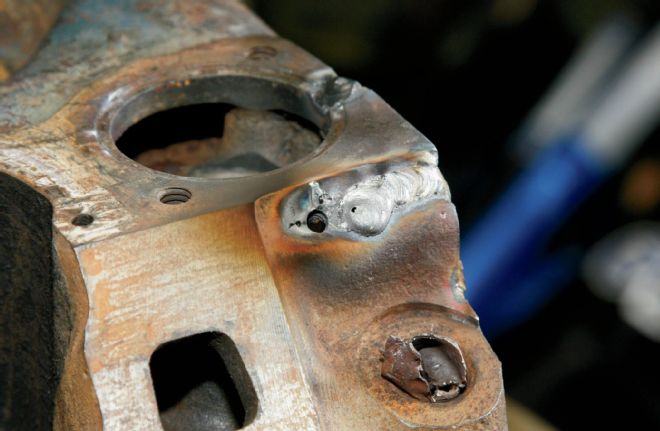
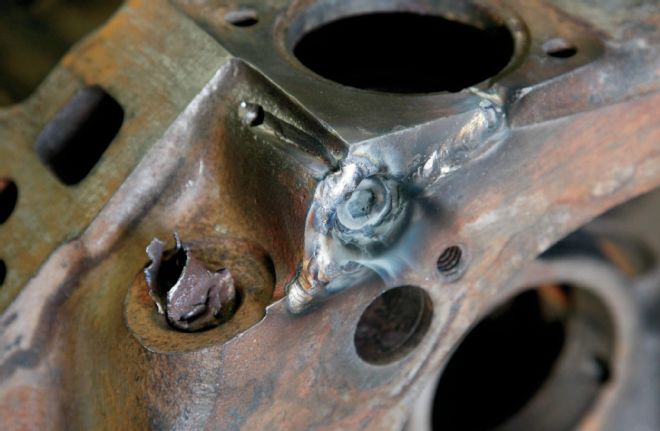
Everything looked better than anticipated, Sprinkle says. Our block repair was exhibiting great signs of success. From here, Sprinkle will fill the relief hole, then use the ⅛-inch Nickel 99 rod to pool and totally fill in the bolthole on the front side.
After the last fill, Sprinkle brushed off the area with a clean wire brush to closely examine his work.
All in all, the welding process couldn't have gone more perfectly. All of the beads will be left as-is except for the small area on the water neck that will require light machining to form a seal.
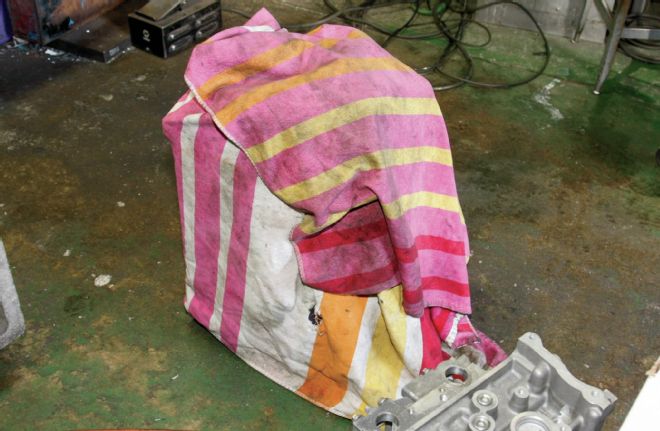
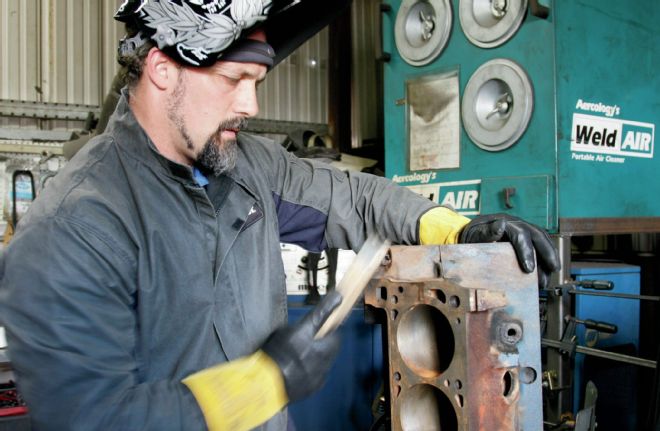
We're not totally out of the woods, though. The last critical part is cooling. The cast iron needs to cool very slowly. Ideally we'd bury it in sand or wrap it in thermal blankets, but on a fairly warm Southern California day we're able to get away with a pile of beach blankets. This part is a bit nerve-racking since catastrophic failure is possible. Fortunately we never heard the distinctive "ping" sound of cast iron splitting. Our Cleveland should be ready for a future build!