There are instances where OEM design is so good that it lends itself to a broad range of applications within the high-performance aftermarket. Some good examples are the Mustang II frontend, Corvair turbo mufflers, and the GM HEI distributor. The GM one-wire HEI distributor is the world's simplest, most integral design ever introduced, and thanks to a clear distributor cap from Performance Distributors it's also the easiest to set initial timing. For those unfamiliar with the term, initial timing is what needs to be done to an engine's ignition system before the engine can be started for the first time.
On those gearhead TV shows it's always a big anticipatory moment whether the engine will fire up or not, but in the real world there's never a question if the job has been done right. The first step is to bring the engine to TDC (top dead center), but there's a 50/50 shot at getting the timing 180 degrees out if a few checks aren't put into place. Some like to depend on removing the number 1 spark plug, and using a finger to feel for compression as the engine comes up to TDC, and then there's the method I believe is more absolute.
I prefer to remove the valve cover on the bank with the number 1 cylinder and establish the compression stroke by seeing if the exhaust and intake valves are closed at TDC. Naturally the location for number 1 on a Ford and Chevrolet engine are different, so the message here is no matter which make of engine is in question always verify the location of number 1. The basics discussed in this article apply to every internal combustion engine ever made.
There are several brands with GM-style HEI one-wire distributors on the market, and with varying degrees of quality and pricing. I've tried the really inexpensive HEI distributors and think they're great for installing into something one plans on selling the next day. My experience was the distributor cap and rotor disintegrated immediately, and when diagnosed they were the source of a bad miss.
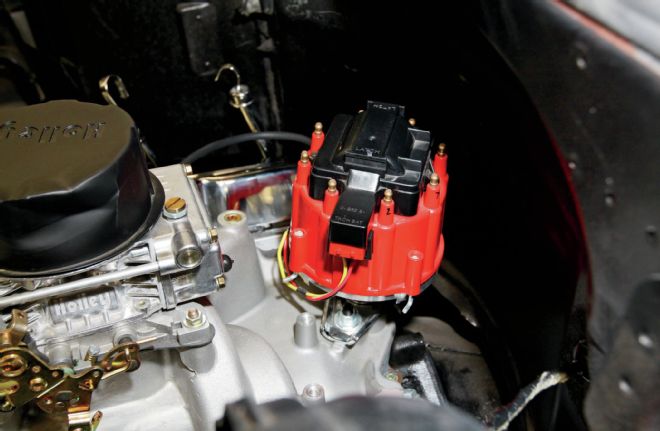
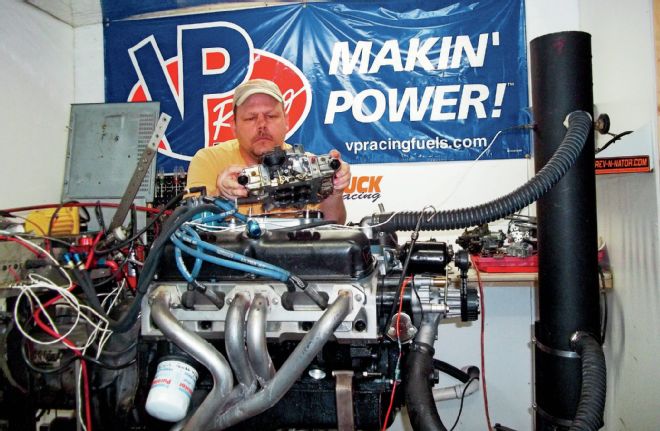
There's no economy to be found in an unreliable part that will ultimately fail. In the last eight years I've installed four Performance Distributors DUI (Davis Unified Ignition) HEI-style distributors into my vehicles with complete satisfaction. I verified a horsepower increase for my 1979 C10 on the dyno, and made noticeable gains in fuel mileage.
The most recent installation was last year into my 1927 Ford Track T with a 350. It's the custom-build approach that sets Performance Distributors ahead of the pack. With the cam specs handy I called and specified I wanted the DUI calibrated with an advance curve for 87-octane regular unleaded gas. The engine fired right up the first time, and has run crisp without pinging ever since.
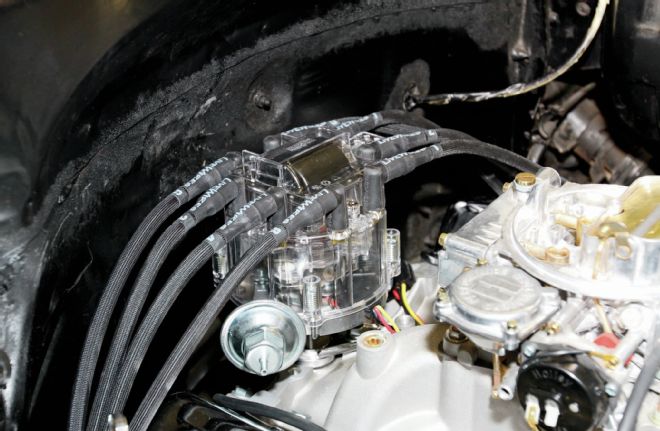
1. In addition to being able to see the rotor contact the number 1 plug at TDC the clear cap DUI cap enables one to verify if the vacuum advance works.
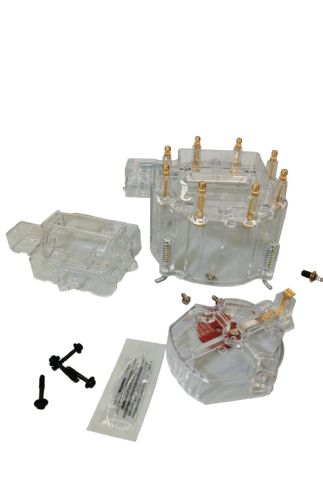
2. Performance Distributors clear cap comes complete with clear rotor, clear coil cap, and all hardware including the coil insulator and dielectric grease used on the coil insulator.
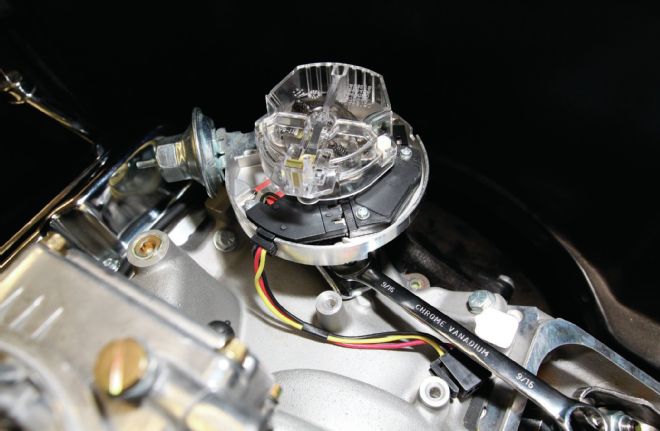
3. The existing distributor wasn't initially timed. It was removed by completely removing the distributor pinch clamp and lifting the distributor out.
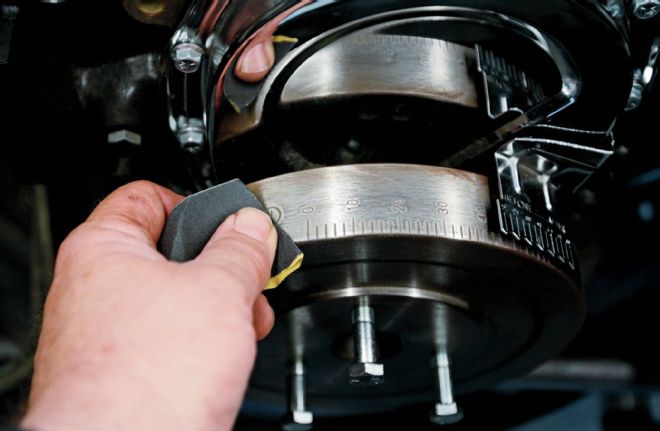
4. The timing (degree) marks on the harmonic balancer were made more visible by sanding with 220-grit sandpaper.
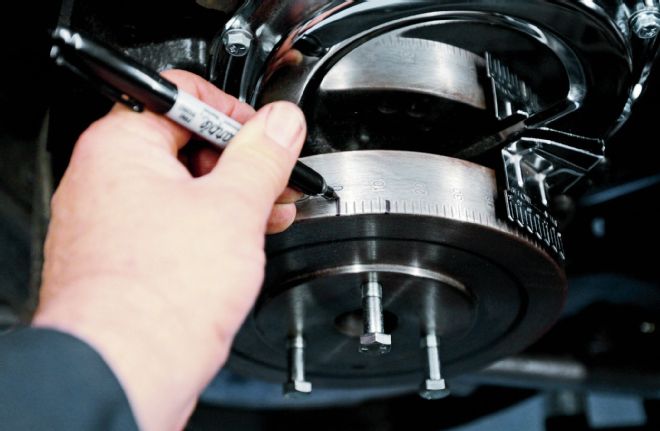
5. The TDC (top dead center) mark indicated by a zero was made more visible and identified with a Sharpie marking. A bright paint color works even better.
6. Only the left bank valve cover needs to removed to gain sight of the valvetrain. To avoid an oil leak, a new valve cover gasket was installed. Do not over-tighten.
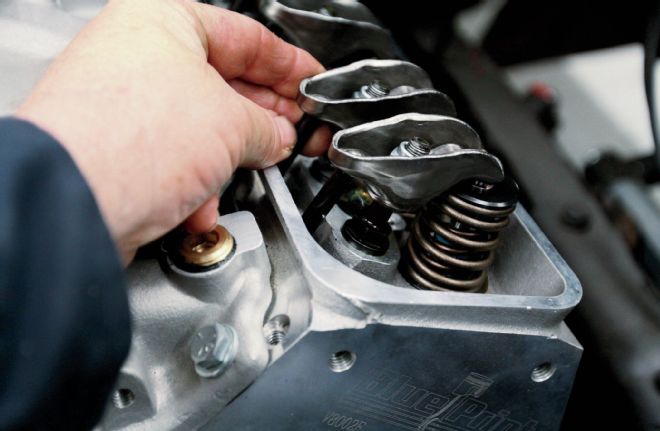
7. At top dead center the intake and exhaust valve will be closed. This is verified by checking (spinning) the pushrod will turn freely with slight resistance.
8. Timing specs vary, but a good rule of thumb is to set the timing at 12 degrees advance once the engine has started up for the first time. Use a timing light with vacuum advance disconnected.
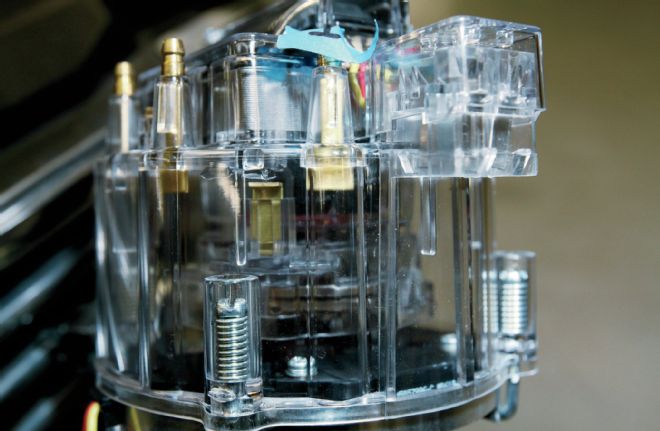
9. Here's the brass rotor arm as it meets up with the plug wire terminal on the clear distributor cap. The number 1 terminal can be set at any point on the distributor cap.
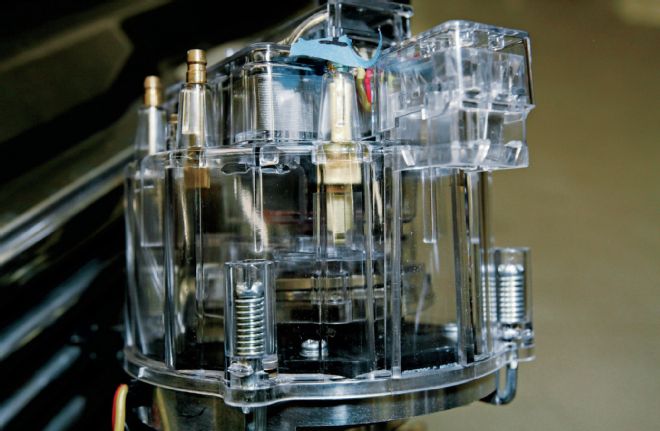
10. Here's the rotor arm perfectly aligned with the number 1 (plug wire) terminal on the distributor cap. The initial timing is set in this position.
11. Ultimately I moved number 1 clockwise one place on the distributor cap because the distributor fell into place easiest at this position.
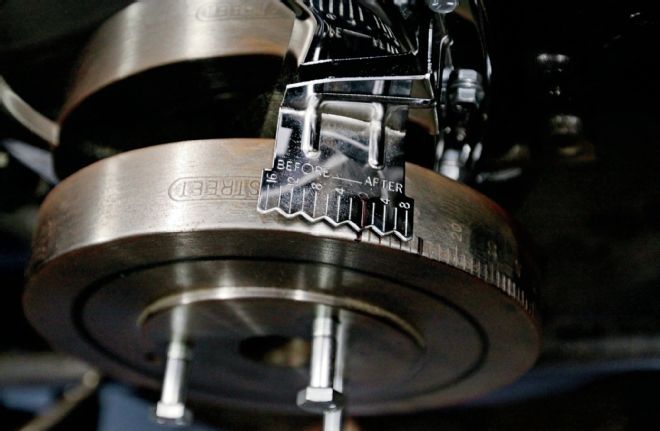
12. Making a chart like this simplifies setting initial timing. Performance Distributor live wires are indicated on both ends, further simplifying the job.