Short of swapping intake manifolds, installing a performance camshaft might be the classic muscle-car how-to of all time. For the budget-based, this means a flat-tappet cam. Amongst those, the private-label cams from the well-known speed emporiums like Summit Racing are some the least expensive offerings. While the days of $29 cams are long gone, if you really take all the details into account, the cam and lifters are only part of the total cost. Add a timing set, gaskets, RTV, break-in oil, filter, and a weekend's time, and the combination of cost and effort is enough to emphasize you do this right.
We realized it's been years since we've offered a how-to on doing this swap in the car, and when our friend Eric Schmiege said he was looking for a new cam and a little more power for his 454-powered 1965 Bel Air, we had our willing subject. Along with Escondido, California, pals Doug Eisberg and Eric Rosenthal, we attacked the big-block. We ordered a Summit Racing cam, lifters, a timing set, and a gasket set, then took our time to make sure we did it right. After starting on Saturday morning, the Bel Air was back on the road by noon Sunday after a wrenching time of 14 hours, 44 minutes. The desired rumpity exhaust note made it worth the effort, and all was right with the world. Here's how we did it.
Cam Specs
Camshaft: Summit 1303 Adv. Duration Duration at 0.050 Lift Lobe Separation Angle Intake 296 238 0.540 110 Exhaust 306 248 0.540Parts List
Description PN Source Price Cam/lifter kit SUM-K1303 Summit Racing $109.97 Timing set SUM-66610-9 Summit Racing 39.97 Intake gasket SUM-G2413 Summit Racing 17.97 Valve cover gasket SUM-G2201 Summit Racing 5.25 Permatex RTV 82180 Summit Racing 5.99 Gasgacinch 9300 Summit Racing 5.97 No-Rosion additive No-Rosion Applied Chemicals 9.97 Spring comp. tool SUM-906784 Summit Racing 44.97 Posi-Lok 3 jaw puller Model 104 eBay 104.99 Balancer pull/install W89711 Summit Racing 69.97 Comp Break-in 10W-30 1590 Summit Racing 5.97 (x5) Fram oil filter PH30 Summit Racing 5.97 Comp Muscle Car 10W-30 1594 Summit Racing 8.97 (x5)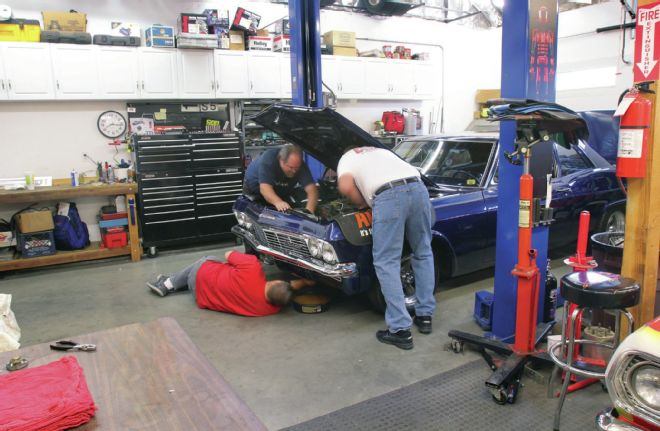
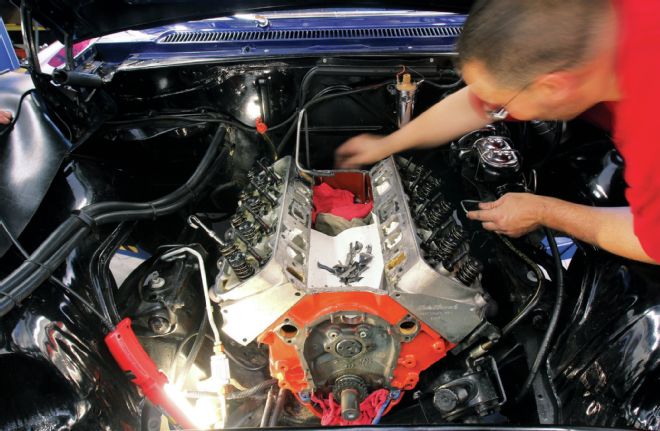
The crew started right at 8 a.m. by draining the coolant, removing the radiator, and unbolting the fuel pump. The boys removed the distributor and the Offenhauser 2x4 intake manifold. After that, they also removed the rockers, pushrods, and lifters—keeping them in order in case someone might want the original cam and lifters.
If you don't have a harmonic balancer remover/installer tool, the big chain stores rent them. If you plan on doing lots of engine work, buy a good tool with Torrington bearings. Summit Racing sells several versions from companies like OTC and ProForm.
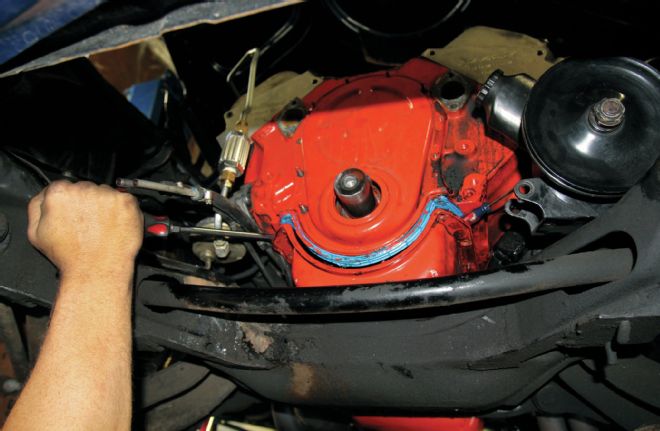
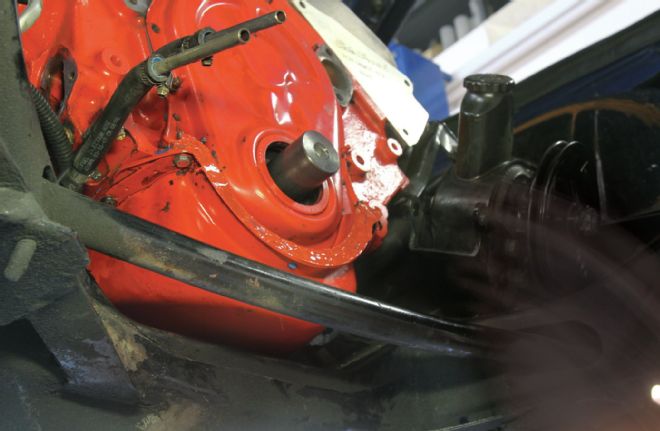
Working under the car, remove most of the oil pan bolts and loosen the rest to drop the pan far enough to allow removing the timing cover. This engine was assembled with Fel-Pro's one-piece pan gasket, instead of a multipiece gasket set. Though we tore the right front corner of the gasket while removing the timing cover, it can be fixed with RTV. We spaced the pan down with two small screwdriver handles.
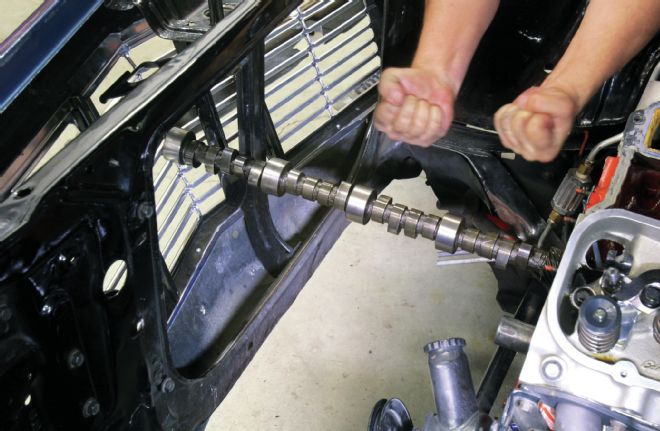
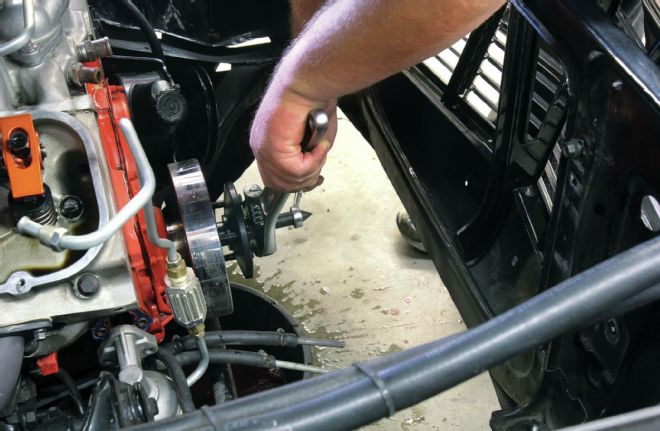
Before starting, we measured between the timing cover and the grille to see if the cam could be removed with the grille in place. We thought it would work but knew it was going to be tight. It turned out we were short by about 1 inch. Doug had the idea to remove the motor-mount bolts and jack the engine up. Because the Bel Air has an angled grille, Eric was able to slide the old cam out—avoiding a tedious two-hour grille R&R effort.
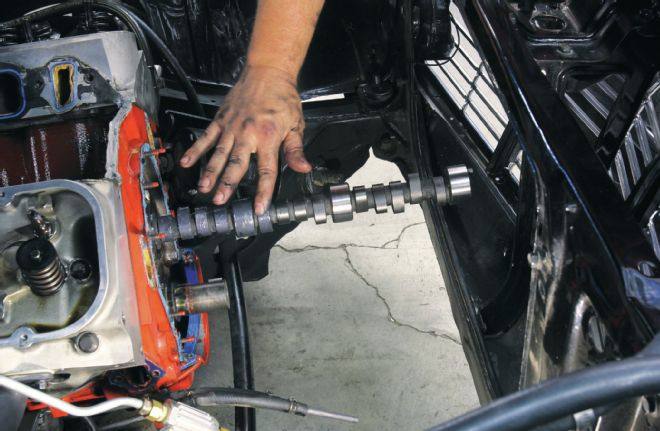
With the engine still raised off the mounts, we installed the new cam, coating the lobes (including the fuel-pump lobe) with the moly lube that comes with the cam. We used engine oil on the cam journals.
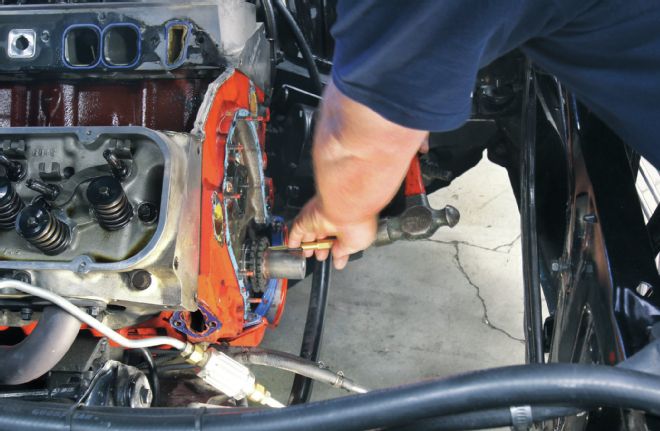
We used a Posi-Lok three-jaw puller to remove the original crank gear, and then used a brass drift to fully seat the new gear on the crank. It can be installed in different positions (4 degrees advanced, 4 degrees retarded, or 0 degrees), but we installed the cam using the “0” or straight-up position. We didn't degree the cam, although you could if you desire.
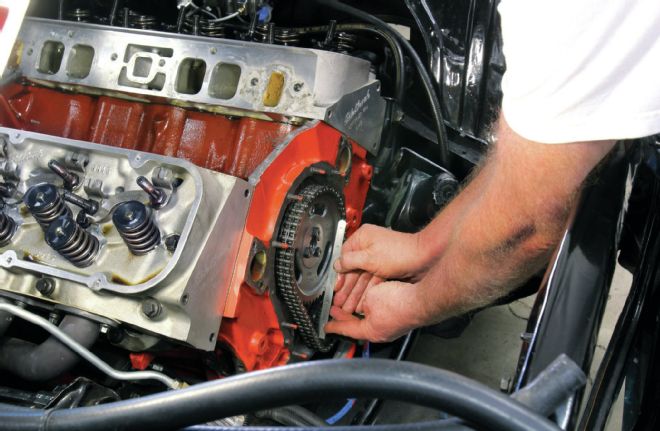
We carefully lined up the timing marks on the crank and cam gear and put thread-locking compound on the three cam bolts. We also used a machinist scale to ensure the cam gears were properly aligned
With the cam timing set and a new gasket in place, Eric installed the cover and replaced all the pan bolts. After carefully positioning the pan gasket where it broke at the passenger front corner, Eric filled in the whole front gasket area with Permatex RTV silicone sealant to help prevent oil leaks that seem to occur here.
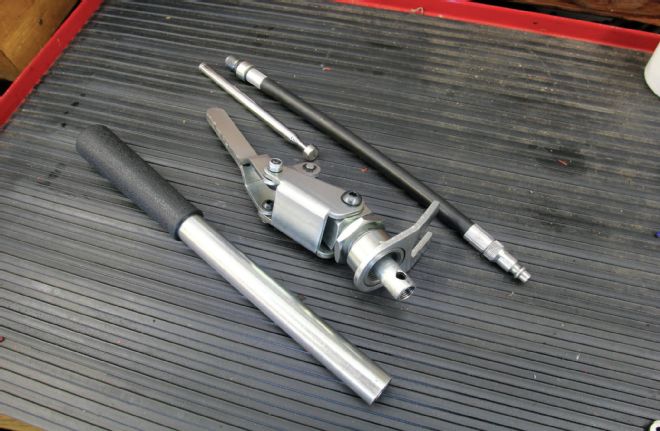
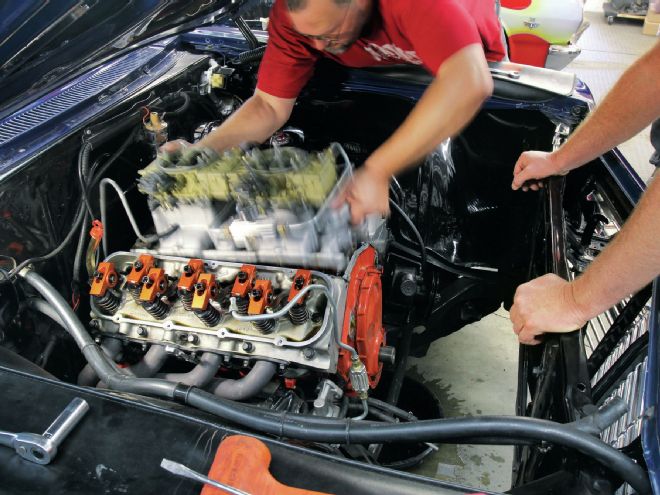
Eric's Edelbrock heads use dual valvesprings, so we used this Summit over-center-style valvespring compressor to remove the inner springs, reducing the load on the new cam during the crucial break-in period. It screws down on the rocker studs and uses leverage to compress the spring. This tool works really well in the engine compartment because the handle can be positioned anywhere in a circle around the spring to clear obstructions.
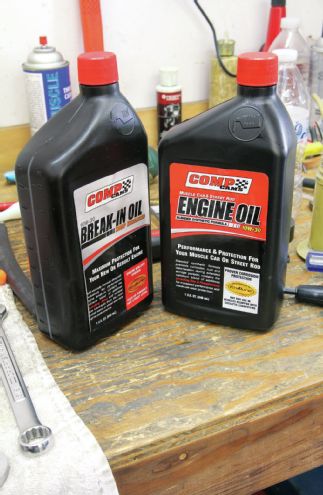
We took this moment to drain the oil and refill the engine with Comp Cam's Break-in oil and installed a new Fram oil filter. After the engine has about 200 to 300 miles on the break-in, Eric will change to Comp's Muscle Car 10W-30. We also used Applied Chemicals' No-Rosion coolant additive to protect the aluminum radiator from corrosion.
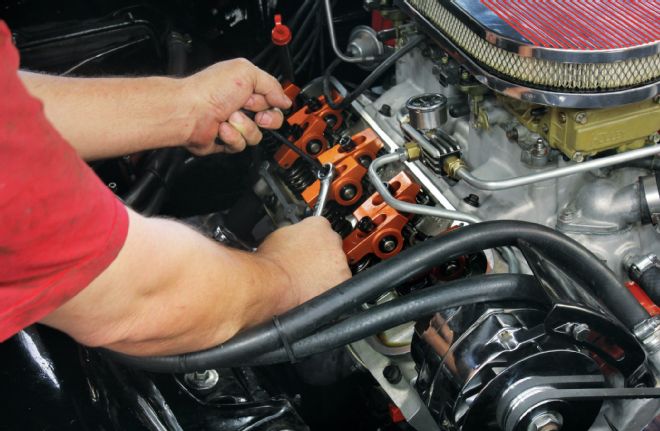
We then set a quarter-turn preload into each lifter using the exhaust-opening and intake closing (EO-IC) method. Working on each cylinder individually, bump the engine until the exhaust begins to open and set the preload on the intake valve. Then turn the engine until the intake is nearly closed and set the exhaust preload. Do this for all 16 valves.
After removing all the old intake gasket material, we installed the new ones using Gasgacinch gasket sealer around the intake ports and RTV around the water outlets. Some types of RTV sealant can dissolve in the presence of gasoline, so use Gasgacinch or Permatex adhesive or a fuel-resistant silicone sealant around the intake ports.
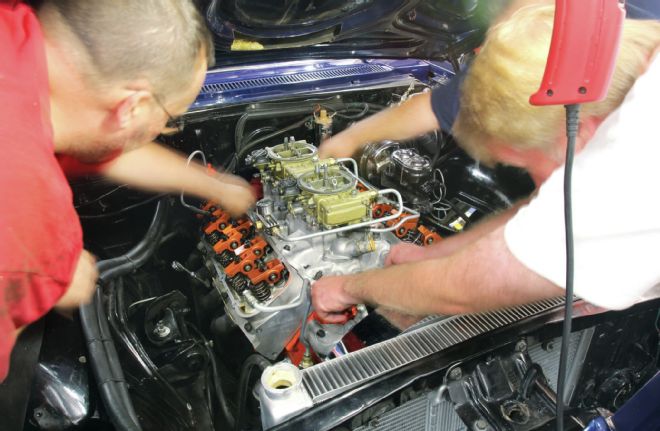
The team replaced the intake and torqued it down. We set the initial timing at 15 degrees BTDC on cylinder one and positioned the distributor with the rotor pointing to the No. 1 plug wire. Double-check that the initial timing is correct so the engine will start as quickly as possible.
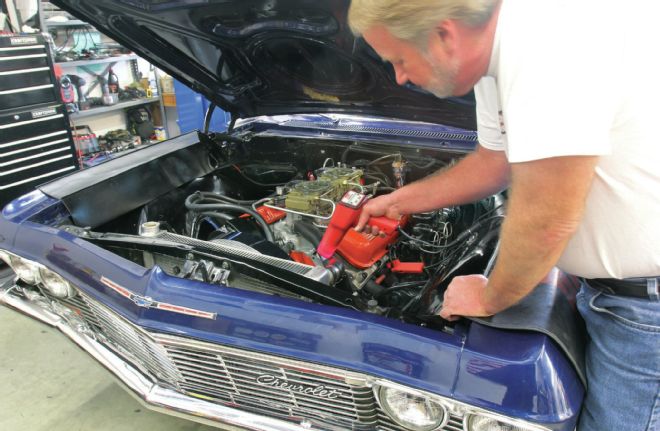
After the guys replaced the valve covers, spark plugs, and wires, we made sure there was plenty of fuel in the carburetors, hit the throttle three times to prime the intake, and the engine immediately fired. One rocker clattered a bit, but we maintained 2,000–2,500 rpm and rechecked the timing (with the vacuum advance disconnected) to ensure it was accurate. Eric monitored the engine temp and oil pressure and constantly varied the rpm. This is important because the lifters are splash-oiled, and varying the engine speed ensures plenty of oil is slung off the crank and onto the lifters. Do not allow the engine idle for the first 20 minutes.
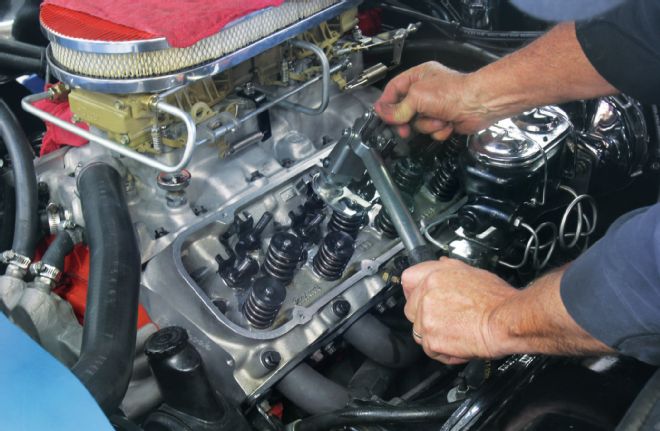
With the cam broken in, we took the car for a quick spin to make sure it ran acceptably, then we replaced the inner valvesprings and set the lifter preload a final time. The engine ran rough upon startup, and we discovered two lifters were set with too much preload because the new lifter plungers depressed very easily even after they were charged with oil. This required sneaking up on zero lash very carefully.
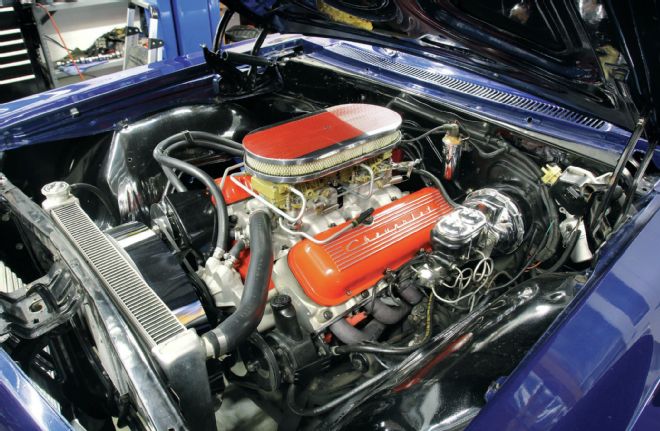
Once we had the 454 buttoned back up for the final time, the engine didn't look any different, but adding roughly 10 degrees of intake duration over the previous cam made for a great running Rat. Those are 600-cfm 0-1850 Holleys that Eric has tweaked with jetting and idle feed restrictor trims to create a sweet package.
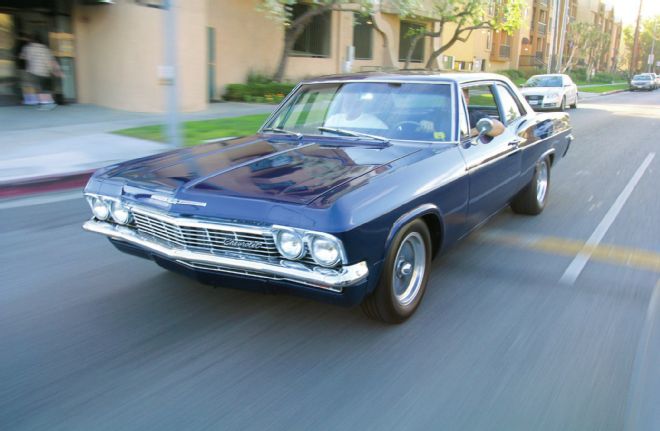
With 10.5:1 compression and a new cam, Eric's '65 Bel Air now runs harder in the midrange and at top end. We added 5 degrees initial timing (from 12 to 17 degrees) to improve idle quality and create sufficient engine vacuum (9.5 inches of vacuum at 750 rpm in gear) to support the power brakes. We will have to modify the distributor curve to remove three degrees of mechanical advance to compensate for the added initial, but for now the car runs great.