The Problem
Malcolm Dunk has owned his 1965 El Camino for years. It’s overheated for years. And he’s torn his hair out trying to fix it for years. The present combo sports a mild, 9.5:1-compression, 0.030-over, 350 small-block with an RV cam, an Edelbrock 600-cfm Performer carb on a Performer intake, a Performance Distributor large-cap DUI spark-sorter, and small-tube headers. A swapped-in 700-R4 automatic overdrive transfers the torque back to a 3.73:1-geared 10-bolt rearend. Up front, V-belts spin a Sanden air conditioning (A/C) compressor, a generic “long-nose” iron water pump, and a power-steering pump. Like many old cars, the pulleys and brackets are a smorgasbord of wrecking yard and custom aftermarket brackets of unknown origin. Still, Dunk’s four-core desert cooler radiator, beltdriven flex-fan, coolant-recovery tank, external auto trans cooler, and 180-degree thermostat should have been adequate.
 Owner Malcolm Dunk had a frustrating low-speed overheating issue on his mild 350 small-block–powered ’65 El Camino.
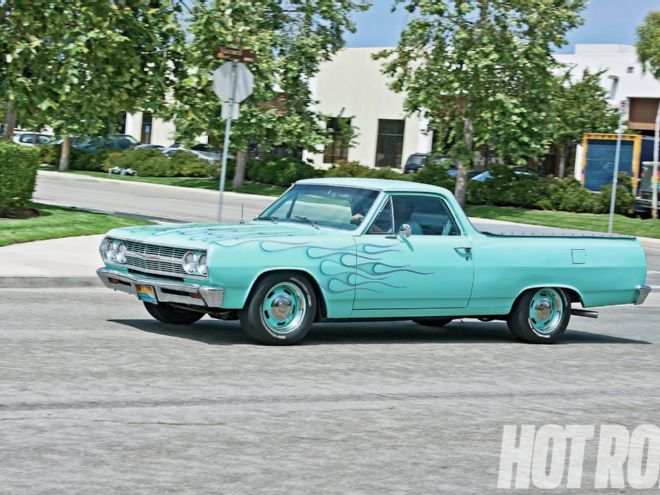
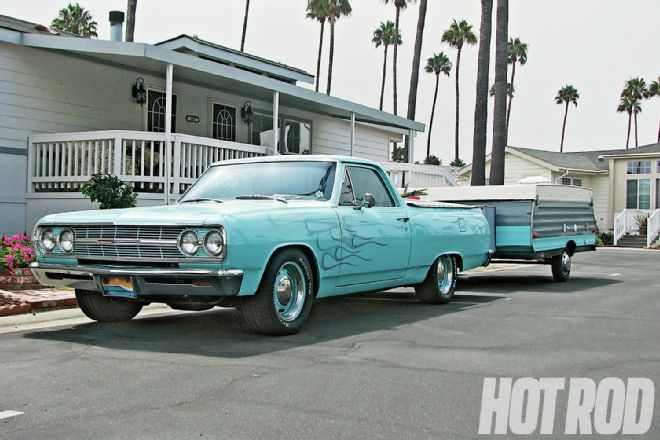 Cool dude Dunk loves to hit SoCal beaches in his ’65 El Camino, camp overnight, and go surfing. Unfortunately, the car was just “uncool.” Pic: Malcolm Dunk
But as explained by daughter Meghan Dunk, who originally requested the rescue, “Dad and my mom love to drive the car and tow a pop-up tent trailer, but even without the trailer, they can only drive it on cooler days or for short distances. Dad has been dealing with this for years. I hate to see him so frustrated! He has installed two different mild rebuilt 350 engines. He has changed water pumps, radiators, fans, pulleys, and who knows what else.”
Malcolm himself says he’s tried high-flow water-pumps, an aluminum radiator (“it rotted out after a year, perhaps from electrolysis due to poor grounding”), a high-flow thermostat, different crank and water pump pulleys to slightly underdrive the pump by 6 percent, an auxiliary heater core up front (since removed because “it didn’t do much”), and an internal spring in the upper hose (“sometimes it gets sucked flat”). The patches didn’t accomplish much: “The car cruises at 210–215 degrees and is even hotter at idle. The only time it won’t overheat is if the ambient air temperature is less than 65 degrees. I don’t feel comfortable if the car gets over 210. I’d like to see it run at 180–190 all the time. It could even go to 200 with the A/C running—if I knew that was as high as it was going to go.”
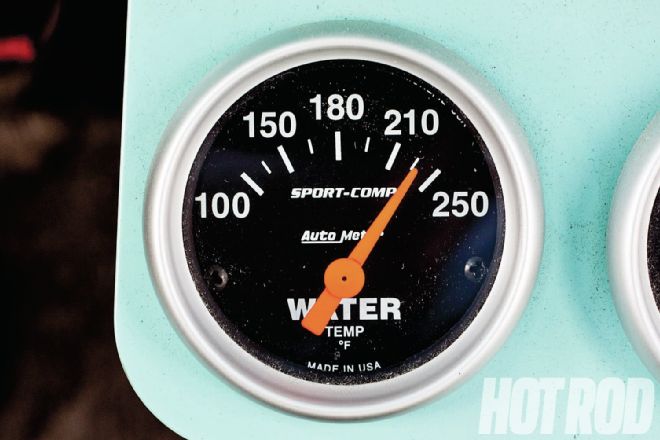 Definitely hot under the cowl: 225 degrees and climbing after 10 minutes, with the car sitting stationary in Drive with the wheels chocked.
The Diagnosis
Dunk, a Thousand Oaks, California native, is only half an hour away from Granatelli Motor Sports in nearby Oxnard. Owner Joe Granatelli, one of the legendary Andy Granatelli’s grandsons, grew up living and breathing race cars. He can fix just about anything, early or late. Dunk limped the car over to the shop, where Granatelli confirmed that at steady-state idle, with the wheels chocked and the 700-R4 in Drive, the coolant temp rose to 225 degrees in 10 minutes—and kept on climbing. A handheld infrared heat gun verified that Dunk’s problem was real, and not incorrect data supplied by a defective gauge. At this point, the car was prudently shut down to prevent engine damage.
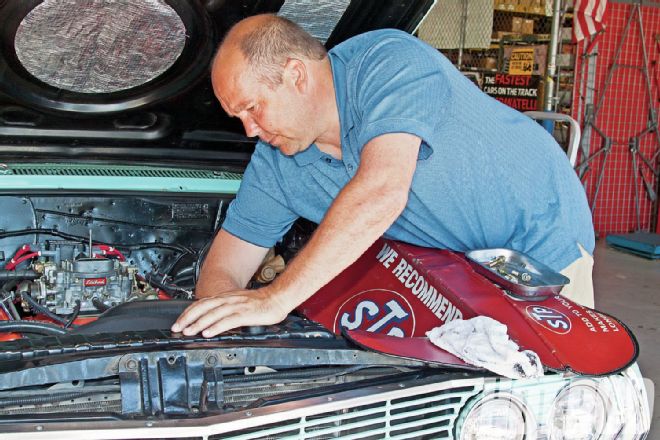 Joe Granatelli at Granatelli Motor Sports diagnosed a bunch of cooling system glitches. He and his crew soon set things to right.
Removing the radiator cap revealed air bubbles in the radiator, indicating there were also steam pockets in the engine. Further investigation determined three primary contributing factors to the air-bubble problem, plus two other issues:
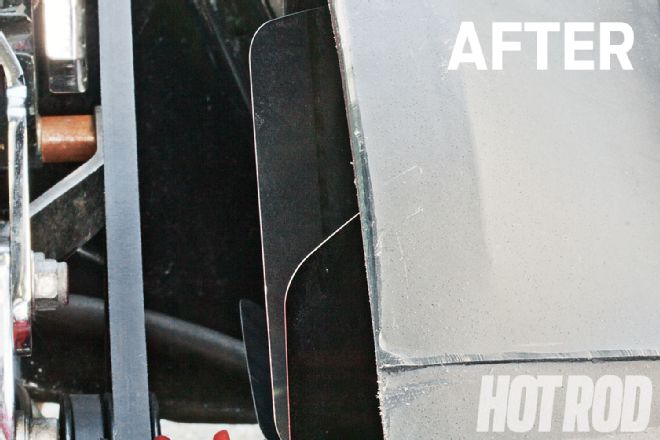
1. The top hose was higher than the radiator cap.
2. The coolant recovery system wasn’t working.
3. The engine was installed at an angle—higher in front, lower at the rear.
4. The fan blades were positioned too deep within the fan-shroud.
5. The ignition timing was retarded.
Issues 1–3 induced vacuum in the sealed cooling system’s upper hose (no wonder it sucked flat). Issues 3 and 4 negatively impacted fan efficiency. Issue 5 in and of itself can cause an engine to run hot.
The Initial Fixes
Granatelli reworked the top hose, lowering it so the radiator cap would correctly be the coolant system’s high point, then repaired a manufacturing defect in Dunk’s generic parts-store coolant recovery system. As for the engine angle, ideally the motor should sit near-level in the chassis. Because they receive coolant last, the rear cylinders tend to run slightly hotter anyway. In this case with the back of the engine lower than the front, it was even harder to evacuate air and steam from the rear of the motor (this also contributed to positioning the engine outlet hose higher than the fill-cap). Dunk says the engine positioning was deliberate to prevent the bulkier 700-R4 trans from hitting the floorpan.
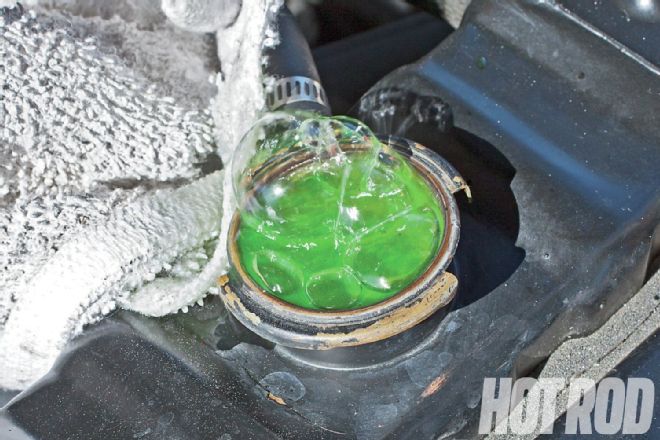 Boil, toil, and trouble! Removing the radiator cap revealed air bubbles in the coolant system. The engine wasn’t self-bleeding.
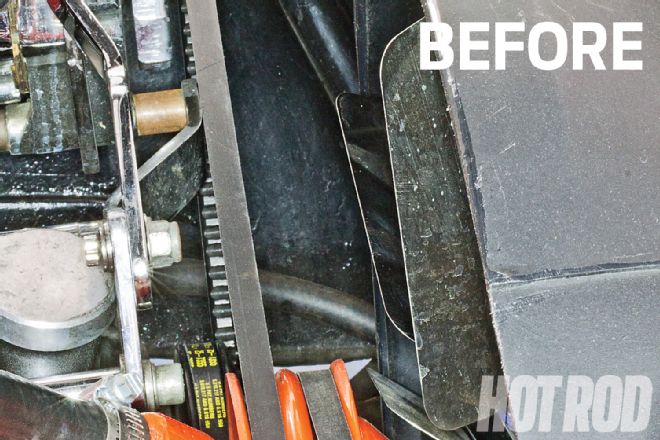
Already on the car when Dunk bought it, the long water pump plus the engine’s installation angle adversely affected the cooling-fan installation. Everything had been pushed forward, closer to the radiator, causing interference between the stock ’65 small-block fan and fan shroud. Dunk’s attempted solution had been a similar-vintage fan shroud off a short water-pump big-block; it’s longer in front than a small-block, so the fan shroud is shorter. Combined with a new, smaller-diameter 11-inch flex fan that cleared the shroud with the angled engine, this prevented actual physical interference, but blade positioning with the mismatched parts still wasn’t right.
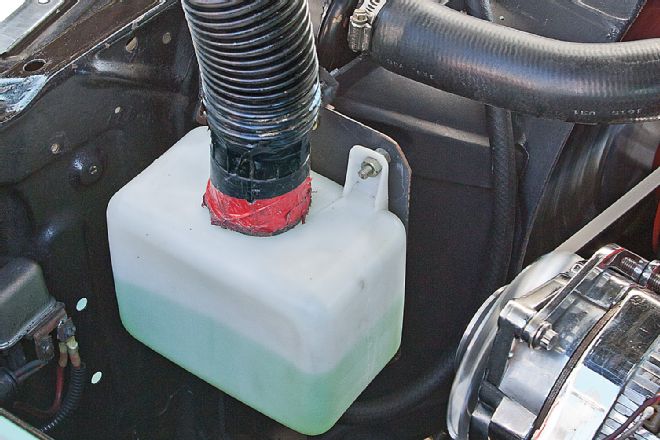 The coolant recovery system wasn’t siphoning. Radiator overflow was neither captured when the engine was hot nor returned when it cooled. Trying to jump-start it with a shop vacuum applying suction to the tank had no effect. The fact that the several-years-old generic parts-store tank was still pristine white should have been a clue that it had never worked.
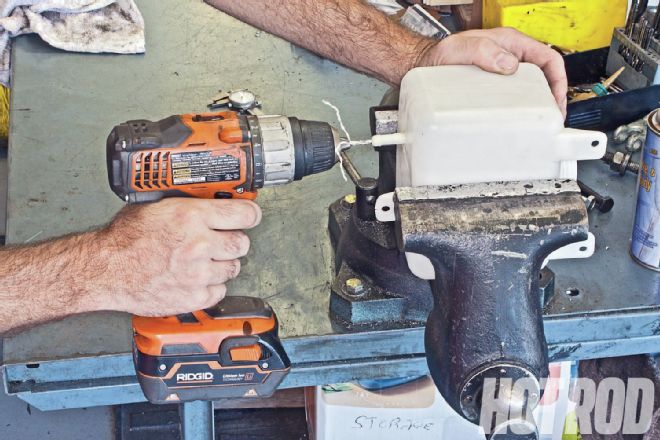 WTF? It turned out the recovery system had a manufacturing defect: there was no hole in the hose nipple on the bottom of the tank. Drilling a 5⁄64-inch hole through the nipple was the easy fix…once the problem was finally identified.
Ideal fan blade tip location is about “50/50”—halfway in the shroud, halfway out—with about ¾-inch projected blade tip-to-shroud clearance under operating conditions. Granatelli installed a shorter fan pulley-hub spacer that got things a lot closer, but the top and bottom blade offset still varied due to the engine’s weird installation angle.
 The weird combo of a late-model long small-block water pump, an early big-block short water-pump shroud, a tilted engine, and a 1-inch fan spacer positioned the fan blades too deep in the shroud for max efficiency. About half the blade should extend out of the shroud.
On a test drive, Granatelli observed the engine was slightly doggy at cruise. A timing check revealed the total advance was just 31 degrees. Retarded timing can cause overheating, so Granatelli dialed in another 4 degrees initial, raising total mechanical advance to 35 degrees. The engine performed better and cruising temps dropped a tad, but low-speed temps still didn’t improve. At least the air bubbles were gone. If they’d persisted, the next step would be a compression check to look for a possible leaky head gasket.
Clearly, surgical strikes weren’t cutting it. Time for shock and awe. Basically, there were three possible big-gun options: Re-engineer the drivetrain installation to level the engine and trans, return to a short water pump, or upgrade to a modern, high-quality aluminum radiator and electric fan. Leveling the drivetrain would require lowering the engine and trans in the chassis and/or modifying the floorpan. That might upset the driveshaft angle between the longer late-model trans and rearend pinion yoke, causing new issues. Installing a “correct” short water pump would mean replacing the entire front drive setup with new pulleys and brackets. There was no guarantee that the first two options, complex and time-consuming as they were, would ultimately resolve the cooling issues. That left the new radiator and fan combo as the most practical choice without major surgery.
 A ¾-inch spacer got things a lot closer, at least at the top. It was still too far in at the bottom.
The Fix: Flex-a-lite Radiator and Electric Fan
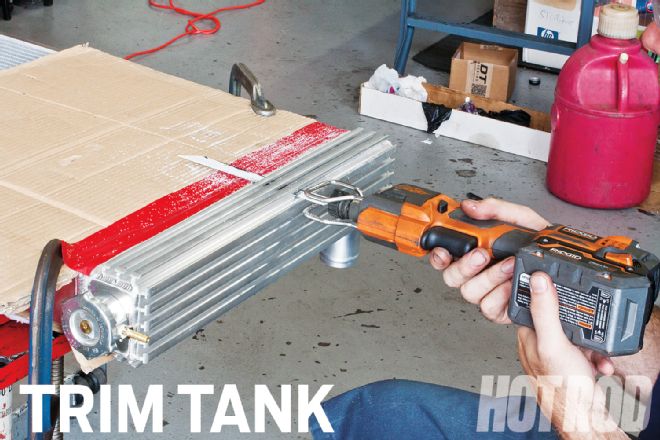
To replace Dunk’s copper/brass four-core downflow radiator, we chose Flex-a-lite’s Flex-a-fit aluminum two-core crossflow radiator and Black Magic 180 electric fan combo. Both radiator’s core areas were about the same size (in inches): 23.5-wide × 18.5-tall × 2.5-thick for the old radiator versus 22-wide × 19.5-tall × 2.5-thick for the Flex-a-lite unit, the biggest we could squeeze in the car (still, some mods were needed to get it to fit; see photos).
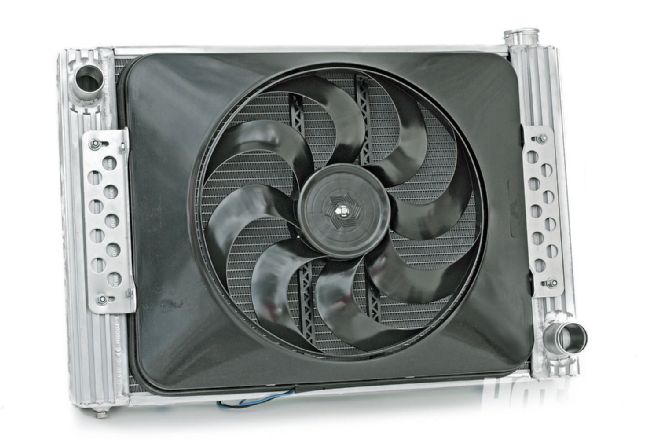 Flex-a-lite sent us its Flex-a-fit universal two-core aluminum crossflow radiator and Black Magic 180 electric fan. The radiator, fan, fan controller, mounting brackets, and wire harness are available as complete kits. With its 22-inch core, PN 52180L is about the biggest that would squeeze into Dunk’s ’65 El Camino.
But there’s lots more to radiator efficiency than gross dimensions. A crossflow radiator is inherently superior to a downflow design. Coolant stays in the crossflow configuration longer, a definite boon at higher rpm in performance applications. On a crossflow, the fill-cap is on the radiator’s cold, low-velocity, side—the side closest to the water pump, furthest from the radiator’s inlet/top-hose location. So located, the cap sees lower pressure, delaying its pop-off point (the higher the temperature, the higher the pressure). The cap’s location on the suction-side of the system upstream of the water pump also isolates it from positive pumping high-pressure forces. And with velocity lower near the cap, the system self-bleeds easier, even at high rpm.
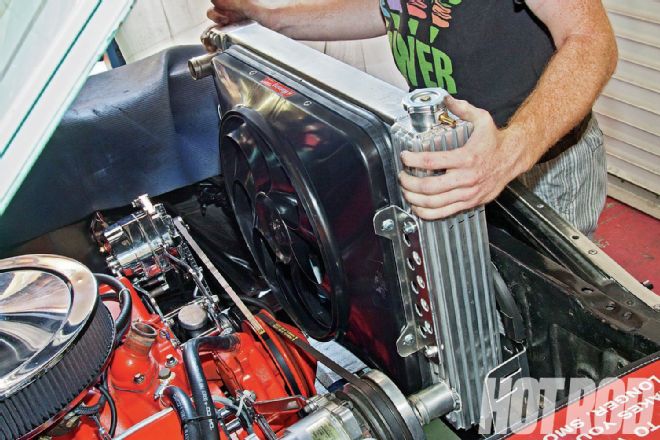 Flex-a-lite’s Flex-a-fit aluminum radiator and electric fan plus a 140-amp Powermaster alternator put the big chill on the El Camino.
 Time to roll out the big guns: a Flex-a-lite aluminum radiator and electric fan, a high-output Powermaster alternator, and wiring upgrades. The callout numbers correspond to the numbered photos on these pages.
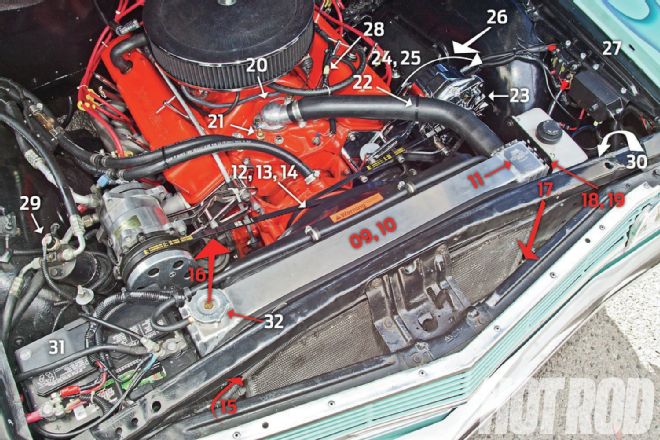
09, 10] Flex-a-lite radiator, electric fan, and controller 20] Change water neck and thermostat 27] Circuit breaker and fan controller mounting 11] Finned radiator tanks 21] Relocate gauge coolant-temperature sender 28] Key-switched fan controller power tap 12, 13, 14] Water pump pulley clearance 22] Fabricate hose support bracket 29] A/C-switched fan controller power tap 15] A/C condenser clearance 23] Powermaster 12SI 140-amp 1-wire alternator 30] Horn relay 16] Hood clearance 24, 25] Reclock alternator 31] Battery connection 17] Lower core-support clearance 26] Alternator rear mount and electrical hookup 32] Special coolants 18, 19] Coolant recovery tank mounting
 The electric fan hit the water-pump pulley bolts. To allow moving the radiator farther forward, the front tank fins were cut off with a reciprocating saw. A surface grinder with an 800-grit, aluminum-compliant wheel cleaned off the burrs. This even gained enough room to add spacer washers under the pulley bolts so their threads wouldn’t hit the water pump under hub rotation (don’t ask how we know this).
As to the great copper/brass-versus-aluminum radiator debate: Yes, copper/brass is a slightly more efficient heat exchange medium than aluminum, but its tensile strength is lower than aluminum. Being stronger, aluminum supports higher pressures and larger-diameter, thinner-wall radiator tubes (in this case, 1 inch for the Flex-a-lite unit versus ½ inch for the old radiator). Larger tubes have more surface area than smaller tubes, facilitating heat transfer. Aluminum also changes temperature quicker, offering yet another heat-transfer advantage when using a slightly undersized radiator.
 Flex-a-lite includes everything needed to wire-up the controller. In automatic mode, it senses temperature using a probe (arrow) that inserts through the radiator core’s fins, optimally on the hot-side near the upper (return) hose.
 The Auto Meter gauge’s coolant-temperature sender (arrow) was relocated from the driver-side to the passenger-side of the intake manifold so it cleared the new water neck.
Then there’s the issue of multicore stacking: On an old-school three- or four-core radiator, the rear cores are progressively less efficient because they see air that’s already been heated by the forward core(s). The rear core in a four-core radiator may be down in efficiency 25 percent or more.
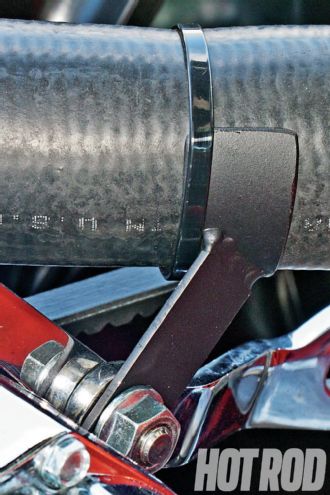 Granatelli sectioned the existing top hose yet again to properly interface with the new water neck and radiator. This fabricated support bracket attaches to the front alternator brace and prevents any belt-to-hose contact.
In sum, a similarly sized two-core aluminum radiator with larger tubes nearly always outperforms a four-core copper/brass radiator. Real-world experience shows electric fans perform best on a radiator with fewer cores. In turn, a good electric fan is the best choice here because the car’s overheating problem is worst at idle. Unlike a beltdriven fan whose speed is tied to engine rpm, an electric fan runs at a constant speed independent of engine rpm—assuming sufficient voltage.
The Fix: Powermaster 140-Amp Alternator
Ah, there’s the rub: “assuming sufficient voltage.” Flex-a-lite’s highly efficient Black Magic 180 fan flows 3,300 cfm of air, but it needs 18 amps of current at initial inrush and 14 amps under constant running conditions to do it. That’s at 14.5 volts at 65–70 degrees F ambient temperature. If voltage drops and/or temperature increases, fan speed decreases. Flex-a-lite says there’s a significant flow drop off under 13.8 volts. Old muscle cars were underwired even stock; their marginal wiring harnesses have deteriorated further from wear, tear, and corrosion; and their ancient externally regulated alternators didn’t put out enough juice at idle even when they were brand-new. How many of you have experienced dim headlights at idle with the windshield wipers on?
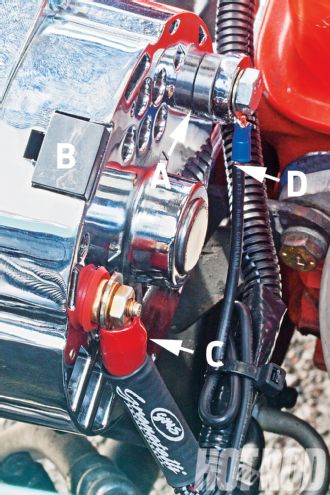
Reclocked, the 12SI bolts to the existing brackets. The old 10SI’s rear threaded hole is in a raised boss, but on the 12SI it’s flush with the case surface; the difference is easily cured with a ¼-inch spacer (A). Hooked-up in “one-wire” mode (note blank connector cover, B), it uses a big 6-gauge charge wire (C). A fail-safe extra Ground wire (D) feeds back to the battery.
As alternators evolved, they became more efficient, developing higher peak output in a similar-size case, putting out more power at idle, and ramping up to full power quicker. Sometime in the past, Dunk’s car had been upgraded to a ’70s-era 10SI–series alternator, GM’s first-generation internally regulated unit. The wiring requires some mods to bypass the old external regular, but a 10SI still bolts to the same brackets as older alternators. Dunk’s unit had no service tag, but even the best factory-produced 10SI’s peaked at 63 amps. Flex-a-lite recommends at least 90 amps rated output to allow for heat-induced voltage drop; ensure the capability to support other modern, power-hungry, accessories; and to guarantee fail-safe low-rpm performance.
That requires at least a late ’70s 12SI, GM’s next alternator evolution. In stock form it makes 78 or 94 amps, still bolts to the old brackets, accepts the old pulleys, and wires up like a 10SI. But you can do better yet: Powermaster sent us one of its custom, 12SI-based units rated at 140 amps.
Isn’t 140 amps excessive? Won’t it drag down the engine and rob power? No! An alternator only puts out the current (amps) needed to charge the battery and operate the car’s accessories. If all that’s needed at a given point is 60 amps, that’s what a “140-amp” alternator will put out. Its extra “reserve” is there if it’s ever needed, but otherwise the overall average alternator duty cycle as a percentage of its total rated capacity is less, so under normal running conditions a higher-rated alternator should last longer because it’s under less strain, not constantly running on the edge. Plus, low-end output and ramp-up to full output is enhanced—the Powermaster puts out over 90 amps at idle! Don’t be afraid of running a “too-big” alternator—provided the car’s wiring can handle its higher output.
Powermaster 12SI alternators can be wired as either a standard three-wire unit or as a “one-wire” unit that simplifies installation (just run a charge wire from the alternator BAT stud to Battery Positive). The one-wire’s downside used to be it wouldn’t charge until engine rpm reached a sufficient threshold to “excite” (turn-on) the device. That’s no longer a real issue; Powermaster uses improved internal regulator tech that self-excites at low idle-speeds. Due to the questionable reliability of the car’s old wiring harness, Powermaster advised going the one-wire route.
The Fix: Wiring
Like most old Chevys, the stock alternator charge wire ran to the horn-relay busbar, and from there back to the battery. Why the horn relay? Back in the day, it not only supplied high-side current to the horns but also served as the main distribution node for passing power to the car’s wiring harness and accessories. At best, the main charge wires were no larger than 10 gauge, clearly insufficient for the new 140-amp alternator if it ever ramped up to full output. Another problem was that ’65 Chevys still didn’t incorporate protection for those circuits upstream of the fuse box, including the charge wire (fusible links didn’t appear until ’66).
 The old, small charge wire formerly attached to the alternator BAT stud was relocated to the output side of the circuit breaker, but its other end still terminates here at the stock horn relay that distributes power to the original harness. The original (from the looks of it) relay would be marginal under 140 amps of current, so the new, large charge wire goes directly to the battery.
During the diagnostic process, Granatelli also observed a possible intermittent engine ground condition on the aged car. Normally, the alternator case is self-grounding through its mounting brackets to the engine, and from the engine through the chassis and/or negative battery cable back to the battery; obviously, any intermittency can adversely affect alternator as well as ignition performance.
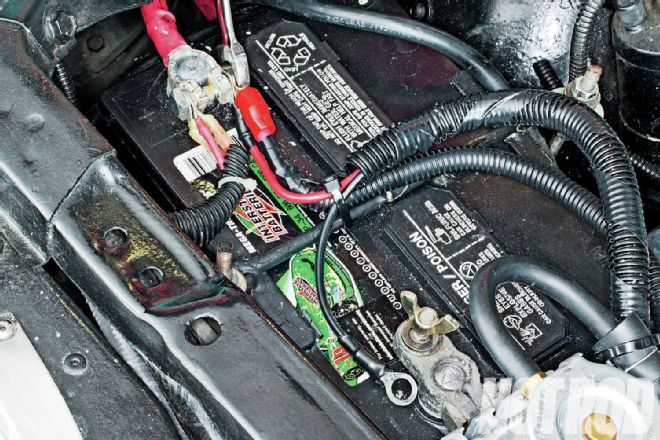
The final connections are to the battery: new 6-gauge charge wire and the electric fan’s high-power feed to positive (+) ; new auxiliary alternator ground-wire and the electric-fan high-power ground to negative (–). Never work on an electrical system with a “hot” battery. Disconnect the negative side first and reconnect it last (don’t ask us how we know this).
The solution was relatively straightforward: Upgrade to a giant new 6-gauge charge wire capable of safely handling the new alt’s full output; run the new wire directly to the battery, protecting it with an inline 150-amp circuit-breaker; relocate the old charge wire still needed to feed the horn relay from the alternator BAT stud to the breaker’s output side; and add an auxiliary Ground wire from the back of the alternator directly to the battery to bypass any potentially flaky engine Ground issues (see wiring diagram, page 120).
Results
Voltage drop between the alternator and battery is virtually zero. Proving yet again that any miniscule losses from an electric fan and high-output alternator pale in comparison to the power consumed by a beltdriven fan, running on Granatelli’s Mustang chassis dyno, SAE Net rear-wheel power and torque increased from the beltdriven fan’s 210.6 hp/283.5 lb-ft to 219.8 hp/288.9 lb-ft with the electric fan and new alternator, a 9.2 hp/5.4 lb-ft gain even on Dunk’s mild motor.
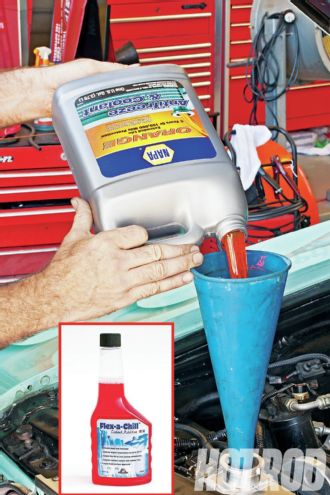 For optimum compatibility with an aluminum radiator, Granatelli poured in a gallon of NAPA’s extended-life, five-year antifreeze and coolant (equivalent to GM Dex-Cool), plus a 12-ounce bottle of Flex-a-lite’s new, racetrack-surface-approved Flex-a-Chill coolant additive that’s said to lower engine temps by 20 degrees and provide 100 percent corrosion protection.
But does it cool? You bet: Granatelli let the car idle until the coolant temp hit 205 degrees with the fan disconnected. After reconnecting the fan, he says “it took only three minutes to get the temperature back down to 175 degrees.” The El Camino idles indefinitely without overheating whether the hood is open or closed. With the fan module’s control-knob in the middle of its adjustment-range, the fan actuates at 190 degrees—but cruising down the highway, so far the only time the El Camino with its 160-degree thermostat exceeded 180 was climbing the steep local Camarillo grade, when on a 95-degree California day with the A/C running Dunk still saw no higher than 195 degrees—while towing his pop-tent trailer. As he puts it: “For years, I worried about getting stuck in traffic. It was getting to the point where I was going to sell the car. But now I can drive it anywhere! I’m very pleased with what Granatelli and HOT ROD were able to achieve.”
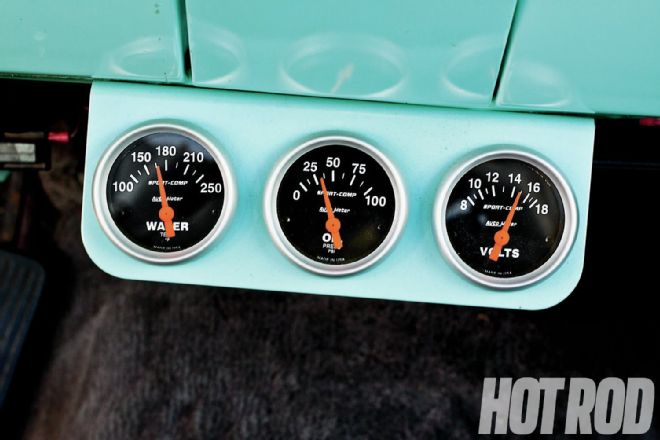 Well, that’s a lot better: 176 degrees F on the temp gauge; 14.5 volts at the dash. No coolant leaks, no voltage drops, no errors.
Lessons Learned
Beware the domino effect. Change one thing and it can affect a whole bunch of other, seemingly unrelated, things. If changes are needed, tackle the basics first before making drastic alterations. If you have cooling issues, ask yourself, as Granatelli puts it: “What did I change to make it overheat? When you make a wrong move, don’t compound it. Take a step back.”
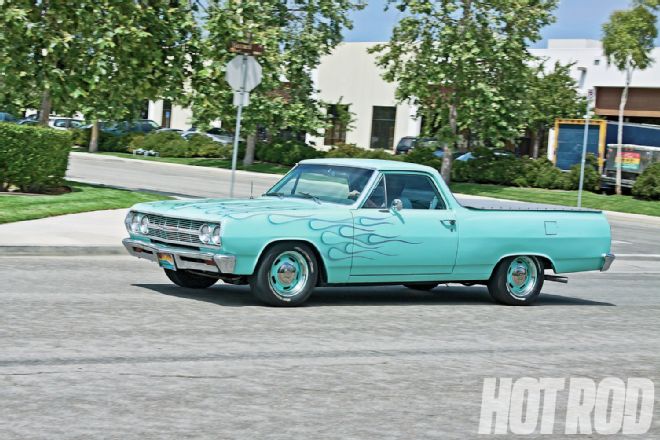 Post-fix, Dunk motors by at 175 degrees. Even on the steepest hills with the A/C on and the trailer hooked up, temps don’t exceed 195.
Alternator & Fan Wiring
 Pic: SIM Creative Services
Alternator
A 140-amp Powermaster one-wire 12SI alternator replaces Dunk’s previous 10SI upgrade. No longer needed, the 10SI’s two-prong connector is taped off and laid back in the harness (it’s still there if an emergency parts-store replacement is ever needed). With a one-wire alternator, the stock warning light isn’t connected, but that’s OK because Dunk has a voltmeter. The new 6-gauge charge wire is protected by an inline 150-amp circuit-breaker on its way to Battery (+). The stock charge wire to the old horn relay is also retained, but relocated from the alternator BAT stud to the breaker’s output side. An auxiliary “fail-safe” ground wire runs from the alternator case to Battery (–).
Electric Fan
With the engine running, when coolant temperature measured by a sensor inserted through the radiator core reaches a set threshold (between 160 and 240 degrees F, depending on the controller’s dial-adjustment), power flows through the green wire spliced into Dunk’s existing ignition-switched carb choke and antidiesel solenoid circuit to controller terminal (+), closing an internal relay circuit. The relay will also close regardless of coolant temperature whenever the A/C is on, as actuated by power directed to controller terminal C through the yellow wire spliced into Dunk’s existing A/C control circuit at the A/C high-pressure cut-out switch. Either way, when the relay closes, high-amp current flows from Battery Positive (+) through a 40-amp inline fuse to Controller terminal B, out through terminal M+ to the fan motor, from the motor back to terminal M–, and out from terminal G to Battery Negative (–), thereby actuating the fan.
Major Parts and Prices
NOTES: ¹Sold by Waytek under PN 46989. ²Cut to length. ³Alternate clock positions available from Powermaster via special order; append desired clock position to the basic PN. For example, to order this alternator oriented at 12:00 o’clock, the PN would be: 37293-1200 (price may vary).
If your car has a gremlin that just won’t quit, you could be chosen for Hot Rod to the Rescue. Email us at [email protected] and put “Rescue” in the subject line. Include a description of your problem, your location, and a daytime phone number.