Some of you avid readers may know that I swapped the stock dash in my 1959 Chevy Apache to a 1964 Chevy Nova II SS dash. What I was always dreading was the day that I would put A/C in the darn thing. Because of the A/C's space constraints I was uncertain that any aftermarket unit would fit under the passenger side of the dash. I guess I got lucky one day when we had an open house at our CLASSIC TRUCKS HQ and because Rick Love, vice president of Vintage Air and one of the nicest guys on earth, peeked his head under dash. It only took Rick a second to say that he had a universal unit that would fit great and he even had Nova II dash parts that would fit in the stock location.
I was blown away by the discovery, but I still had a few more questions for Rick. I asked about air-conditioning, autocross, and drag racing since those are trends going with truck enthusiasts. Rick said that most A/C compressors while shut off could handle high rpms because the compressor's clutch is disengaged and that the internals were not spinning. However, they do offer a wide-open-throttle switch that disengages the A/C compressor if you decide to floor it.
Since my personal truck will see lots of miles and autocrosses this was good to know. The overall A/C case, hoses, fittings, condenser, and accumulator don't really add a ton of weight and in fact I found the parts rather light. Adding weight to any truck, especially toward the front end, makes the truck feel sluggish, but this was not the case for our Vintage Air unit.
Remember the old days when they said by turning the A/C unit off you would lose tons of mileage? Yeah me too, but nowadays the gasoline is better, we have better compressors, and in some cases fuel injection. I'd rather be in comfort than be sweaty driving through Texas in the summer, wouldn't you?
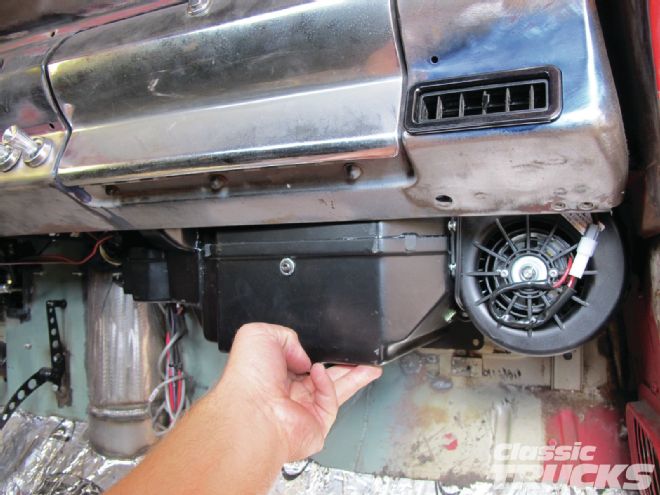
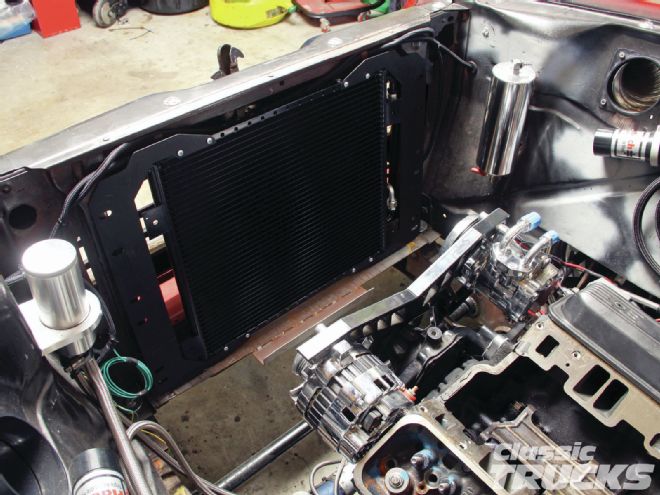
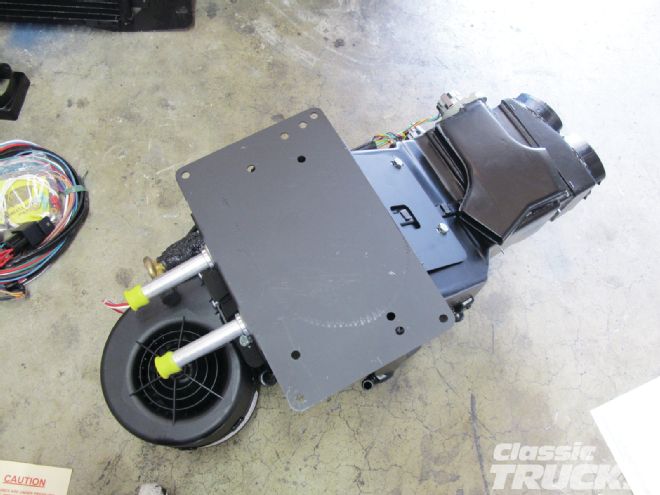 01. The Vintage Air case features an evaporator, heater core, blower motor, blend doors, actuators, and computer that controls the actuators. Pretty cool to see such a small package that packs a punch.
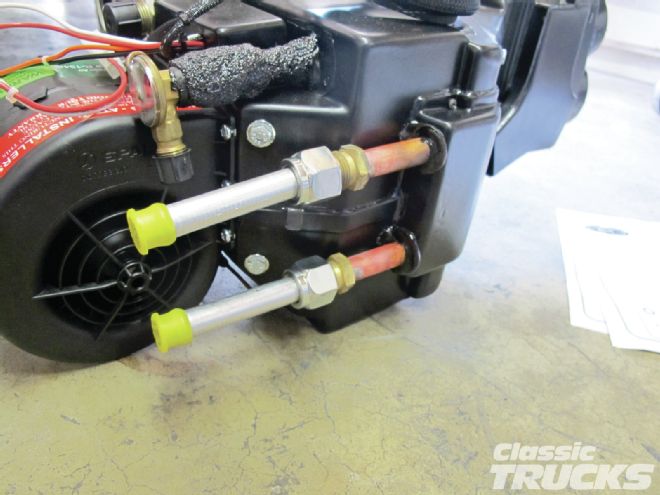 02. For the heater core lines you need to use these extensions that connect to the heater core.
03. This is a view from the back of the case where we installed the bracket to connect the case to the firewall.
02. For the heater core lines you need to use these extensions that connect to the heater core.
03. This is a view from the back of the case where we installed the bracket to connect the case to the firewall.
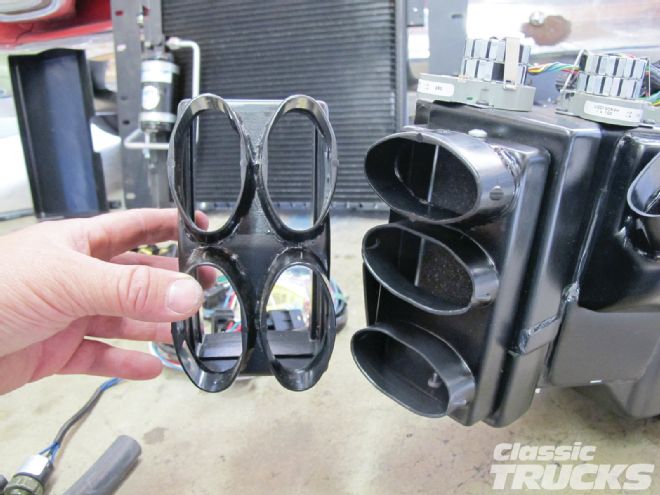 04. Since it is a small cab I chose to only use three A/C vents, two outer and one center.
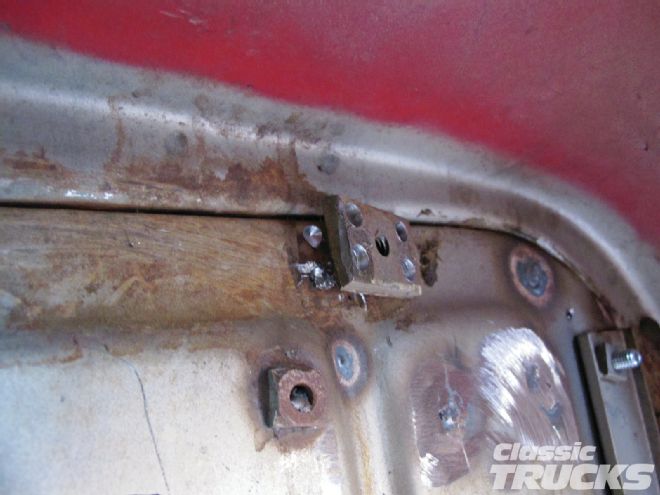 05. A quick test fit revealed that I needed to remove some factory mounting tabs.
 06. I used a drill to remove the four welded points on the tab.
 07. The stock Chevy defrost vents were in the way of the new Vintage Air case.
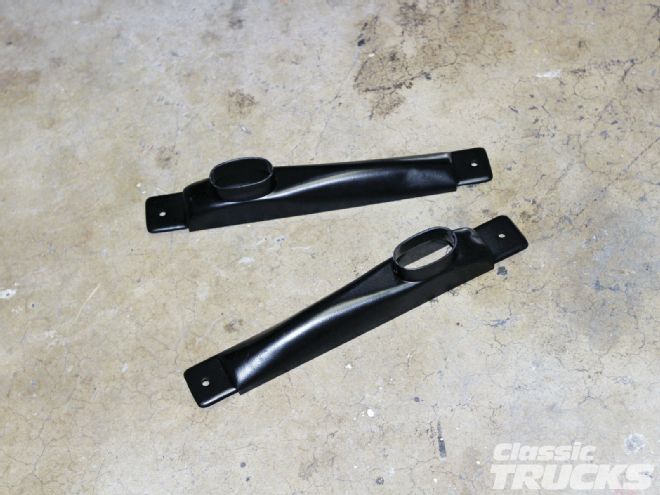 08. An easy fix was to adapt these shorter vent ducts from Vintage Air.
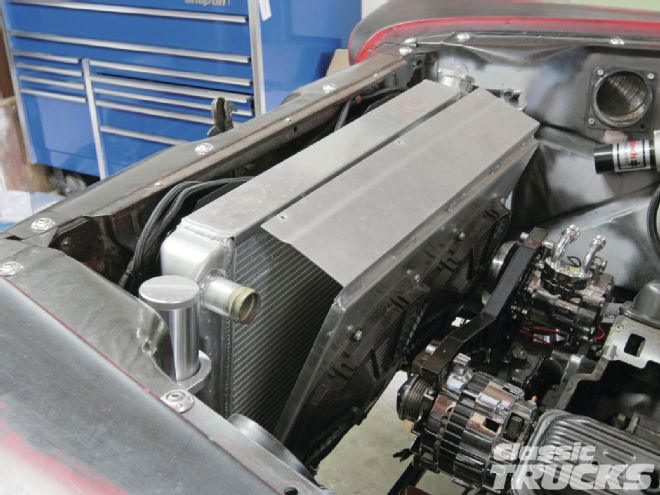
 09. The condenser fits snug, right in front of the radiator.
 10. Make sure the condenser has plenty of air flowing to it and or the A/C and regular engine fans are sucking air through the condenser then radiator into the engine bay. Having the fans blowing against the incoming air will cause the A/C to blow warm.
 11. Also make sure the radiator is sealed or has minimal gaps around the fans and or core support. If the incoming air from driving flows around the condenser then the condenser can't do its job properly. This also holds true for the fans that are sucking the incoming air past the condenser and radiator; if they can't draw suction because of a loose-fitting fan shroud then the airflow is reduced. Think of it like trying to drink soda from a straw with a hole in it, you can't get the soda up the straw until you plug the hole.
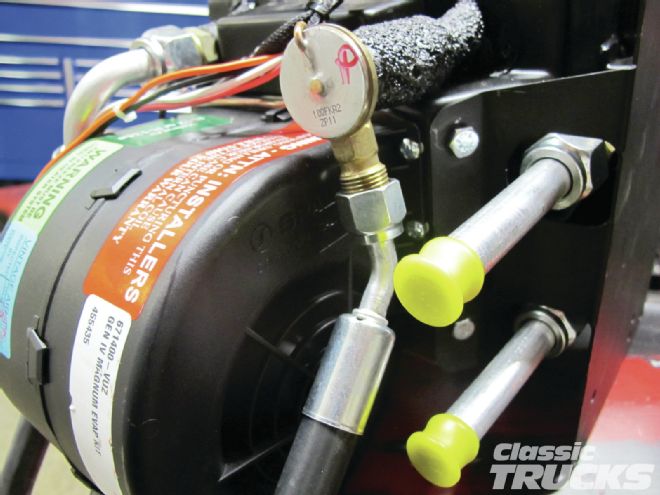
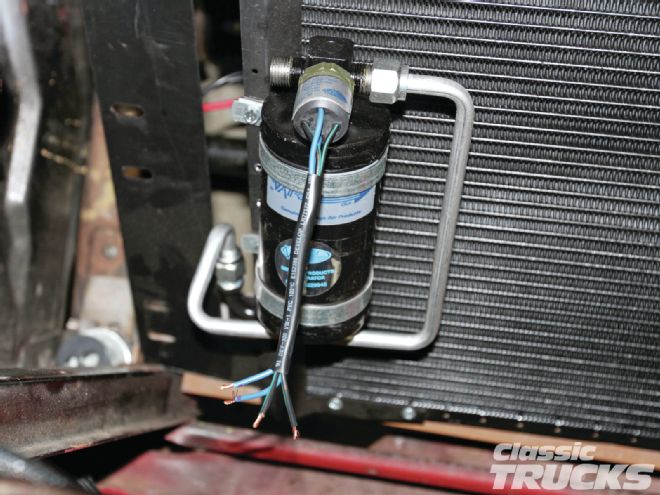 12. A trinary switch is used to shut off the A/C compressor when it detects extremely high pressure in the A/C system. It is also is used to turn on the A/C fan when pressure reaches a predetermined amount. When the pressure is reduced by the A/C fan pulling colder air across the condenser, then the trinary switch turns off the fan. If you have two fans or a high- and low-speed fan then hook the trinary switch to the secondary fan or high-speed fan and not the primary engine-cooling fan.
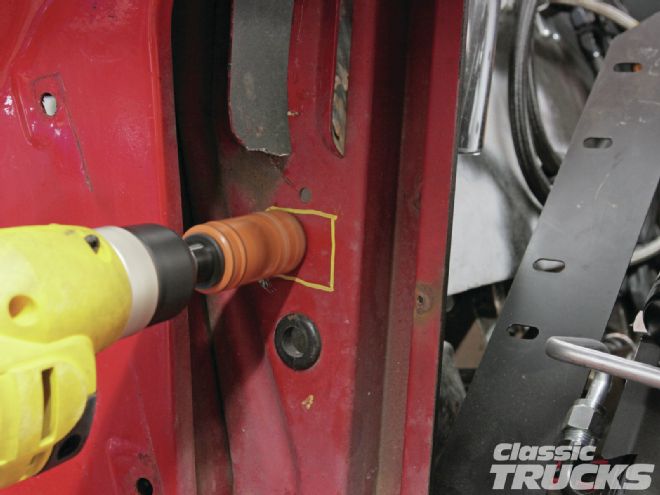 13. A hole for the condenser lines needs to be drilled with a hole-saw bit. Mock up the location and drill away, but be careful if you have a wide aluminum radiator not to route the A/C lines right into the side tank of the radiator. A simple solution is to carefully hand bend the lines where you want them.
 14. Options for firewall hose connections come in many different forms. Since I moved my firewall around I was limited in space as where to put the bulkhead fittings.
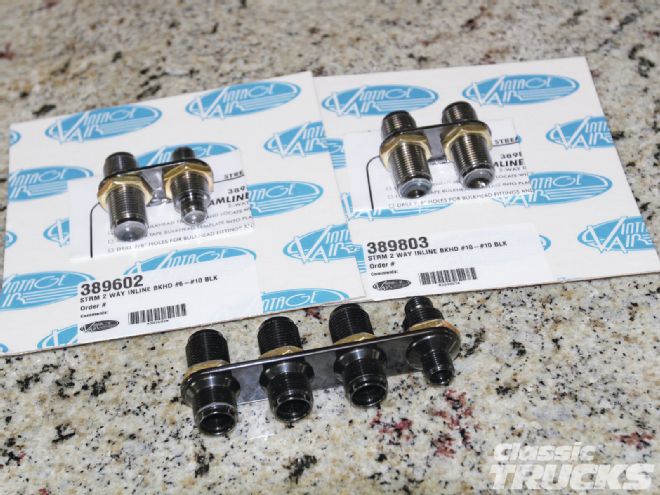
 15. I chose not to install the heater lines because I live in California and don't really drive the truck in cold weather. I went with the Vintage Air #10 and #6 black firewall fittings to connect the evaporator case to the compressor and condenser. Vintage Air provides a template in the instructions that makes it easy to mark and drill for the firewall fitting.
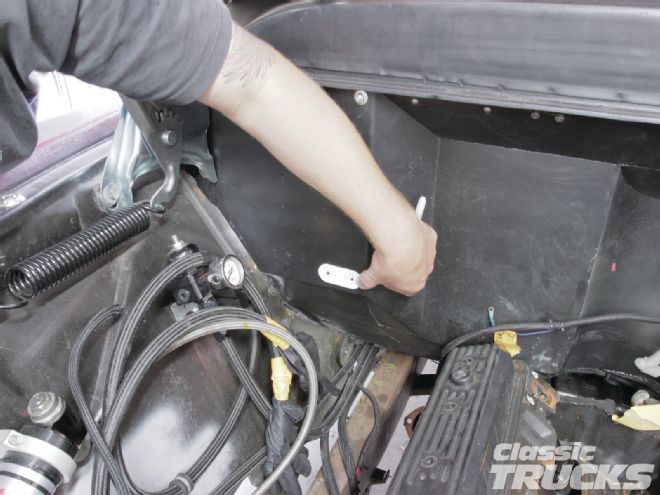
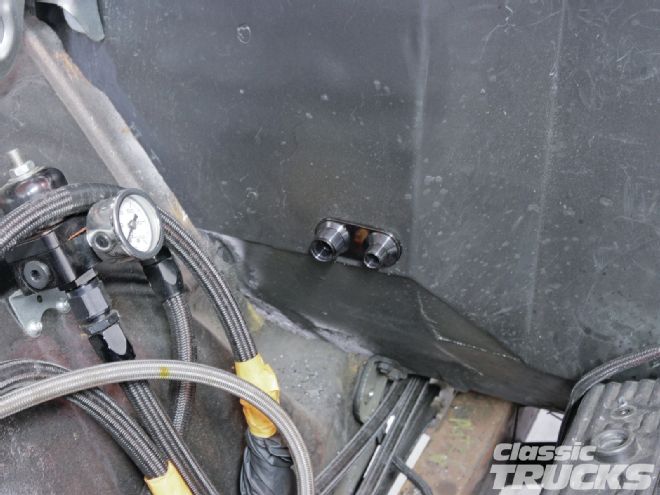 16. I ended up flipping this over, but you get the point of how it fits on the firewall. I used a small drill bit to establish the center and then using a uni-bit opened the hole up until the fitting went in.
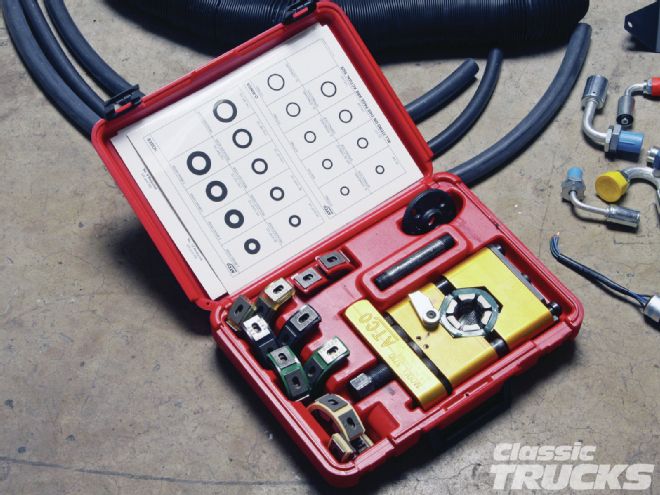 17. Vintage Air offers a kit that works great for crimping A/C lines.
 18. Make sure you read the directions before crimping the fittings. Use the correct size dyes and the crimp will look something like this. Don't overcrimp the fitting, Vintage Air recommends using a torque wrench set to 100 lb-ft and not to go over.
 19. Follow the natural curve of the hose and mark the hose and fitting where you would like to crimp it to. This makes it easier to attach the hose once the crimp is completed.
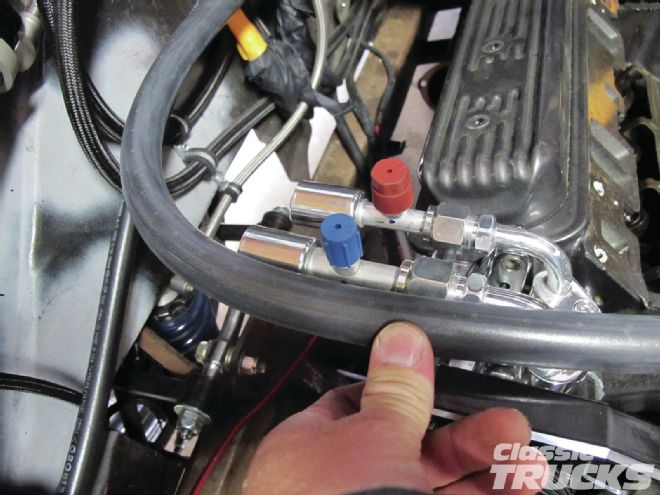
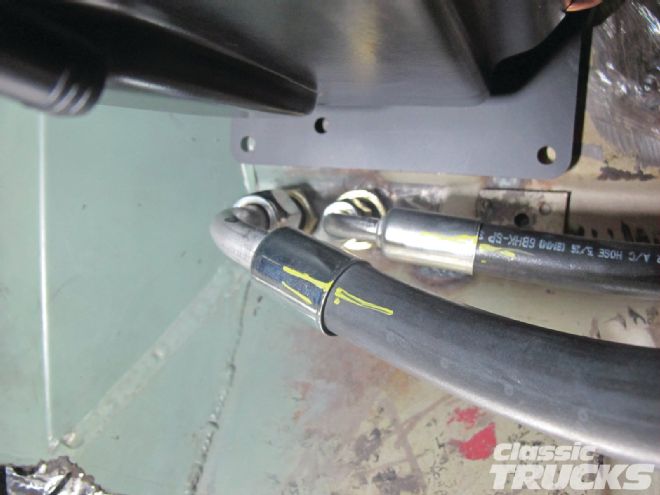
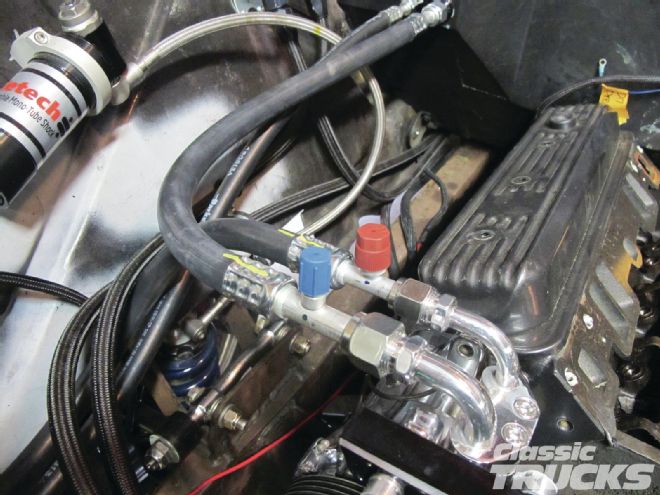
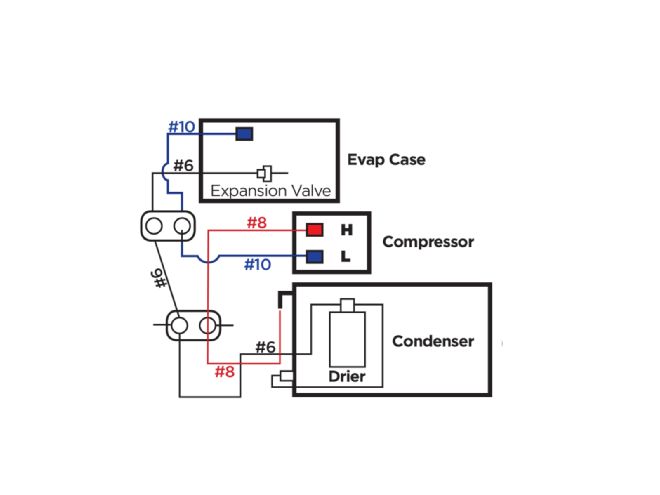 20. Low side and high side? What is the difference? Without getting too technical, the high side is red/large and low side is blue/smaller. The blue side is will be the #10 hose going back to the evaporator case and firewall fitting. The red/high side heads toward the condenser and connects to the top of the condenser with a #8 hose. A receiver drier is mounted/connected to the bottom left of the condenser with a supplied hard line. From the drier #6 hose is used to connect to the firewall fitting then to the expansion valve on the evap case.
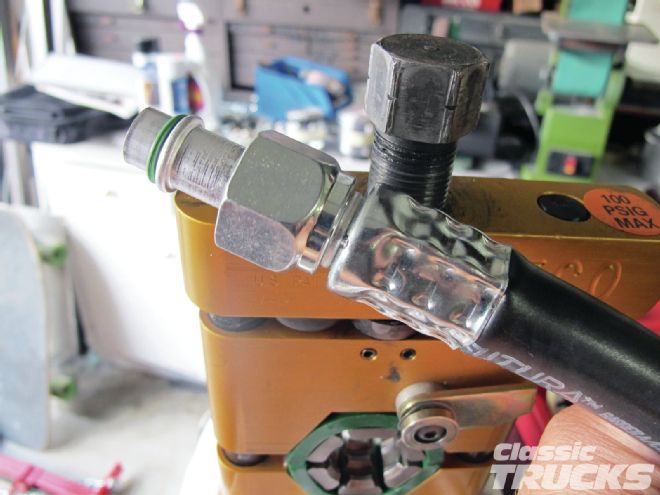
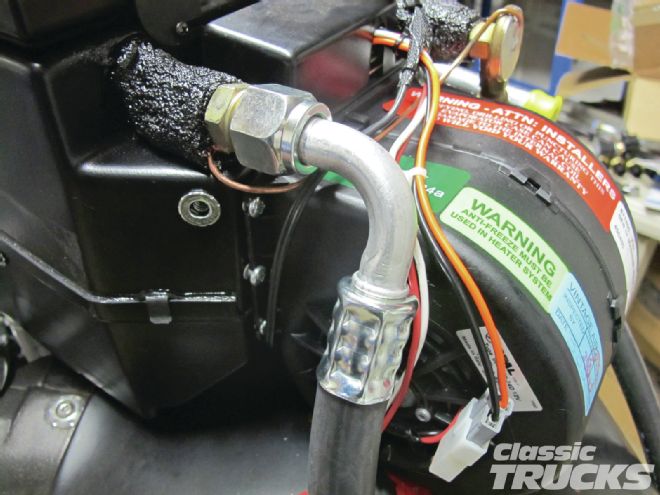
 21. This is a photo of the #6 hose being test fit to the expansion valve. This fitting connects to the #6 firewall fitting then to the drier. Make sure after you crimp and tighten this fitting down that you wrap it with the provided black rubber to prevent rusting and leaks.
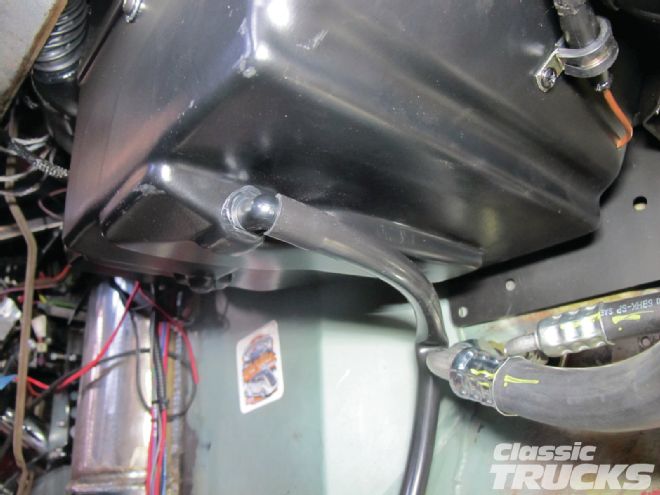
 22. I repeated the last step with the with the low side connection #10 hose that connects to the low side connector of the compressor.
 23. Now cut the hoses to size and make sure to mark the fitting and hose location before crimping so you don't twist the hose making it hard to install.
 24. The evaporator case collects water vapor just like the outside of a soda can on a hot day. To get rid of the water you need to hook up this hose and drill a hole in the floorboard somewhere to drain the water outside.
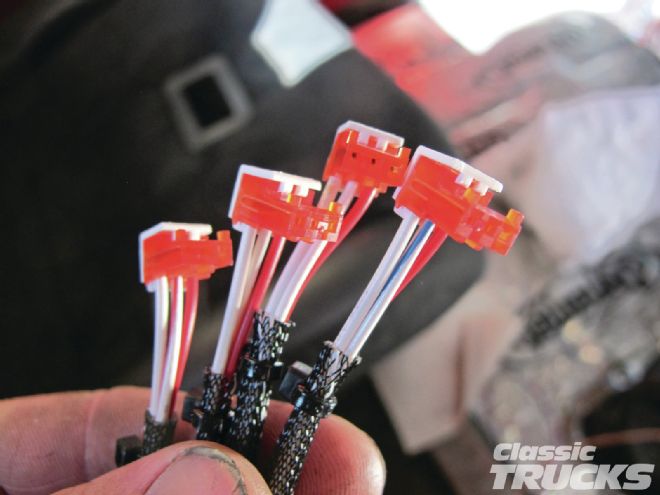 25. These wires have different colors that determine where they go. Green is the fan, red is temp, and yellow is the mode, and we don't use the fourth connector.
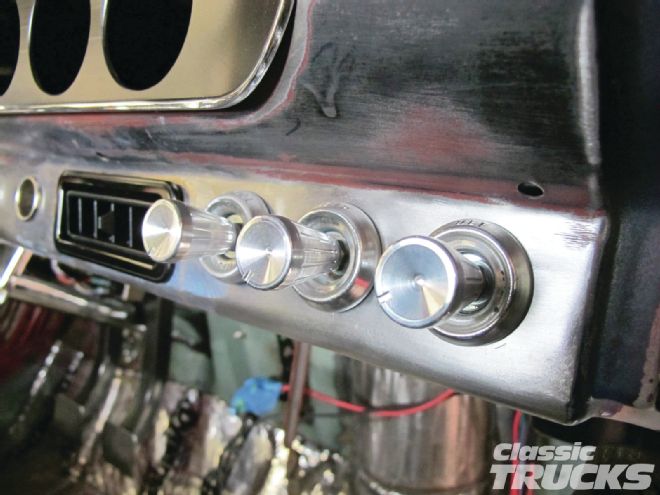 26. We opted to use the Nova II retrofit kit that gets rid of the cables and converts the A/C into potentiometer-style control knobs, similar to how a dimmer switch works.
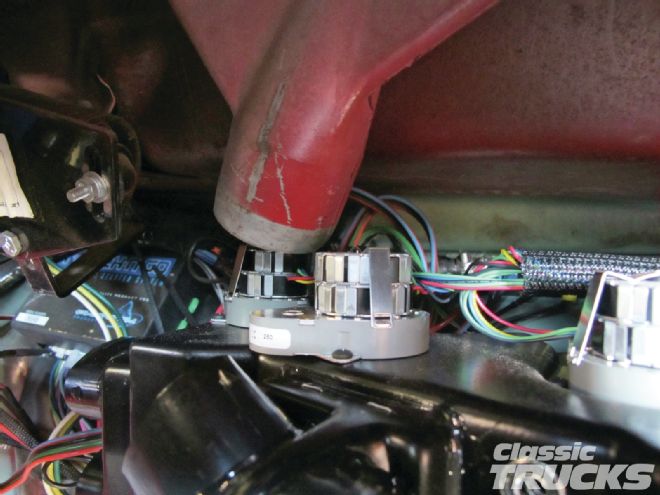
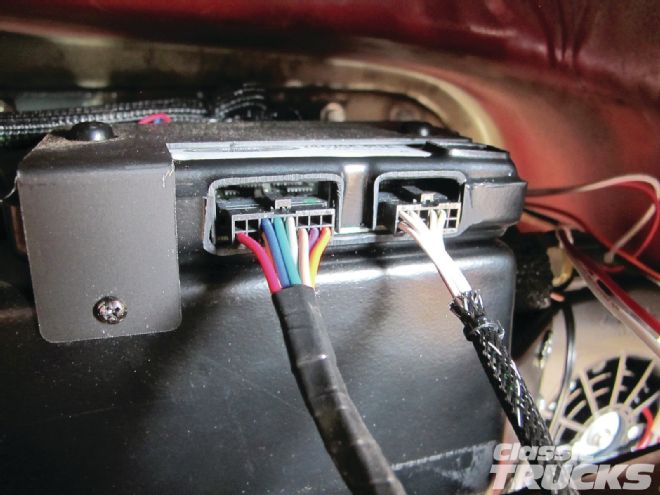 27. The computer that controls the actuators, etc., needs to be hooked up along with the blower motor.
 28. A heavy-gauge wire will support the amperage that it takes to run the blower motor, plus it has a circuit breaker that will pop when the voltage gets too high. Make sure to connect the ground to a known good ground.
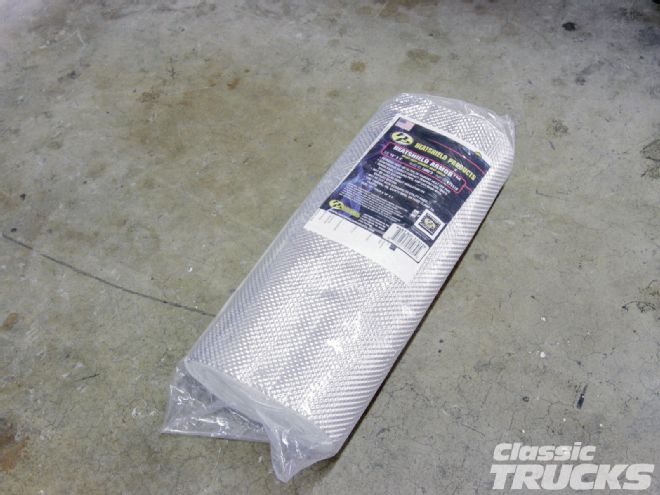
29. Since I tucked my mufflers under the cab I was getting tons of residual heat inside the cab floor. My solution was to use this muffler wrap from Heat Shield Products to help control the floor temps and not heat up the cab. This effectively reduced inside cab temps and didn't burn my shoes anymore. I will also look into heat insulation for the floor to further reduce the floor temp and noise.
28. A heavy-gauge wire will support the amperage that it takes to run the blower motor, plus it has a circuit breaker that will pop when the voltage gets too high. Make sure to connect the ground to a known good ground.
29. Since I tucked my mufflers under the cab I was getting tons of residual heat inside the cab floor. My solution was to use this muffler wrap from Heat Shield Products to help control the floor temps and not heat up the cab. This effectively reduced inside cab temps and didn't burn my shoes anymore. I will also look into heat insulation for the floor to further reduce the floor temp and noise.
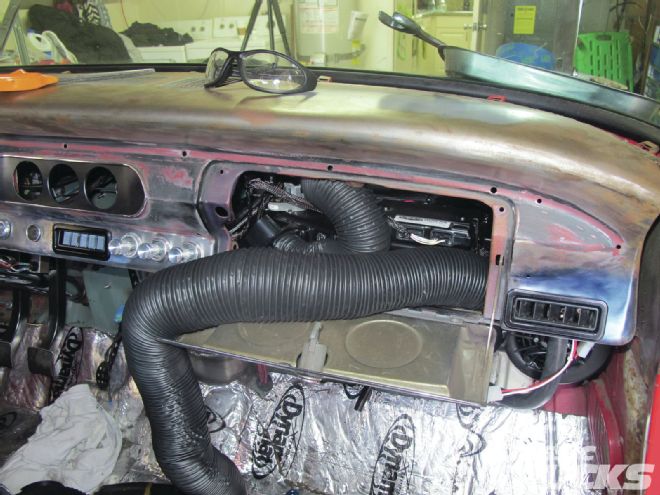 30. The hoses connect in order from left to right and defrost, so make sure you connect them properly.
 31. Last but not least...charging! Since I don't have the running engine in my truck at this moment I'm going to wait to charge the system. But if you are ready, make sure that the person that is charging it does a vacuum test sucking down the complete system and holds it there for 45 minutes. This checks for leaks that will not show in the first few minutes of vacuum. And let's face it, we want the A/C system to work when we want it to. Also make sure to read the instructions on how much R134a is entered into the system and if you need to add PAG oil to your dry compressor. When all is said and done make sure all the fans are working and put a thermometer in the center vent to see how cool the air is. In the mid 50s is about average depending on the outside temp. Good luck guys and gals and hopefully you can chill out while hot rodding.