Over the years there have been a number of landmark production engines that have found favor with hot rodders—the Flathead Ford, Chrysler Hemi, and the small-block Chevy just to name a few. But there are some new engines on the scene that are well on their way to being added to the list, namely the LS series from General Motors. These engines make great power, are economical, reliable, and they have been around long enough to be readily available in used or in new crate motor form. If there are any drawbacks to swapping an LS into an early truck it’s often the depth of the pan and the location of the engine-driven accessories. But never fear, there are solutions for both these problems and they come from one of the oldest names in the aftermarket business, Holley.
LS Retro-Fit Oil Pan
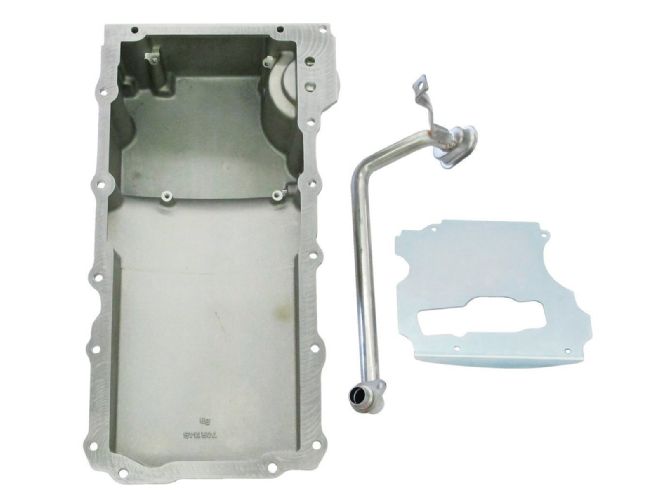
Holley’s replacement oil pan (part number 302-100) is shallower than the stock pan, providing considerably more chassis and ground clearance. The new cast aluminum pan has the structural rigidity of the OEM pan and holds 5.5 quarts (6 with the filter). It has all the features GM incorporated into the original design including the oil filter mount, oil cooler port, NVH suppression, bellhousing attachments, and it accepts the flange-style gasket. The installation kit includes a sump baffle, pickup tube, sump plug, oil filter stud, and oil passage cover.
LS Accessory Brackets
Packaging of the beltdriven accessories on the front of an LS engine isn’t always compatible with the dimensions of an early truck’s engine compartment, but again it’s Holley to the rescue.
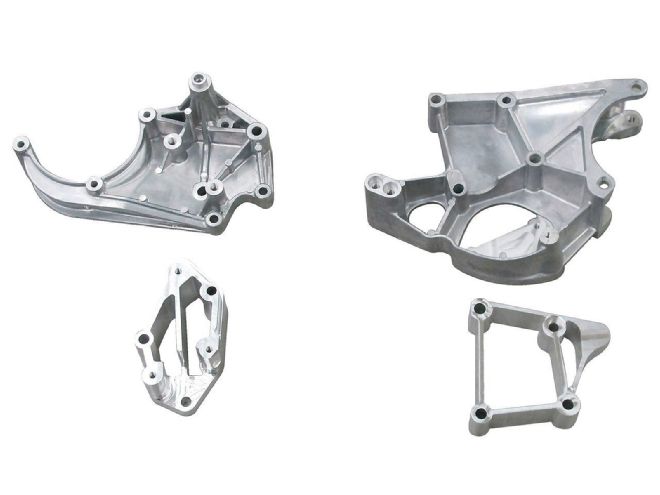
Holley’s new accessory brackets have the appearance and stability of factory components and provide proper belt alignment. It should be noted that there are differences in the various LS engines, but Holley has that covered as well. Holley has a comprehensive “Fitment and Required Components Guide” to make sure all the components are compatible and even gives sources for additional parts such as the A/C compressor and alternator.
To determine which Holley kit is correct requires three simple steps. First is determining the belt alignment based on the engine’s crank pulley position. Next is to decide on the Holley accessory drive brackets required—A/C, alt, and P/S. Finally, choose the Holley installation kit for the accessories that will be used and the crankshaft pulley position.
Holley’s LS brackets are die-castings and come in natural finish, but can be painted, plated, or powdercoated. The A/C bracket mounts the compressor (either a GM R4 or Sanden) and the alternator (GM or Holley) at rocker cover level for increased chassis component clearance while still staying well clear of the hood.
Recently we took delivery of new LS from Chevrolet Performance that was destined for installation in a C10 pickup. Once it was uncrated in the Source Interlink Media Tech Center our very own Jason Scudellari went about swapping parts. Thanks to the reduced depth of Holley’s replacement pan and the brackets that relocate the beltdriven accessories our new LS was now a lot more old-truck friendly. Here’s how it was done.
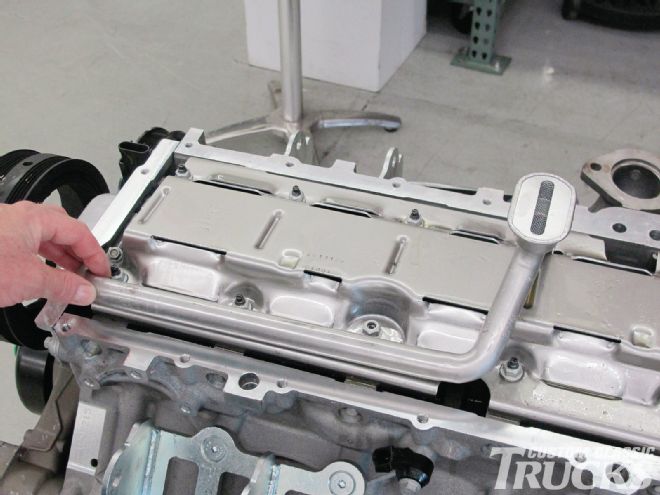
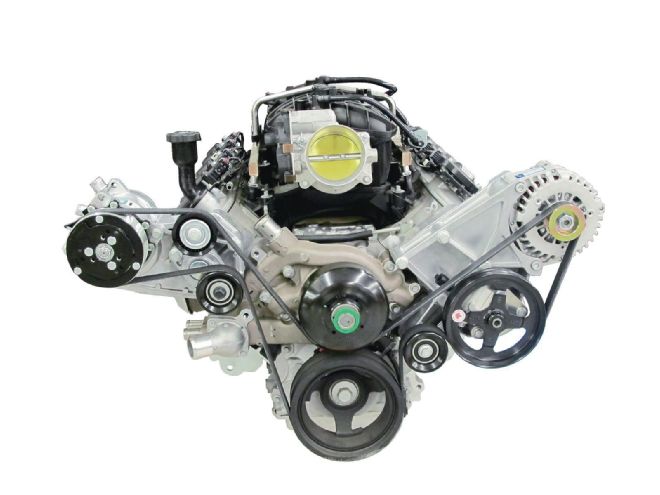 1. Our new Chevrolet Performance LS3 E-Rod engine now wears a Holley Retro-Fit oil pan and accessory brackets. These brackets fit virtually all common LS engines regardless of water pump and harmonic balancer offsets.
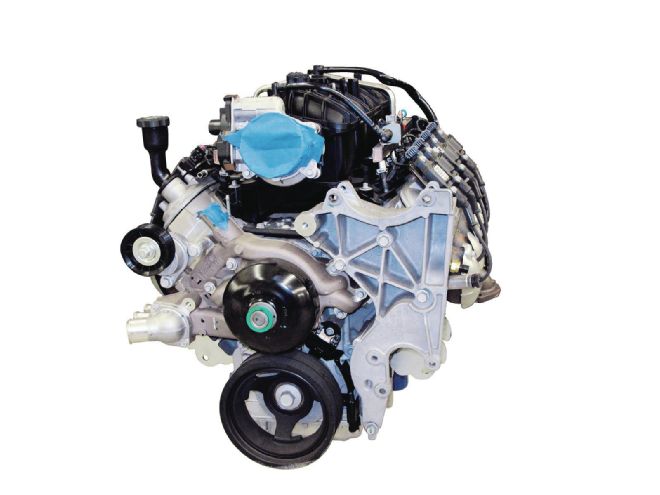 2. Out of the crate, the accessory brackets on the new engine were not compatible with our old truck, and the pan was too deep as well.
 3. The stock cast-aluminum pan adds strength to the bottom end of the engine, but it’s almost 8 inches deep.
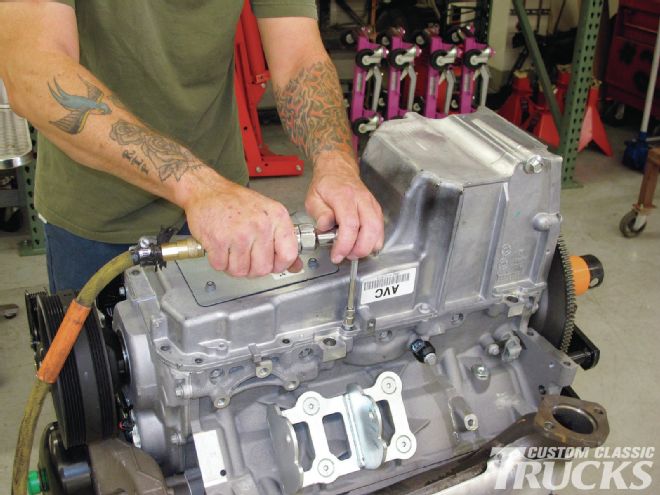
 4. With the pan removed, the oil pump pickup can be seen—it will be replaced. Note the factory windage tray.
 5. Two cap screws attach the pickup to the oil pump, there is also a support bracket that attaches to a windage tray stud.
 6. Holley’s Retro-Fit pan is 5.8 inches deep and holds 5.5 quarts of oil. It adds the same structural integrity to the block as the original pan.
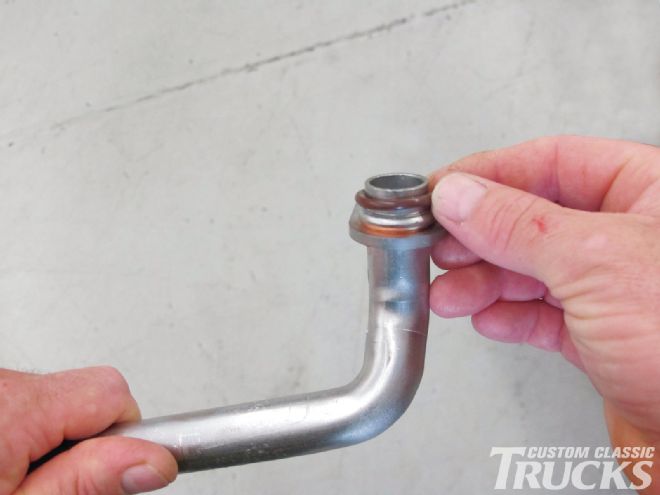 7. Before installation, the new pickup is fitted with an O-ring that seals the tube to the pump.
 8. Minor modifications to the oil deflector may be necessary to accommodate the mounting bracket of the pickup screen. If deflector GM part number 12611129 is used no modifications are required.
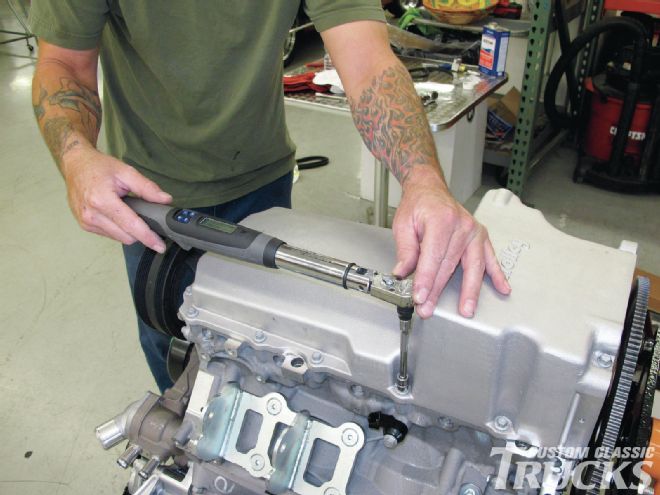
 9. The new baffle and pan are combined with the supplied ¼-20x½-inch-long cap screws. An LS3 dipstick (GM part number 12634547) and matching tube (GM part number 12625031) are used.
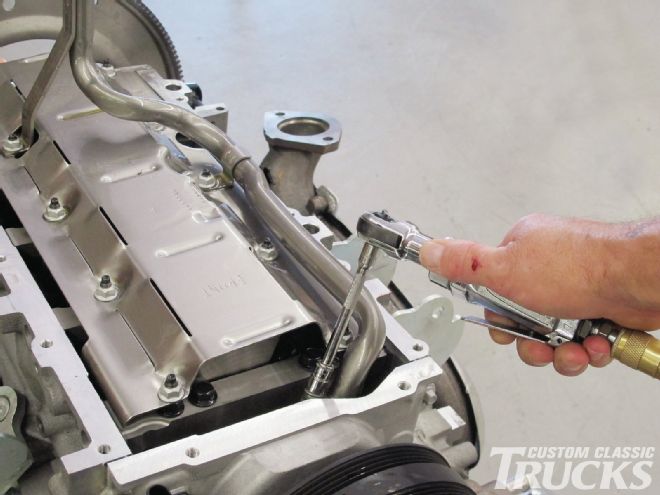
 10. The one-piece oil pan gasket (GM 12612350) along with a host of other parts came from Guaranty Chevrolet.
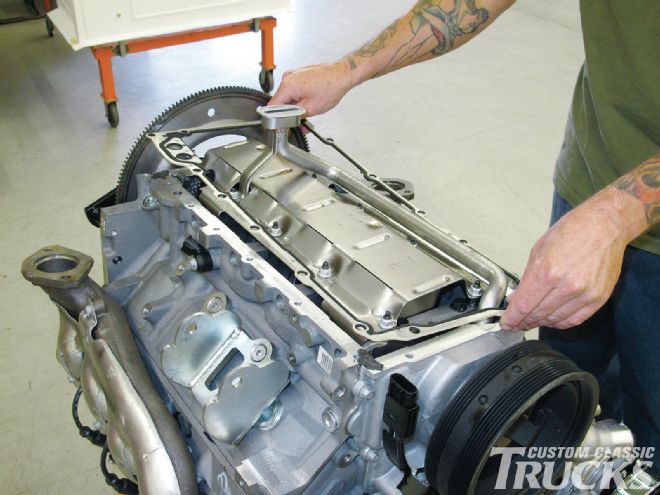
11. Not only is the pan a structural part of the block, it provides bellhousing mounting points. At the rear of the engine the block and pan must be flush for proper transmission alignment.
10. The one-piece oil pan gasket (GM 12612350) along with a host of other parts came from Guaranty Chevrolet.
11. Not only is the pan a structural part of the block, it provides bellhousing mounting points. At the rear of the engine the block and pan must be flush for proper transmission alignment.
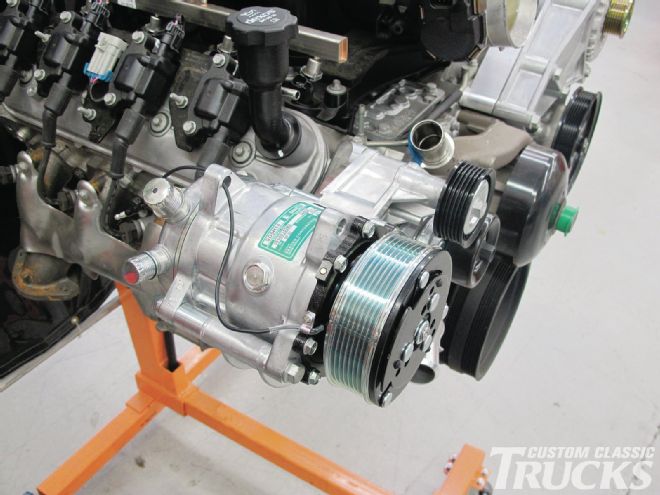
 12. There are two sets of accessory brackets—the left or driver’s side (right side of photo) mounts the alternator and power steering pump. The right side bracket holds the A/C compressor.
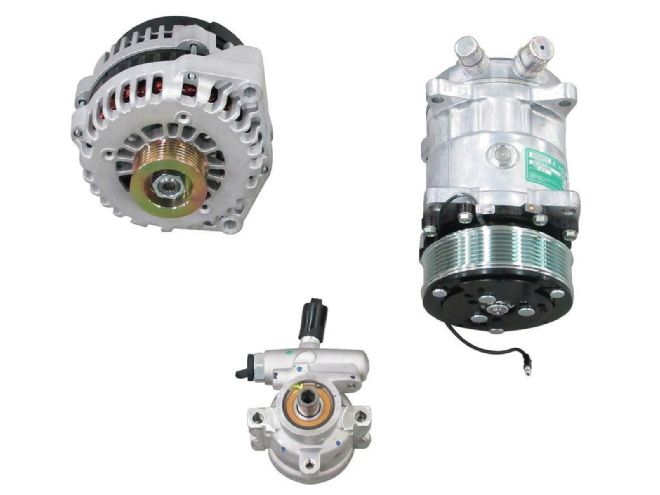 13. We used a Holley 130-amp alternator, a Corvette-style aluminum power steering pump (also known as Saginaw TC type), and a Sanden A/C compressor from Vintage Air.
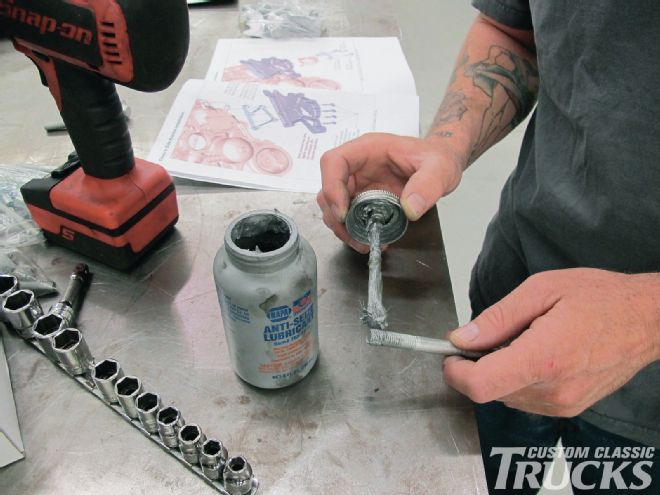 14. OEM-style flanged fasteners are part of the bracket kits, they were given a liberal dose of antiseize compound before assembly.
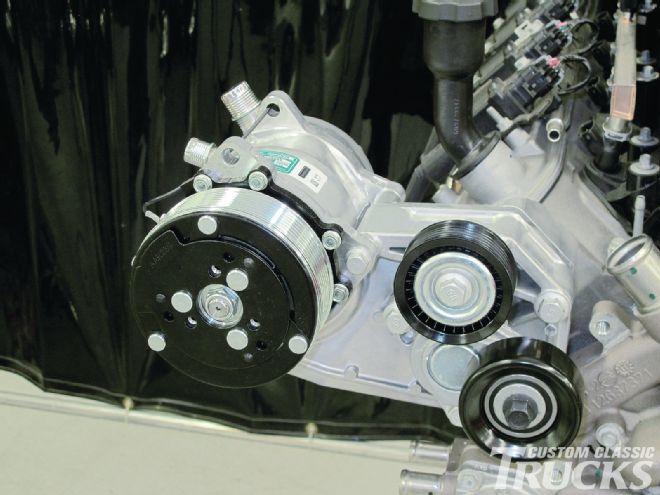
 15. The A/C compressor bracket has been bolted in place. One of the advantages of the serpentine belt system is the driven components stay in place as a spring-loaded tensioner tightens the belt.
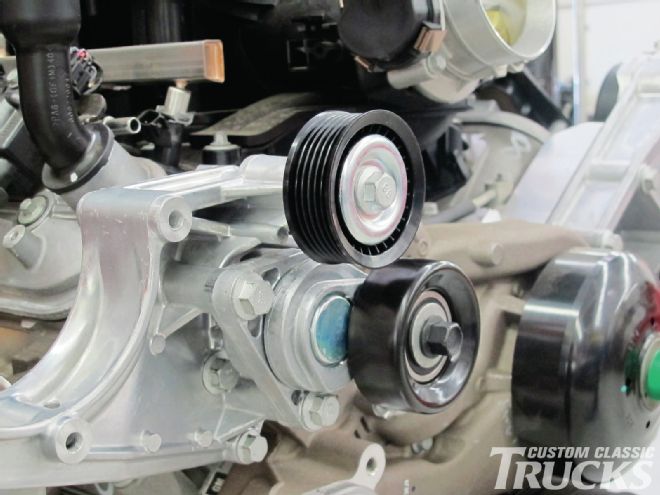 16. Here the A/C idler pulley has been installed, below that is the tensioner. The tensioner, pulleys, and belt are standard GM items from Guaranty Chevrolet.
 17. The Sanden A/C compressor requires spacers between the mounting ears and the bracket.
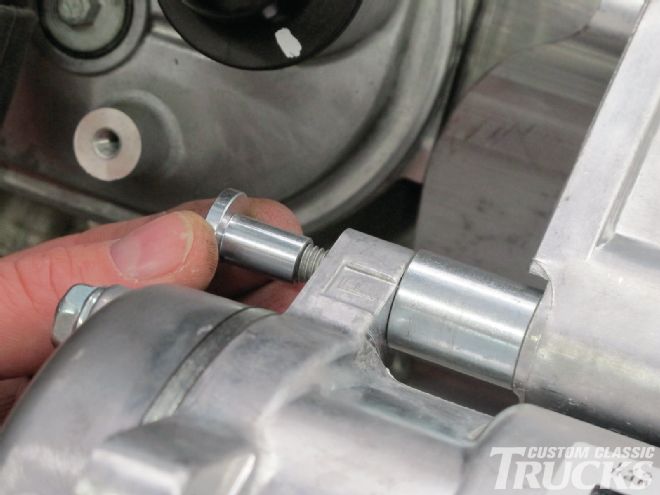 18. A special bushing makes up for the difference in the diameter of the hole in the compressor and that of the mounting bolt.
19. Holley advises that LS engines are capable of high rpm that can damage the A/C compressor’s internal parts. A tach or TPS monitoring rpm switch, such as NOS part number 15982NOS should be used to deactivate the compressor clutch when the engine is above 4,000 rpm.
18. A special bushing makes up for the difference in the diameter of the hole in the compressor and that of the mounting bolt.
19. Holley advises that LS engines are capable of high rpm that can damage the A/C compressor’s internal parts. A tach or TPS monitoring rpm switch, such as NOS part number 15982NOS should be used to deactivate the compressor clutch when the engine is above 4,000 rpm.
 20. The completed A/C compressor installation. Note the idler pulley is ribbed and the tensioner is smooth as it runs on the outside of the belt.
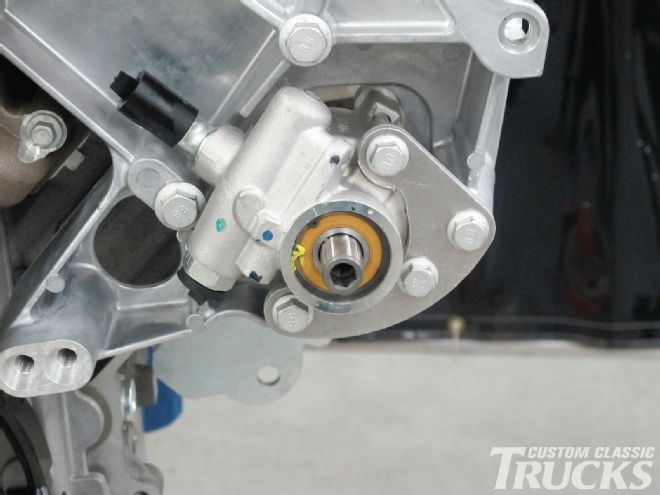 21. A Corvette power steering pump was used—a pulley with a 0.66-inch bore is required. Holley cautions that 2010 and later Camaro pulleys have the correct bore, but will not align to the belt for this application.
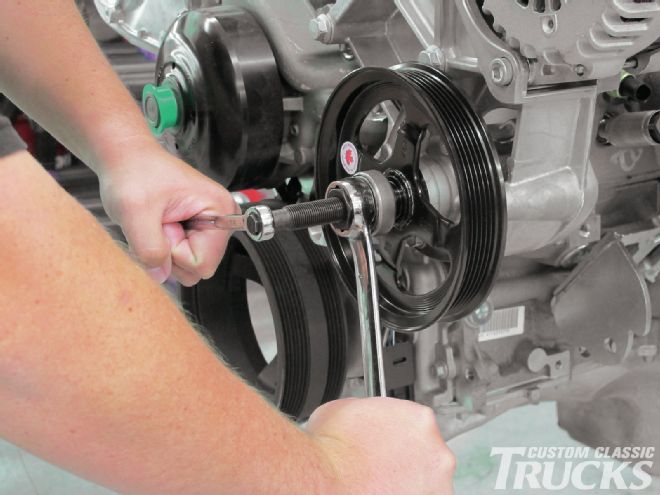
 22. The proper tool must be used to install the pulley on the pump. Driving it on with a hammer and block of wood will cause serious damage.
23. Another idler pulley is used on the power steering bracket. To allow for belt options there are two mounting locations for the idler; the difference in belt length is ½ inch.
22. The proper tool must be used to install the pulley on the pump. Driving it on with a hammer and block of wood will cause serious damage.
23. Another idler pulley is used on the power steering bracket. To allow for belt options there are two mounting locations for the idler; the difference in belt length is ½ inch.
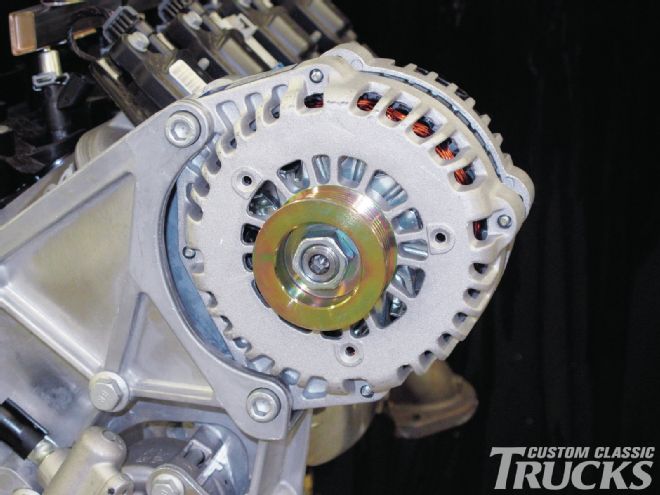 24. To keep its cool, the Holley alternator (part number 197-301) has twin internal fans. The wiring pigtail (part number 197-400) has a weatherproof connector and can be used with or without a charge indicator light.
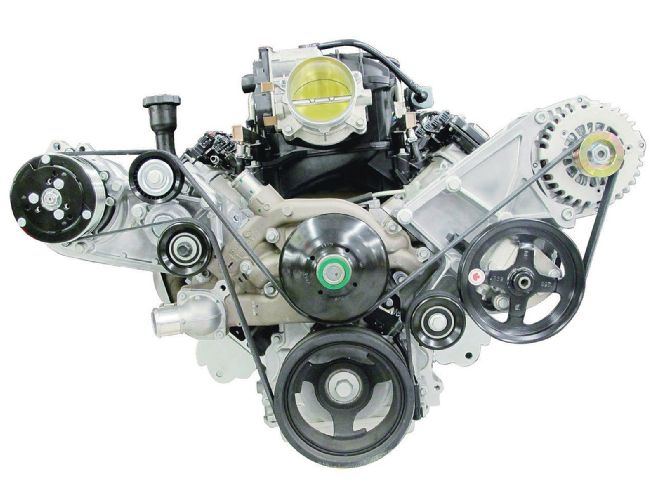 25. With a shorter pan and relocated accessories, thanks to Holley, the new Chevrolet Performance Parts LS3 is ready to slip into a vintage C10.