One of the most interesting new products of 2012 has to be Aeromotive's Phantom Fuel Pump/Baffle System. What makes it interesting? The fact that it's a universal system that can be used with almost any tank or fuel cell, whether stock or aftermarket, deep or shallow (as shallow as 6 inches), steel, aluminum, or plastic.
What makes it a phantom? The fact that it's an in-tank fuel pump system that, once installed, is practically invisible.
As any street rodder running electronic fuel injection already knows, it's necessary to upgrade the fuel system in order to provide constant fuel pressure for EFI. In addition to running a feed line, return line, and vent line, a well-baffled tank is necessary to prevent sloshing fuel from causing an interruption in flow. The solution has been to cut open the tank and install an aluminum sump box with baffles. The Phantom System replaces that with an easily installed, everything-included, bolt-in modular system, requiring no welding. All you do is drill a hole and insert the system. It's really that simple.
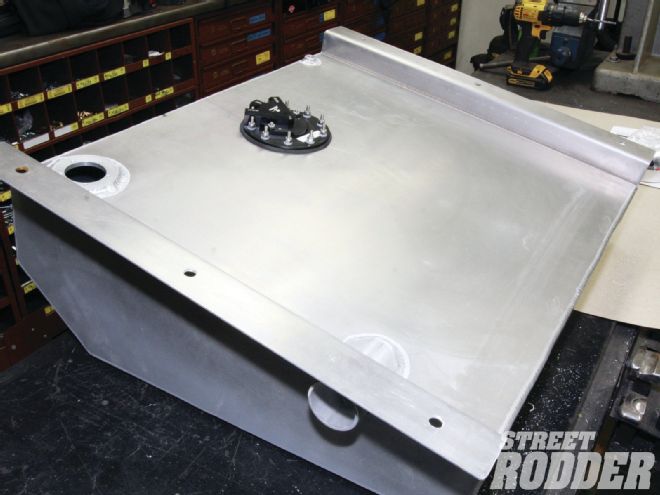
When we saw a quote from Troy Ladd of Hollywood Hot Rods on the Aeromotive website praising the new Aeromotive system, we decided to take a ride to the shop where a Phantom System (PN 18688) was being installed on custom tank for a customer's '55 Chevy.
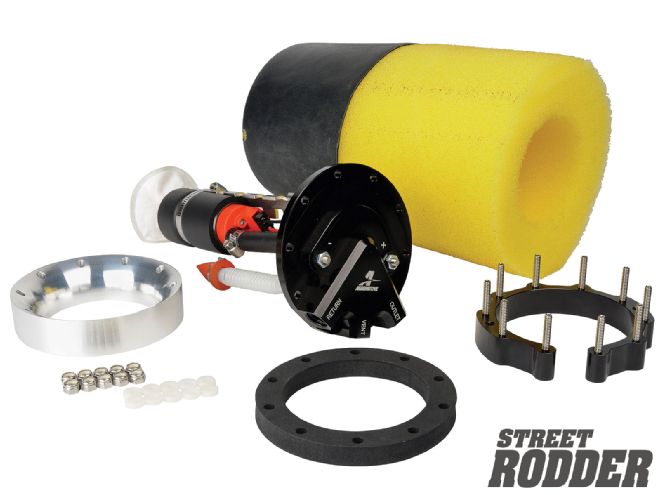
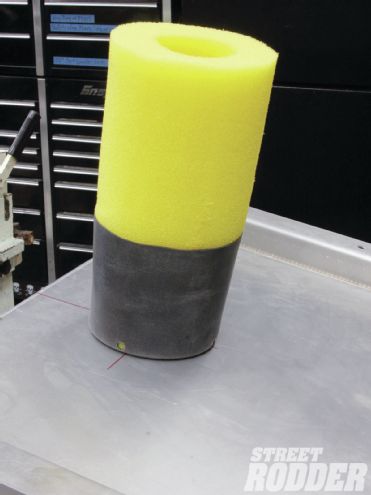
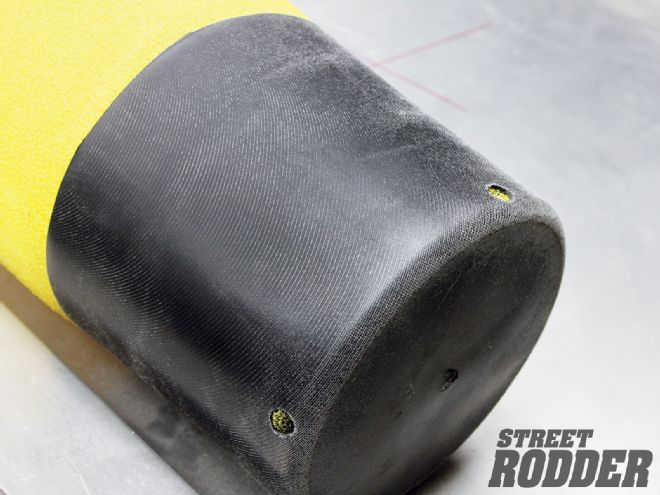
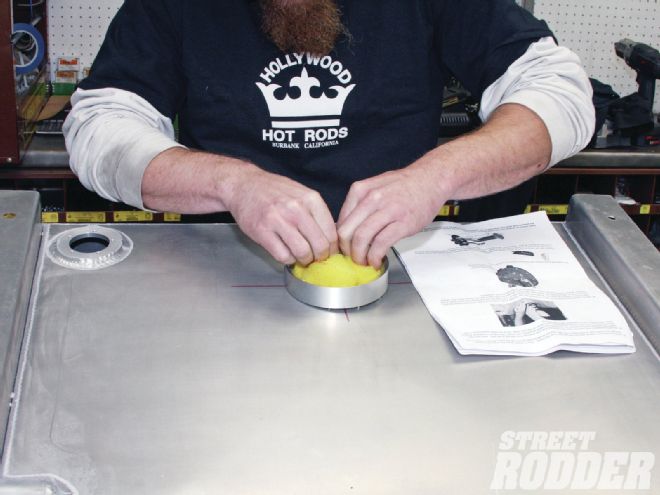
1. The Phantom System's Internal Baffle/Basket consists of a foam baffle and rubber bladder cup assembly, which keeps the pump submerged in non-slashing fuel. The assembly should be an inch taller than the tank depth; the foam can be cut to fit practically any tank.
2. The bladder cup features 3/8-inch holes to draw fuel from low in the tank.
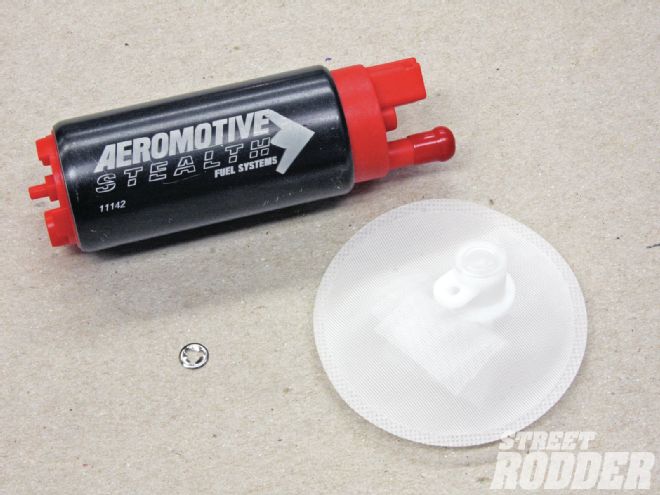
3. The system includes an Aeromotive 340 Stealth in-tank fuel pump and a strainer/sleeve, which acts as a pre-filter.
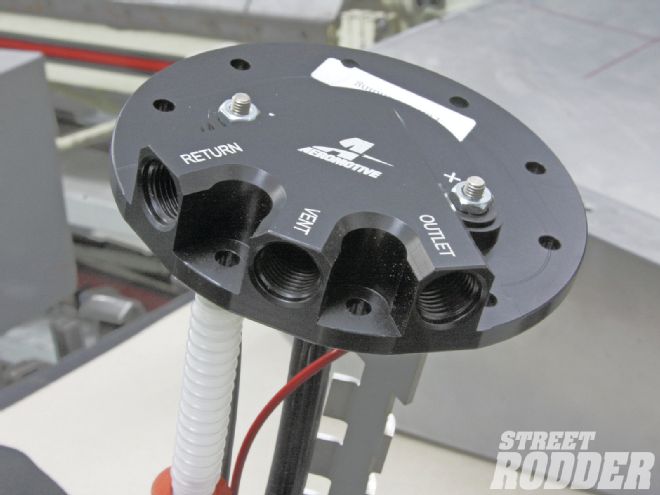
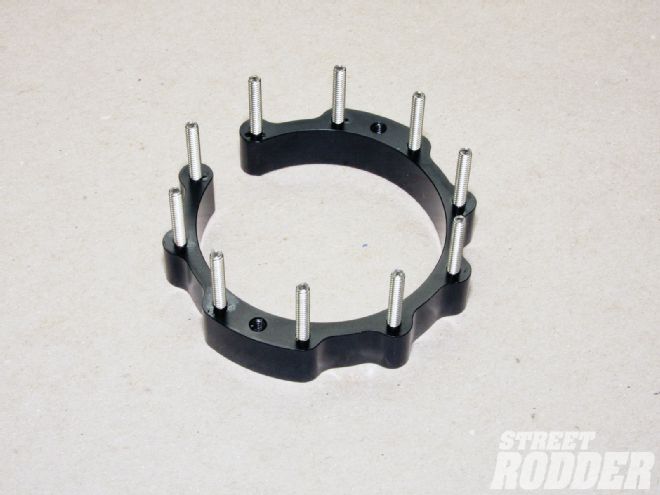
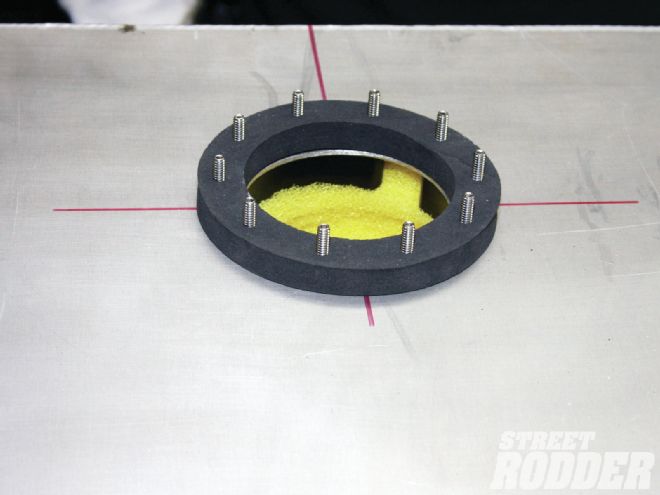
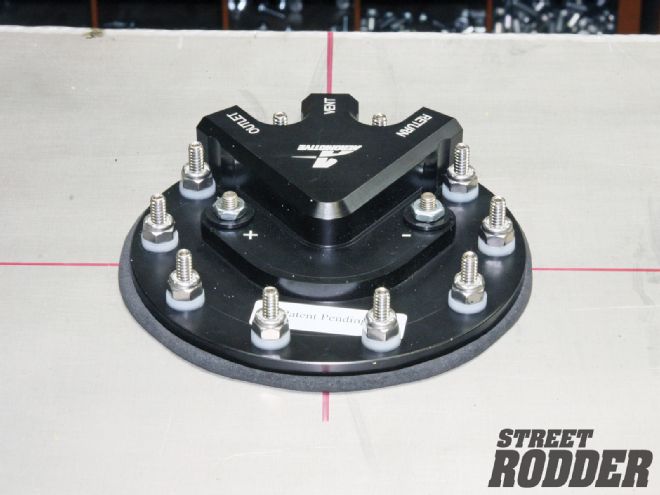
4. At the top of the fuel pump hanger assembly, the outlet cap incorporates three built-in ORB-06 ports (outlet, return, and vent), along with two pump power terminals and 10 mounting holes.
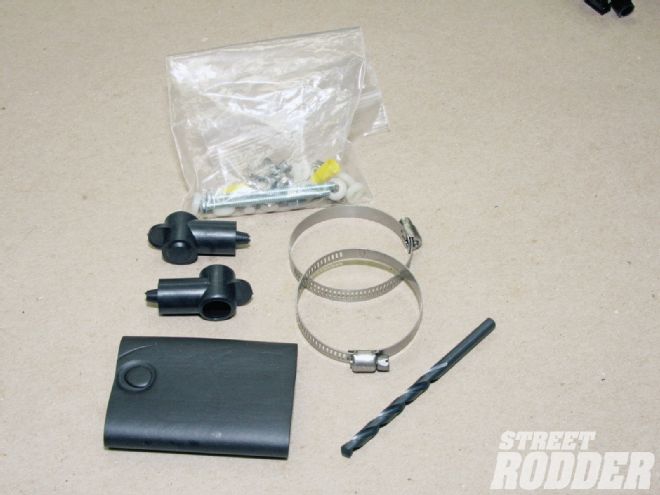
5. The system comes complete with all required installation hardware, including clamps, nuts, washers, fittings, and even a bit for drilling mounting holes.
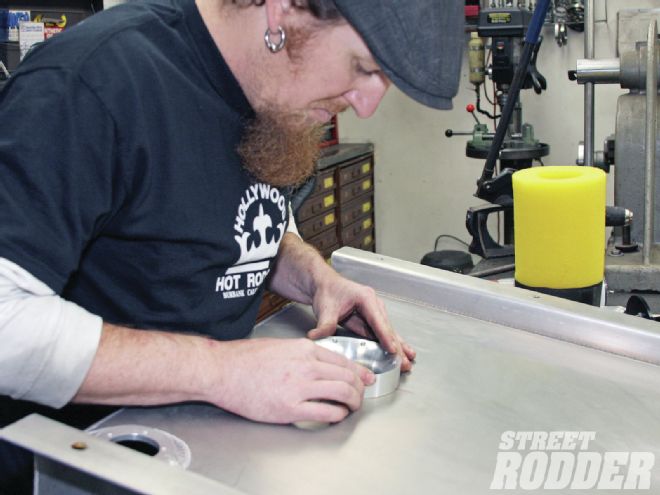
6. The first step was to determine the mounting location in the top of the tank and drill a 3-1/4-inch-diameter hole.
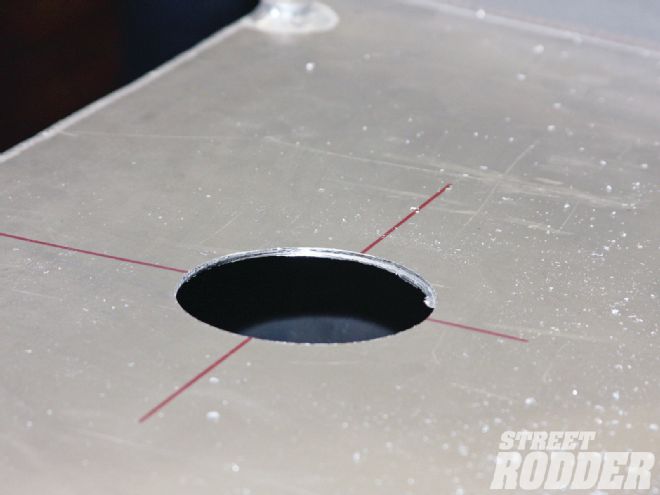
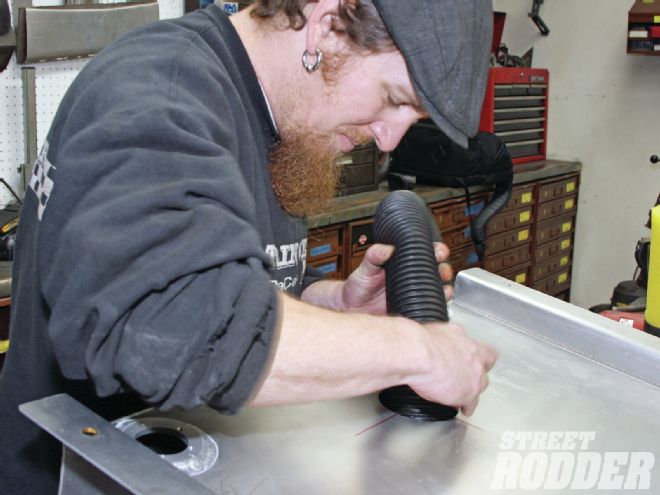
7. The hole was deburred then a shop vacuum was removed to thoroughly remove any metal and other debris from the inside of the tank.
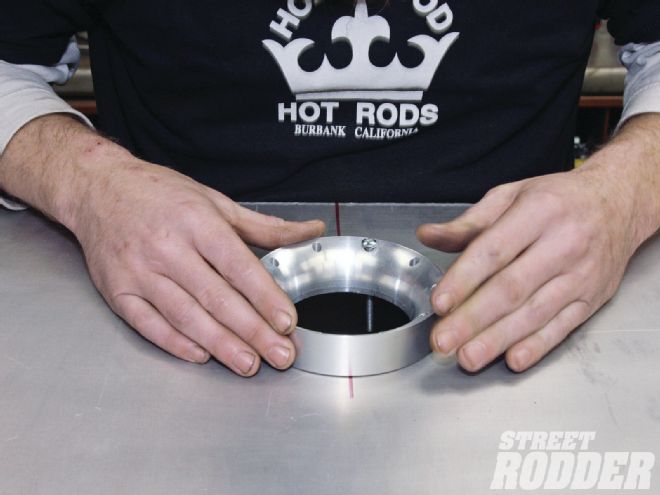
8-9. Using the installation ring drill guide and No. 2 drill bit (both provided with the Aeromotive system), ensure that the size and pattern for the mounting holes is exactly correct.

10. The fuel pump retainer ring includes 10 threaded studs, which will be used to mount the fuel pump hanger assembly.
11. The C-shape of the fuel pump retainer ring allows it to fit into the hole. Don't drop it.
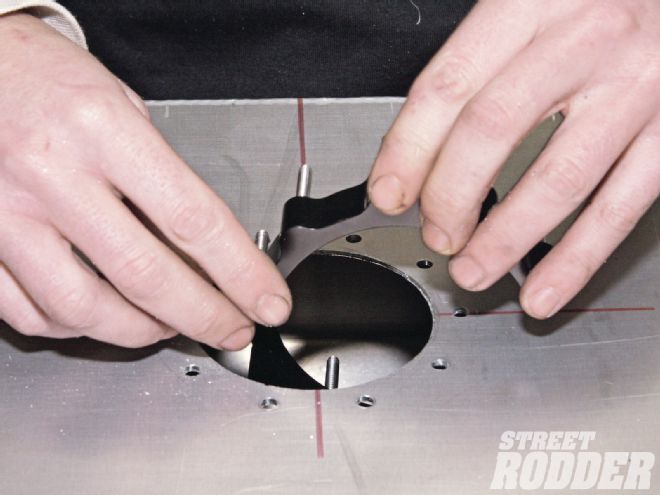
12. Thanks to the installation ring, the studs in the retainer ring fit perfectly through the drilled mounting holes.
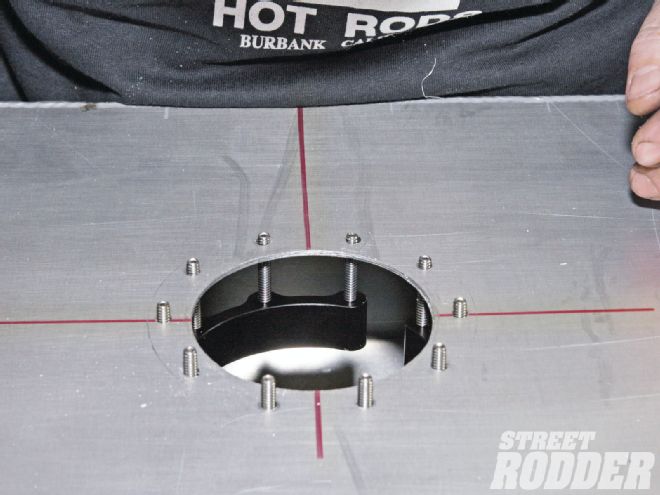
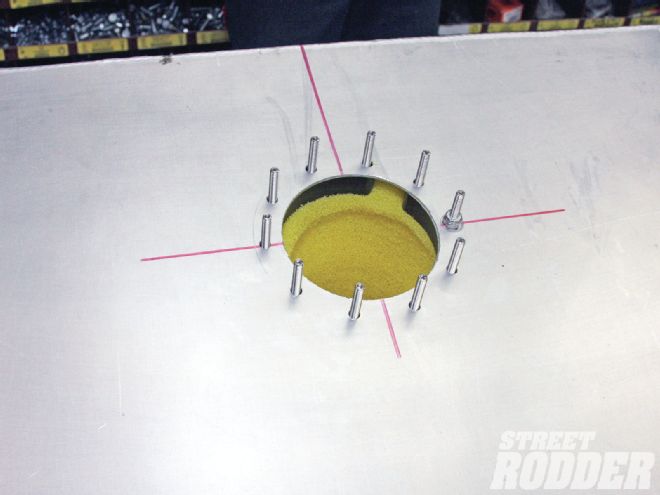
13. With the installation ring mounted on the retainer ring studs, the baffle/cup assembly was carefully squeezed into the tank.
14. The assembly was centered in the hole and the installation ring was removed
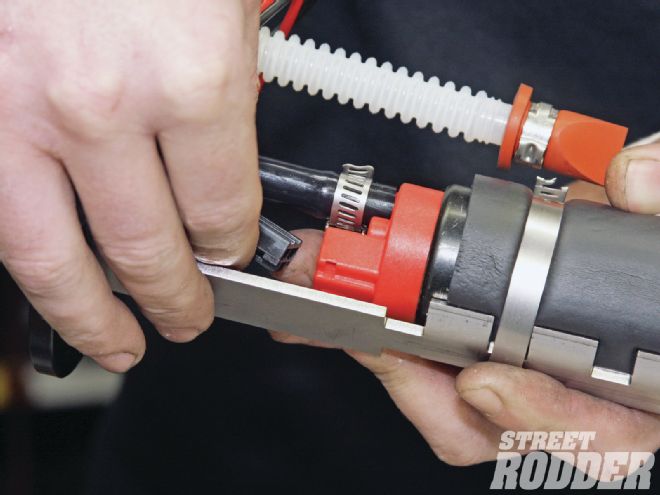
15. The strainer and sleeve were installed onto the Aeromotive Stealth fuel pump.

16. This fuel pump hanger assembly is a universal part, and was too long to fit properly in this tank. The distance from the underside of the outlet cap to the bottom of the strainer should be the same as the tank depth.
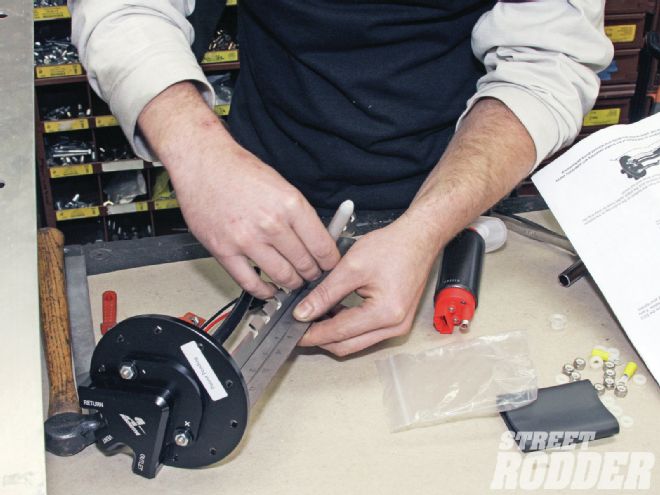
17. After the pump bracket and the outlet hose were measured and cut, the hanger assembly was a perfect fit.
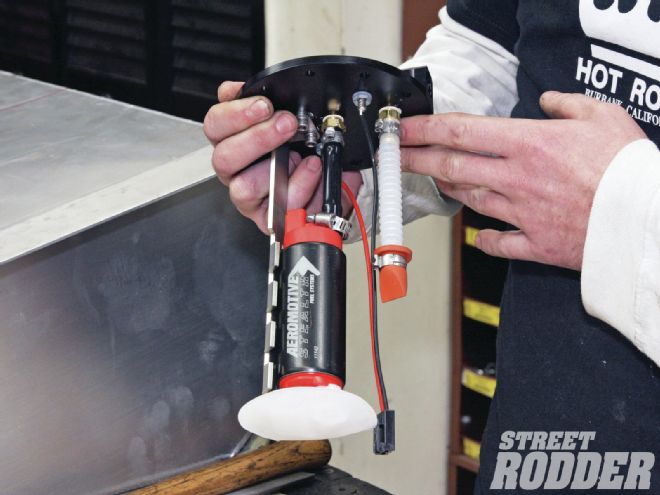
18. The pump was attached to the bracket using the supplied clamps.

19. The electrical connector was plugged into the fuel pump.
20. A 1-inch-wide, 1/2-inch-thick foam spacer forms a gasket between the top of the tank and the outlet cap. This would be particularly useful on a corrugated or ribbed surface.
21. The fuel pump hanger assembly was lowered into the baffle assembly inside the tank and the outlet cap was fastened to the studs with the supplied nylon washers and locking nuts.
22. From start to finish, the installation was quick and simple. The system includes an Aeromotive 340 Stealth in-tank fuel pump and a strainer/sleeve that acts as a pre-filter.
