EFI swaps are so easy these days. With the burst of new bolt-on kits that require no tuning, it's become little more than a day's task to remove your carb and have the engine retrofitted and ready to run with either throttle-body or multi-port injection. And, in most cases, you'll never even have to break out a laptop. No more crazy wiring harnesses or junkyard digging for stock parts is necessary; we really do have it so much better than ever before.
The only shortcoming with EFI so far has been at the other end of the car: the fuel tank. While there are a couple companies out there with EFI-specific retrofit tanks for vintage cars, most are very expensive and only offered for a select few popular cars at best. Outside of that, you're looking at a custom-built tank, finagling in a tank from another car, or just making do with the stock carb-style tank.
While it's totally possible to do a proper EFI swap on the engine and drive around with a carb-style tank, there are a couple issues that will come up quickly. First and foremost, EFI tanks are baffled around the fuel pickup to keep a column of fuel around the inlet to prevent pump starvation. Without this baffle, it's necessary to keep the fuel tank over half full at all times so that you don't lose fuel and kill the engine doing something as simple as taking a freeway exit ramp. Trust us—that's all it takes.
This one is more personal preference, but using a vintage tank will also require an external fuel pump. While that doesn't sound like much of a big deal—and performance wise it's not—you're guaranteed to be able to hear it whirring away under the car, especially if it's a powerful pump. Not such an issue on track cars, but on street-oriented touring muscle cars we much prefer the silence afforded by an in-tank pump. It lets us enjoy the loud exhaust without interference!
We've previously worked with Aeromotive on a project for the EcoNova to show you how it's possible to cut up a stock-style fuel tank and build and install your own baffle and in-tank pump. It's totally doable for most homebuilders with access to cutting tools, a sheetmetal brake, and a welder, but it's still a daylong project at best. Sometime shortly thereafter, the fuel heads at Aeromotive had a stroke of brilliance and developed their new Phantom 340 EFI conversion kit. The absolute anyone-can-do-it-ness of this kit cannot be overstated: any stock tank plus the Phantom kit and one hour later you can have the conversion complete with zero welding involved! It's true—we did it. And when you see how ingeniously simple Aeromotive's solution is, you can't help but laugh and wonder why it took so long for someone to figure it out. On top of that, it's way cheaper than any other proper EFI tank we've ever come across. We now know how we'll be converting any offbeat future projects that lack drop-in tank options to EFI.But There's More …
If still you'd rather just have a drop-in solution delivered to your door, Aeromotive is expanding their Muscle Car Stealth Fuel Tank offerings to include first-gen F-bodies, '64-68 Mustangs, and now '55-'57 Chevys, and more options are in the works! They're still stock style, and the most budget-friendly EFI tanks out there.
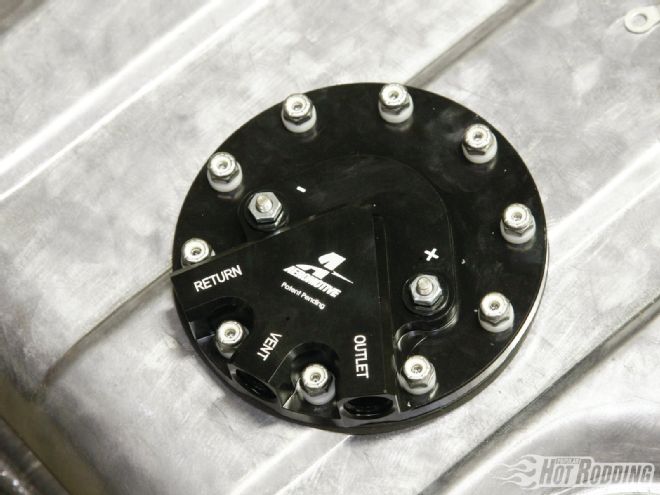
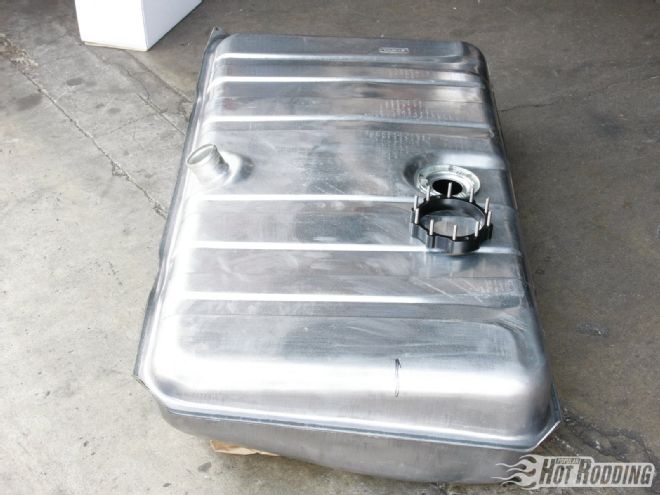
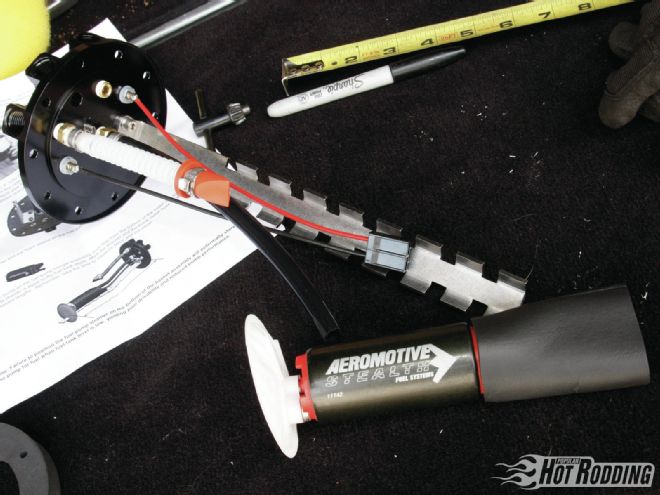
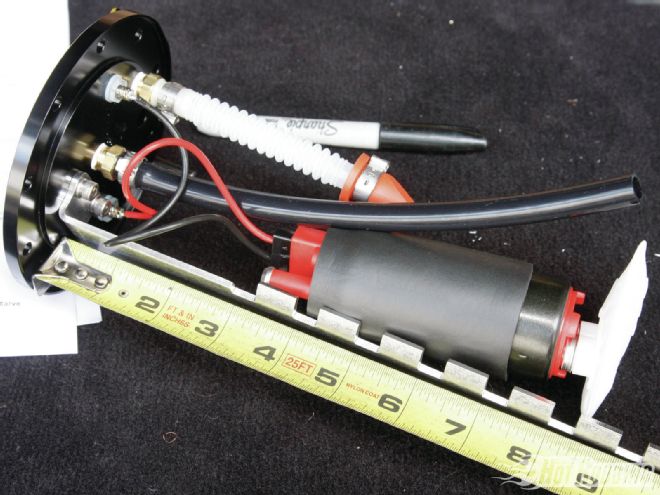
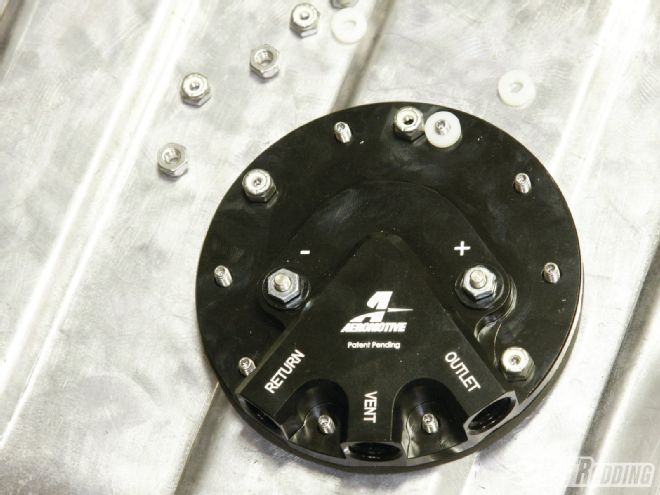
This is the heart of Aeromotive’s Phantom conversion kit (PN 18688, $549.95); the black anodized hanger assembly features three ORB-06 ports for supply, return, and vent. The 340 Stealth Fuel Pump is rated to support up to 850 hp in EFI applications or 1,000hp carbureted. With forced induction it’s good for 700/800 hp, respectively.
In case you’d rather run a returnless-style system where the ECU uses PWM to control fuel pressure, Aeromotive thought ahead. All you have to do is drill a 1/32-inch hole through the brass pipe plug to provide reference. We also love that Aeromotive included a check valve for the return into the tank.
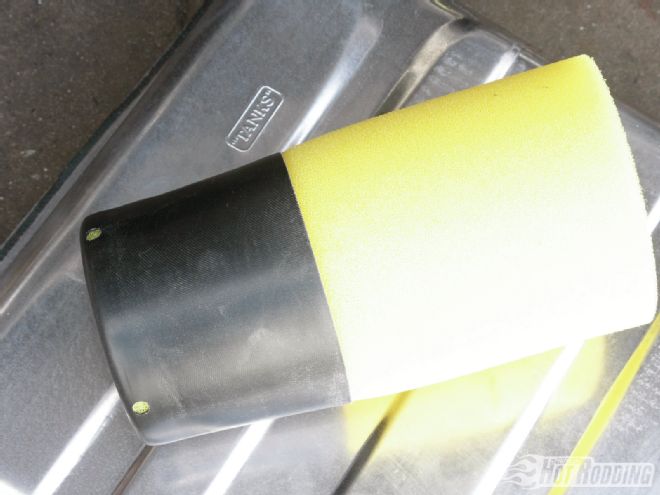
Behold the brilliant simplicity that is Aeromotive’s solution to the fuel baffle conundrum! This column of dense fuel cell foam sits in a rubber boot that has two ⅜-inch holes near the bottom. The boot acts like the fuel baffle in a standard EFI tank and keeps the pump submersed.
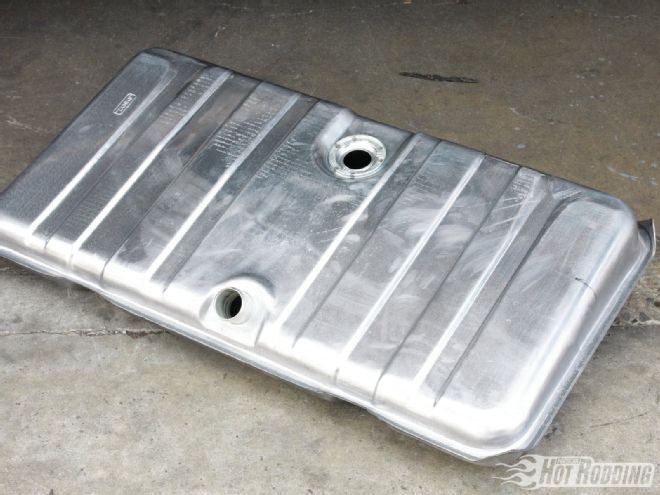
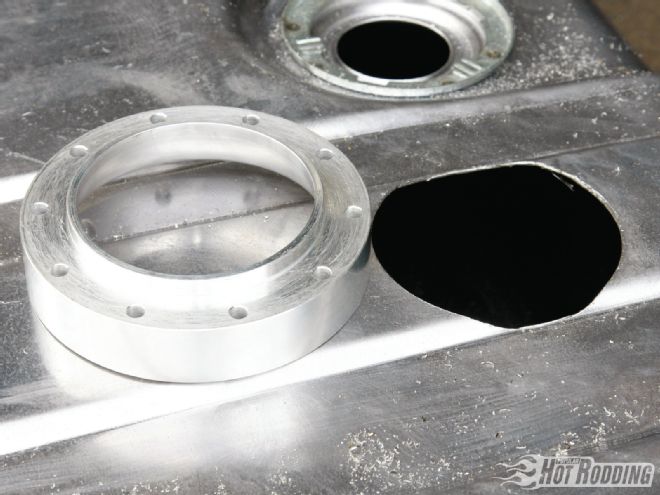
Aeromotive partnered with Tank (’67-’68 F-body, PN TM32A, $150) as their source of excellent reproduction muscle car tanks. The higher quality of their steel is very noticeable when cutting. Speaking of that, though you can use the Stealth EFI conversion on any fuel tank, Aeromotive highly recommends using a new tank whenever possible, or at least a professionally cleaned tank. We’re not welding, but there is a risk of spark from the required cutting and drilling.
When selecting the location for the installation of the Stealth pump, the most important consideration is keeping it at the deepest portion of the tank, preferably toward the center. Due to the angle of the floor on a first-gen Camaro tank it needs to be located parallel to the original pickup location.
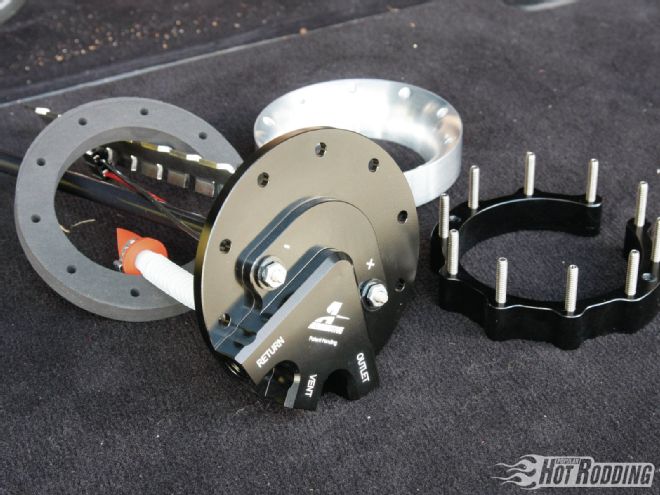
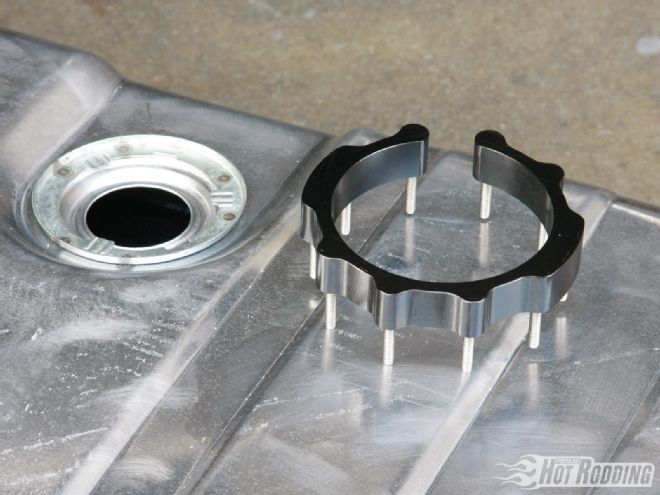
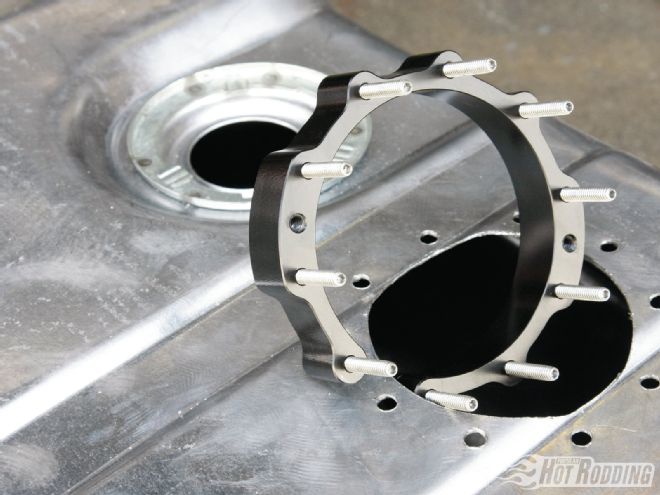
The fuel pump retainer ring will be located inside the tank, but it’s also used to determine the stud placement. Since we need to straddle the beads in the tank, we flipped it upside down and rotated the ring until none of the studs landed on the sides of beads.
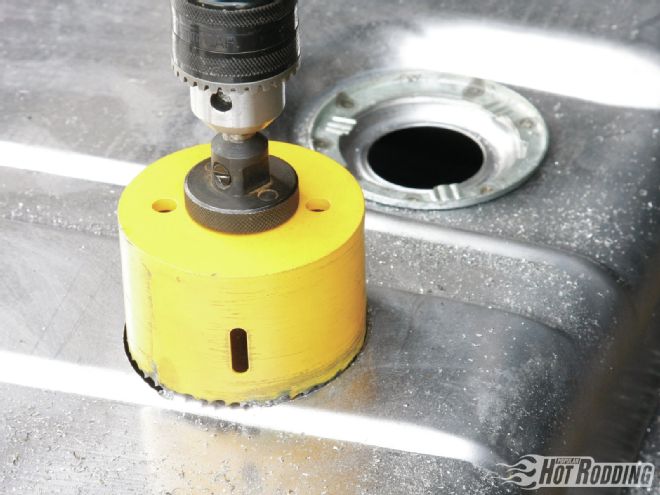
Once we’re satisfied with the placement, it’s time for the big cut. A 3½-inch hole saw and a drill are all that’s needed to make the input for the hangar assembly. Cutting on the beads can be a bit tricky since the center will cut out long before the edges, so to protect your wrists we recommend a sharp, new hole saw and bracing the drill against your leg.
This is officially the most bitchin template we’ve ever seen, and just goes to show how Aeromotive refused to take any shortcuts on making this kit high quality and user friendly. The raised register should fit perfectly inside the 3½-inch hole.
Aeromotive’s Stealth kit is so complete it even comes with the drill bit needed for the retainer ring studs. With the template in place, it’s rotated until the holes line up with the pattern previously established with the fuel pump retainer ring. Two holes are drilled 180 degrees from one another and two 10-24 x 2½-inch screws are dropped through the template to help hold in place for the other eight holes.
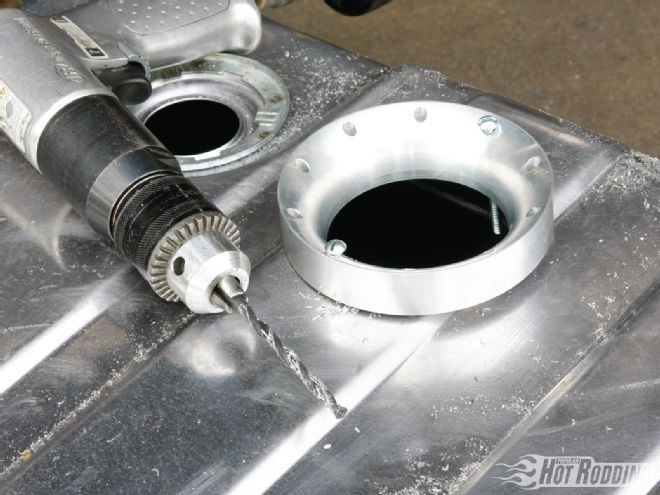
The template will get all the holes in the correct locations, but it’s likely a few will need to be deburred for the studs to slide through smoothly. Don’t open it up too much though; it will be helpful during install for the fit to be snug.
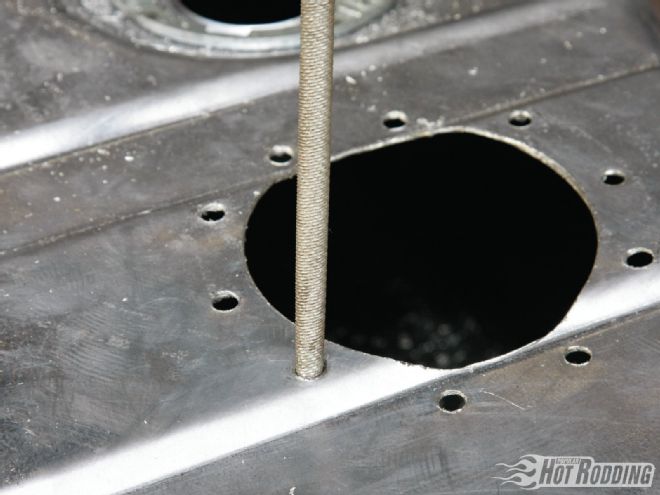
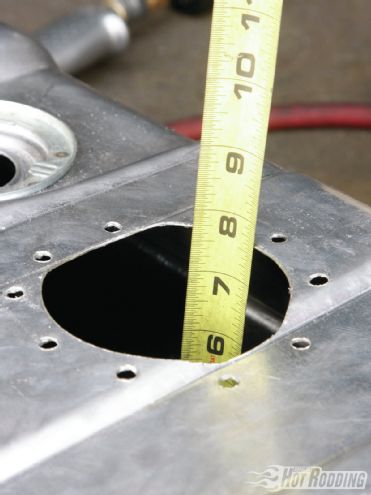
We need to know how deep the tank is from the bottom to the lip of the highest point. It’s not a super-critical number, but we need to know within 1/16 inch. Ours was almost 7⅝ inches.
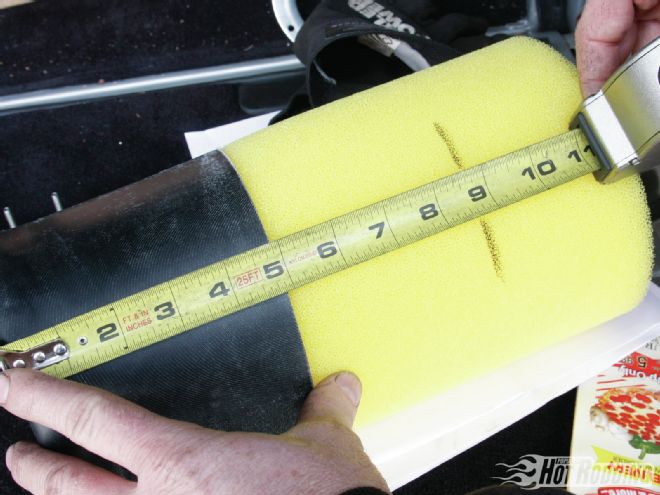
The fuel cell foam and baffle are the first pieces to be installed, so to set their height we take the measurement from the floor of the tank and add 1 inch. This will create a bit of compression that will help hold it in place. A hacksaw blade, bread knife, or a good pair of scissors will get the job done.
Before anything can be installed, the fuel pump retainer ring needs to go inside the tank. The notch in the ring makes it possible to slide in through the smaller hole. Keep your hand through the middle of it to pull the studs up and through the holes. The fit should be snug enough to hold it in place.
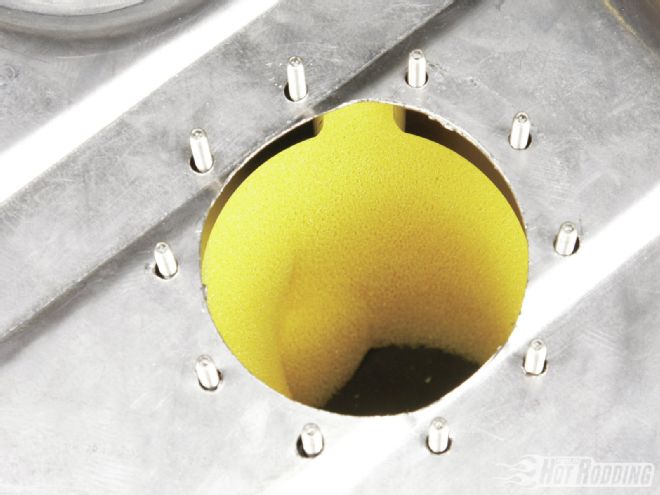
The template comes in handy for getting the foam and baffle inside the tank as well; slide it over the retainer ring studs and it creates a funnel as well as prevents the foam from snagging. The foam and baffle is simply squeezed and pushed through the opening.

Once the foam and baffle is inside the tank, manipulate it until it is centered within the opening and the top lip is outside of the retainer ring.
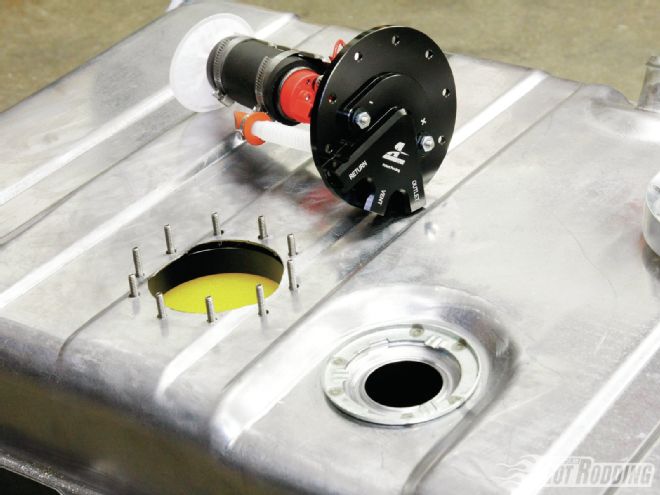
The fuel pump hangar assembly is universal fit, so we have to do a little trimming to the mounting bracket and the fuel hose.
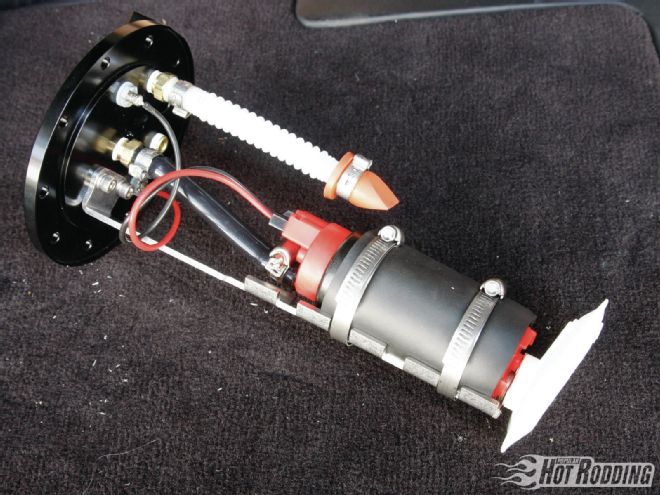
We need the measurement from the bottom of the upper mount to the bottom of the fuel pump strainer to match the measured depth of the tank, not the length of the foam and baffle assembly. This will put the inlet of the pump slightly off the floor of the tank so that it is submersed as much as possible without impeding flow.
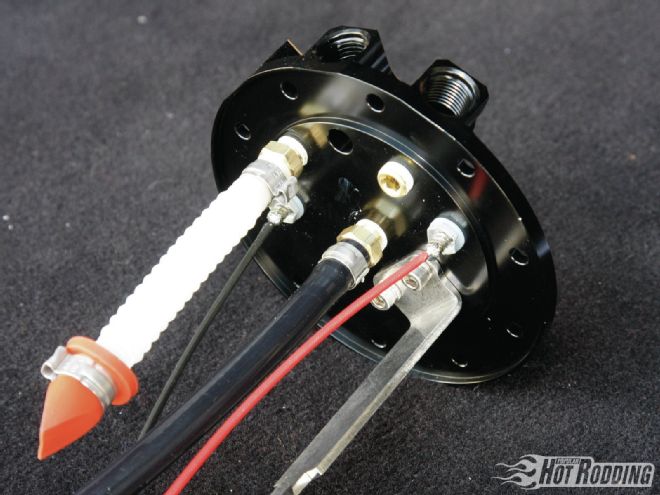
This is how the finished assembly should look. Make sure to install the foam sleeve over the pump before snugging down the ring clamps
.
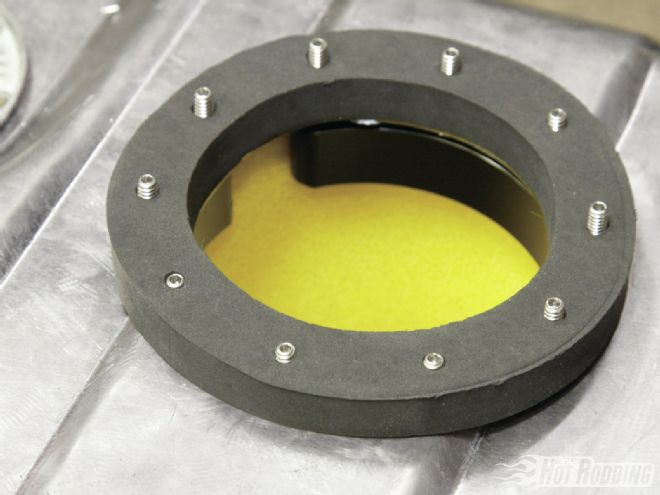
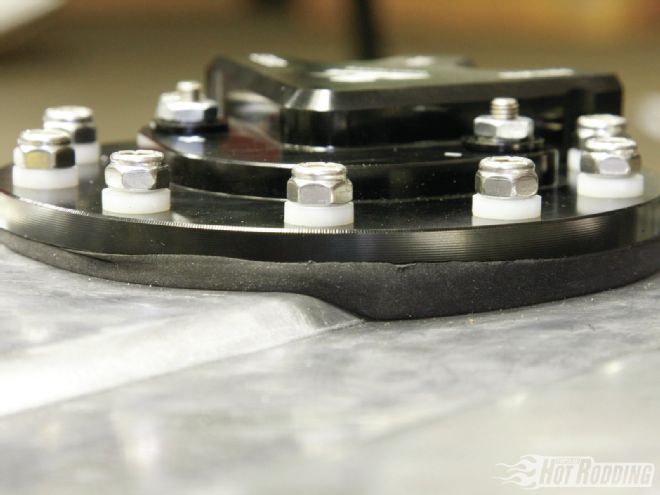
Here’s quite possibly the coolest part of the kit, and what makes the no-welding install possible: the ½-inch–thick fuel-resistant gasket. This gasket will swallow up beads up to ¼-inch high and seal up the tank.
This step might be the hardest part of the whole process; we need to compress the dense gasket down enough to get two Nylok nuts on the retainer ring studs 180 degrees from one another. Once those two are threaded on we can use them to draw the port assembly down.
With the gasket squashed enough, the retainer ring studs each get a No. 10 nylon gasket before the Nylok nuts are fully installed using a crisscross pattern to press the gasket down evenly. Note how the ½-inch gasket swallows up the beads on the top of the tank creating a solid seal. Speaking of that, there’s no need to try and mash it completely flat; that could compromise the gasket’s effectiveness. In our case, roughly 50-60 percent compression was good enough. If you have really large beads or need a touch more sealing power, use a fuel-rated sealant such as Dow Corning 730 fluorosilicone RTV or Hylomar Universal Blue, not traditional gasket maker; it’s not fuel resistant.
And that’s it! Even with taking photos and a pizza break, we were done in a couple hours. Without the camera, you can easily do it in one. As for the fuel-sending unit, just use a stock one in the tank’s original location and cap off the pickup tube. That way it will plug right into the stock wiring. Since all the work is on top and no welds were made, once the tank is in the car no one will be able to tell it’s not completely stock!