Horsepower and torque are all about cylinder pressure. Compression ratio, cam timing, cylinder head flow, and all the rest of the goodies that go into an engine aren't worth much if what enters the cylinder doesn't remain there to be turned into cylinder pressure that will push those pistons around.
In the dark days of engine-building, car crafters had to rely on a compression tester to tell them if they had a weak cylinder by comparing the cranking pressures of the cylinders against each other. But this was crude and a less-than-accurate way to evaluate how well the engine was sealed up.
Today, it's common practice to use a cylinder leakdown gauge to evaluate how well each cylinder performs in retaining pressure. The process is simple enough-pump a measured amount of air pressure into the cylinder, and the gauge will tell you the percentage of leakage. But there's a whole bunch more to this story than just pumping air into a cylinder. Let's take a look at how to perform a cylinder leakdown test properly and what you can learn from the results.
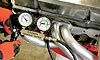
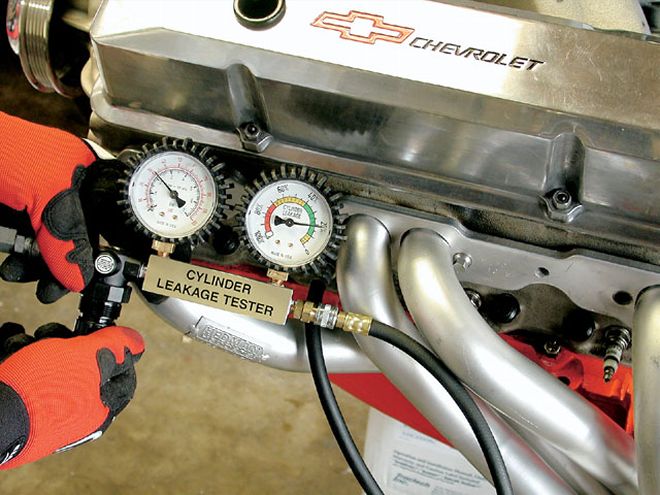
ToolsLet's start with the leakdown tester itself. There are basically two different styles: single- and dual-gauge units. The single-gauge units would seem to be a little easier to operate, but they require you to pay particular attention to the inlet pressure, as each gauge will have its own requirement. If the inlet line pressure is too high or too low, the result will probably be in error.
Some twin-gauge models also require a specific range of inlet pressure, which you read on the first gauge. The second gauge will read a percentage of cylinder leakage. The Matco tool that we use in this story works in this manner.
Regardless of which tool you use, the point is to use your leakdown tester as a comparative tool. For example, your gauge might read 10 percent while your buddy's reads only 8 percent on the same cylinder. It's really not critical which gauge is correct as long as it operates consistently every time.
ProceduresThe first step is to ensure the engine is warm. Because we will be pumping air into the engine, leave all the spark plugs in except for the cylinder you're testing. As an example, let's start with a small-block Chevy, cylinder Number One. Yank the plug and turn the engine over until the piston is at top dead center (TDC). If you have balancer marks every 90 degrees, this will help. Now install the air-fitting adapter into the spark plug hole. You'll also need a breaker bar or ratchet and socket for the crank nut. Remember to double-check that your gauge reads zero before you start.
The idea is to put air to the cylinder and then gently rock the piston around TDC to ensure the rings are seated. Keep in mind that cylinder pressure is used to help seal the rings to the cylinder bore, so you want to give them every opportunity to do so. Now record your leakdown percentage. It's really just that simple. Test the remaining cylinders in the same fashion and you're done.
Often, the cylinder pressure applied to the piston may turn the engine over. The key is to have the piston as close to TDC as you can so the crank, rod, and piston are all as vertical as possible. Once the rod journal has leverage on the crank on either side of TDC, the cylinder pressure combined with that leverage may force the piston down the bore. This is the reason for leaving the spark plugs in the engine.
ResultsEveryone wants to have a hero engine, but don't believe all the hype you hear about 2 percent leakage engines. No cylinder seals perfectly, especially if the engine is nitroused, supercharged, or turbocharged where the top and second rings are set with wide ring endgaps. Even for normally aspirated engines, respectable leakage numbers would be anywhere from 8 to 12 percent with a variation between cylinders of 4 to 5 percent, but it's possible the variation could be as high as 10 percent.
So if you test an engine and see leakage numbers even in the 15 to 20 percent range, this is not cause for alarm. Much of your concern around an engine that needs freshening should revolve around exactly where the leakage originates. That's where we'll go next.
Always make sure to test cylinder leakage with the piston at the top of the cylinder. This is where the greatest cylinder wear occurs. It does little good to measure leakage with the piston at bottom dead center since this is not where the engine makes power.
Leak PathsThere are three major leak paths where cylinder pressure can escape: past the rings, the intake valve, or the exhaust valve. We'll ignore the head gasket for now. With each of these three leak sources, it's easy to tell where the leakage is originating with some sleuthing. If you can hear a hissing sound coming from the valve cover breather hole or from the dipstick tube, then the air is escaping past the rings. If you prop open the throttle blades and hear that same hissing sound, then the pressure is leaking past the intake valve. If the air is escaping past the exhaust valve, you will probably be able to hear the air even as far back as the tailpipe.
Let's evaluate each of these leak paths separately. Say your engine measures 30 percent or more for each cylinder, and it's all running past the rings. This is a good indication that your engine is tired and could use rebuilding. But if the leakage number is under 20 percent and most of it's past the rings, then be advised that a rebuild is not going to be worth 50 or perhaps even 20 hp. As an example, on the nitrous small-block Chevy story in this issue, we replaced pistons and rings in the engine (granted the cylinder wall finish was not corrected) and picked up less than 5 hp, the equivalent of just over 111/42 percent gain. The point here is that even cylinders with 20 percent leakdown do not represent a major horsepower loss.
The consensus among performance engine tuners for leakage past the exhaust valve is that it would have to be massive-over 30 percent or more-before it should be of concern. Flowmaster Dyno guru Kevin McClelland suggests tapping the exhaust valve with a plastic mallet to help seat the valve if you find high exhaust valve leakage. Often, this might help, but Kevin also says that cylinder pressure will help seal the valve during the compression and combustion cycles.
The area where leakage presents the most concern is the intake valve. If you detect a significant amount of air escaping past the intake valve during the leakdown test, try tapping on the intake valve with a plastic mallet to see if this will reduce the leakage. If the leak persists and is well into the 20 percent zone, it might be worth the time to yank the head and repair the problem. However, if you're looking at just one cylinder with difficulties, you can guess where we're going. As an example, we floated the valves on a 430hp small-block Chevy and tagged a valve lightly against the piston enough that the seal went away. We replaced the valve and went back on the dyno only to discover the engine generated no increased power anywhere in the power curve.
ConclusionsThe overall point is that a leakdown tester is a great diagnostic tool to identify real (or imagined) cylinder pressure difficulties. But don't be alarmed if you get 15 to 18 percent leakdown on all cylinders. If the cylinders perform within a couple of percentage points of each other, it's time to look elsewhere for major power gains.
Parts ListThe following are part number references for leakdown testers from several performance or tool companies.
Tool Manufacturer Part Number Dual-gauge leakdown Powerhouse POW-301018 Dual-gauge leakdown ProForm 66839 Single-gauge leakdown Childs & Albert LT-105 Dual-gauge leakdown Matco CLT2PB Compression tester Matco CT66K Dual-gauge leakdown {{{Summit}}} Racing SUM-900010 Vacuum gauge Matco VG1