When the MyLink system came out for the fifth-gen Camaro for the 2013 model year, a lot of 2010-’12 owners could be heard yelling expletives and other colorful epithets. The system featured modern touch screen functionality; a larger display for the backup camera that allowed the factory to install a smaller, less obtrusive rearview mirror on the windshield; and a navigation system that didn’t require an OnStar subscription and actually worked like a modern nav system with a map of your location and the surrounding area, not just text instructions displayed through the tiny display screen between the speedometer and tachometer.
Thanks to modern technology though, and the work of the crafty and quite ingenious folks at Gen5 DIY (gen5diy.com), owners of non MyLink-equipped Camaros can retrofit MyLink into their cars and experience the bliss and usefulness of the modern setup. Gen5 DIY sells not only the adapter harnesses necessary for the install but also the required faceplate and the head unit, which Gen5 DIY reprograms to be compatible with your car.
Being addicted to the latest and greatest, we decided that our ’10 SS could benefit greatly from this upgrade and give us something new to play with. While this install isn’t hard necessarily, it does require a lot of patience and a basic understanding of wiring and electrics. If you have any doubts about your skills for doing this, we’d advise you to leave the job to a competent install shop. Our friends at AntiVenom Performance were more than qualified and happy to do the work. Their knowledge of the fifth-gen Camaro nearly rivals that of GM. The install was done in a day, and after everything was done you’d never know our ’10 didn’t come with MyLink installed from the factory.
01. The 2010-’12 Camaro came with a bulky mirror assembly that also had the video output for the backup camera, if so equipped. Compared to the ’13-up frameless mirror, it looks enormous.
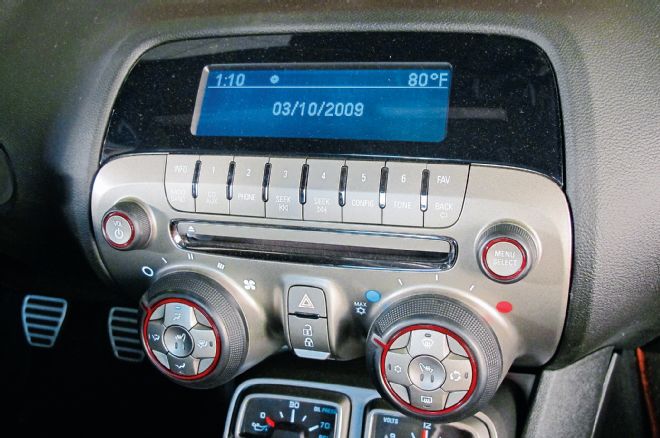
02. The factory radio setup in the 2010-’12 Camaros was a topic of much negative discussion during those years. Some liked it, some were ambivalent, and others downright hated it. The door lock actuator button mounted below the radio buttons was also a highly debated item.
03. The 2013-up touch screen unit can be purchased from Gen5 DIY and is a factory unit that, along with the supporting module, is programmed by Gen5 DIY for your car. The MyLink touch screen and navigation system was new for the ’13 model year. It provided a true nav unit to the Camaro that didn’t require the use of OnStar, along with touch screen controls for the sound system. The door lock actuator button was also deleted in 2013, and the controls moved to the door by the door handle.
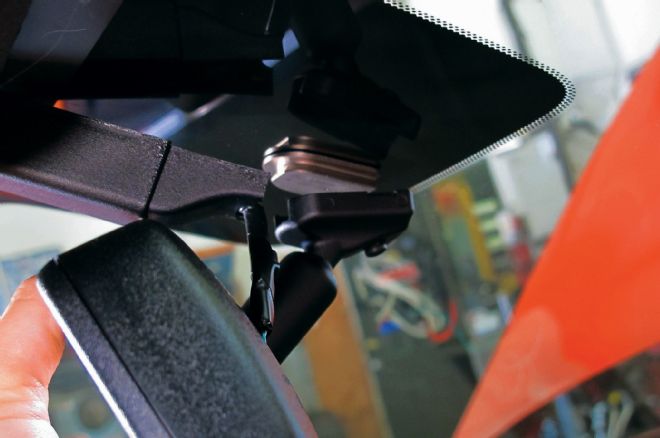
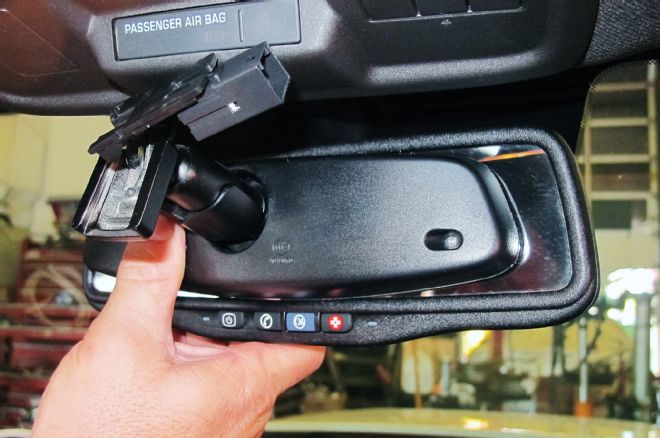
04. The first step is prying off the wiring cover by the mirror, then removing the unit from the windshield mirror button.
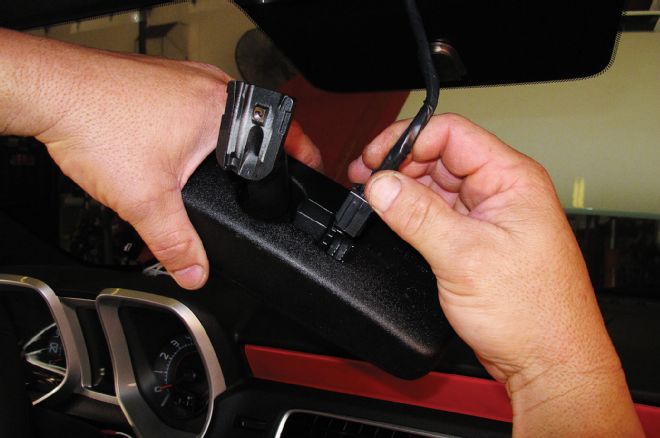
05. Then you can simply unplug the mirror and set it aside.
06. The Gen5 DIY kit comes with an adapter harness that plugs into the factory wiring harness for the mirror.
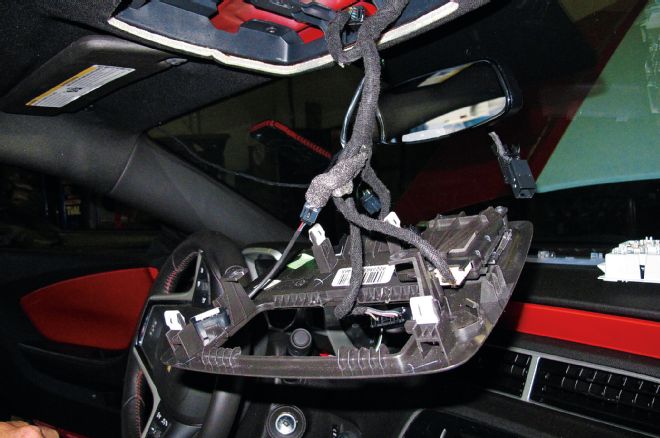
07. To wire the new frameless mirror into the car, you’ll need to open up the overhead console to access the wiring so you can plug in the adapter harness and run it correctly.
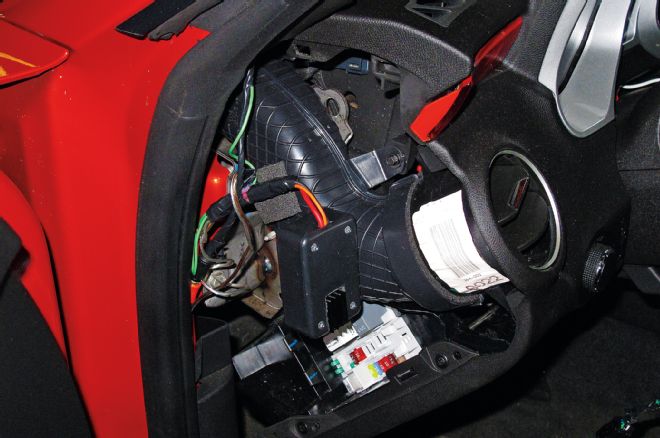
08-09. This part is run behind the headliner and over to the driver-side A-pillar, down to the junction block on the left side of the dash. It provides power for the mirror.
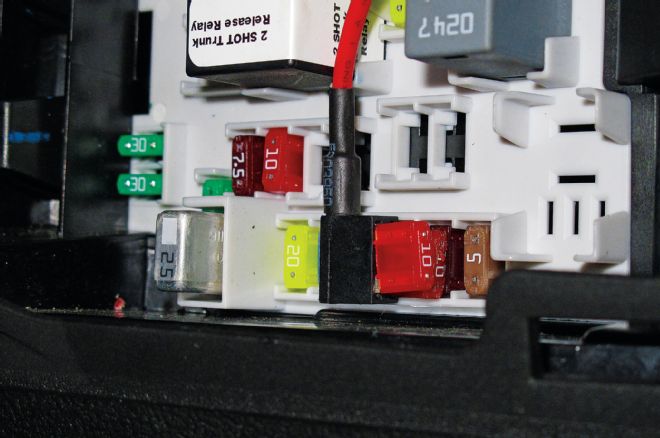
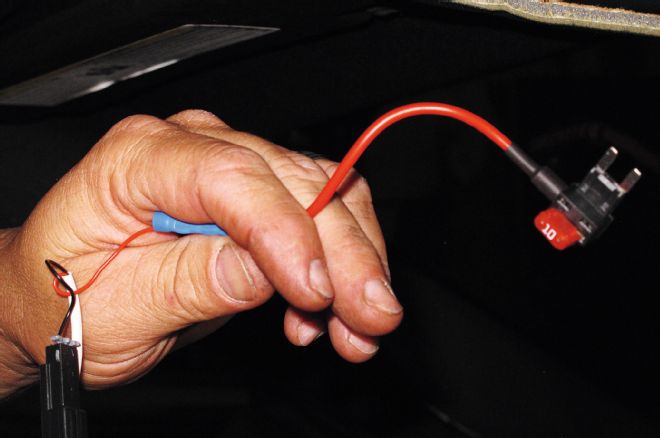
10. The fused plug is plugged into the fuse block as such. This wraps up the install of the frameless mirror.
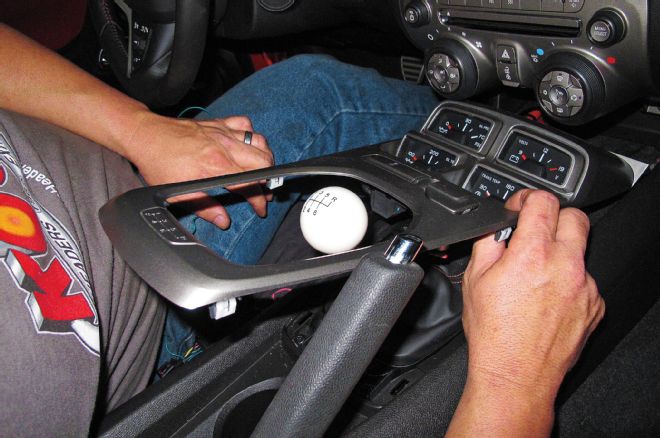
11. For the MyLink touch screen installation, you first need to remove the cover off the center console.

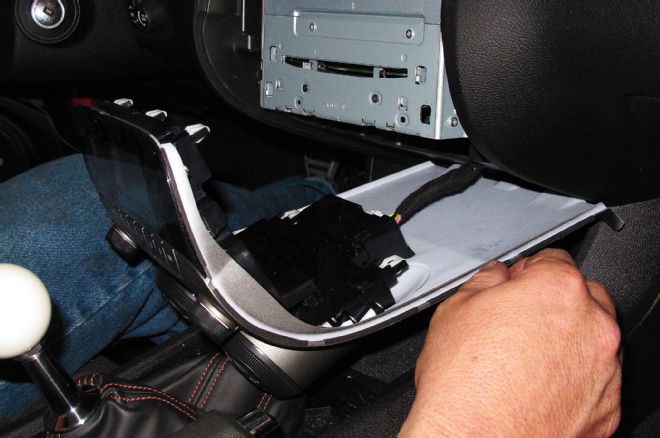
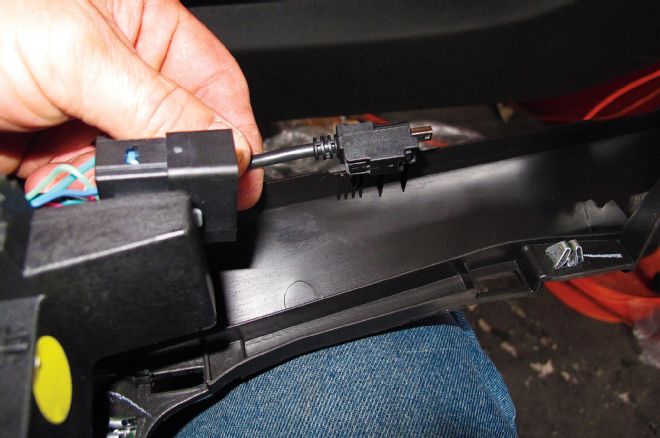
12. You’ll need to unplug this connector so you can get the center console completely out of the way.
13. Next, the two bolts at the bottom of the radio faceplate are removed, and the faceplate unclipped from the dash so you can unplug it.
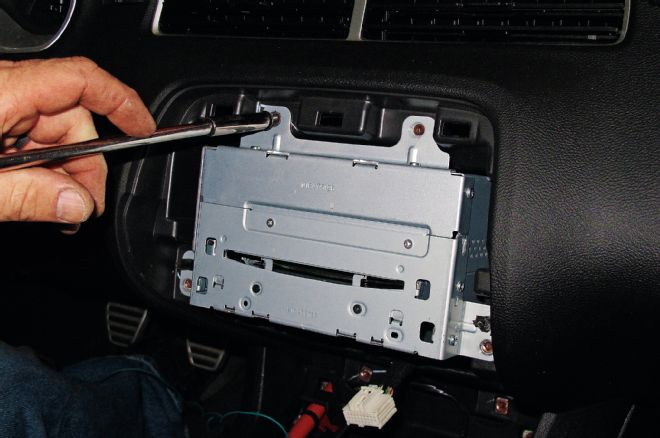

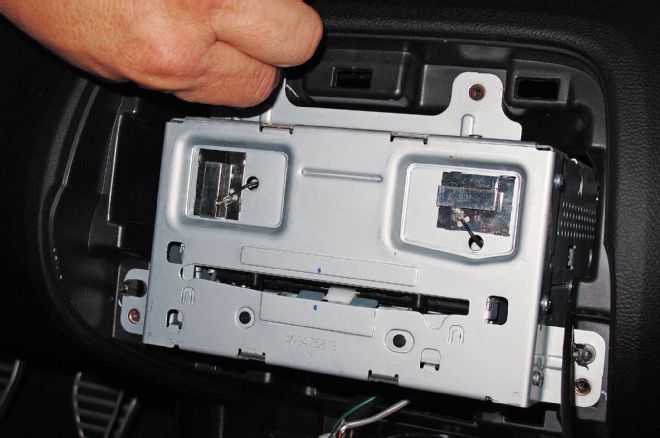
14-15. With the faceplate out of the way, the CD player and head unit can be unbolted from the dash and pulled out. We then removed the harness plugs from the back of it.

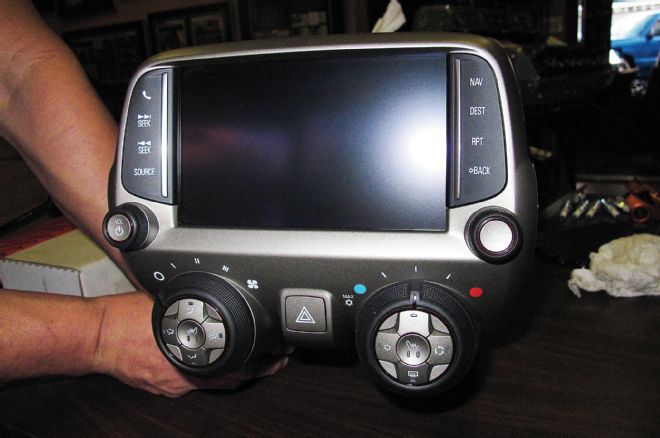
16. Here’s the side-by-side of the two faceplates. While we never had a problem with our ’10’s factory unit, we like the look and functionality of the later touch screen system much better.
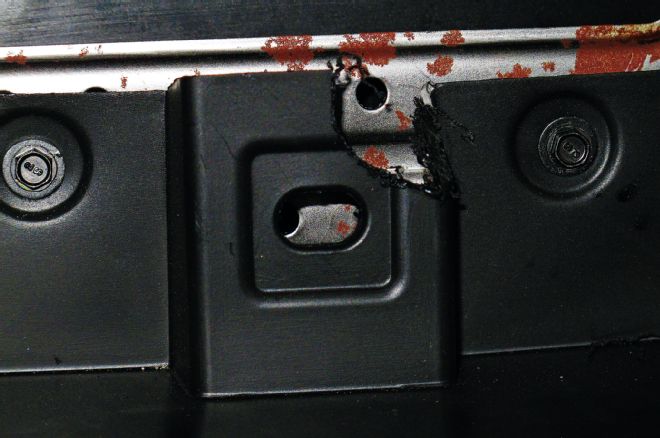
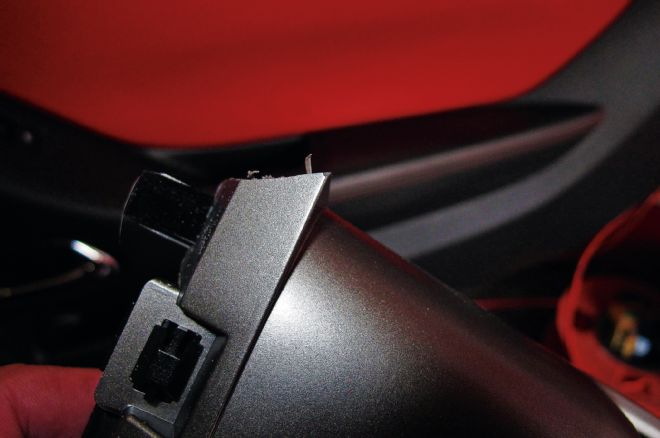
17. To install the new MyLink head unit, you’ll need to notch this plastic mounting tab as seen in the photo.
18. The new adapter harness from Gen5 DIY is run through the factory holes in the dash assembly.
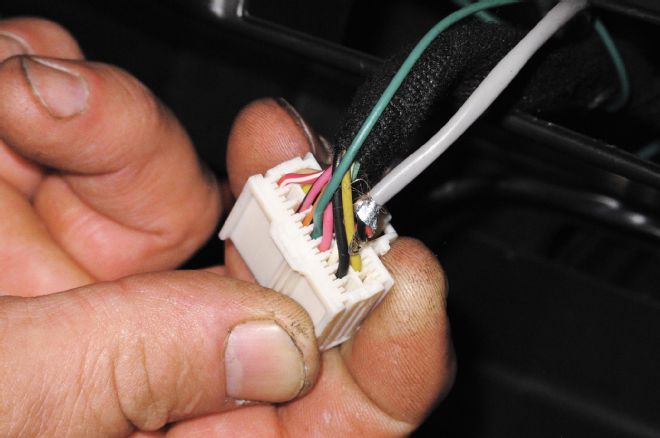
19. The Gen5 DIY kit comes with printed instructions and a helpful DVD disc for the installation, including directions on how to wire in the adapter harnesses to the factory plugs. Here, three wires are added to the plug connecting to the faceplate.
20. With the necessary wiring mods done, the new MyLink head unit is installed. With this conversion you lose the factory CD player, but considering how many people use iPods or satellite radio for listening to something other than terrestrial radio these days, the loss of the CD player isn’t really much of a problem.
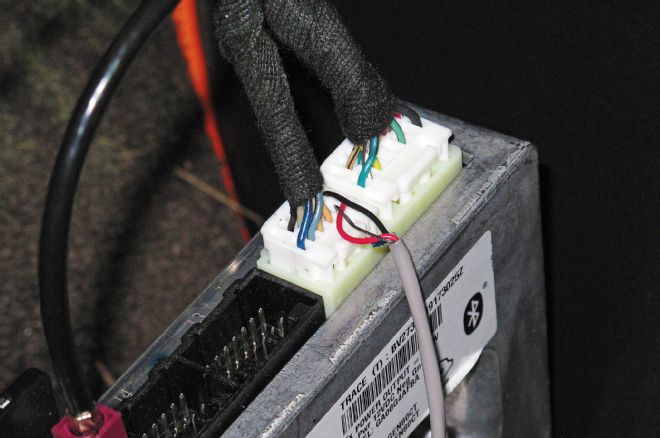
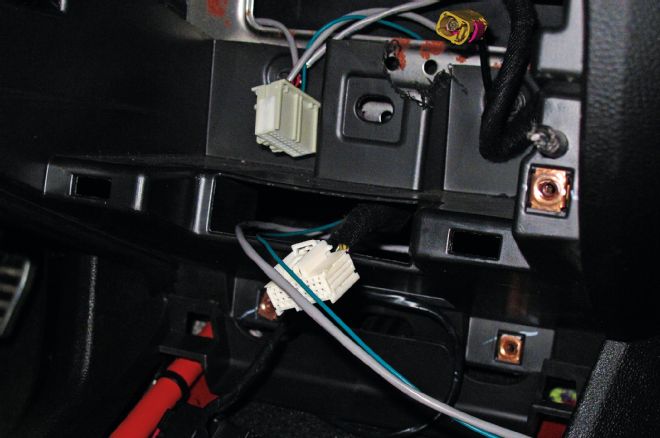
21. To hook in the navigation of the MyLink, you have to add three wires from the Gen5 DIY adapter harness to this plug on the back of the module mounted behind the glove compartment.
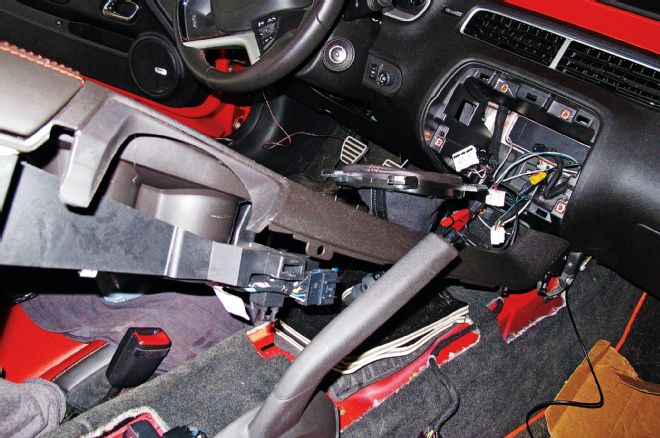

22-24. To connect the new unit to the USB plug at the back of the center console, you have to remove the entire console and plug the Gen5 DIY harness into the factory one for the console.
25. For correct fit of the MyLink faceplate, you have to notch the front of the center console as such on both sides, per the instructions in the kit.

26. With that done and the center console put back in place, the MyLink faceplate can be installed, followed by the center console cover.
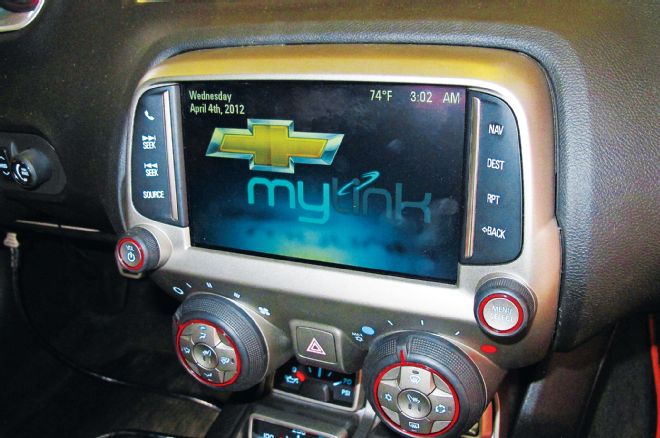
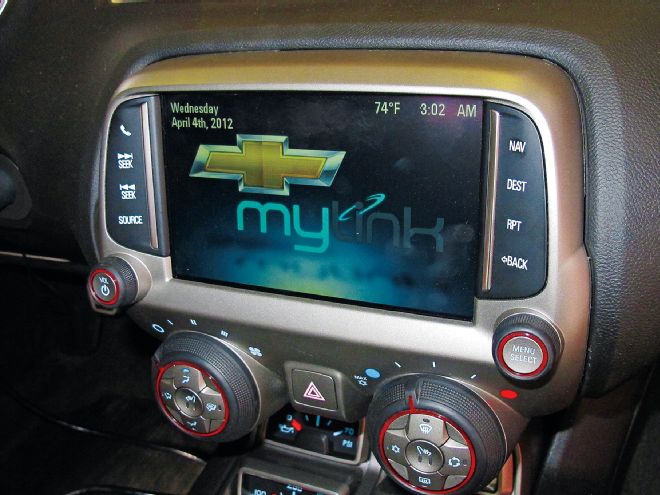
27. And here’s what you get, a fully functional MyLink touch screen system with fully functional navigation, satellite radio function, and a much larger backup camera display. It’s a much preferable alternative than going with an aftermarket head unit and faceplate, which requires hacking up the radio area of the dash and doesn’t come near to looking as good as this does.