At one time it was unusual to see a pickup with air conditioning and while heaters were commonplace they were often marginally effective. But times and trucks have changed, today it would be unusual to see the vintage haulers we know and love without heat and air. And why not? Just about anything with wheels can easily be equipped with the latest technology in heating and cooling thanks to Vintage Air.
The Basics
In operation the heater portion of any heat and cool system passes hot water through a mini-radiator and a fan blows air through the core to provide warmth for the passengers. While that's simple enough, cooling the air is a little more complicated. Basically there is no such thing as cold, rather an absence of heat. And that's the way air conditioners work, they make the air cold by removing heat—we know, it sounds crazy but it works.
The major components of an automotive air conditioning system are: the compressor, evaporator (inside unit), condenser (outside heat exchanger), hoses, fittings, drier, safety switch, and of course refrigerant. As the compressor pumps refrigerant through the system it passes through the evaporator where heat is absorbed, which changes the refrigerant from a high-pressure liquid (what's referred to as the high side of the system) to a low-pressure gas (the low side of the system). The heated gas passes through the condenser where air flowing through the condenser's fins carries off the heat. As the refrigerant cools it condenses into a liquid, which pours into the receiver/drier where the vapor and moisture are removed—and the cycle begins again.
An often-overlooked part of an air-conditioning system is the safety switch. Vintage Air systems are equipped with a binary pressure safety switch (PN 11078-vus) that disengages the compressor clutch in case of extreme low-pressure condition (refrigerant loss) or excessively high head pressure (406 psi) to prevent compressor damage or hose rupture. A trinary switch (PN 11076-vus) combines hi/lo pressure protection with an electric fan operation signal at 254 psi.
SureFit Systems
When aftermarket A/C units became available for hot rods, classic trucks, and similar vehicles they were universal in design and application. That was another way of saying some cutting, grinding, and other modifications may have been required to make them fit. But all that has changed—today universal kits have become more user friendly and Vintage Air has developed a line of SureFit systems designed to fit specific vehicles with little more than drilling some mounting holes. Along with a variety of cars and other trucks, SureFit systems are available for Chevrolet/ GMC pickups from 1947 to 1986 (check the Vintage Air website for specific applications). The system shown here is a SureFit Gen-IV for 1981 to 1987 Chevrolet/GMC trucks—there are two versions of this system: PN 944181 is for trucks with factory A/C, PN 941181 is for trucks without it.
Like many things, sophisticated electronics have made air conditioners more effective. Vintage Air's Gen-IV systems are operated by microprocessor-controlled servos that provide dramatic gains in airflow, superior defrost performance, and provide true bi-Level operation in both heat and A/C modes. In short, electronics have made these new units much more efficient when compared to older designs (including the OEMs) that relied on vacuum and cable-operated controls.
Installation
Installing a Vintage Air system is easy enough—the instructions are thorough, easy to understand, and a knowledgeable tech team is a phone call away if need be. However there is some prep work that should be done before installation begins. Remember, an air conditioner removes heat from an enclosed area, so the more heat you can keep from entering the passenger compartment in the first place, the more effective the A/C unit will be. Make sure the window and door seals are in good condition; keep heat from the engine, exhaust, and the sun from entering the passenger compartment by insulating the firewall, floor, and roof. Tinted windows will also help reflect the heat soak from the sun.
If you want to cruise in comfort, regardless of what Mother Nature throws your way, order a SureFit system. Follow Vintage Air's instructions to the letter, prep the cab properly, have the system evacuated and charged correctly, and you'll have a state-of-the-art climate-control system at your fingertips. Wouldn't that be cool?
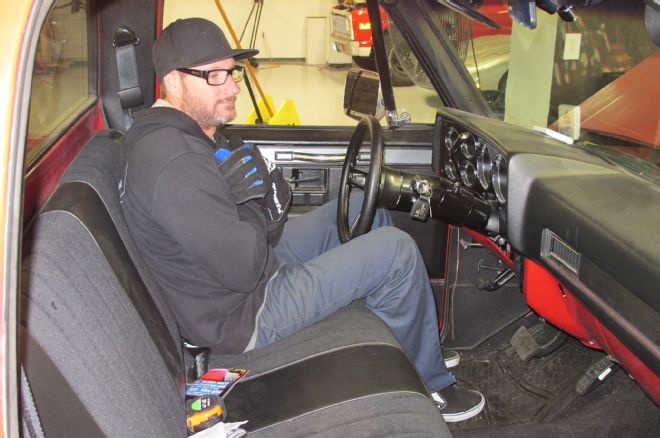
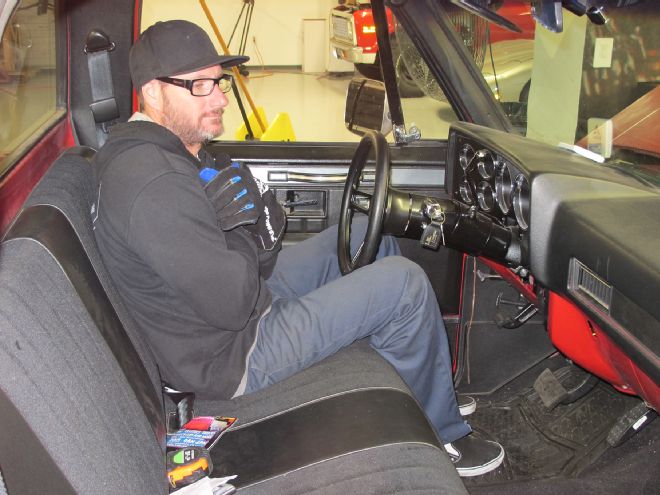
01 Jason Scudellari bundles up to test the effectiveness of Vintage Air's SureFit system in A/C mode. You wouldn't want to see how he was dressed when the heater was tested.
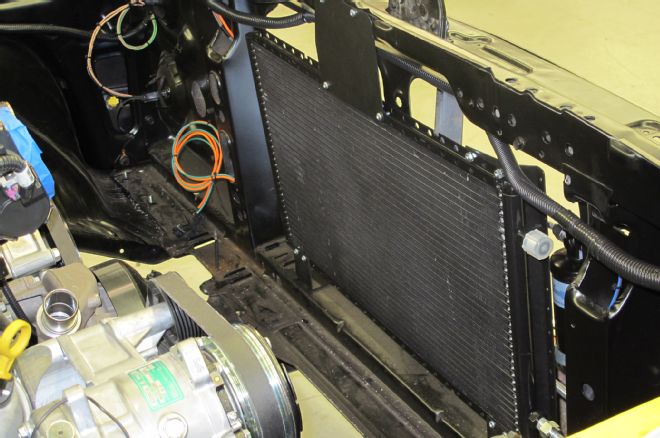
02 The A/C condenser mounts in front of the radiator. It must have unrestricted airflow to dissipate the heat removed from the passenger compartment.
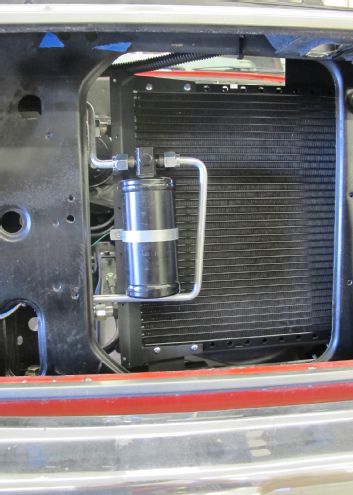
03 This is the receiver/drier. It mounts to the evaporator and is connected with pre-formed lines that are part of the SureFit kit.
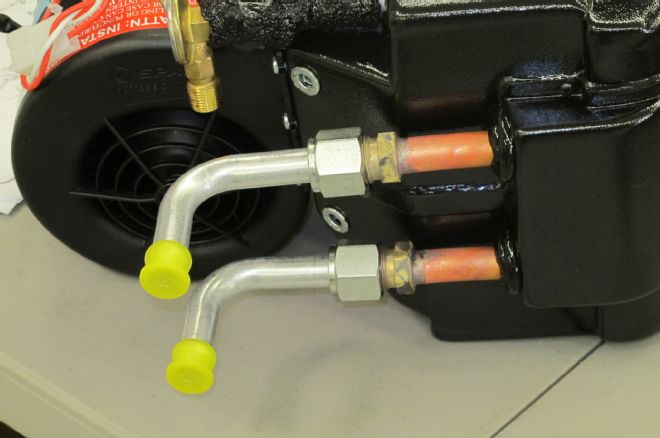
04 These pre-formed lines are part of the SureFit kit. The small #6 line comes from the evaporator, the larger #8 connects to the compressor.
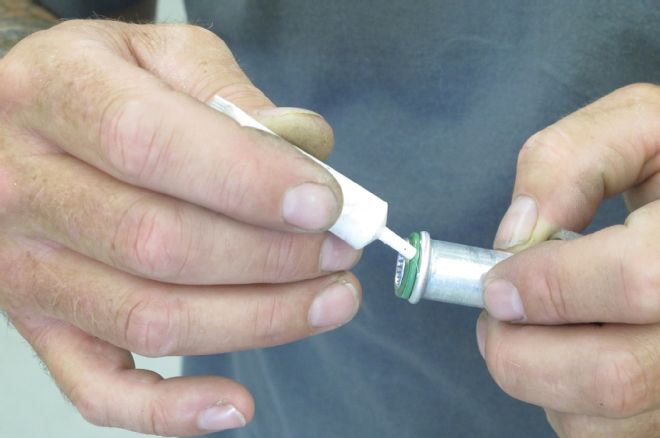
05 There a variety of O-rings used to seal connections in the system; they should be lubricated with the proper refrigerant oil before installation.
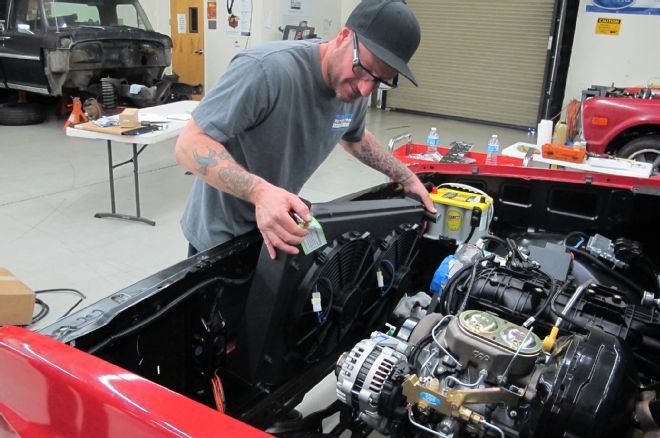
06 To keep our Chevy cool and to cope with the addition of air conditioning, Scudellari installed an AFCO radiator with twin electric fans.
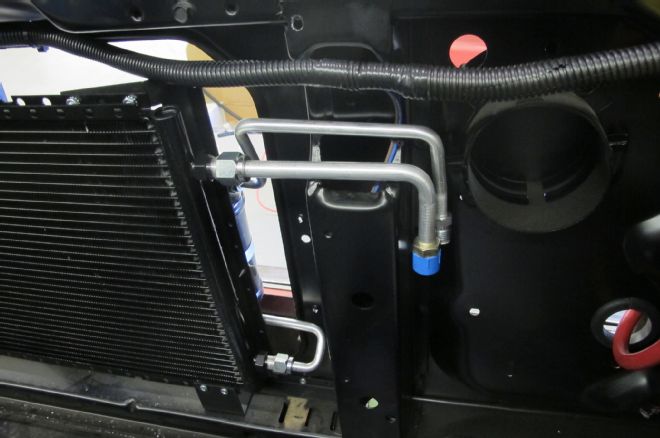
07 These 90-degree adapters provide the connection points for the heater hoses.
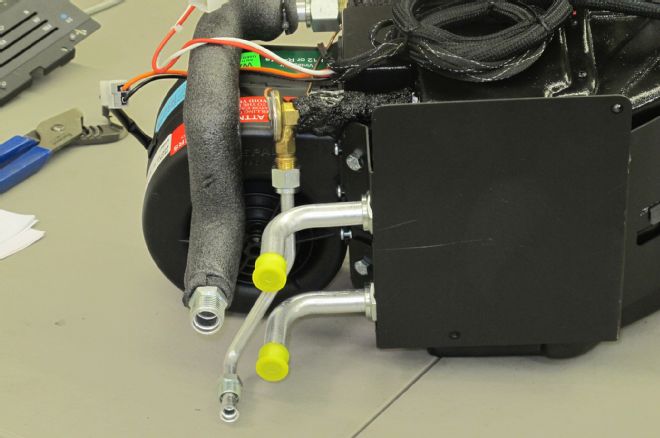
08 Here the firewall mounting bracket has been installed and the A/C lines have been installed on the evaporator.
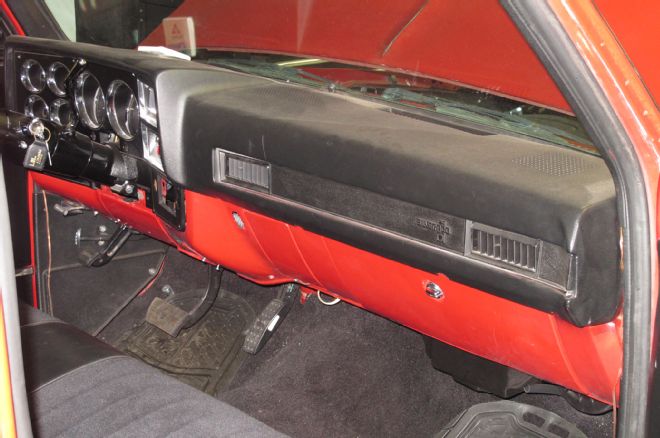
09 New defroster ducts are part of the SureFit kit—they're a direct replacement for the originals.
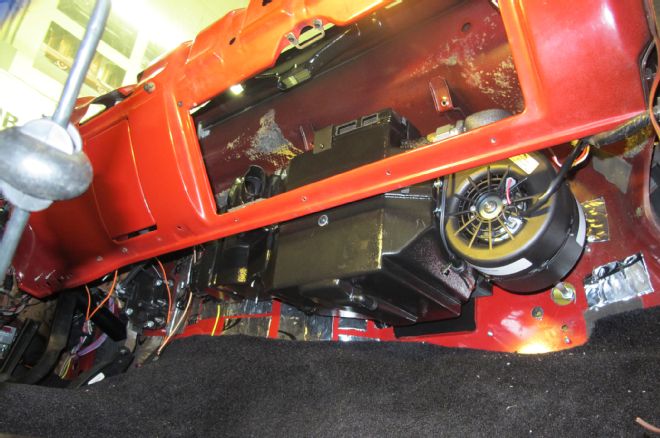
10 The evaporator assembly attaches to the firewall with the included bracket; for secure mounting a second bracket attaches the evaporator to the dashboard.

11 Included in the kit is a new control panel that fits in place of the original.
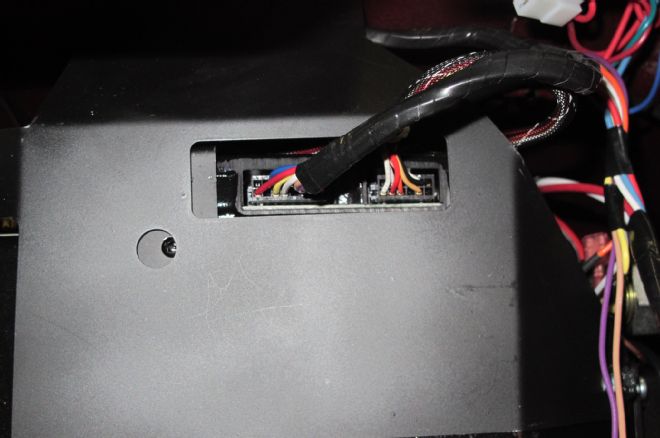
12 Making the electrical connections at the evaporator couldn't be easier—it's plug-and-play.
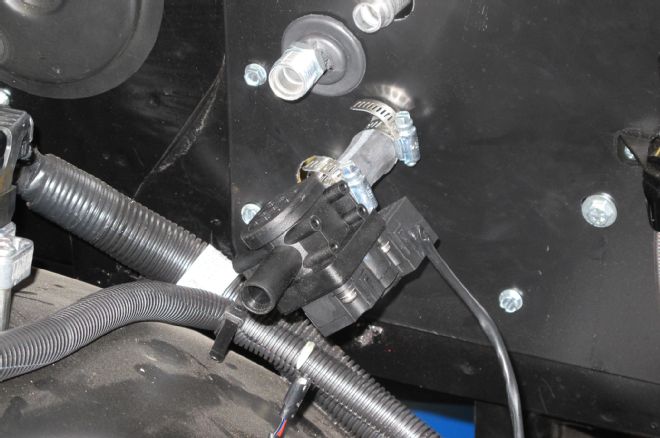
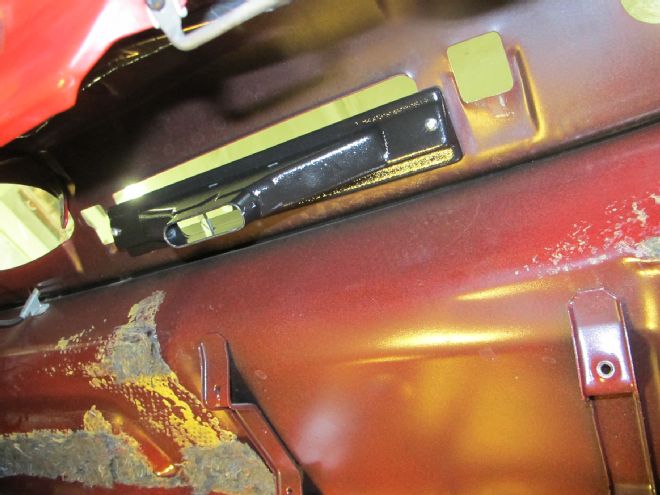
13 This is the servo-operated heater control valve; it provides precise control of water flow to allow precise management of passenger compartment temperature.
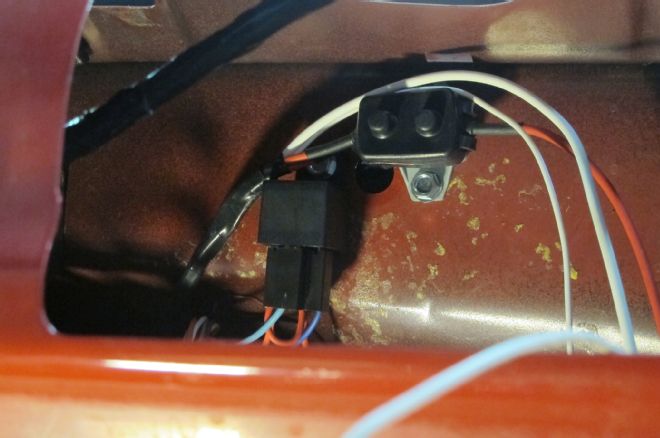
14 Included in the wiring harness is a relay and circuit breaker. They were mounted out of sight on the inside of the firewall.
15 The refrigerant hoses are cut to length then the supplied ends are installed.
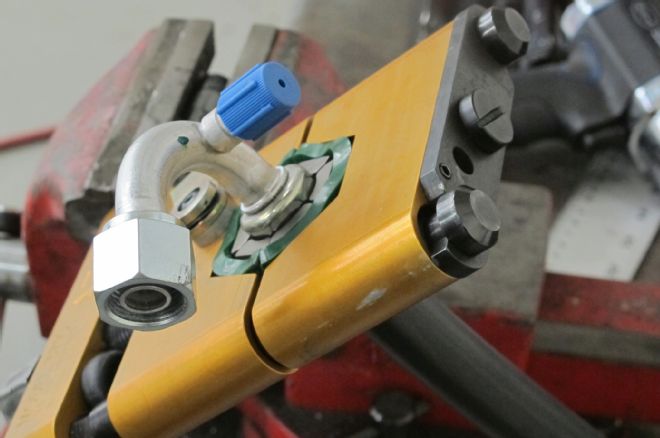
16 Installing the hose ends requires the proper tool—any A/C installer can handle the job, or reasonably priced crimpers are available for do-it-yourselfers.
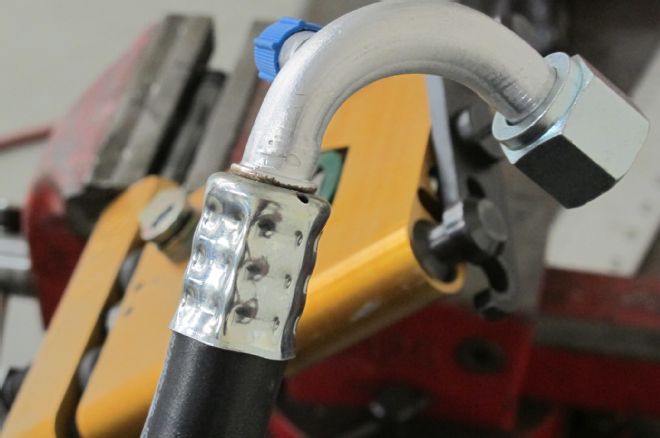
17 This is what a proper crimped fitting look like—it should be evenly compressed all the way around.
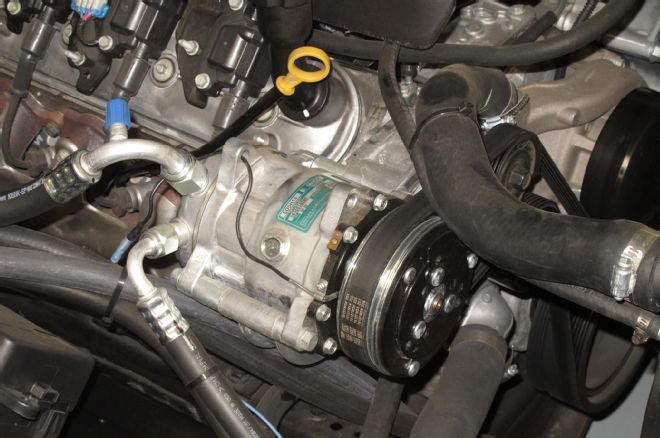
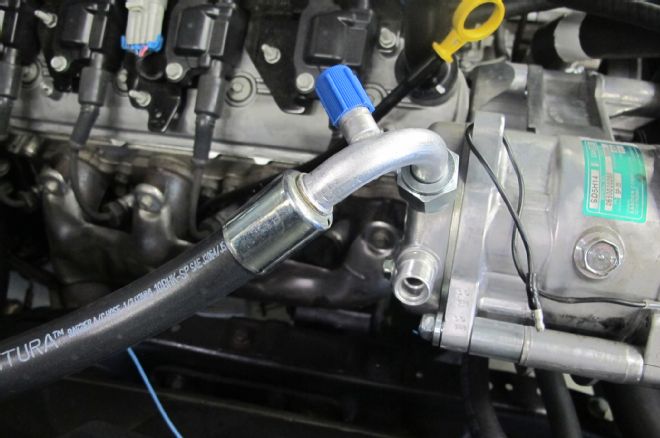
18 The heart of the system is the Sanden compressor. The blue cap on the hose fitting is one of the service ports used to charge the system.
19 Vintage Air has a variety of custom dash outlets—in this case the factory A/C outlets were retained. Regardless of the vents used, outlets in the evaporator case should never be blocked as it can cause the unit to freeze.

20 Although the installation procedure is straightforward, when it comes to charging the system that should be done by a shop with the proper equipment. Systems should be evacuated for 35 to 45 minutes before charging with the proper amount of refrigerant. No oil should be added as the compressors come filled.
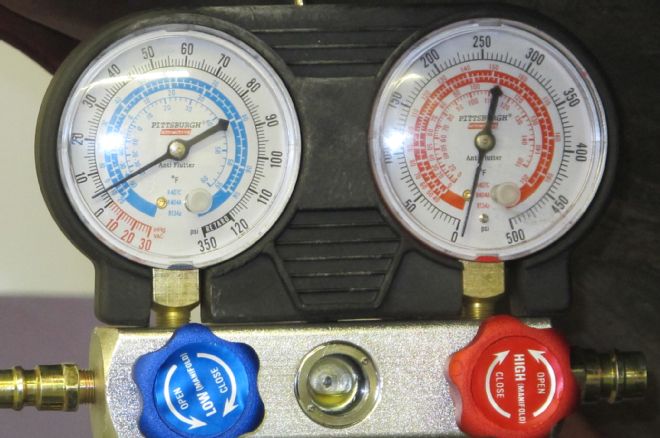
21 These gauges show pressures on the low and high sides of the system. With the engine running at 1,500 rpm with a fan in front of the radiator the low side should read 6 to 18 psi and the high side should be 160 to 250 psi.