At one time rewiring a classic truck usually meant going to the parts store for a couple of spools of wire and a bunch of butt connectors all in an effort to try and save what was left of the dilapidated original harness. That was often followed sometime later by troubleshooting a confusing mass of wires—all of which were now the same color.
A number of things have changed since those simplistic efforts were the only option. Certainly the demands placed on our trucks' electrical systems are greater. It's now common for trucks to have a long list of power accessories, including killer stereos, heat and A/C, a host of computer-controlled devices, and seriously bright lights, which all add to the complexity of the electrical system.
While our trucks' electrical systems have become more complicated, installing new wiring has never been easier thanks to American Autowire. For those wanting to stick with an OEM-style harness, American Autowire offers Factory Fit OEM Reproduction Wiring harnesses for GM vehicles. There is no cutting or crimping; this is a true plug-and-play installation. Made from original GM tools and molds, some modifications can be made for HEI, an internally regulated alternator, or alternator relocation. Installation usually takes eight to 10 hours depending on the complexity of the harness and skill of the installer.
For modified or performance applications American Autowire offers the Classic Update Series. The fuse box mounts in the stock location, and while 70 percent of the wires are terminated, those running to the front and rear of the vehicle are extra long for stock or custom routing (cutting and crimping will be required) and there are extra circuits for power accessories. To provide flexibility, stock or aftermarket gauges may be used, and to make installation easier, each wire is labeled every 3 inches.
For custom installations, or when there is no Classic Update Kit for the application, American Autowire offers the Highway 22 Wiring System. The modular kit includes a 22-circuit fuse panel that is not prewired so it can be mounted almost anywhere. Protecting the entire system is a 175-amp Mega fuse and a 6-gauge bus bar, 40-amp fan relay, turn signal relay, and horn relay built into the panel. All wires are labeled every 3 inches and are long enough to allow for custom routing in almost any vehicle. As with all American Autowire kits full color schematics and instructions are included.
American Autowire's Rewire Tips
Identify your project. If your project is being built from the ground up then you have a far more complex task at hand. If you are starting with a running truck, you may not need to replace all the harnesses. However, this can all change with a complete restoration. The important point here is that there are many options to handle your project and there is not a "one size fits all" solution.
Plan your project. The most important part of the project involves the "wish list" of electrical system accessories that you want. Once you have determined those accessories, you can then determine how may circuits or how many amps you need to feed those accessories.
Research what is available. There are basically two major categories of harness products. Those are original replacement and generic rewire products. Original replacement harnesses, such as American Autowire's Factory Fit product line, are available for most factory vehicles from 1955 and up. This is by far the easiest way to rewire, since the harnesses are plug-in replacements made specifically for the vehicle in question. Some vehicle attributes must be defined in more detail because there were many factory options available for each model. These harnesses generally cost more; however, installation time is much shorter and requires less skill. The most common alterations for alternators and ignition systems are also available as complete plug-in modifications.
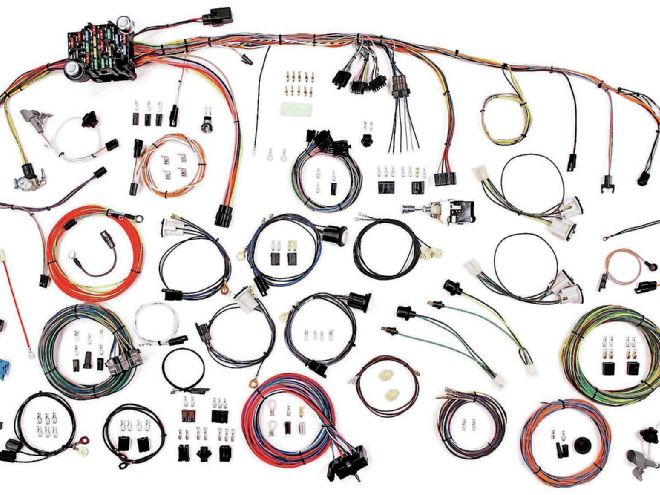
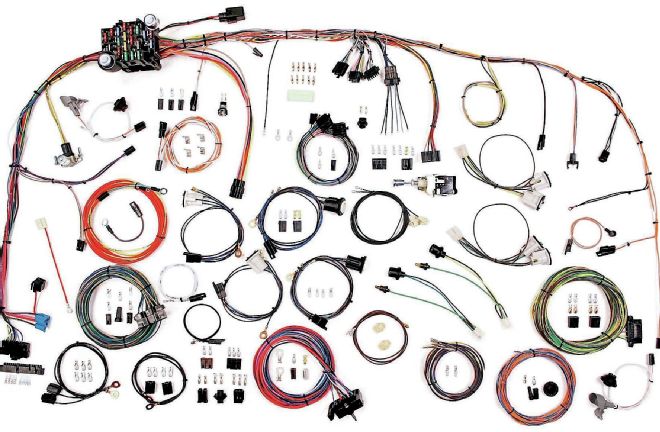 American Autowire offers a variety of kits for Chevy pickups. This is a Classic Update harness for a ’73-’82 C10.
Generic rewire kits require more work on the part of the installer. However, there is a wide array of kits that range from vehicle-specific update kits to totally generic and universal wiring kits. This is the area that requires the most research on the part of the customer.
Determine your comfort level and assess your level of expertise and your capability to install the wiring system chosen. Evaluate the level of documentation that exists, experiences of friends, magazine installation articles, and direct contact with the manufacturer's customer service department.
Select the wiring system best suited to your requirements and the vehicle. A general rule concerning number of circuits is that if your wish list contains items that you think you may want to install later, it is wise to plan to purchase a kit with more circuit capability now. The second part of this decision centers on the selection of a modular or integrated fuse box kit. Modular kits are easier to install because none of the wires are pre-connected to the fuse panel and all power circuits are wired from the outside into the fuse panel. Panel placement is not constrained and circuits not used are not connected.
Integrated fuse panels are designed to mount under the dash. All connections are done from the fuse box out requiring termination of each wire at the final connection point. These systems are less flexible in the panel mounting location and do present more routing issues than a modular system. The Classic Update Series kits combine aspects of a generic kit, with those of a vehicle-specific kit. Classic Update kits provide as much plug-and-play capability as possible, while accommodating the increased circuitry and free routing requirements of a street rod kit design. These kits are designed around a specific group of vehicles. Original switches, heater controls, taillights, parking lights, factory gauges, and dash design are incorporated into the design of these kits. If this kit exists for your vehicle, it will be the most complete option available to you, saving considerable time and effort in the rewire project.
Finally, if a true plug-and-play system is required or the need exists to restore your vehicle to original specifications, the Factory Fit line of harnesses will be your solution. Modification harnesses exist to address charging system and ignition system updates. While the cost of these harnesses is more than the generic kits, considerably less time is spent in installation.
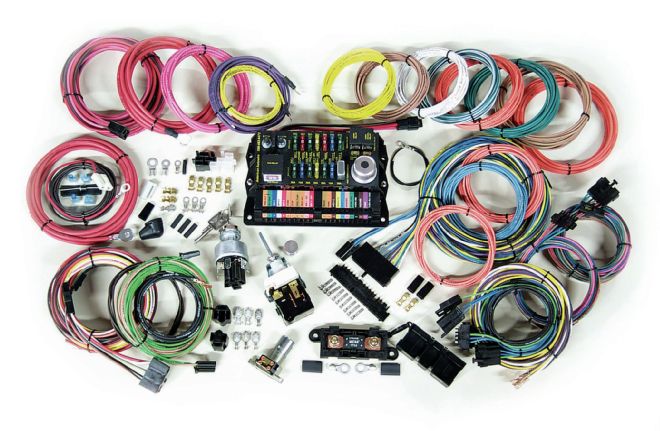
01 The Highway 22 harness offers the utmost in flexibility with 22 separate circuits—the fuse block also comes with electric fan and horn relays.
02 For those looking for originality, American Autowire offers original-style glass fuse panels. This example is attached to a '67 Chevy truck dash harness.
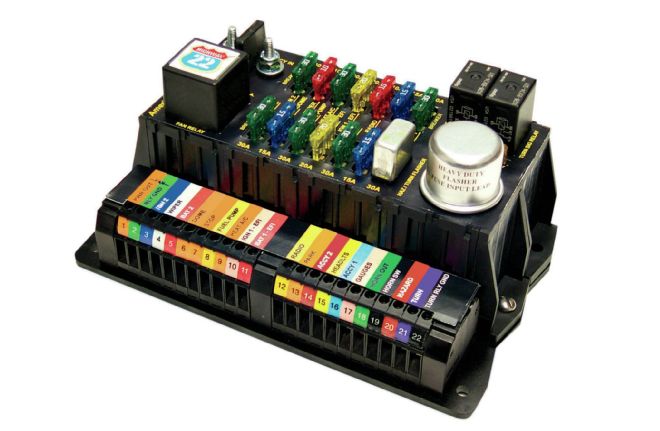
03 The Highway 22 fuse block is not prewired, which allows it to be located virtually anywhere before terminating the wires.
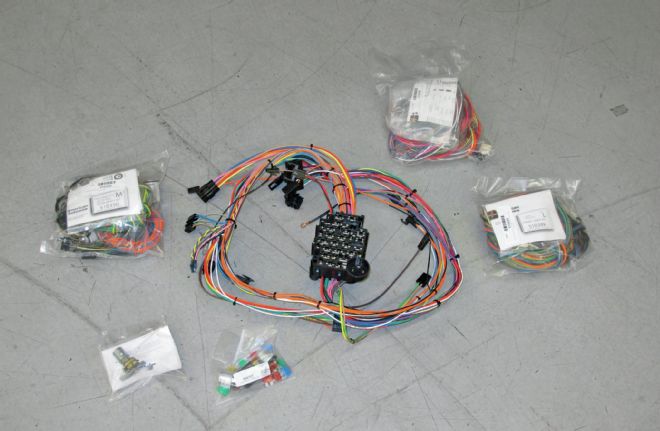
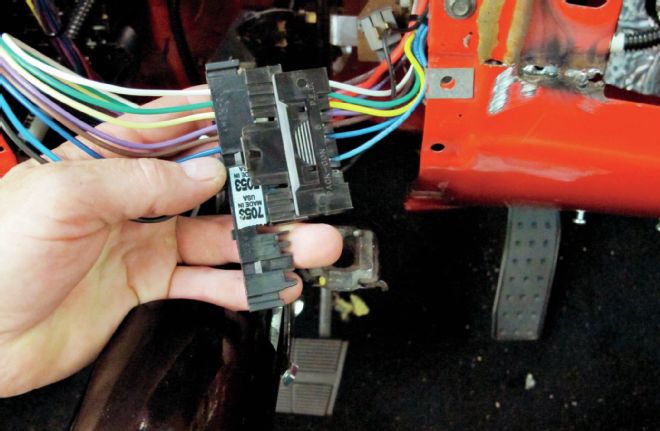
04 For our application we used a Classic Update kit for '73-'82 Chevy trucks. Like many of our in-house projects Tech Center Manager Jason Scudellari was the go-to guy on this one.

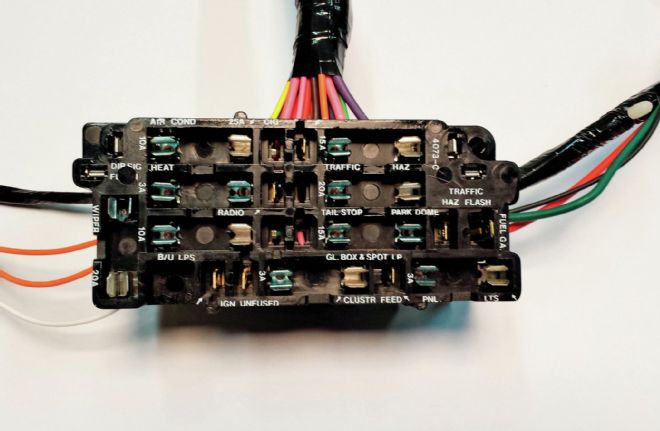
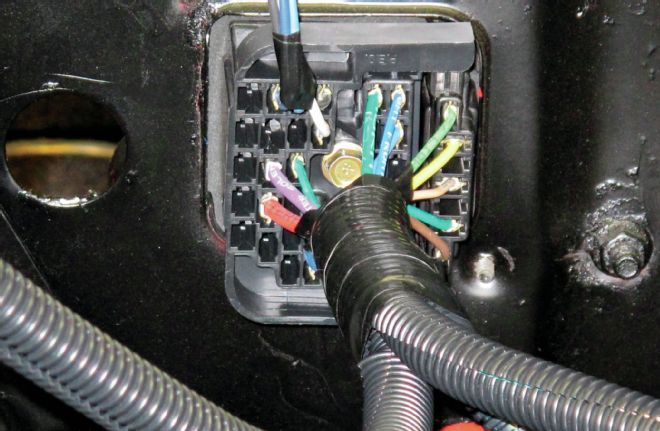
05 The new Classic Update fuse block mounts in the original location. It's spaced away from the firewall to allow routing of the wires inside the cab.
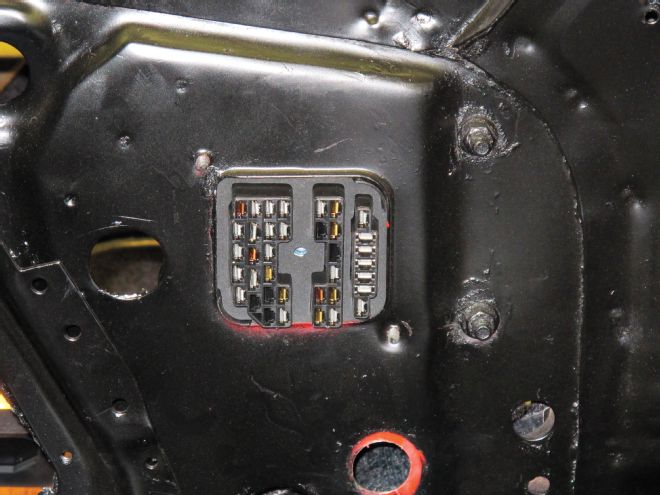
06 This is the fuse block viewed from the firewall side.
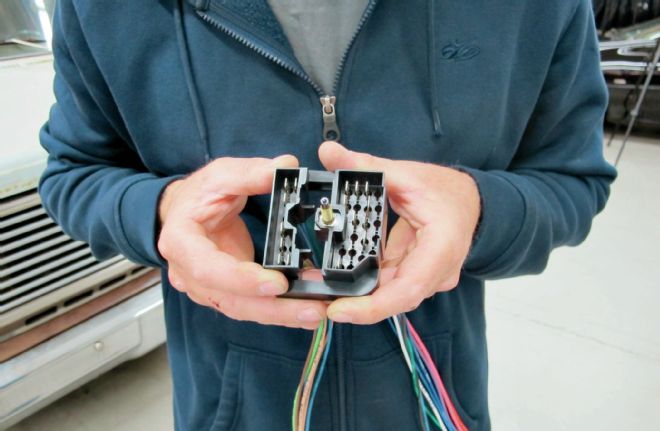
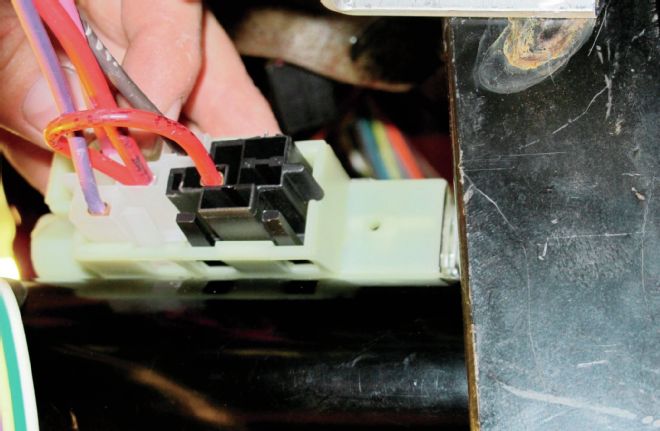
07 The front section of the wiring harness is terminated in a factory-style plug that fits into the fuse block.
08 A single hex head screw secures the firewall plug to the fuse block.
09 Back inside the wiring harness plugs into the column-mounted ignition switch.
10 The turn signal switch is also plug and play. Note the American Autowire color code matches the GM column wiring.
11 Classic Update and Universal kits will require some wires to be cut to length and the ends crimped on.
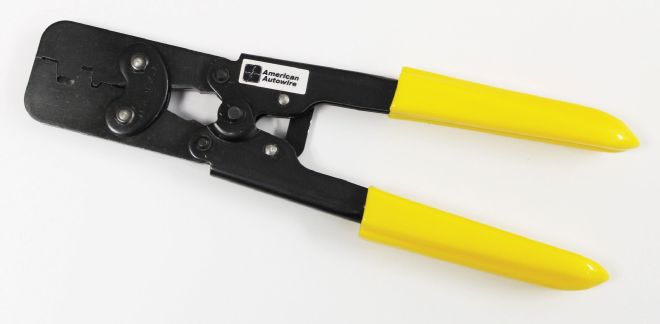
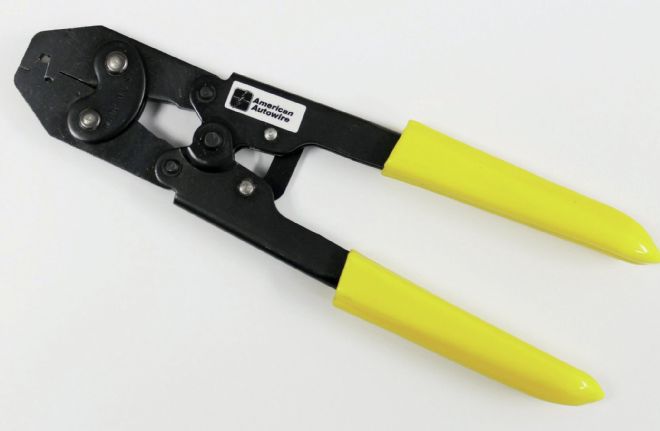
12-13 Newly released are these redesigned crimp tools for Classic Update and Universal kits.
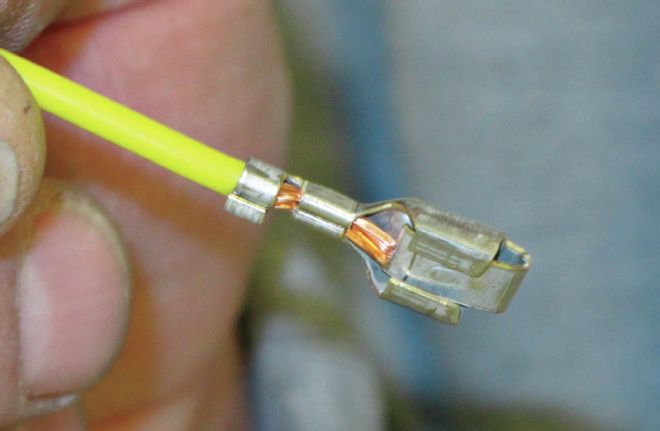
14 A properly executed crimp captures the conductor and the insulation; the latter provides strain relief that helps prevent the conductor from being pulled out of the terminal.
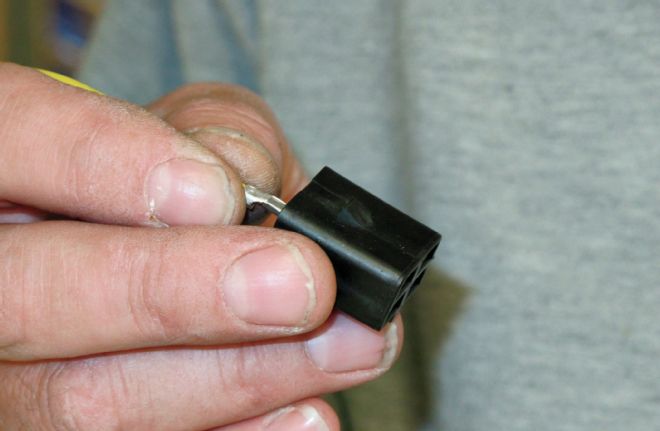
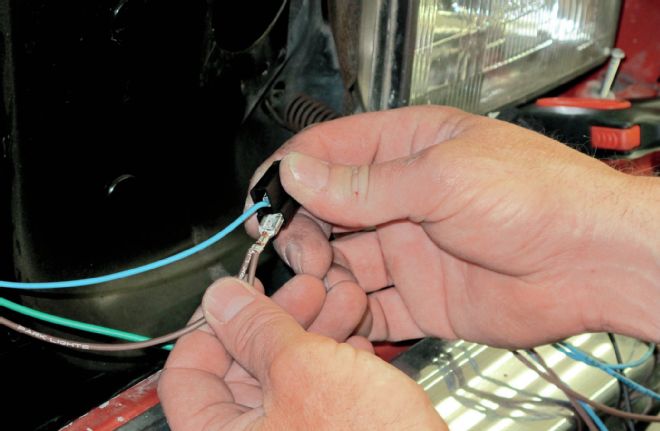
15 Once the terminal is crimped on the wire it's inserted into the plastic connector until it locks in place. This is a headlight harness plug.
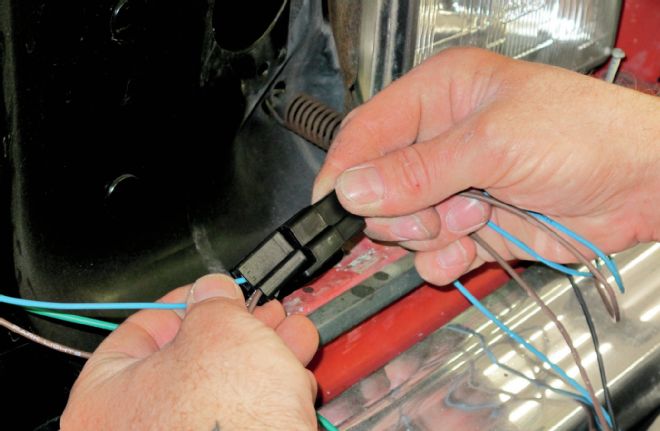
16 Due to the shape of the male and female plugs they will only fit together one way. The critical part is making sure with wires are properly placed in both halves of the plug.
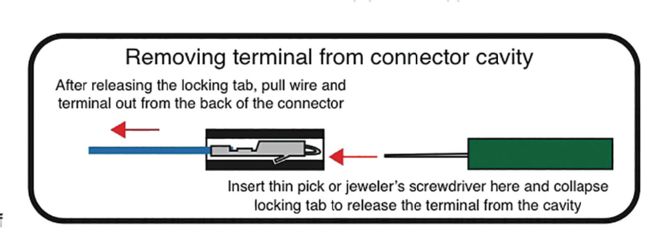
17 When necessary this is how to remove terminals from the connector.
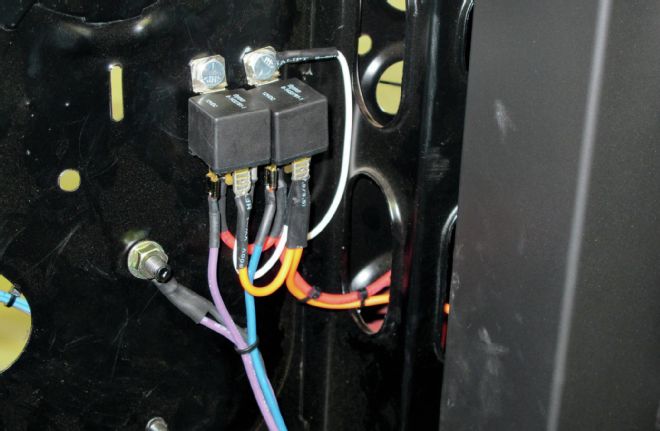
18 In some cases relays will be part of the wiring harness. These operate the engine cooling fans.
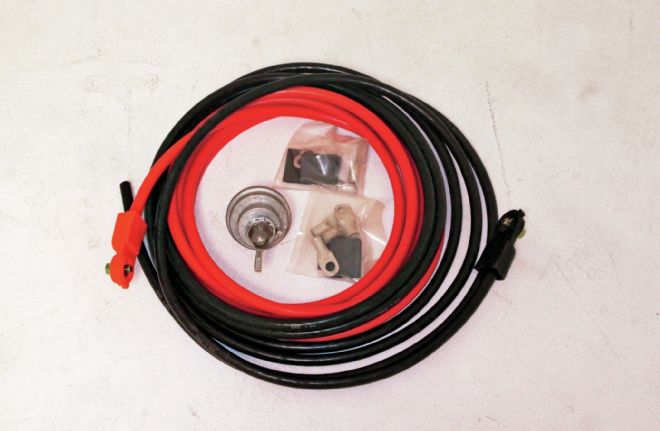
19 Along with the new wiring harness, we picked up an American Autowire battery cable kit and shutoff switch.
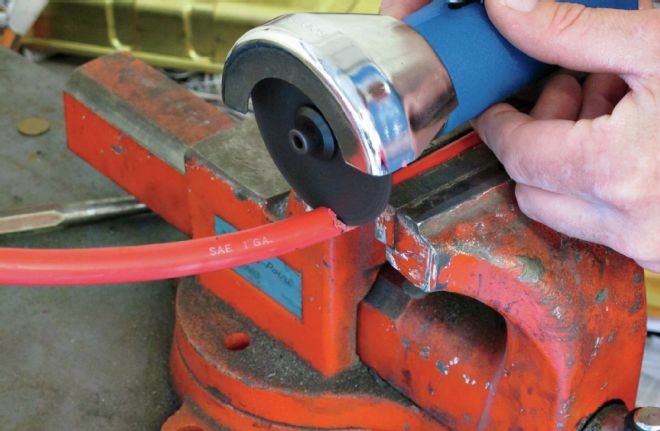
20 To cut the battery cables to length an air-driven abrasive wheel was used.
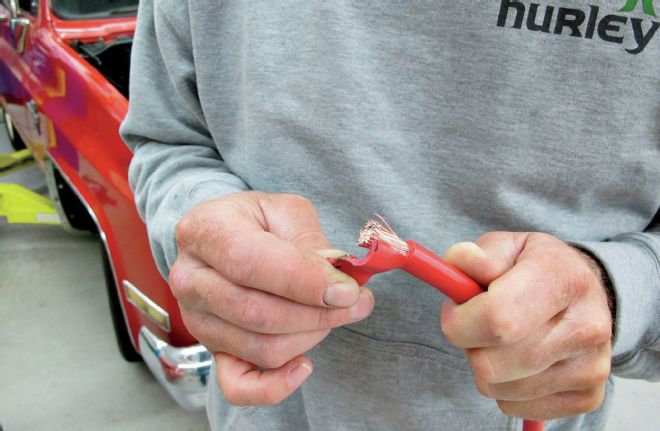
21 Being careful not to nick the wires, the insulation was cut away with a razor blade.
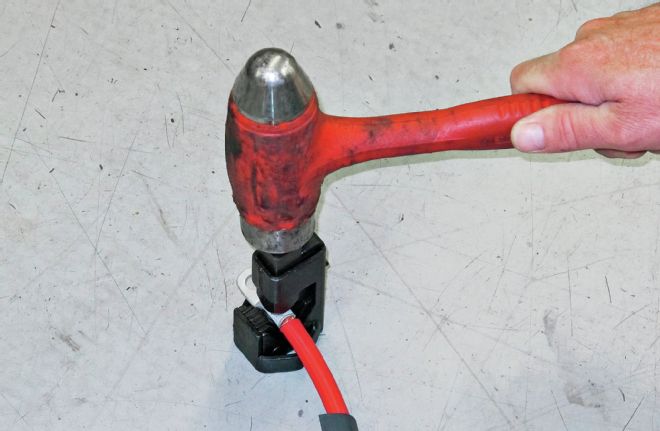
22 A new terminal was put in place then secured with a special crimping tool.
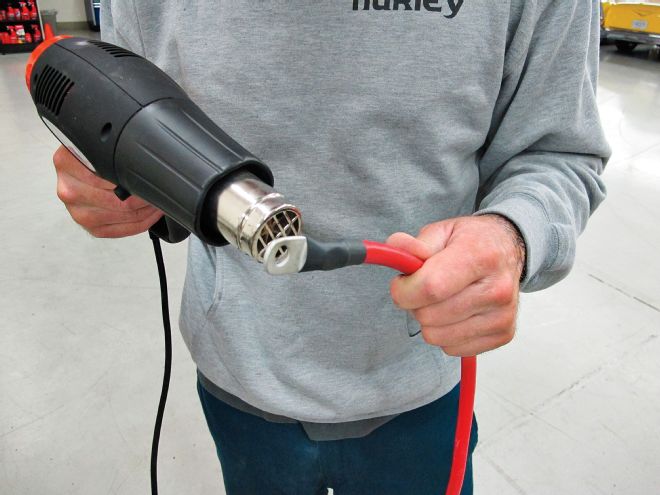
23 To provide a finished look and help prevent corrosion the new end was sealed with shrink tubing.
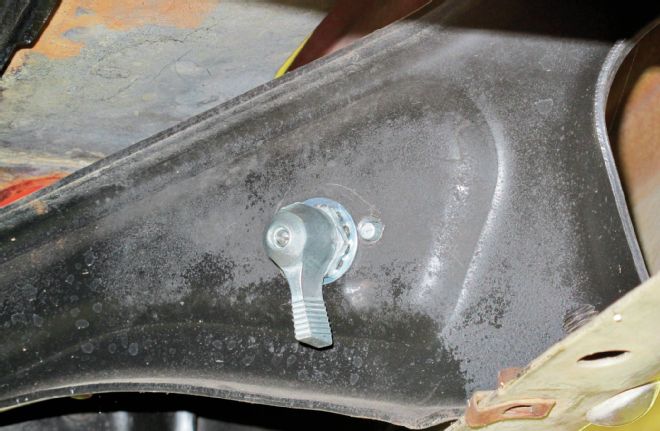
24 For safety and security a master shutoff switch was mounted to the inner fender panel.