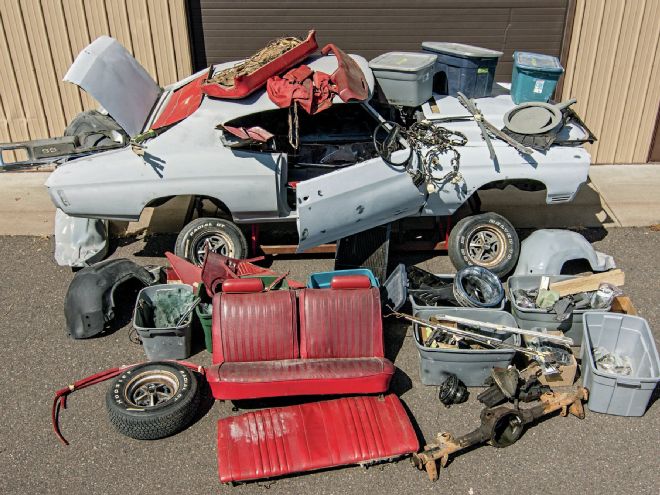
In our Nov. '14 issue we debuted our latest project, a basket case 1970 Chevrolet Chevelle SS396 that's getting a total makeover at Muscle Car Restorations in Chippewa Falls, Wisconsin. So far we have concentrated on the car's interior, recovering the seats in Part 1 and replacing the carpet, headliner, and door panels last month. The last items inside the car that we'll focus on are the dash and gauge cluster.
If restoring your dash and gauges scares the you-know-what out of you, relax. You can't do this yourself anyway. This step in the process requires specific repair-and-replace skills. What you need to know is where to send the components to get them returned to their original beauty.
Muscle Car Restorations sent the entire dash and gauge cluster out to Instrument Specialties for a complete rebuild and color change from the original red to black. Cosmetically, this dash was faded, scratched, and otherwise pretty gross-looking, and the chrome bezels and lettering were mostly gone. Fortunately, it was structurally in good shape, though there was some repair and strengthening needed in the radio mounting holes.
Wiring up the cluster couldn't be easier
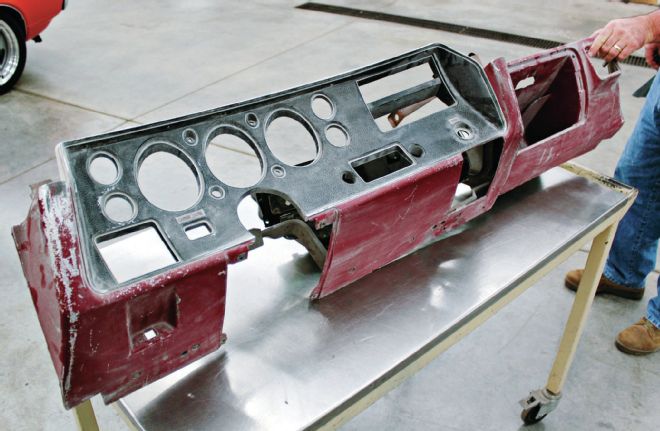
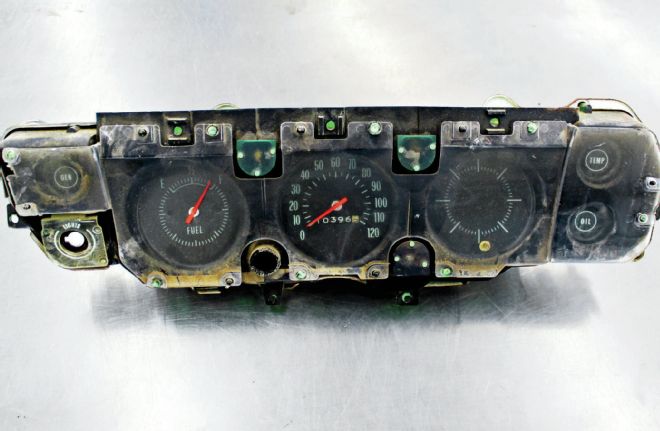
1 We're not sure what happened to the dash before it arrived at Muscle Car Restorations. It sort of looks like someone started to prepare it for new paint, but there's no way to know for sure. That's just par for the course when dealing with a basket case. Fortunately, it was in good shape structurally so it was very restorable.
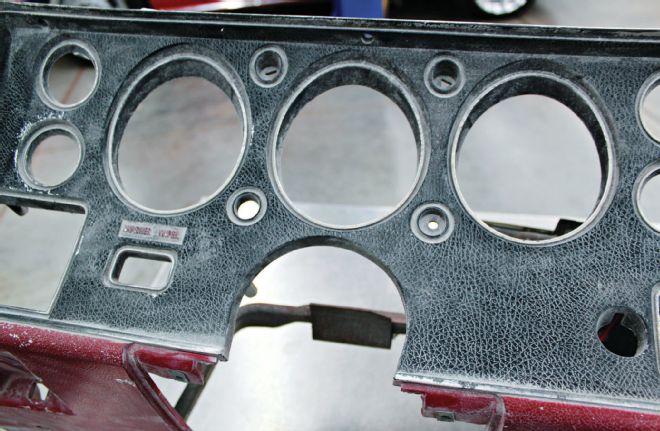
2 As you can see, there is not much left of the chrome trim around the gauge bezels, and the chrome lettering for the washer/wiper control is just gone.
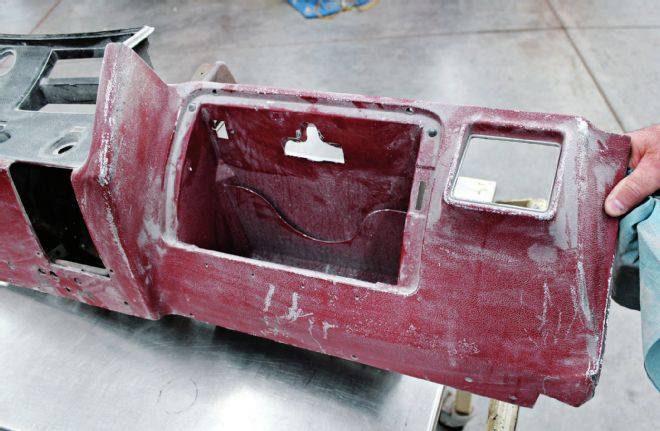
3 With the color worn (maybe sanded) through in multiple places, there is no way that this dash can simply be cleaned up. It will have to be repainted.
4 Good news: The dash pad isn't cracked, split, or otherwise damaged, so it to can be returned to looking like new.
5 Did you know that the gauge cluster is one self-contained unit? It is removed from the dash with just a few screws. Since it's pretty gross and there's no way to know whether it works or not, it's best to have it professionally restored. We sent the entire unit to Instrument Specialties to be redone.
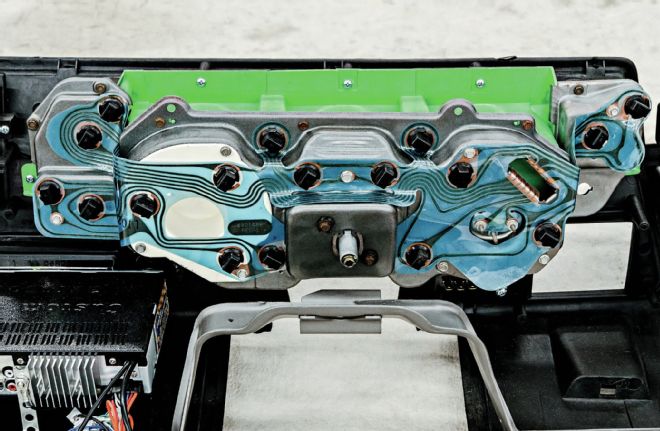
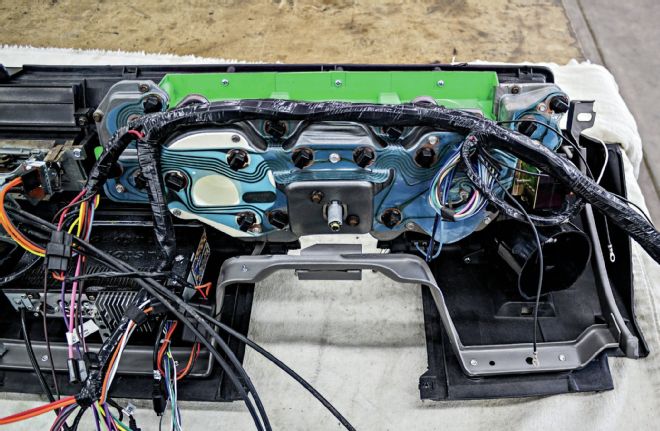
6 After the cluster's return, it was ready to be hooked up. The large female receptacle on the right side is where the wiring harness plugs in to power the cluster. The three-blade male connector underneath is for the washer/wiper. The little black knobs are for the dash lights.
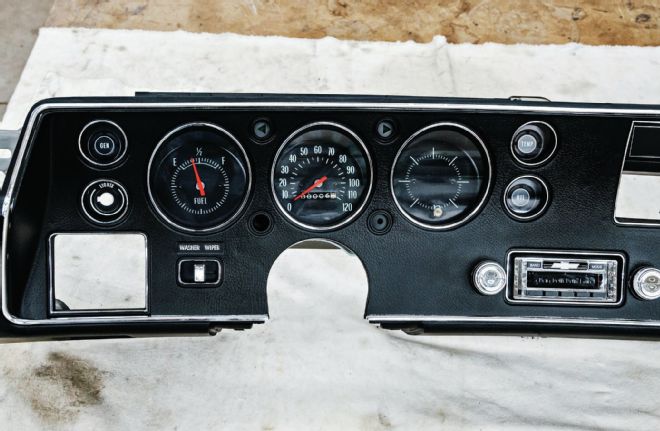
7 Here's how the gauge cluster looked after the Instrument Specialties restoration. Hard to believe this is the same dash panel. The dash, gauges, and chrome trim are all show quality.
8 Wiring up the cluster couldn't be easier. Just that one main plug on the right. The small three-wire plug underneath is for the wiper switch, and the large box to the right of the main plug is the headlight switch.
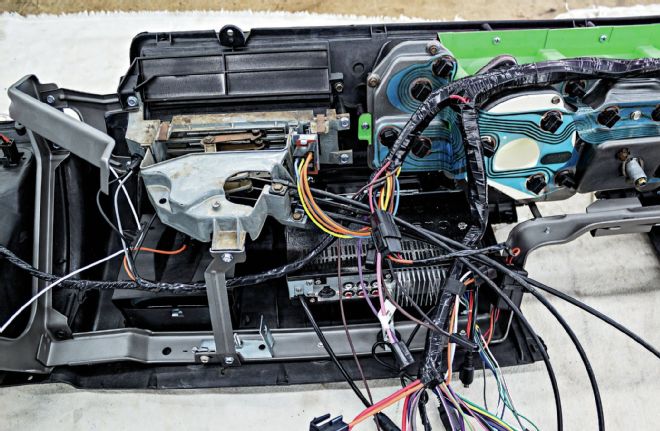
9 Instrument Specialties also restored the heater control face. Note that the control wires should be connected before the dash is bolted into the car. The plug to the right of the heater control is for the fan switch. Also, since speaker wires are not part of the wiring harness, they need to be run from the back of the car and connected to the premarked wires from the Custom Autosound radio before the dash is bolted in.
Instrument Specialties uses the original formula PPG Duracryl suede-textured lacquer to refinish each dash, so it looks exactly like the original factory unit. Dashes can be refinished in almost any color.
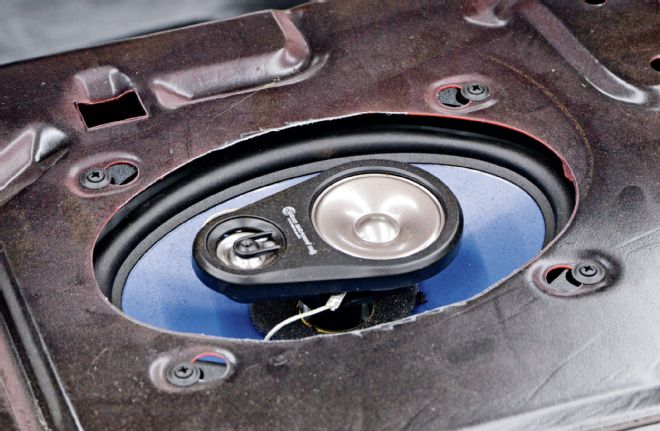
A challenge with dash restorations is figuring out what to do with the radio. Cutting up the dash to fit a modern stereo system is unthinkable, but so is having to cruise around listening to the old AM radio. Enter Custom Autosound. It produces a sound system that, while not an exact match, does mimic the factory look and fits the factory opening exactly. But that factory look hides every modern feature you could desire, such as 300 watts of power, iPod control, Bluetooth adaptability, a USB port for flash memory playback, direct six-CD changer control, and even auxiliary inputs for satellite radio. Plus, Custom Autosound has modern speakers designed to fit in the factory locations, so the excellent sound quality can be realized from the original speaker locations.
Cutting up the dash to fit a modern stereo system is unthinkable, but so is having to listen to the old AM radio
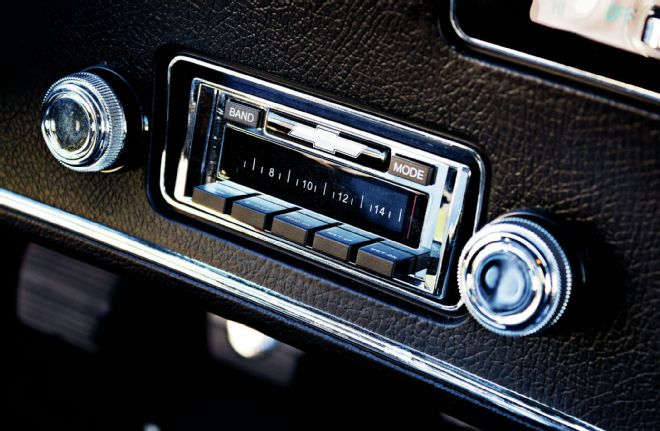
10 Custom Autosound's model USA-630 radio is a direct bolt-in replacement for the factory radio. It may appear stock-looking, but it is loaded with modern features. What looks like an analog dial is actually an LCD display that only appears when the unit is off. Once on, the screen displays a whole host of options for controlling everything from a CD changer to satellite radio to an iPod.
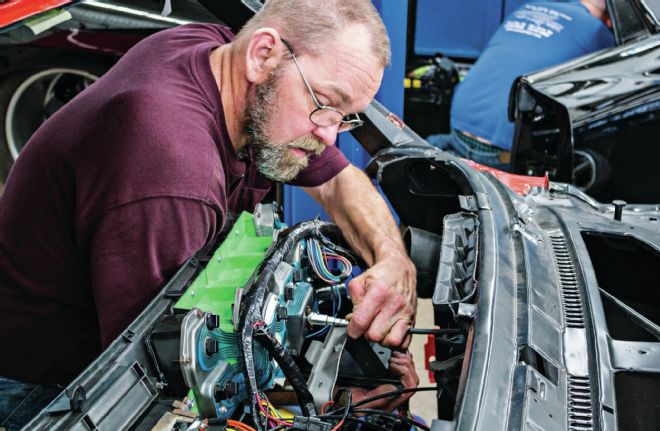
11 As the dash is going in place, the speedo cable, antenna lead, and rear speaker wires need to be attached. See the black metal tab just above the defroster vent that also has the VIN number stamped on it? That's one of the tangs that the dash pad slips over to hold it in place. This step is a whole lot easier if done before the windshield is installed.
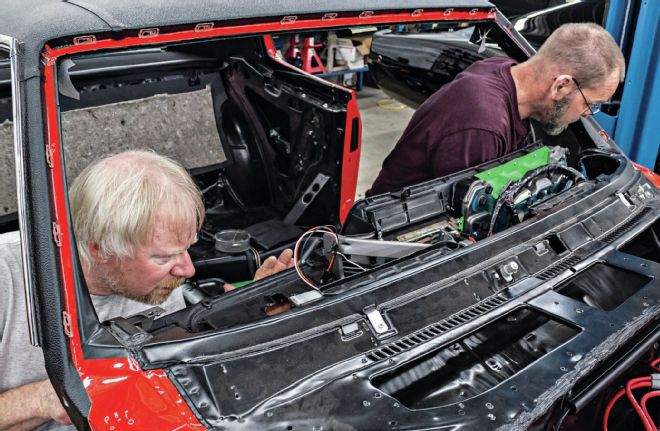
12 The dash simply bolts into place as an entire unit. An extra pair of hands is a really good idea to help get everything lined up properly.

13 A number of bolts fasten the complete dash assembly to the back of the firewall. Note one of the clip-on nuts that holds the dash pad to the top of the dash.
That's just par for the course when dealing with a basket case
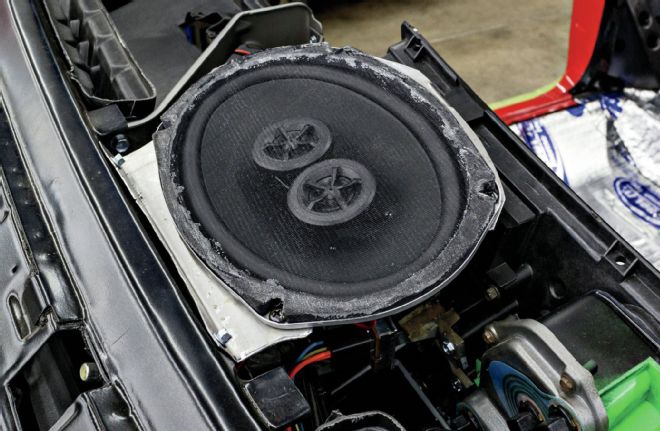
14 The Custom Autosound Dual Voice Coil Speakers are available in a number of sizes, so they are a direct bolt-in replacement for the original mono speaker. Both stereo channels are run directly to this one speaker to give the best sound possible from this one location.
15 Custom Autosound's 6x9 three-way rear speakers are rated at 200 watts and are a direct bolt-in replacement.
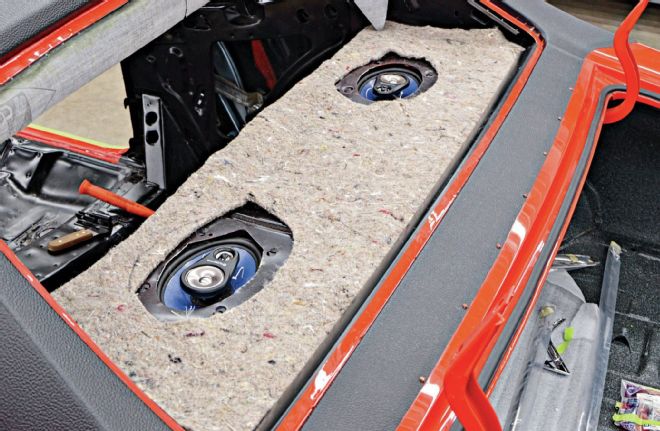
16 Before the package shelf goes in place, Muscle Car Restorations first places a piece of ¼-inch jute.
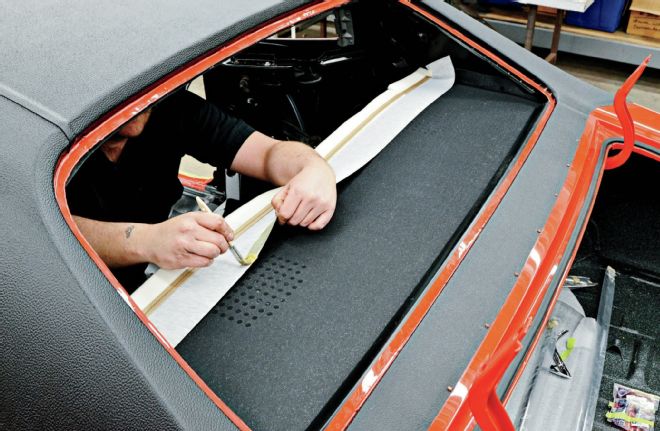
17 To retain the OE look, Muscle Car Restorations foregoes the available speaker grilles and uses only the original package shelf, which has grille openings built in. It is glued in place just the same way as the headliner.
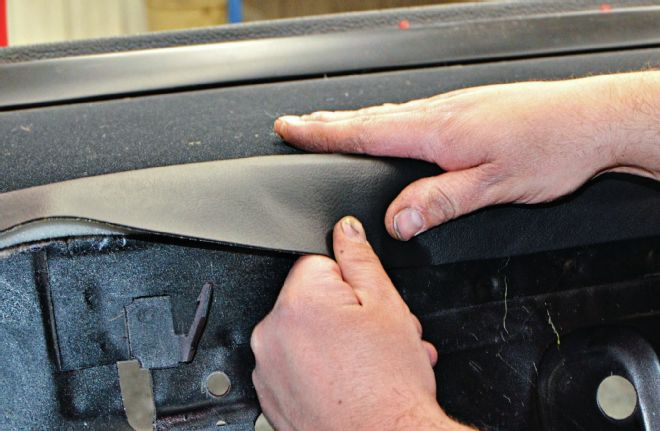
18 The package shelf is held in place by rolling the vinyl material over the edge, where the end will be hidden by the backseat upper.