Back when driver ergonomics were an afterthought at best, tilt columns were a luxury that was rarely seen in pedestrian level cars. For the most part, cars had a straight stick of a column with a set angle from the dash, and if the stock steering angle happened to create an uncomfortable driving position or be inconvenient for viewing the dash, well tough luck.
It's even worse if you happen to be taller or shorter than average, since vintage cars with minimal driving position adjustments in the seat and column were designed to kinda hit down the middle of stature and size. If you're over 6 feet tall or under 5 feet 4 inches, it's a definite problem. More seat adjustment from custom sliders helps, but what most of us really need is a tilt column to set things right.
You could dig around at swap meets, junkyards, or eBay to find an original, but you'll likely pay too much for a used column that will need a surprisingly expensive rebuild. It can easily cost a few hundred to bring a worn original back to spec, and you'll still have a less-than-ideal setup that uses rag joints. Those things hate big sticky tires and hard driving; we can attest to that.
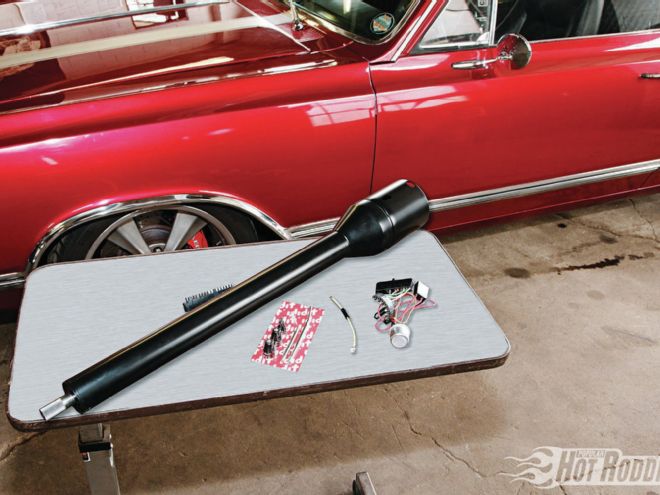
The real solution is to step up to a modern replacement tilt column like the slick unit we're dropping into Project Olds right here. These new ididit columns are bolt-in for any GM A-body like Chevy Chevelle and Malibu, Buick Special and GS, Pontiac Tempest and GTO, and, of course, Olds Cutlass and 442. It's a super simple swap that will make a huge difference in your driving experience. Check out how Kevin Tully and his crew at Hot Rod Chassis and Cycle made it happen in an afternoon for Project Olds.
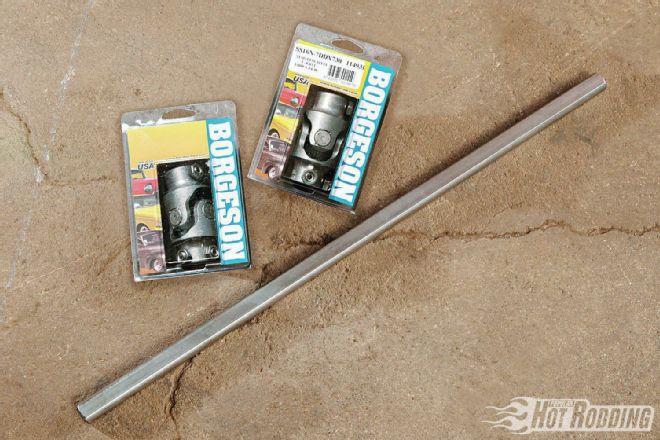 1. Our ididit column has a splined shaft that will connect to beefy Borgeson ¾ DD U-joints (¾-30, PN 114931, $92.60, and ¾-36, PN 113449, $92.60) and a stainless steel shaft (PN 419436, $64.47), then to the steering box to provide a much more direct and responsive steering feel.
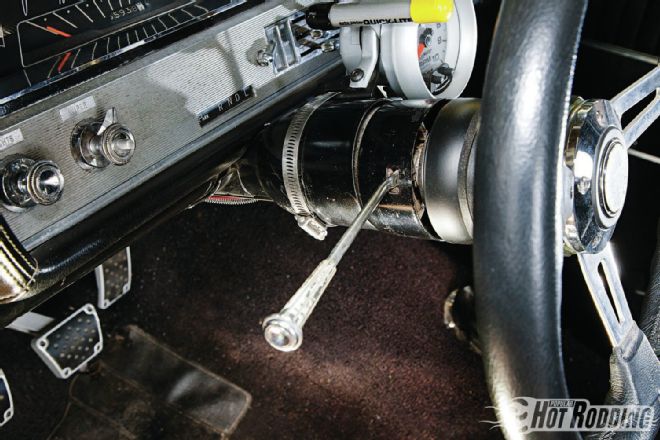 2. Project Olds’ original column was plenty sloppy from years of use and frequent autocross and road course work since joining PHR’s fleet. Before starting the removal process, make sure the front tires are straight and the steering wheel is centered.
 3. To begin, Kevin Tully of Hot Rod Chassis & Cycle removed the lower dash panel with a Phillips screwdriver to reveal the column support.
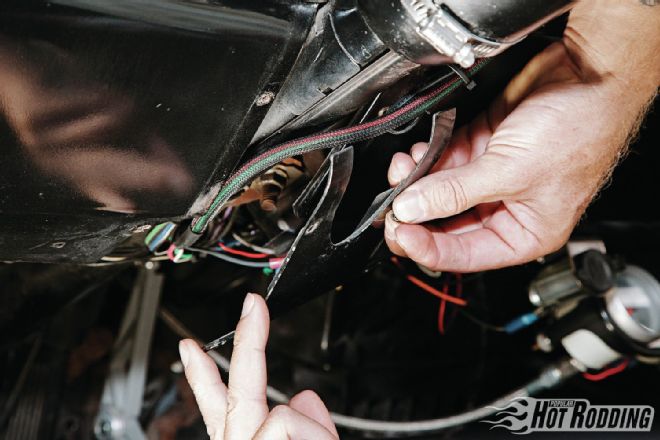
 4. The column harness is disconnected from the chassis harness, along with neutral safety, and the turn signal harness.
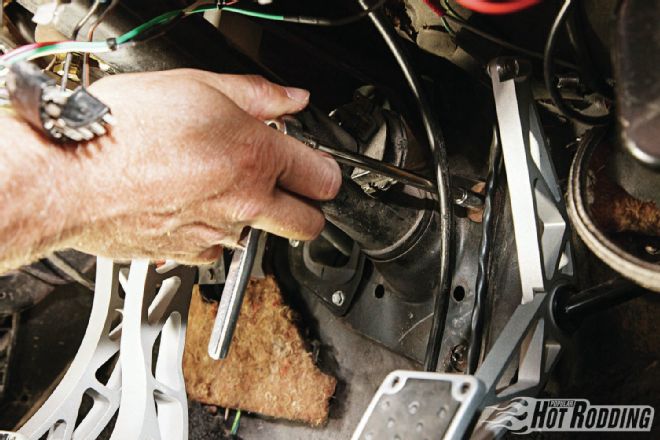 5. The floor trim panel at the column is removed via some push plugs to access the column firewall collar. Four bolts will remove it.
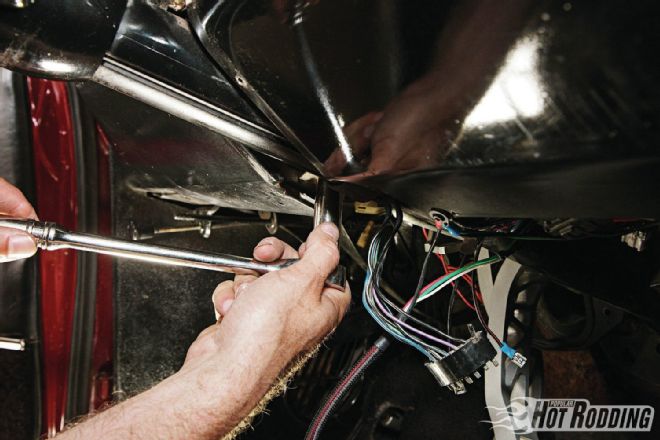 6. After the firewall support collar is loose, the column support clamp can be removed from the dash and the column with steering wheel can be lowered down out of the way.
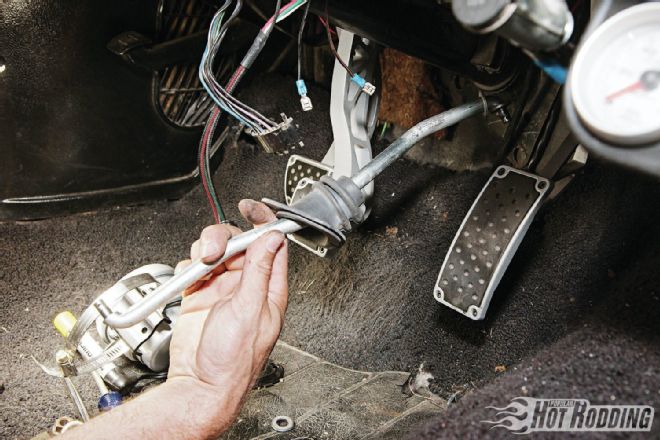 7. We also removed the clutch rod and boot at the same time to aid in removal of the original column.
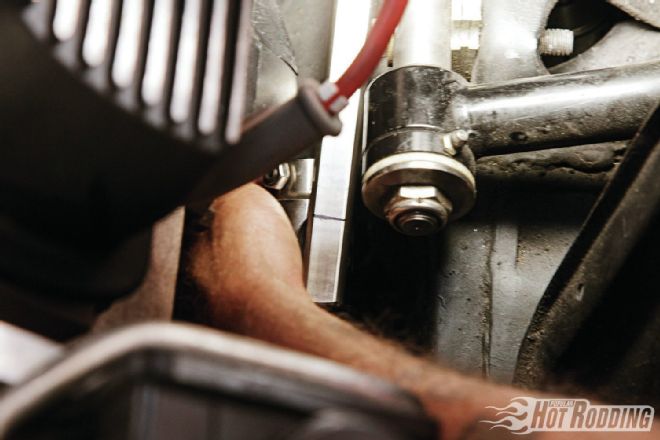
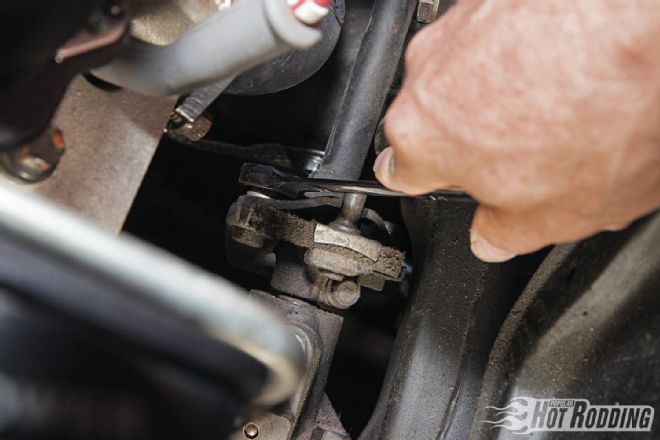 8. Next up is to unbolt the rag joint from Project Olds’ Detroit Speed & Engineering (DSE) steering box. These are great for isolating vibration from a solidly mounted steering box, but terrible for steering performance. The column and steering shaft can now all be removed from the car in one piece.
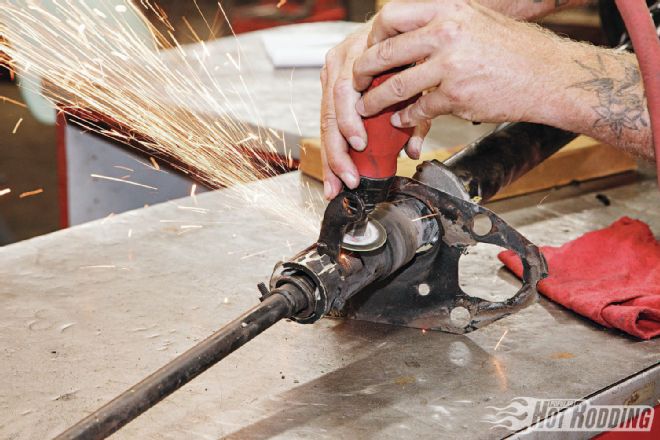 9. Once out, we needed to reuse the column support bracket and isolator, so the factory column shift linkage arm and the end of the steering shaft were cut off to allow it to slide off the column. The column was beyond saving at this point anyway.
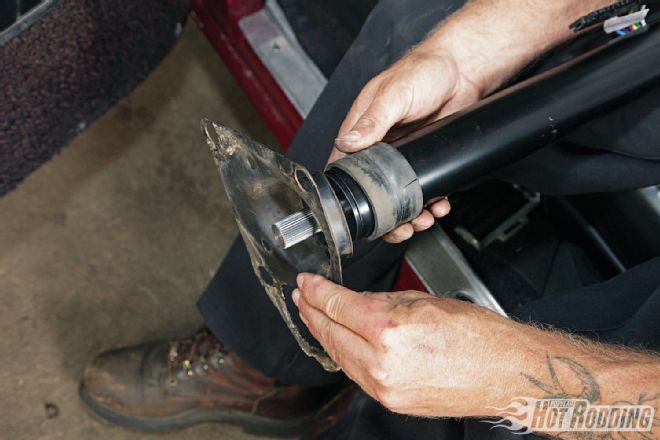 10. The original column support bracket and isolator are then transferred over to the ididit column and clocked according to the instructions.
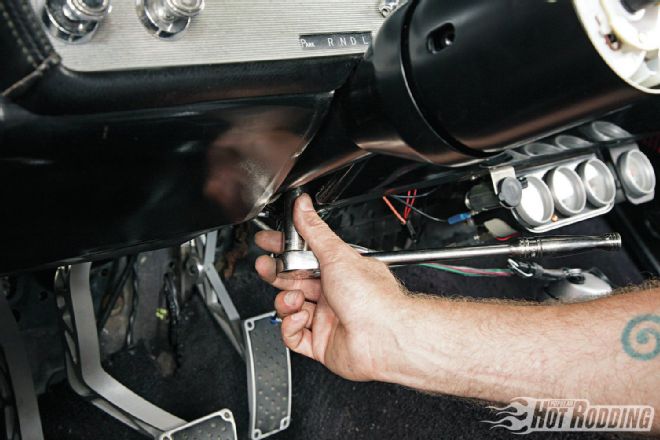 11. The new ididit column bolts right into the dash with the original dash clamp, and the firewall support is also bolted into position.
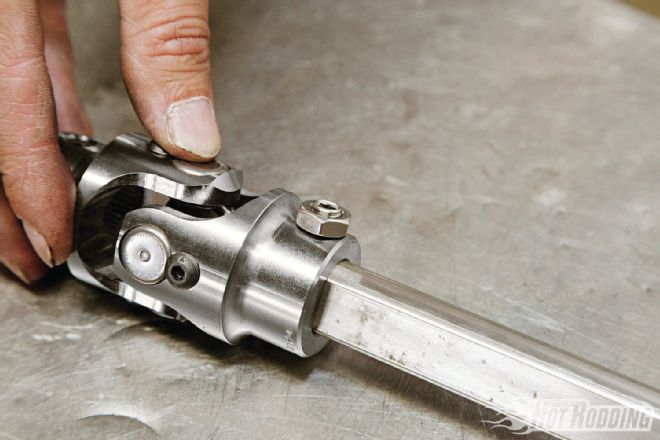 12. Next up is the steering shaft, so the Borgeson ¾DDx¾-36 U-joint is temporarily installed on the shaft to mate it up with the splines on the column output shaft.
 13. The steering shaft will need to be cut to fit, so with the Borgeson ¾DDx¾-36 U-joint installed on the stainless steel shaft and the end of the ididit column, Tully measures the shaft length required.
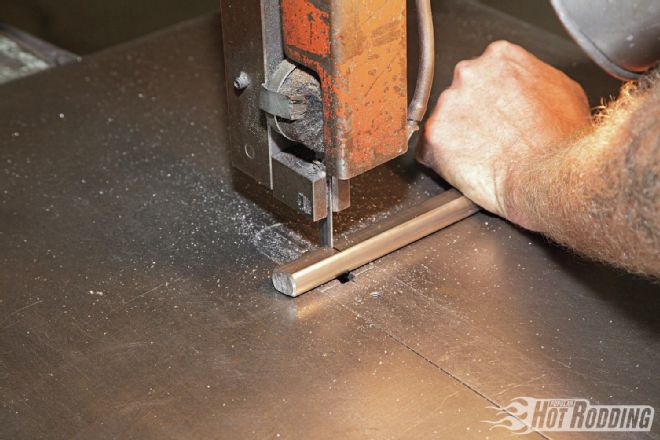 14. Once marked, a bandsaw makes quick work, but a cutoff wheel will work just as well.
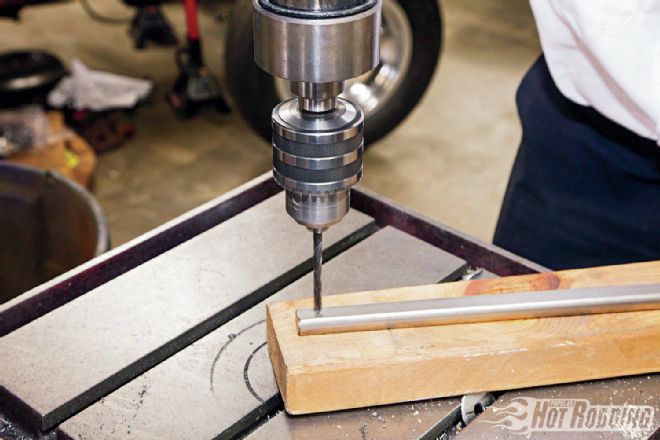 15. Tully likes to put screw recesses in the steering shaft to give the U-joints a secure mount. He mocked the shaft into place with the U-joint and marks the placement of the set screw. He then dimples the shaft with a transfer punch, followed by a center punch. Stainless is very hard, so starting with a ¼-inch bit Tully drills the hole, and then progresses to 5/16 with a drill press. He then installs the U-joint and tightens the set screw with a little blue Loctite.
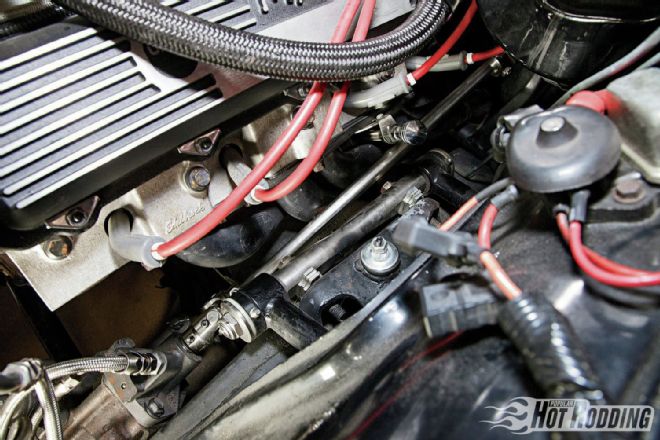 16. With the Borgeson U-joints secured on the steering shaft, the assembly was installed on the DSE box with the ¾DDx¾-30 for the final time. This setup has zero flex in it—ideal for hard driving and handling.
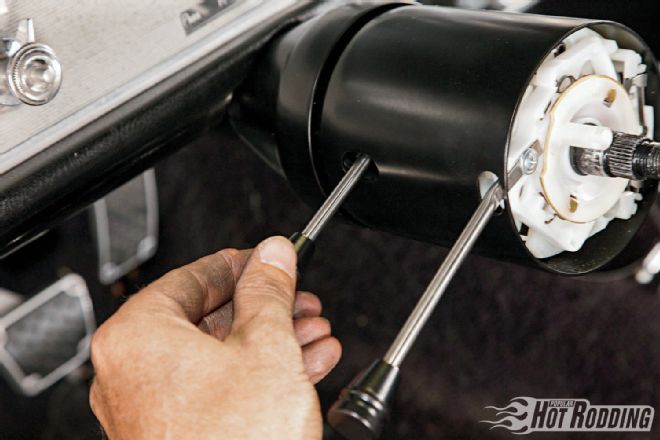 17. The turn signal lever is then screwed to the switch in the column with the provided No. 2 Phillips screw, then the trim knob can be installed. The emergency flasher knob is installed to the threaded stud into the column on the bottom right side. After that, the tilt arm is threaded into position and the trim knob can be installed.
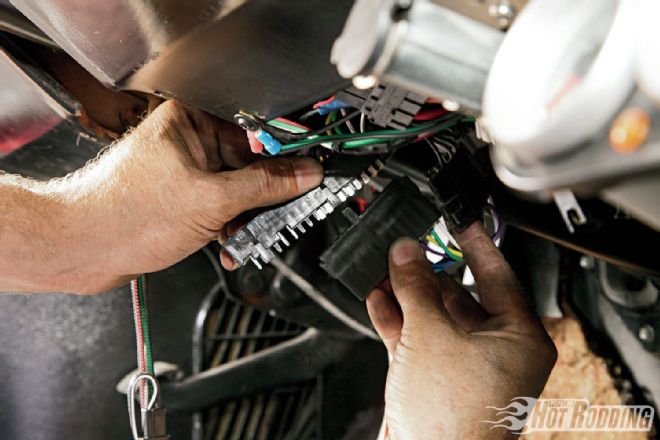 18. The electrical connections are made really simple thanks to ididit’s kit. They are literally plug-and-play, just match the harnesses together. On Project Olds, we did need to tap into a power lead for the flashers.
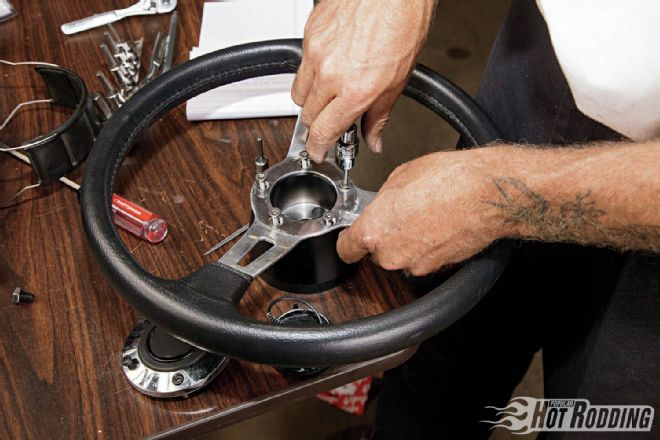 19. Our steering wheel is then mounted to the five-bolt adapter that we received from ididit along with the provided horn wire and button.
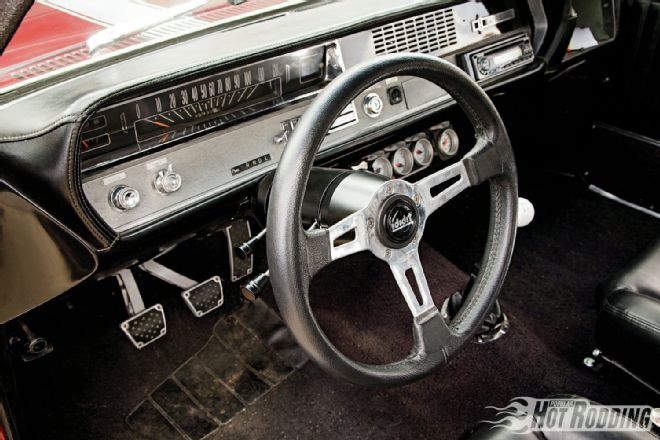 20. Once the steering wheel is centering and torqued to the ididit column, the job is done! PHR photographer Robert McGaffin reports that the new column and steering linkage not only looks great, it also makes a noticeable difference in the responsiveness and feedback through the steering wheel.