With the addition of the intercooler behind the grille of our '68 Chevy, the real estate was starting to become a hot commodity. One of the things that received the "imminent domain" card was the turn signals. When things were first mocked up, I was pretty adamant about keeping the stock turn signals in the stock locations. It is the law and all. But after I researched my options, I realized that relocating them wouldn't be that big of a deal. Like almost everything in this hobby, someone else has already got it figured out.
That someone turned out to be John Lawrence at Brothers Trucks, who turned me on to their Euro-style headlights that incorporate a row of separately wired LEDs on either side of the H4 halogen bulb (PN EHL80TR). I opted to wire the inner side to the park lamp circuit and the outer row of LEDs to the respective turn signal circuit, thereby replacing the aforementioned grille-mounted items. While I was at it, I also figured it wouldn't hurt to take those marker lights on the fenders and make them operable turn signals as well. A little bit of safety for the 21st century I suppose.
When it comes to shaving the turn signals from a '67-'68 C10 grille, there are two options: modify the existing piece or find an original upper grille insert to replace the lower. The latter is by far the easier way to go, but at the time no one reproduced and sold the upper grille insert individually and I couldn't find a stock one. So, it was "back to the bat cave" and time to put my modest bodyworking skills to the test. At the end of the day, it took just that—a day—to fabricate, patch, weld, fill, smooth, smack it up, flip it, and rub it down. And most of that day was spent waiting for body filler to cure!
Once it was all said and done, I was actually surprised at how much I preferred the look of the front end without the turn signals. I'm typically more of a purist when it comes to smoothing and shaving all the stock items, but this one caught me by surprise.
So if you're looking to make a custom statement with the front end of your truck and those turn signals are getting in the way or you'd like to update a vintage hauler that never had marker lights to begin with, here are a few ideas to get you rolling!
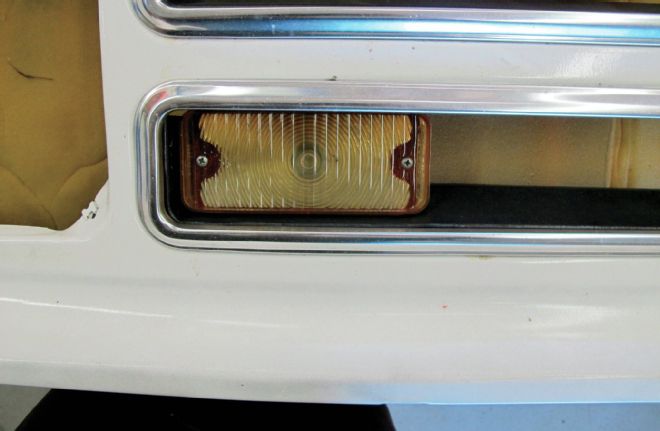 1. Here’s the stock turn signal in question installed in the grille that’s been removed from the truck.
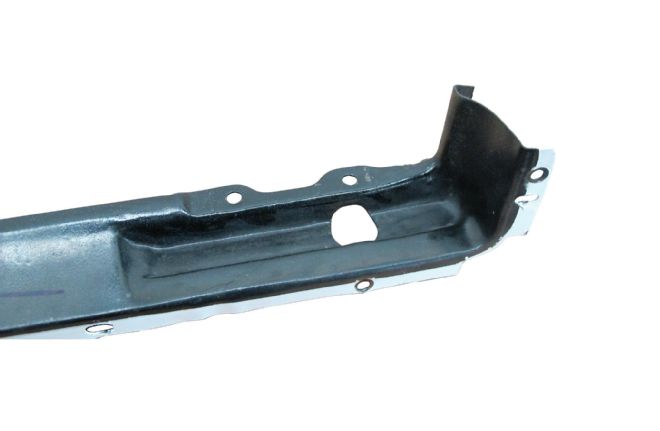
 2. With the turn signal removed, the recess that is stamped into the lower grille insert can be seen. This is the area that needs to be replaced and smoothed out to better match the upper insert.
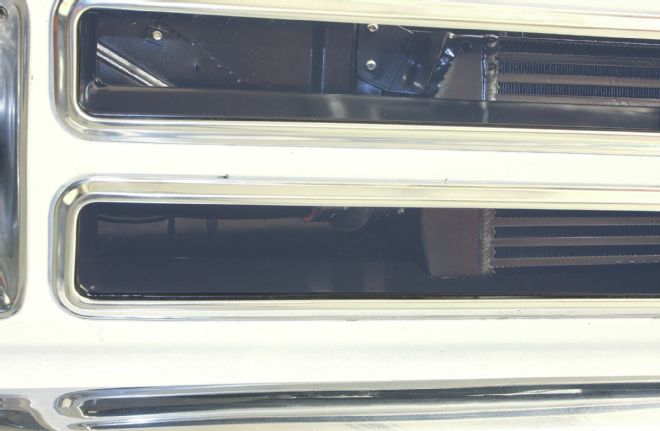
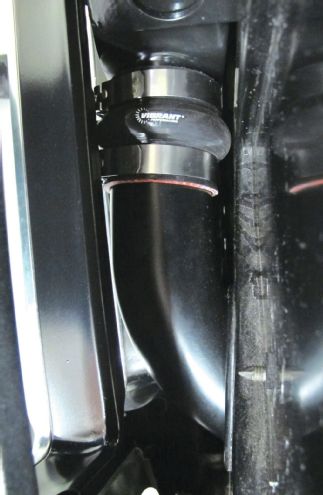 3. This is what begat all this: the inlet tubes for our supercharged LS setup, which claimed the real estate previously held by the stock turn signals.
 4. The first step in fillin’ and shavin’ the grille is to remove the aluminum molding that surrounds the lower opening.
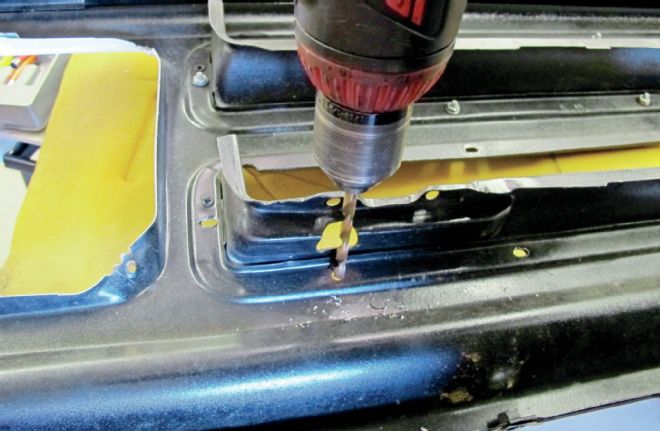 5. Then, the rivets that attach the lower grille insert to the grille need to be drilled out so that the two can part ways.
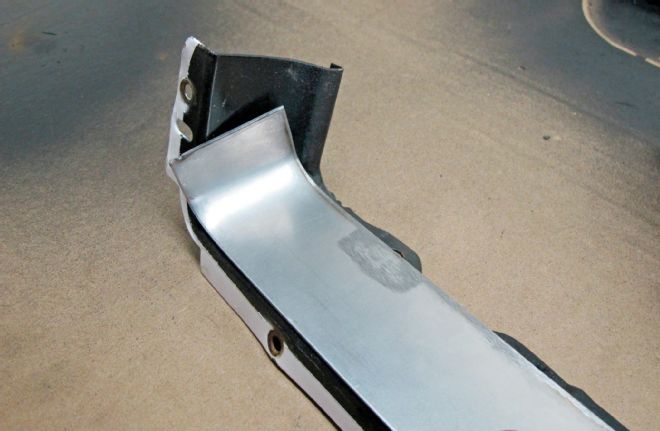
 6. With the lower grille insert removed, we were able to take an inventory of what’s in store to get things nice and smooth.
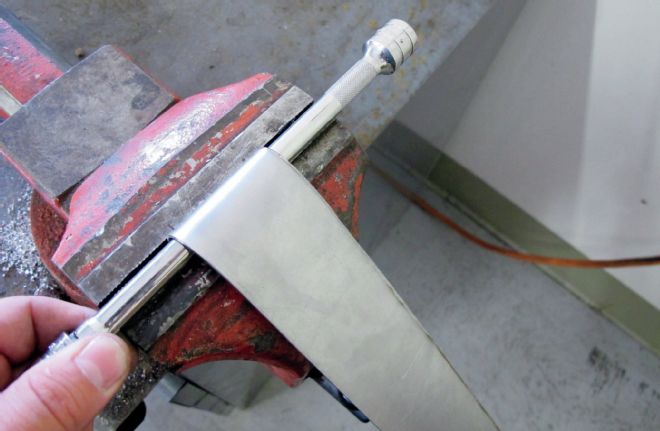 7. While it would make sense to first make a template of the section in question, I opted to do like I usually do, and jumped in feet first. My initial concern was to get the curvature of the corner correct. I used a 3⁄8-inch socket extension as a dolly of sorts to bend a piece of sheetmetal over in the vise to get the initial curve.
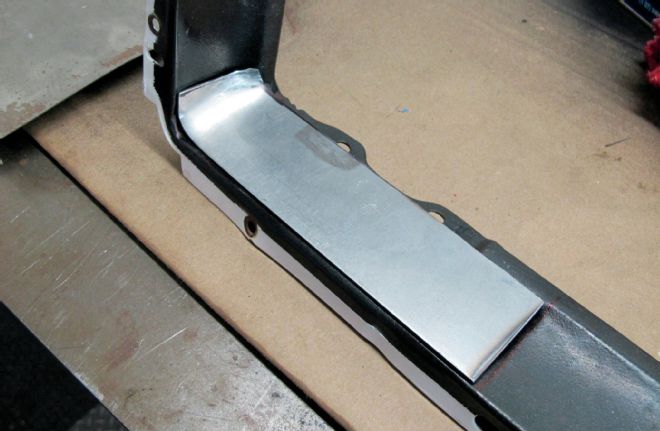
 8. The important thing is that it matches the top insert. Here, we can see I’m pretty close.
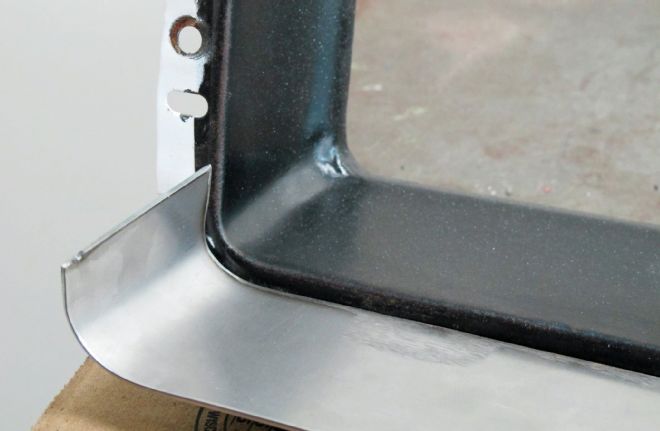
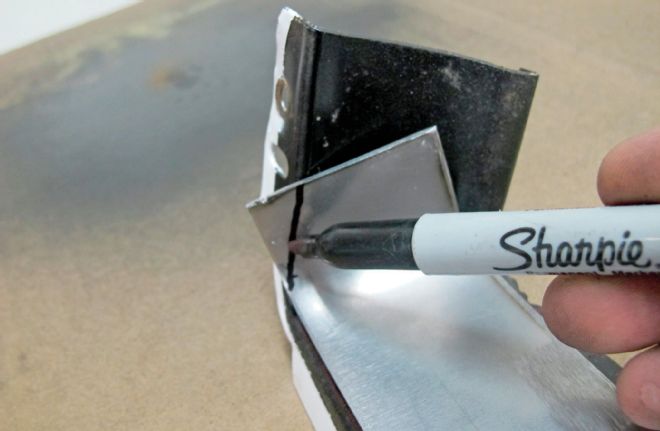
 9. Placed on top of the lower insert, we can get an idea where we need to trim the new sheetmetal patch and how our curve lines up.
 10. Like I said, I’m going to wing this one, so first, it’s necessary to trim the corner off our patch piece.
 11. Once trimmed, it gives us a good start.
 12. Things couldn’t be that easy however. It seems that our friends at GM decided that the insert also needed a curve on the vertical end of the insert as well. A little hammer and dolly work gets us in the ballpark, as does some more trimming.
 13. Things couldn’t be that easy however. It seems that our friends at GM decided that the insert also needed a curve on the vertical end of the insert as well. A little hammer and dolly work gets us in the ballpark, as does some more trimming.
 14. With the new patch panel roughed in, it’s time to trim the section that’s going to get replaced.
 15.To ensure that the new patched lower insert remains true to the original shape of the grille, I clamped it in place and tacked a section of sheetmetal to the backside of it. This will serve as the backbone to the patched section to come.
 16. To ensure that the new patched lower insert remains true to the original shape of the grille, I clamped it in place and tacked a section of sheetmetal to the backside of it. This will serve as the backbone to the patched section to come.
 17. With the shape of the insert set, it’s now time to finesse both the insert and the patch panel …
 18. … and tack the two together. That gap on the right side is a bit big, shame on me. One thing I’ve noticed however is that both my welding and fabricating skills seem to improve simultaneously: either the fit and finish is better or I learn how to fill the seam.
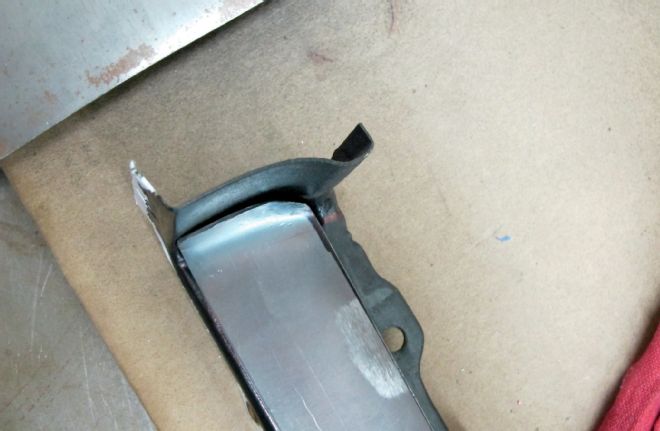
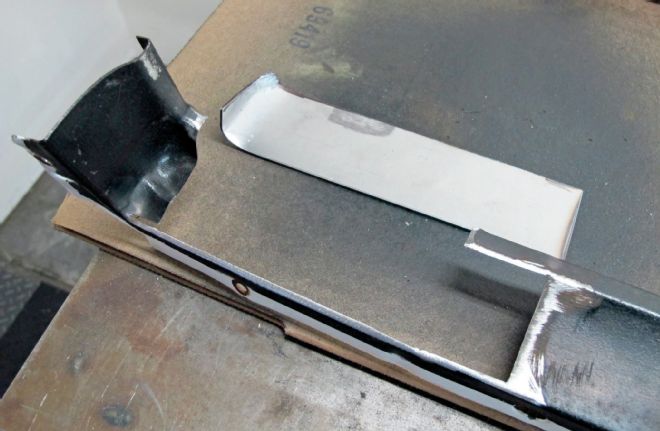
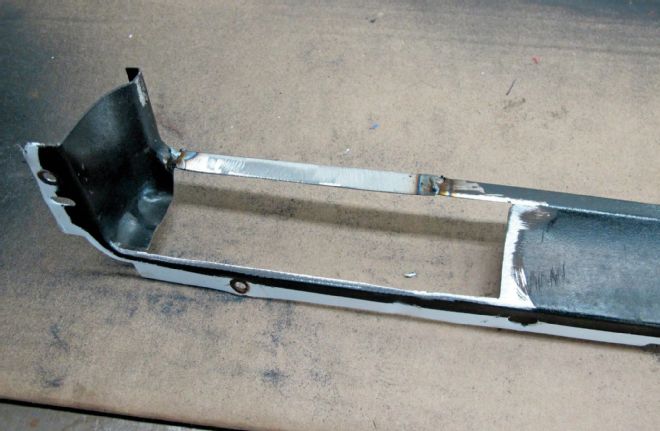
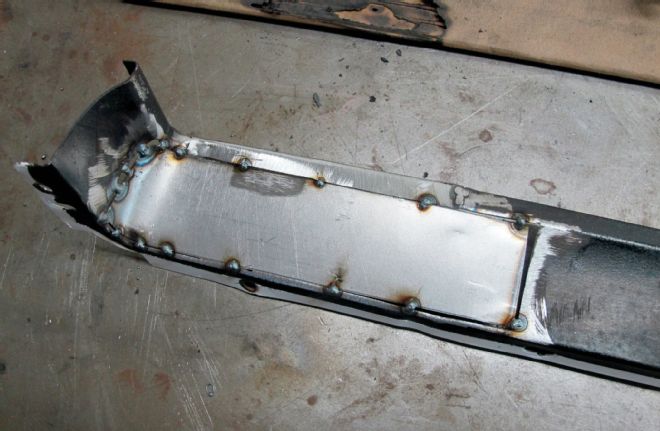
 19. Here’s the patched section after the whole welding and grinding affair.
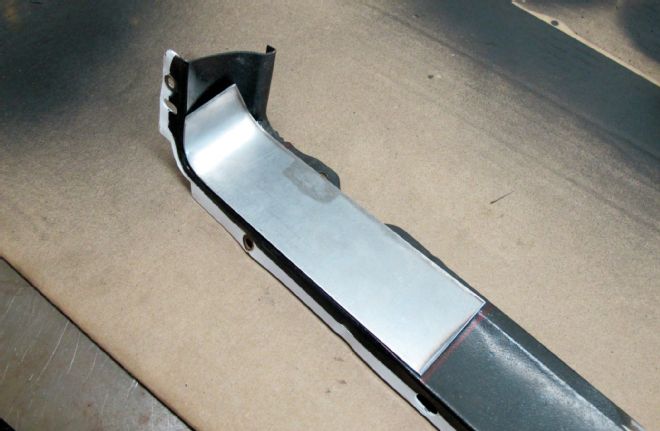
 20. One more trial fitment check and it’s ready for final bodywork. Note the trimmed section that’s already been cut to clear the intercooler.
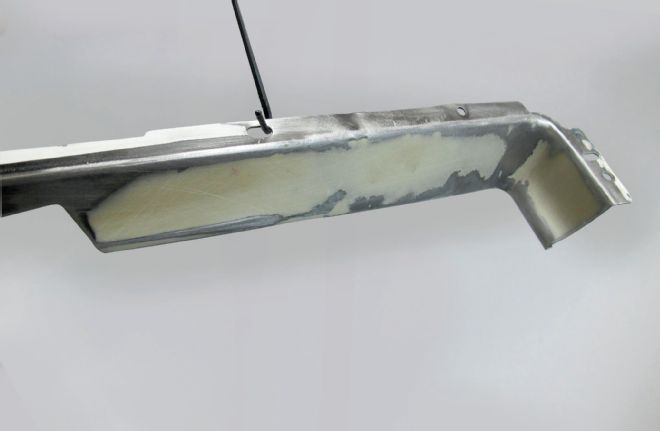
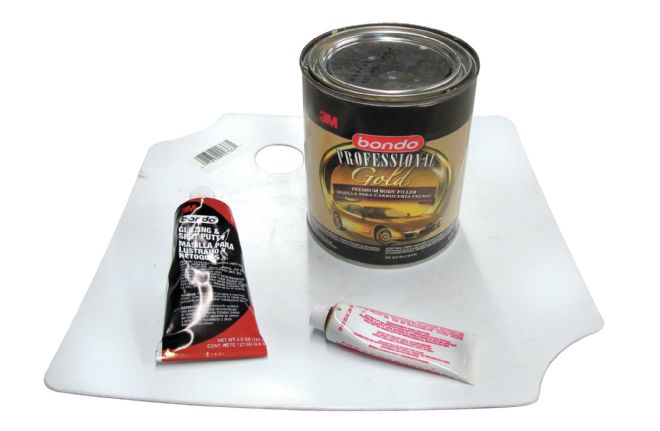 21. One of these days, I’m going to learn how to finish my repairs in metal, but for now, it’s necessary for me to use a little filler to get things nice and smooth. I like 3M’s Professional Gold Bondo accompanied by a tube of Glazing and Spot Putty for the small stuff.
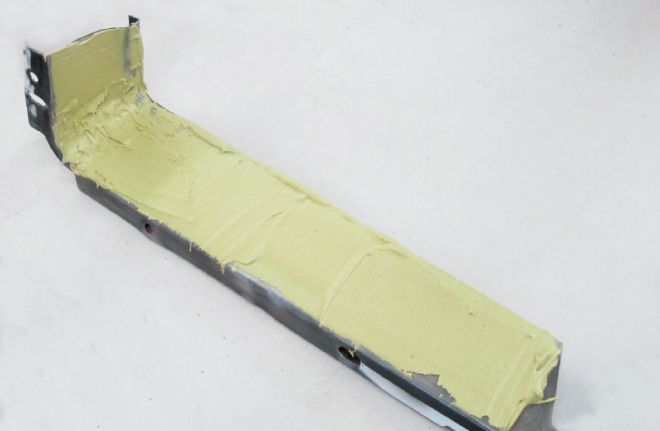 22. A nasty looking initial coat …
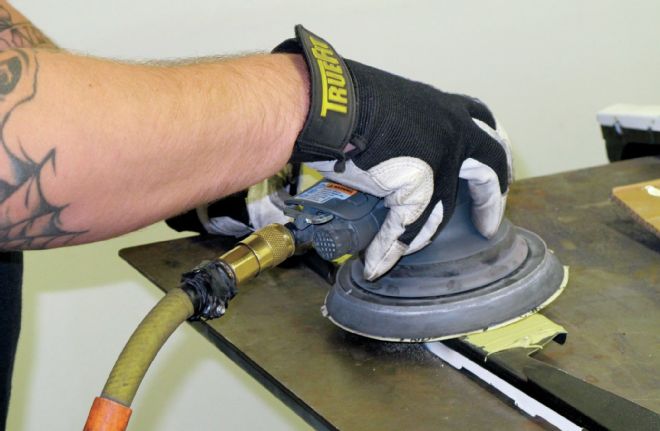 23. … hit with a dual-action sander with a 180-grit disc …
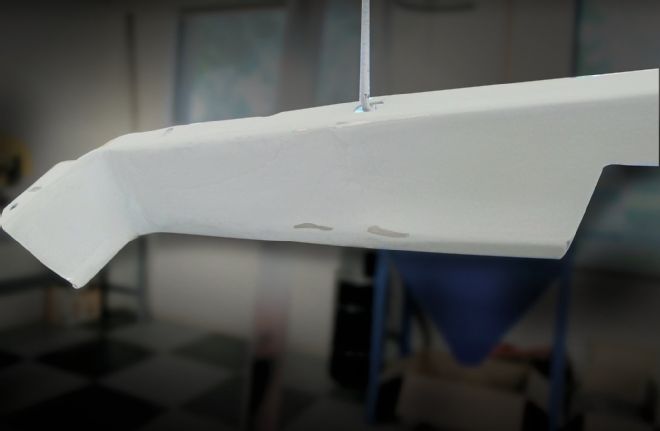
 24. … is ready for a couple of coats of high-build primer and some final sanding.
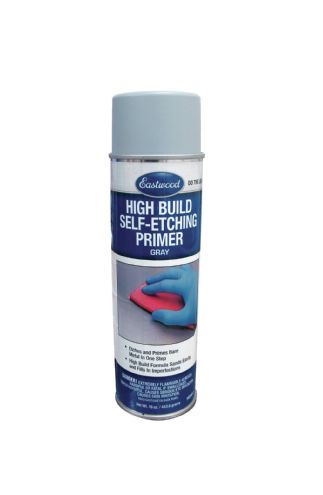 25. For small projects like this, a few coats of Eastwood’s High Build Self-Etching Primer aerosol is all it takes to fill in the small voids that can be wet sanded to perfection.
 26. For small projects like this, a few coats of Eastwood’s High Build Self-Etching Primer aerosol is all it takes to fill in the small voids that can be wet sanded to perfection.
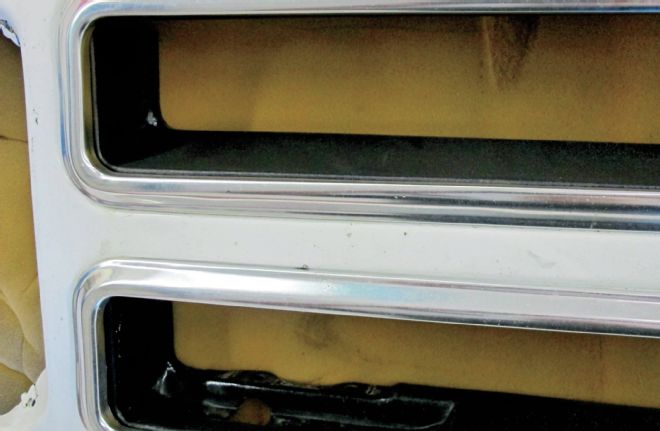
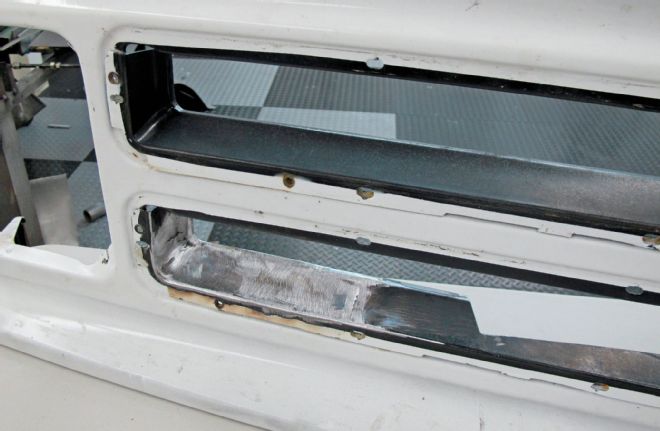
 27. With the upper and lower inserts shot in matching coats of Satin Black and the whole shebang reassembled. It’s hard to tell that the lower insert has even been modified.
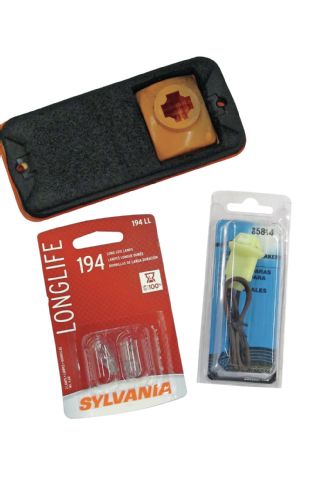 28. Like I mentioned before, I wanted to modify the stock side markers into true turn signals. All that’s required is a pair of marker lenses from Brothers Trucks that accept a standard bulb and holder. The holder is then wired up to the turn signal and you’ve got yourself added visibility.
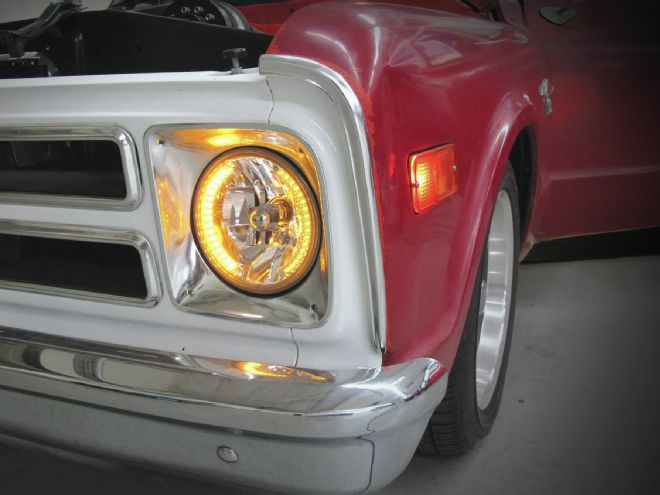
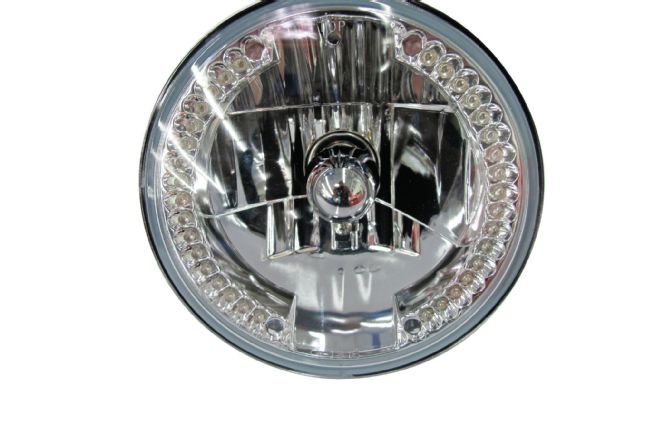 29. These Euro Crystal Headlights from Brothers Trucks are the other pieces of the puzzle to our turn signal quandary. They feature two rows of LEDs that can be wired independently.
 30. These Euro Crystal Headlights from Brothers Trucks are the other pieces of the puzzle to our turn signal quandary. They feature two rows of LEDs that can be wired independently.
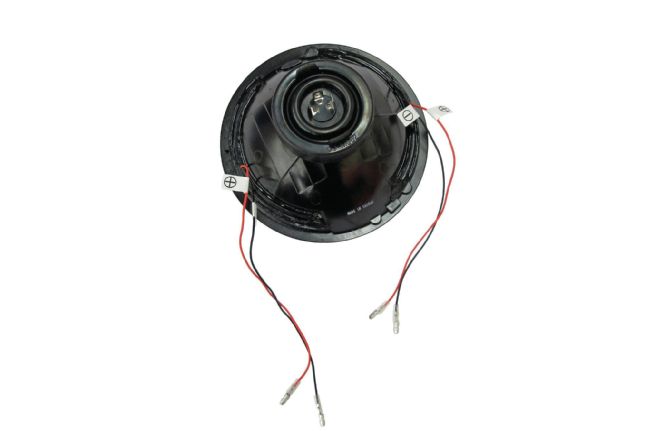
 31. I opted to wire the inner row of LEDs to the park light circuit …
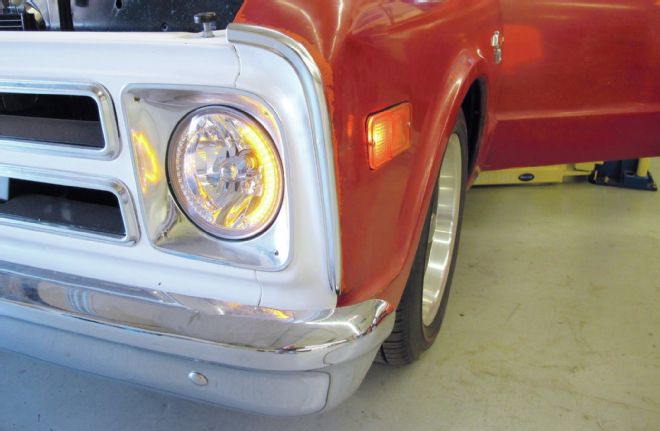 32. … while the outer row of LEDs were wired to the corresponding turn signal circuit, thereby solving our “lack of a front turn signal” dilemma.