We love creature comforts. Though we openly lament the complexity of our daily drivers we think nothing of heaping electrical devices on our fun cars. We'll go way out of our way to get power windows, power door locks, high-watt audio gear, climate control, high-powered lights, and electronic engine management.
Unfortunately, the effort we invest in electrical devices doesn't seem to extend to their installation. Generally speaking we mount electrical components well but we tend to drop the ball when it comes to integrating them with the rest of the electrical system. Most of us simply hard wire a device to the rest of the system and dread servicing the part or any other one near it. Because to remove a hard-wired electrical component means cutting its wires and that means having to reconnect wires likely made too short by the splicing junction. Creating joints with spades and push-on terminals seems like a good idea but a bunch of nearly identical-looking wires each equipped with the same type of terminal is a nightmare puzzle when working upside down and backward under a dark dash. That's no way to live.
Fortunately, it's not the only way to live either. As early as the '50s auto manufacturers began equipping electrical components with multi-terminal connectors or plugs. Need to service a device or get to one behind it? Just pull the plug and remove the part. And because of the plug's index only one-way reconnection happens just as effortlessly.
And that's really only the start. Because the OEMs used these multi-terminal connectors for decades they're considered service items. They're available just about everywhere and as a result they cost peanuts—new ones from the right sources cost so little that it's not even worth harvesting used pieces.
What follows is what you need to know about the three most popular connector styles: Packard 56, Weather Pack, and Metri Pack. There are others but since they lack the utility of these three we'll save them for another entry.
For now, though, learn what it takes to make a wiring installation as serviceable as the one in your new car. These connectors are so handy, affordable, and easy to use that you'll wonder how on earth you did without them so long.
Packard 56
The Packard 56 is the grandfather of the modular electrical connector. If the Packard name sounds familiar it's for good reason: the Packard brothers of automobile fame started it in 1890. In fact the Packard Electric Company bankrolled the Packard Motor Car Company nine years later.
In 1932 the brothers sold Packard Electric Company to General Motors who named it the Packard Electric Division. The company released its 56 series as an un-sealed modular system in the mid '50s. The housings come in a variety of configurations, from plain inline connectors to specialty connectors that correspond to various devices, like sending units, flasher modules, ignition switches, alternator plugs, and, certainly most familiar, three-pin headlight plugs.
The Packard 56 terminals fold over the conductor to form a high-pressure crimp that seals the conductor strands as a soldered joint does yet achieves a superior electrical connection than solder can. The terminals also alleviate strain on the exposed conductor with a secondary crimp that grabs the wire jacket. All 56-series connectors use 1/4-inch blade-type terminals that can handle as much as 48 amps continuously. Though the terminals require a special crimp tool, popularity has made powerful ratcheting models refreshingly inexpensive.
Packard 56 connectors are small and unobtrusive. Since they date to the '50s they're historically possible on a period hot rod or custom (though unlikely at the time since the tools were once exceedingly expensive). The lack of sealing means they don't work well in damp locations, so keep them close to the engine compartment or interior. And they can be a real bear to connect and pull apart, especially when cold or in tight confines.
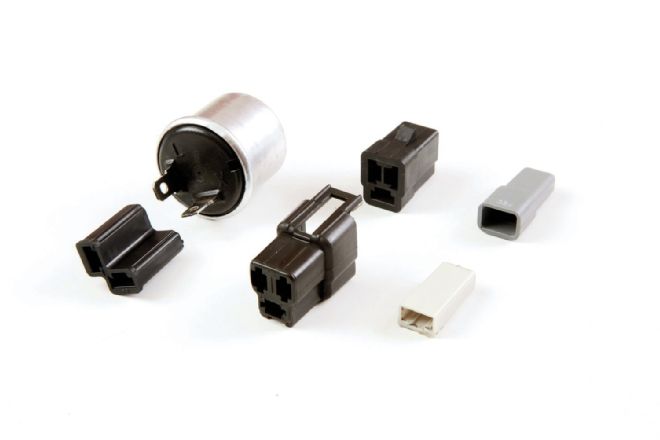 1. Packard Electrical Division made dozens if not hundreds of 56-series configurations. Shown here are one-cavity connectors, a stacked three-cavity connector, and a really handy flasher-module connector.
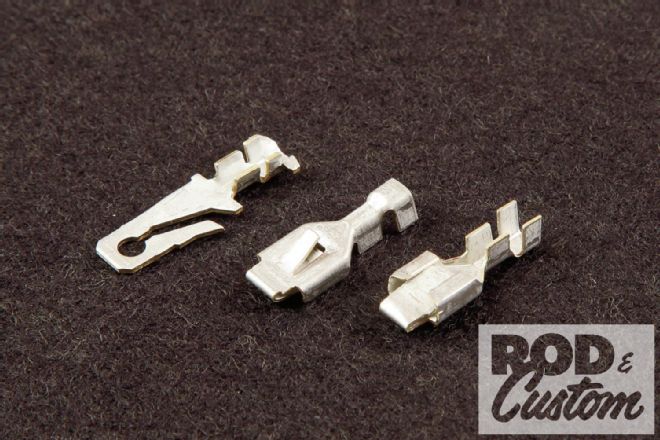 2. The female Packard 56 connector resembles a plain push-on terminal. The foreground terminal shows how it folds in on itself to maintain contact with the male terminal. The middle terminal shows the tang that locks it into its connector. The background terminal is the male.
 3. Packard 56 requires a special ratcheting crimp tool. They once cost hundreds of dollars but nowadays, tools such as the Quick Change Crimp Tool Kit from PerTronix are a fraction of the cost of a single plier. They exert more leverage than plain pliers, critical since the terminals are quite tough. They also won’t release until fully cycled, which ensures a solid crimp every time.
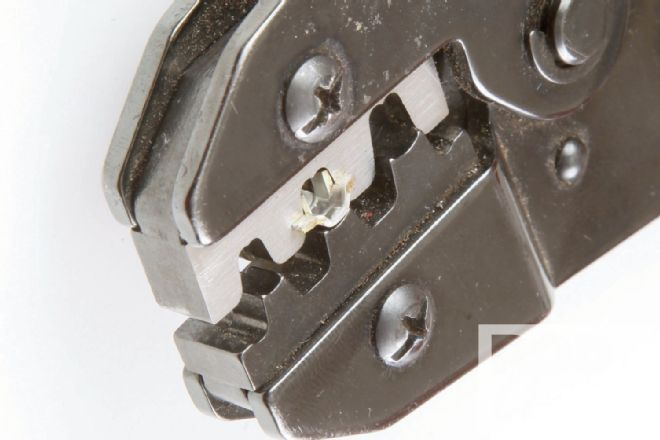 4. The dies in most of these ratcheting tools were intended to crimp plain open-barrel terminals. The 56-series terminals have location “wings” that interfere with those dies. You may have to grind the male die’s strain-relief side until the terminal fits.
 5. I find it easiest to set the terminal in the dies and then insert the wire but it doesn’t photograph well. Strip approximately 3/16 inch of jacket to expose the conductor and push it in the trough until the jacket bottoms on the primary crimp ears, as shown here.
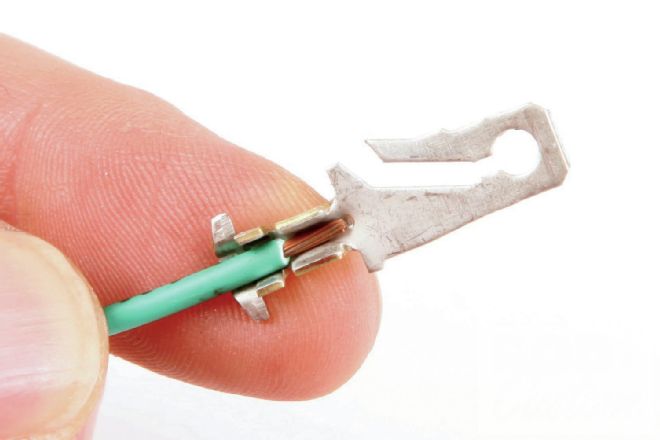
 6. Once the wire fits properly in the terminal squeeze the crimp pliers’ handles until the tool fully closes and releases. Even with the compound leverage it takes a fair bit of pressure to affect a solid crimp. A proper crimp folds the tangs over the conductor and the insulation, as shown here.
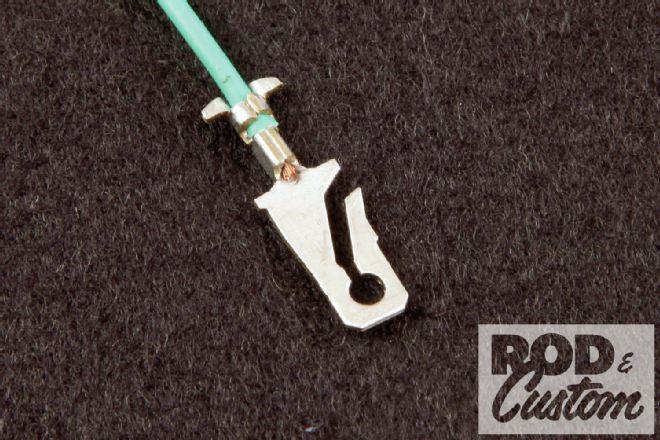
 7. The terminals correspond with the connector gender: male with male and female with female. Tangs lock the terminals into their respective connectors. The tangs on the female terminals orient to the connector’s notched side (shown here) but the male has no orientation.
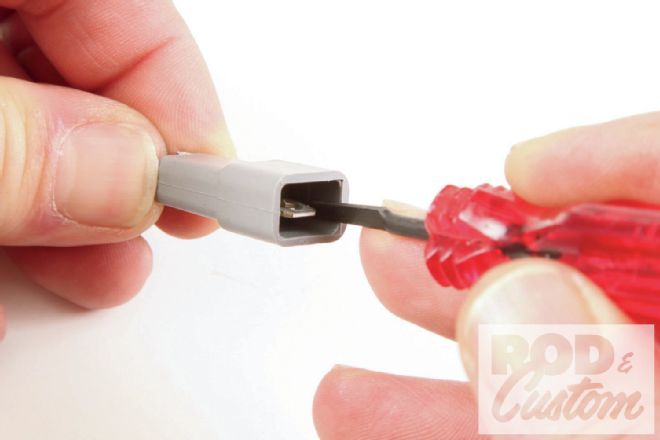
 8. It takes a small, flat-bladed tool to release a Packard 56 terminal from its connector. The correct one has a blue handle but I make do with the smaller red one. It pushes in the groove for the female connector and along the side for the male. Tug on the wire as the tool goes in.
 9. The same release tool or even a small screwdriver blade presses against the tang side of the terminal to release it. Simply pull on the wire as the blade depresses the tang.
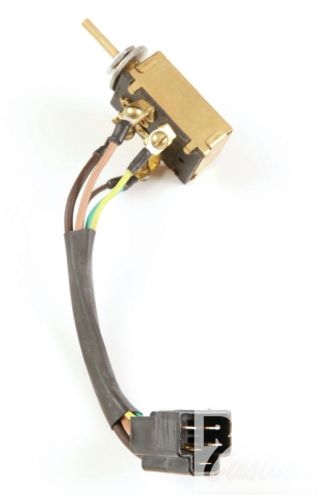 10. The Packard 56 can transform a component with tedious individual connections to one with a single convenient connection. Just wire the device to an inline connector. Seriously nicer than making individual connections.
Weather Pack
Packard 56 is handy for sure but it has one fatal flaw: it doesn't protect the terminals from oxidation. So in the '70s Packard Electrical Division created the Weather Pack (get it? Weather-resistant Packard).
Though Weather Pack is a modular system it achieved its weather resistance by sacrificing some of its utility. For the most part, Weather Pack connectors are inline exclusively and don't connect to a specific component as Packard 56 can. Furthermore, the seal system prohibits more than one wire from meeting a terminal.
Weather Pack's relatively small surface-contact area limits constant current capacity to 20 amps, less than half the capacity of Packard 56. But the design is more than compensated for by availability: every parts store across the country has Weather Pack service parts. And they're almost insultingly inexpensive if you buy them right.
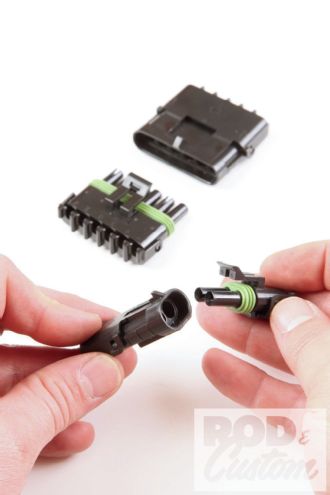 11. Weather Pack connectors are available in seven configurations: from one to six cavities in a flat format and with four or five cavities in a stacked format. Shown here are a two-cavity and broad six-cavity connector. Each set consists of a tower (halves with green seals) and shrouds (no seals).
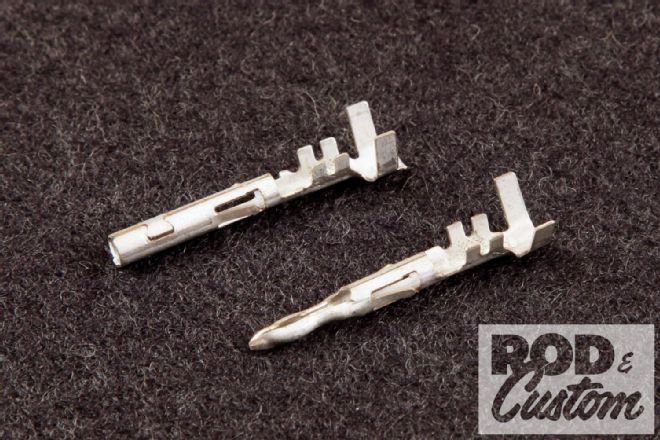 12. Here are male (foreground) and female Weather Pack terminals. The terminal selection in Weather Pack is pretty limited due to its relatively limited current capacity. Two sizes are available, one labeled 15 for 14- to 16-gauge wire and another labeled 20 for 18- to 22-gauge wire.
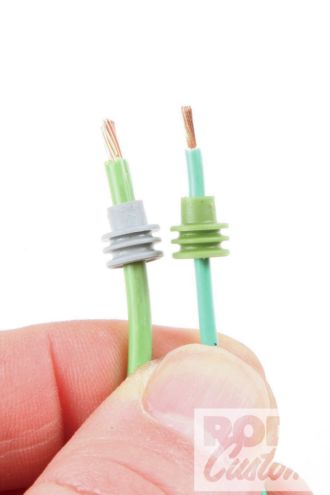 13. Weather Pack achieves its weather resistance with silicone seals on the towers and by these small silicone seals that slip over the wire insulation. They’re available in several sizes but due to the relatively limited wire gauge range, gray (14- to 16-gauge) and green (18- to 22-gauge) are the standards.
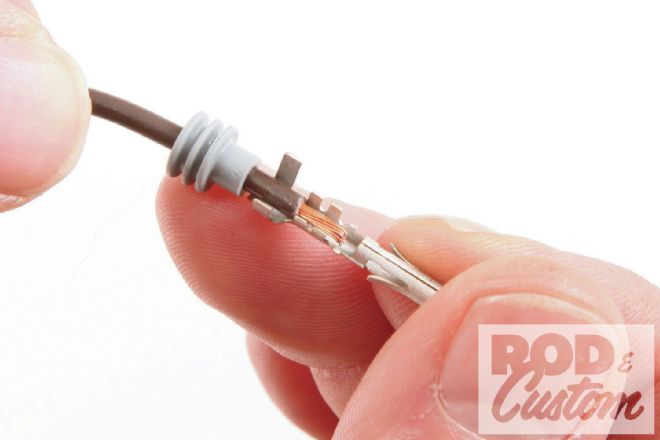 14. Slip a silicone seal over the wire with the fat side away from the terminal and push it back sufficiently to clear the terminal ears. Then strip approximately 3/16 inch of the jacket and push the wire into the terminal until the jacket edge catches the ears. Seal unused cavities with the cavity plug (not shown; Packard PN 12059168).
 15. Like Packard 56, Weather Pack uses an open-barrel design that uses special pliers. The official pliers for this design are exceedingly expensive still but the thin terminal walls mean non-ratcheting pliers like Waytek’s 533 (shown) do the trick. The jaws remain parallel at all times.
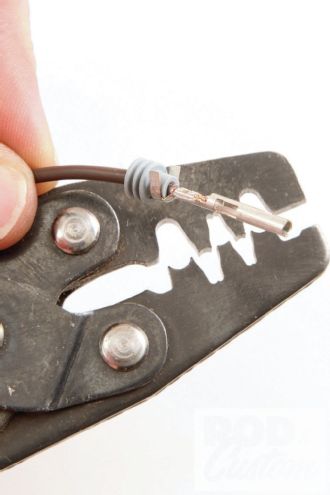
 16. Insert the first crimp into the corresponding die cavity and squeeze the handles until the jaws fully close. That represents the mechanical and conductive component of the installation.
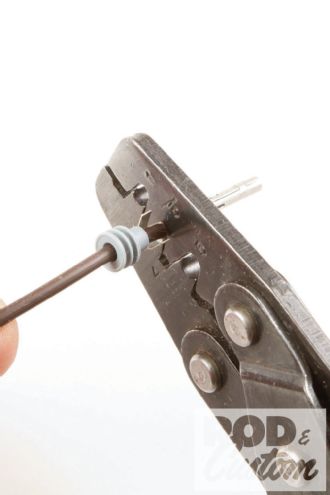
 17. Then push the seal into the secondary crimp area. The larger round cavity crimps these ears. You may need to squeeze the ears toward each other to fit them into the cavity. And the crimp isn’t supposed to get real tight—pressure enough to keep the seal in place will do just fine.
 18. Weather Pack terminals technically aren’t gender specific, however, the tower (shown) best supports the female terminal and guides the male terminal into it. Open the hinged clip and push the terminal in until the tang clicks behind the ear.
 19. Once the terminals seat in their respective tower or shroud simply fold over the retaining clip. The connectors are fully ready to use at this time.
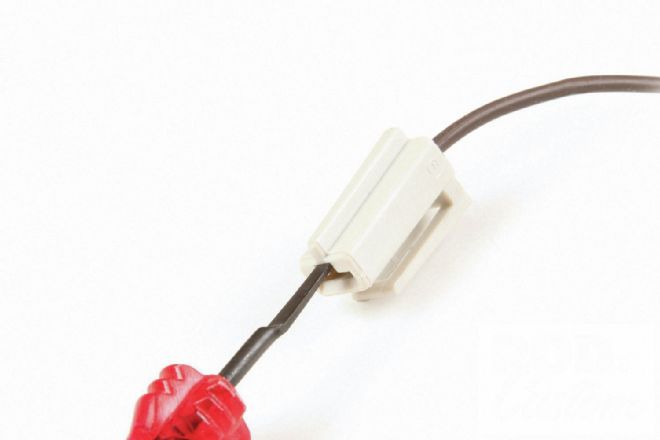
 20. To disassemble Weather Pack connectors first undo the retaining clip. The Weather Pack release tool is little more than a thin wall tube in a screwdriver handle. Simply push over the terminal while pulling on its respective wire until the terminal backs out of its hole.
Metri Pack
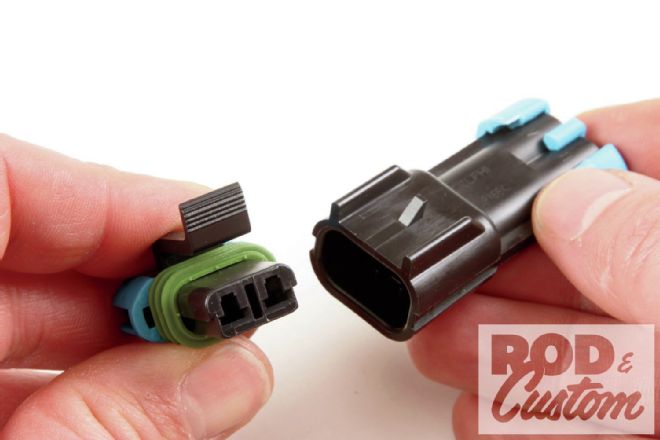
Metri Pack represents Packard's second-generation modular connector. The company completely revised the terminal shape to flat blades and rectangular slots and standardized it to a metric format, hence the Metri part in the name. Though every Metri Pack series has a sealed version, some variants trade the sealing component for a smaller package size. Anyway, not every connector needs the sealing capacity.
Like Packard 56, Metri Pack is available in more applications than inline. In fact pretty much all GM electrical components from the '90s onward feature Metri Pack connections.
Metri Pack isn't a connector design as much as a group of connectors based on terminal width. The 150-series connectors feature 1.5mm terminals and handle 14 amps; 280-series connectors feature 2.8mm terminals and handle 30 amps; 480-series connectors feature 4.8mm terminals and handle 42 amps; and 630-series connectors feature 6.3mm terminals and handle 46 amps.
The series uses a separate clip that retains the terminals. This TPA, or Terminal Position Assurance, retains the terminal at pretty much all costs. In fact, it works so well that some terminals lack the locking tangs.
The 280-series Metri Pack is incredibly versatile. Its footprint not so coincidentally matches the blade spacing of many universal automotive components like mini automotive fuses (APM/ATM), relays, and flasher modules, making it perfect for universal applications. In fact General Motors designs its modern fuse/relay panels to use 280-series terminals pretty much exclusively, something that makes them readily adaptable to other applications. Coolest of all, even-numbered 280 electrical connectors can be used as inline fuse holders—caps for two- and six-cavity female connects exist for this specific purpose.
Though the same fuse-holding application holds true with the 630 series, the series is far larger and less versatile. Because it and the 150 series use a slightly different terminal attachment we're going to devote another story entirely to them and some other slick connectors.
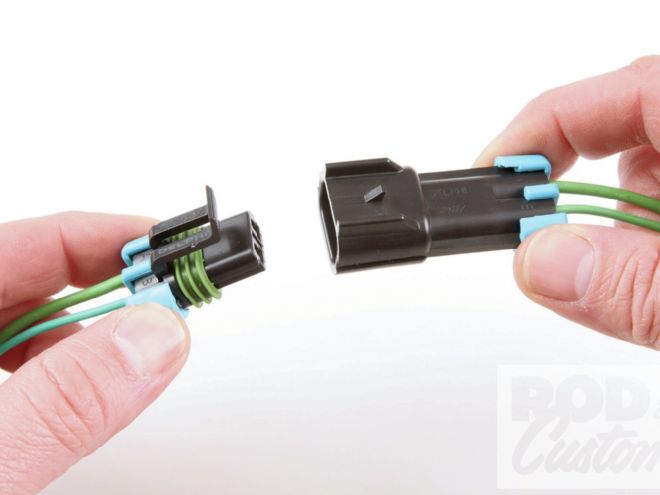
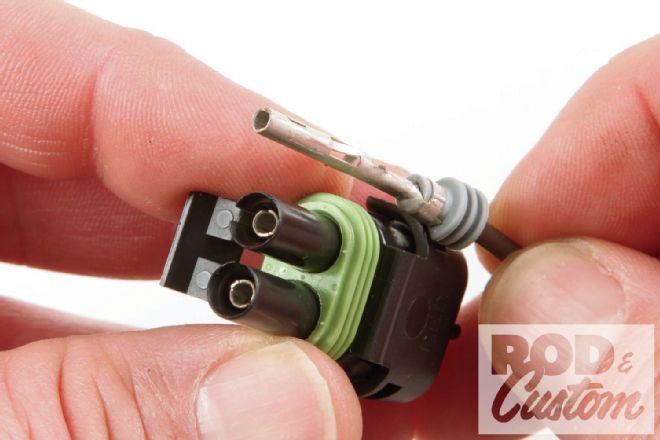
 21. The Metri Pack 280 bears a passing resemblance to the Weather Pack. These are the components of a two-cavity connector.
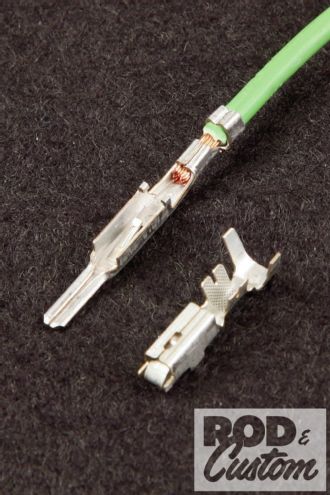 22. The 280 comes in several gauges, the common ones being 10-12, 14-16, and 18-22. Shop carefully as some 280 terminals, like this particular male (background), don’t use seals and their specific connectors are a lot harder to find (though they will work in a sealed connector housing). The non-sealed ones crimp by Packard 56 method; the sealed ones crimp by the Weather Pack method. Seal the unused cavities with a cavity plug (not shown; Packard PN 12010300).
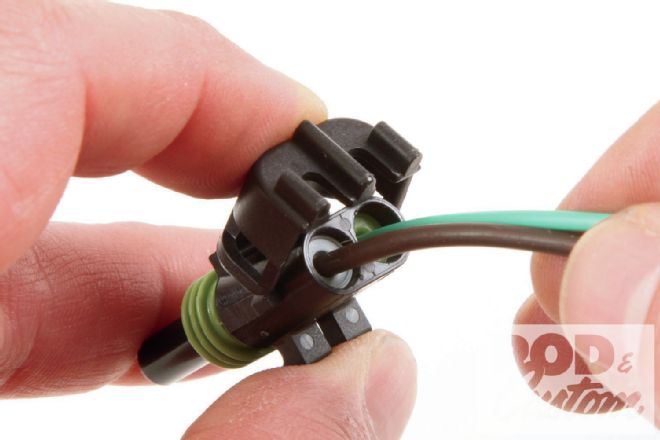
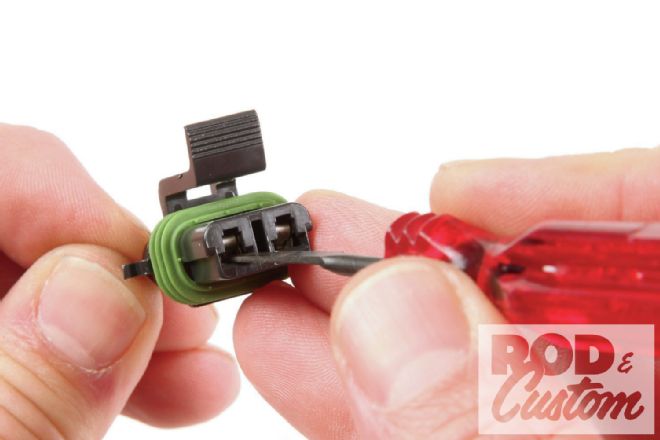 23. The sealed 280 terminals do not lock into their connectors (more on that next) but the non-sealed terminals lock in with a tang. It takes a small release tool to remove the latter. This red one is for really small Micro Pack 100s but it works on 280. Just push it in the open end of the terminal while tugging on its wire.
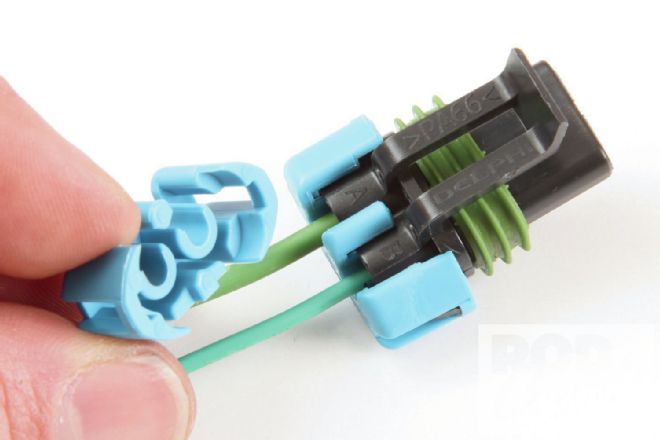 24. The TPA pushes against the terminal’s seal, making Metri Pack really durable. The TPA clips on either way and removes with a flathead screwdriver or even a release tool. It also reveals the cavity letters (A, B, C, and so on), regardless of its orientation.
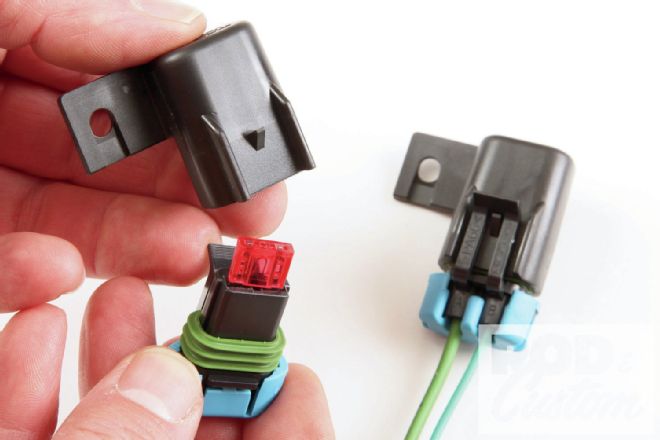 25. This is where Metri Pack 280 really shines. The two- and six-cavity females can be used as a fully sealed inline fuse holder. This shows the cap for the two-cavity female connector. It can mount with a #10 screw, but an optional clip is available.
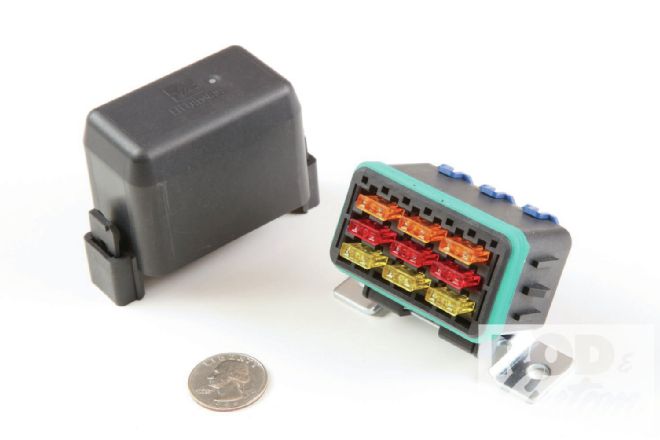 26. Here’s proof. That you’ve probably never seen this before indicates that the aftermarket wiring industry could stand to broaden its horizon. Littelfuse makes these 18-way (shown) and 60-way Mini Power-Distribution Modules. They respectively hold 9 or 30 mini fuses. Even slicker, they’ll hold a combination of fuses and 280-format components, like relays and flasher modules. Since all GM vehicles use that format every parts store carries replacement parts. They come as components but a complete 18-way PDM costs like $10 and the 60-way sells for about $20. If equipped correctly the 60-way could hold a flasher module, headlight and horn relays, and still take nearly two-dozen fuses!