Would you trust an original electrical cord on a well-used kitchen appliance that’s pushing 40 years old? Well, how about if its insulation was brittle and cracking, and the copper wire strands were showing? An electrical short could blow a household fuse or circuit breaker, damage the appliance’s internals, or in the worst possible case, even create a fire. Assuming the appliance is in excellent working order otherwise, simply replacing its cord is the smartest solution.
Apply this to the wiring harnesses in your vintage Pontiac. Many of our beloved possessions are nearing or have pushed past the 40-year-old mark. In that time, while such vehicles were used as daily transportation and the wiring harnesses throughout them were subjected to any combination of temperature extremes, moisture, general wear, and age. The result today is often rusty, corroded, and/or loose connections or bulb sockets, which can lead to erratic operation.
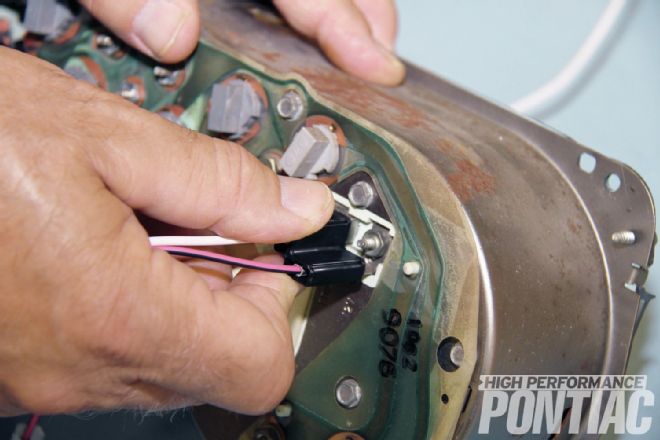
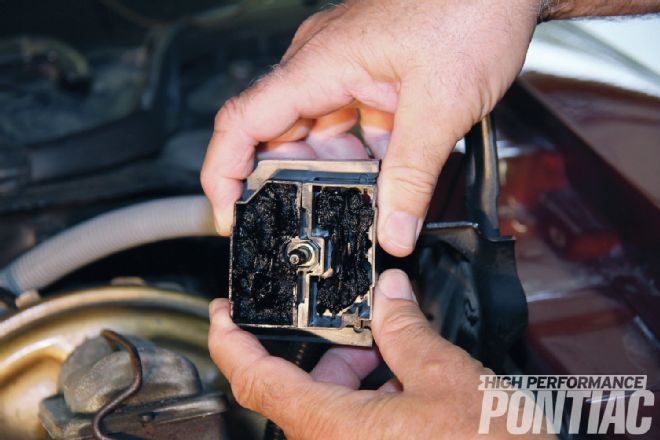
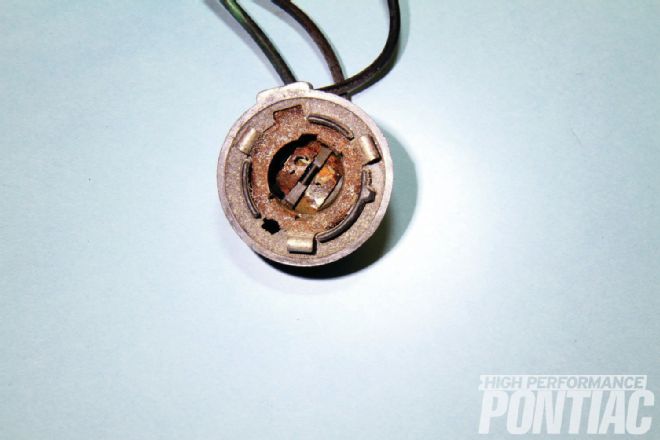 1. Rusted and corroded bulb sockets are a common sight in well-used Pontiacs. This particular example shows just how bad some can be.
Our particular ’76 Firebird is not an exception. While its interior wiring was sheltered from the elements and is otherwise in seemingly excellent condition, the harnesses found under the hood and in the trunk compartment had seen better days. A quick call to M&H Electric Fabricators in Santa Fe Springs, California, and a few hours was all that was required to replace our Pontiac’s aged original harnesses.
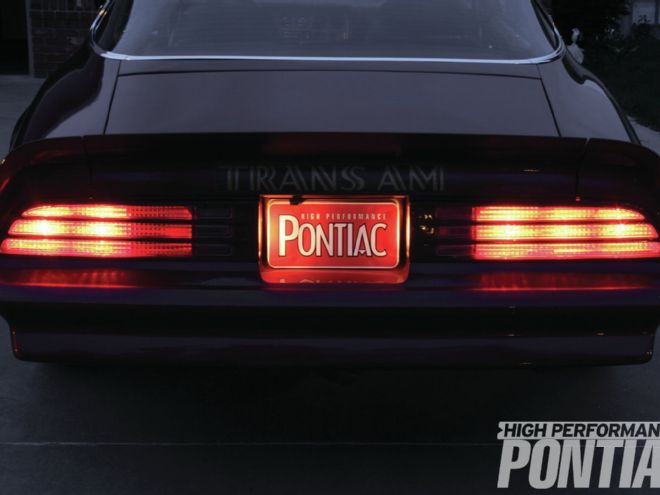
Here’s how we did it. The last time we worked on our Trans Am’s 455, we noticed that some of its engine-harness wires were brittle and frayed. The oil-pressure and temperature sending-unit leads were loose and the retaining clip on the wire that powers the HEI had broken off long ago. Its original taillight harness had one dead socket and a couple others that appeared suspect, too.
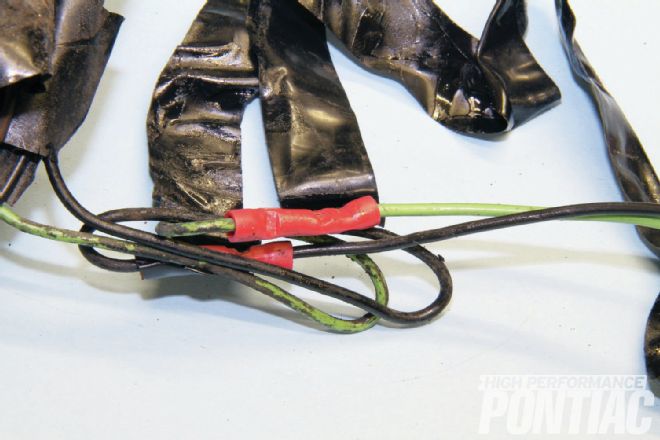 2. Instead of replacing the entire harness, common repairs for bad sockets, broken insulation, and/or frayed wiring were to splice in a new section. It, too, can create issues over time.
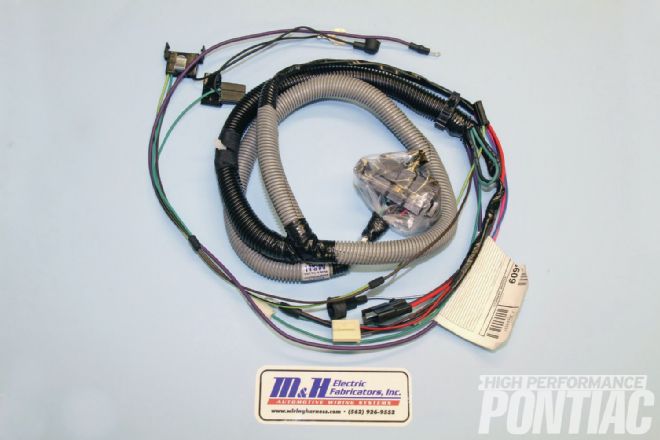
 3. We’d been using wiring harnesses from M&H Electric Fabricators for many years, so when it came time to replace our Firebird’s taillamp harness, we considered its high-quality reproduction the best solution. Compared to our original, this reproduction is identical in every respect—a feature M&H prides itself in.
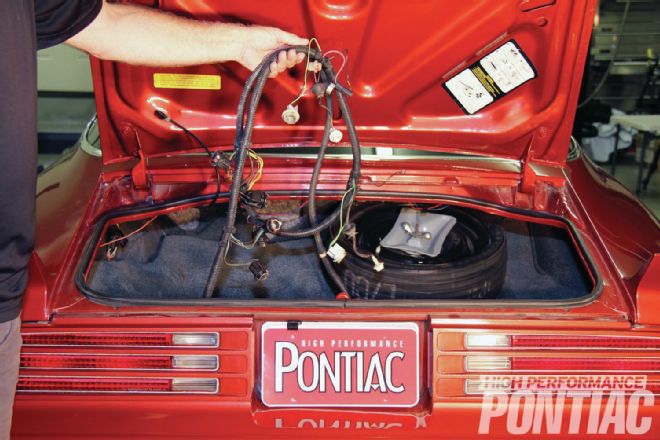
 4. Removal of the existing taillamp harness included unplugging it from the intermediate body harness, which peers through the bulkhead that creates the forward wall of the trunk compartment.
 5. After removing the side-marker lamp sockets, we rotated the eight sockets that serve as brake and reverse lamps in the assembly housing. We also unplugged the fuel-tank lead that passes through the trunk floor, removed the license-plate lights, and using a 1⁄4-inch nut-driver unscrewed the fasteners that ground the harness to the body.
 6. Once the harness is unplugged and disconnected, it simply lifts out of the trunk compartment. We suggest removing all of the bulbs from their sockets before removing the harness from the vehicle. This will eliminate any chance of the bulbs breaking, thereby sending shards of glass into your trunk or onto your garage floor during the process.
 7. Installing the M&H reproduction harness is straight forward. Once the harness is set into place, it connects exactly as the original. The bulbs are reinserted into the appropriate sockets, and they’re reinstalled into the taillamp housing. A quick electrical check proved all bulbs were functioning as intended.
 8. Since we were replacing aged harnesses, it only made sense to replace those found under our Firebird’s hood, too. To ensure absolute correctness for the application, M&H uses the appropriately colored conduits and wrap on the engine harness to maximize the factory look. The gray conduit found on specific portions of the engine harness starting in ’73 offers some flame-retardant qualities when compared to the typical black conduit used elsewhere.
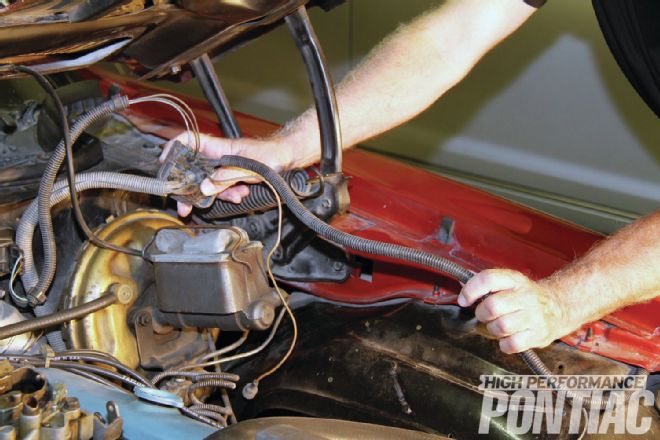
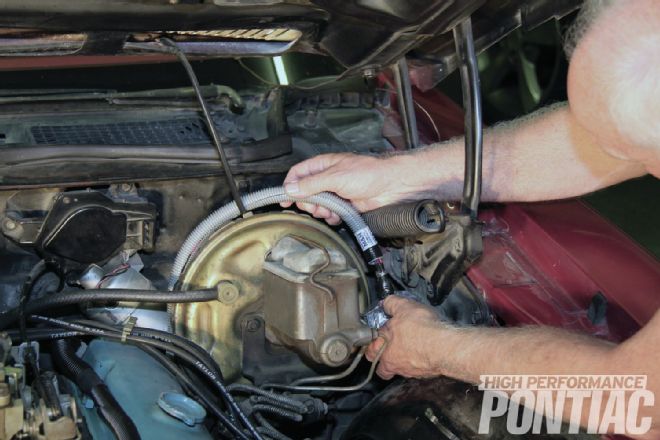
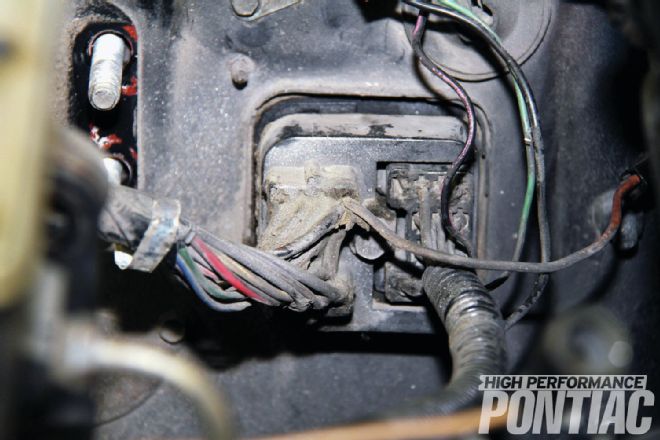 9. The engine and forward lamp harnesses are fastened to the firewall as a unit to a junction located beneath the power-brake booster. Normally somewhat hidden from view, this particular bulkhead connection is of a different Firebird with its brake booster removed for illustration purposes.
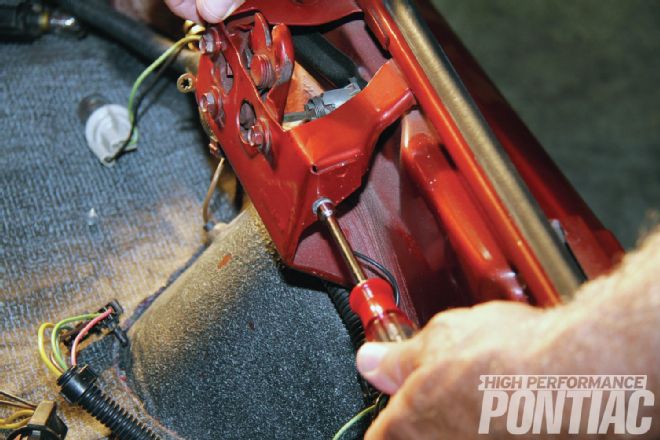
 10. After disconnecting the battery’s positive cable to ensure no risk of arcing or shorting, the harnesses are removed from the firewall junction using a very long extension, universal joint, and a 3⁄8-inch socket.
It’s not uncommon to find that a previous owner or mechanic unraveled one or more of your Pontiac’s wiring harnesses in the past to repair a damaged wire or socket. While we could have certainly performed similar surgery to correct the issues found within ours, the splicing creates another joint, which invites resistance or failure, and it doesn’t look factory stock. We decided it was best to explore our replacement options.
Complete wiring harnesses that fit and function exactly like originals is what M&H is best known for
M&H Electric Fabricators has been reproducing wiring components for vintage vehicles of most any make for nearly 30 years. In addition to its line of cables and switches, its breakerless conversion kit for points-type distributors is among the easiest to install presently on the market. Complete wiring harnesses that fit and function exactly like originals is what M&H is best known for, however, and its in-depth catalog includes most any vintage Pontiac on the road today.
 11. The bulkhead lifts up and away as a unit, at which point the harnesses can be separated for individual replacement. The bolt is permanently retained in the engine-harness portion of the bulkhead, so it won’t fall out.
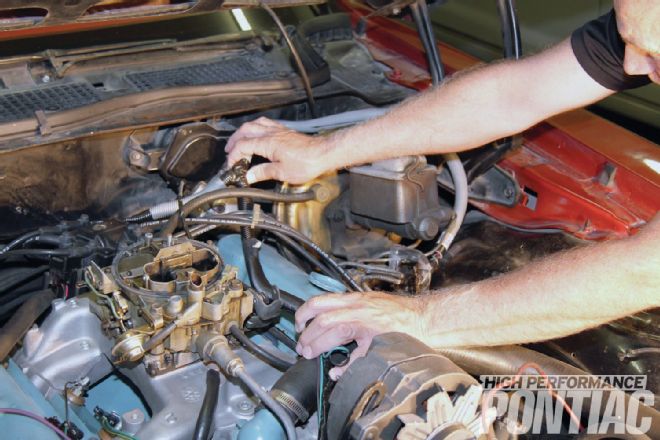
 12. Removal of the original engine harness includes unplugging and unbolting the alternator leads using a 7⁄16-inch wrench, unbolting the starter solenoid lead using a 11⁄32-inch socket, unplugging the oil pressure and temperature senders and HEI power lead, and disconnecting any transmission or air-conditioning system leads if so equipped. If you’re not totally confident of the location for each lead, it’s wise to label them as they’re removed, which can assist during install.
 13. After snaking the wires through the spark-plug wires and vacuum hose, the entire engine harness simply lifts away.
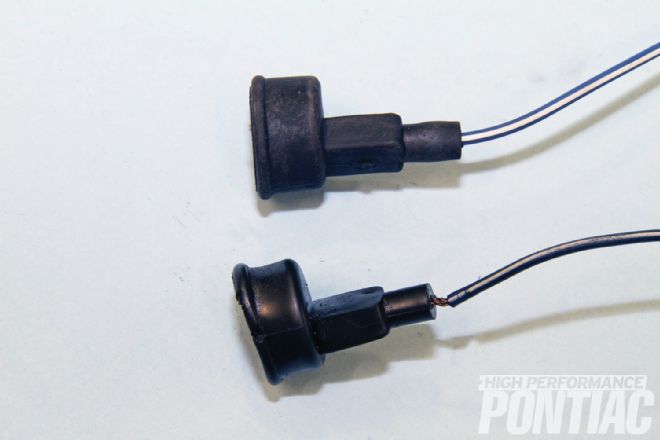 14. While this photo comparing the oil-pressure sending unit on the reproduction harness (top) to that of the original (bottom) confirms that M&H’s attention to detail provides owners with plugs and wires that are identical to the originals, it’s easy to see how distorted the original sender plug is and that it’s literally held on by a few strands of wire.
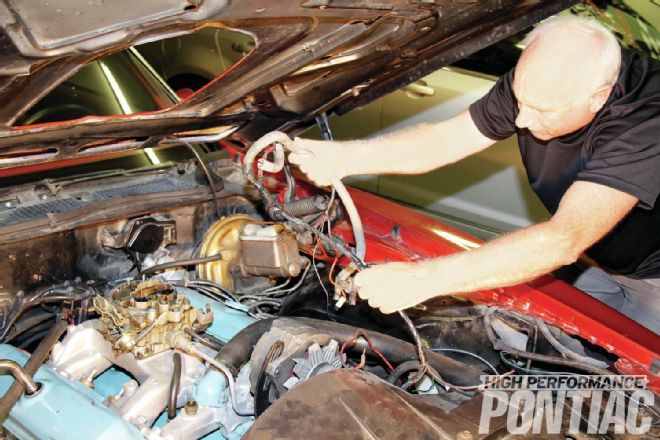
 15. The reproduction engine harness fits our Trans Am’s 455 just like the original. We set it into place and routed the wires accordingly. Everything is reconnected in the exact same fashion as it was removed.
“All of our harnesses are hand assembled in the U.S.,” says Mike Randal, general manager at M&H. “Ours feature original factory-type connectors, terminals, fuseboxes, and conduits to ensure easy installation. The wires match the factory-original color codes and gauge sizes, but ours are constructed using wire that’s much more tolerant to heat than the originals. Our U.S.-made wire is temperature rated to 257 degrees F, where the originals are rated to only 176 degrees. The harness is then wrapped with the correct non-adhesive or cloth-woven tapes to assure a factory appearance.”
When it came time to consider new wiring for our Firebird, we were confident that M&H had us covered. A quick trip through its detailed Firebird-specific catalog revealed that it reproduced literally every possible harness any ’76 Trans Am could’ve been assembled with. We set out to determine the condition of all existing wiring harnesses in our particular car to determine those needing replacement from those that could remain. We inspected for weak or brittle insulation, frayed connections, and/or loose or corroded bulb sockets.
Ultimately we elected to replace these harnesses: forward lamp ($205), engine ($181), tachometer ($32), and rear lamp ($200). While M&H filled our order directly, it noted its products are also readily available through such HPP advertisers as Ames Performance and Year One, so be sure to check with your preferred retailer. Within a few days the harnesses were on our doorstep, and we noted their factory-stock appearance and plug-and-play install. The swap was easy, done quickly and according to plan.
With our newly installed reproduction harnesses in place, we immediately noticed fully functionality of every external bulb, and they seemed brighter to boot. The engine operated just as before; there wasn’t a single hiccup or issue created by the installation of the new wiring.
So the next time you’re working on your Pontiac and notice its wires are aged and/or tattered, consider a reproduction harness from M&H. You’ll find them so faithful to the original design that you’ll think it came from Pontiac’s parts department years ago!
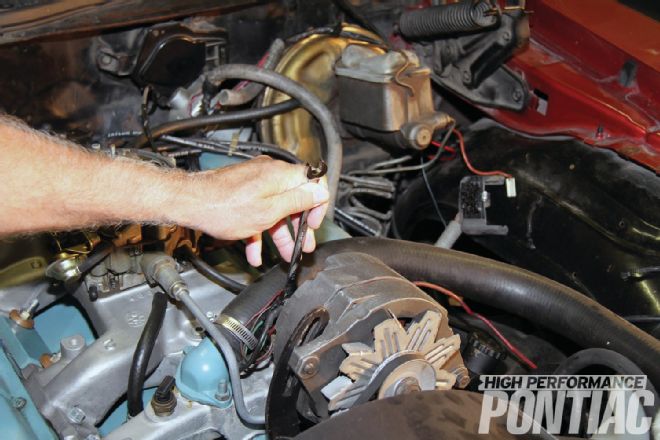
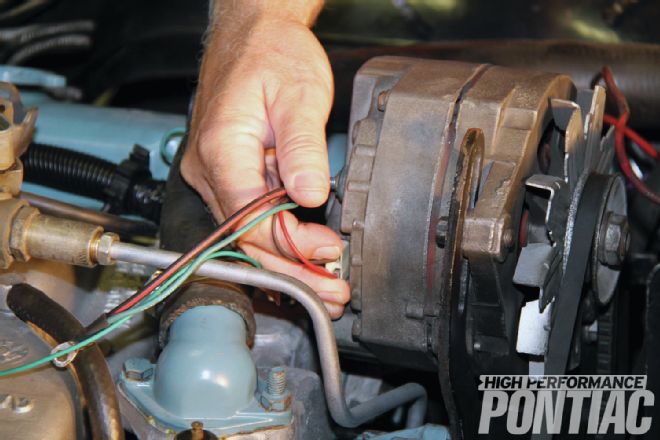 16. The alternator’s new voltage-regulator lead clips into place just like the original. We then connected the main power lead using a 7⁄16-inch wrench, and reinstalled the red plastic terminal cover.
 17. The single green wire slides over the terminal on the temperature sending unit. While the sender is otherwise found in the left-hand cylinder head on ’76 Pontiacs, the cylinder heads we use are of earlier vintage, so we’ve relocated our sender to the intake-manifold coolant crossover.
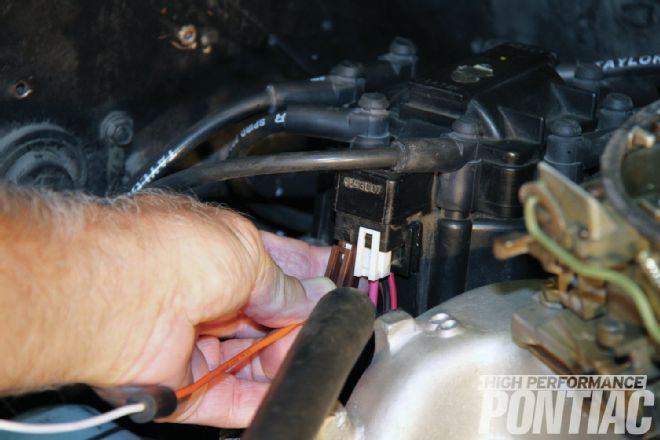 18. The HEI power lead and a new tachometer harness are connected to the appropriate terminals on the distributor cap.
 19. We sourced a new tachometer harness to replace our brittle original. It’s a single wire lead that’s separate from the engine harness. It runs into the passenger compartment through a rubber grommet in the firewall located behind the power-brake booster. Once inside, it’s easily plugged into the fuse block and instrument cluster. The cluster need not be removed for installation. A separate cluster is used here for illustration purposes only.
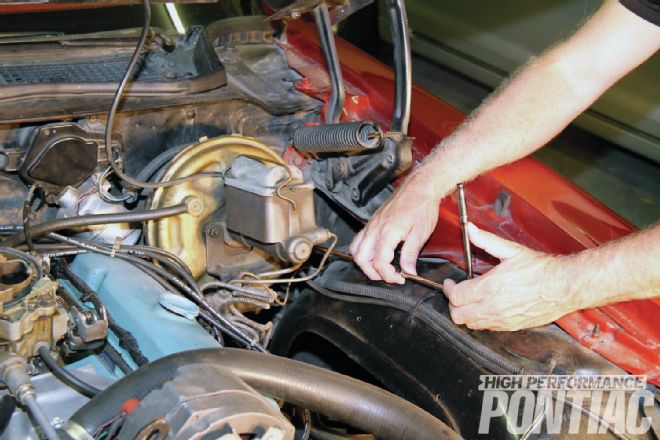
 20. The engine harness is then routed behind the brake booster. It’s retained by a small U-shaped clip that’s bolted to the firewall. We do not reinsert the bulkhead into the junction on the firewall, however. We plan to replace the forward lamp harness, too.
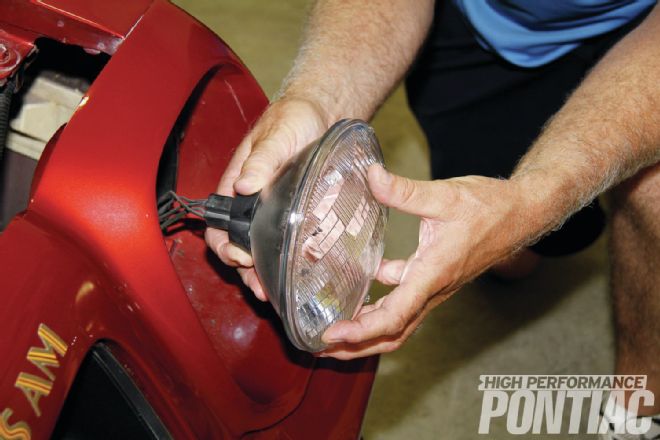 21. Removing the forward lamp harness begins by removing the head-lamp trim and unplugging the lamps from the harness.
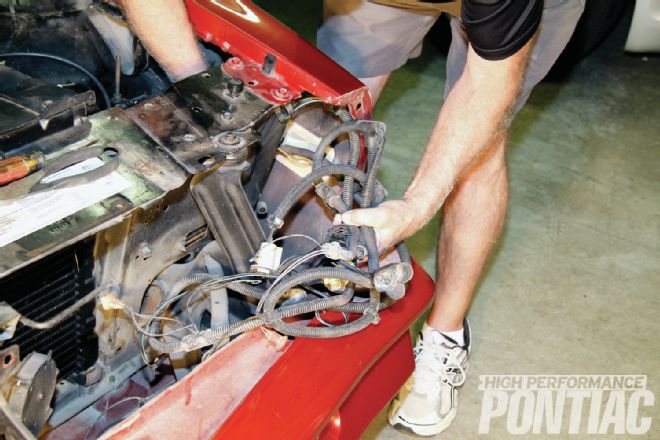
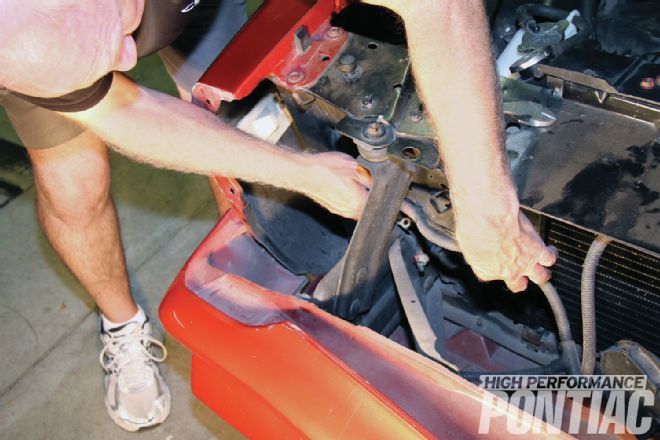 22. We must first state that we removed our particular Firebird’s header panel to better illustrate the process. Much the same can be accomplished by removing the lower spoiler and working from below. From within the engine compartment, we removed the right-hand ground strap, which is bolted to the radiator support using a 3⁄8-inch socket. We then removed the righthand-side marker-lamp socket and forced the harness toward the center of the car, where we removed the plastic clips that maintained the harness’ position on the support and unplugged the horn leads.
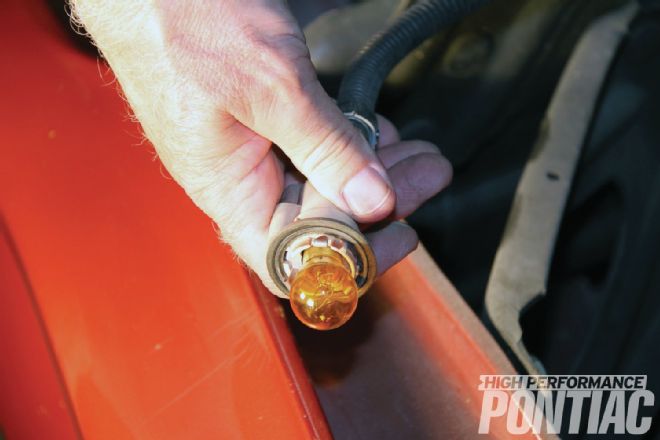
23. This crooked bulb we found indicates just how distorted the original righthand parking-lamp socket is.
22. We must first state that we removed our particular Firebird’s header panel to better illustrate the process. Much the same can be accomplished by removing the lower spoiler and working from below. From within the engine compartment, we removed the right-hand ground strap, which is bolted to the radiator support using a 3⁄8-inch socket. We then removed the righthand-side marker-lamp socket and forced the harness toward the center of the car, where we removed the plastic clips that maintained the harness’ position on the support and unplugged the horn leads.
23. This crooked bulb we found indicates just how distorted the original righthand parking-lamp socket is.
 24. After removing bulb sockets and the ground strap from the left side of the vehicle in an identical manner, we unplugged the windshield-wiper-system leads and brake-system wire. The entire harness is then pulled through the radiator support and removed.
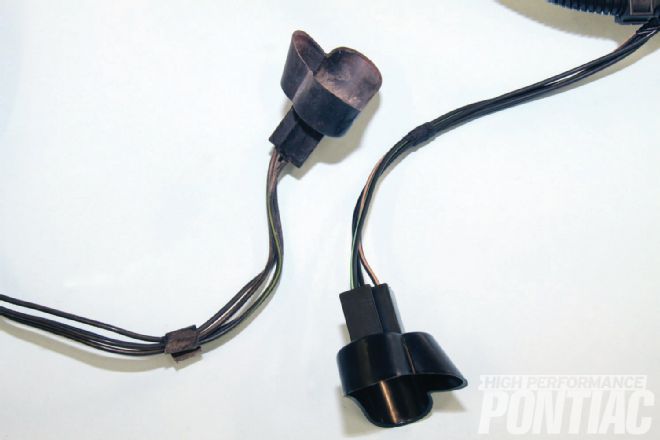 25. Comparing the original forward light harness (left) to the reproduction (right), we could find no discernible differences.
 26. M&H’s reproduction forward lamp harness was routed just like the original and fits exactly as intended by the factory.
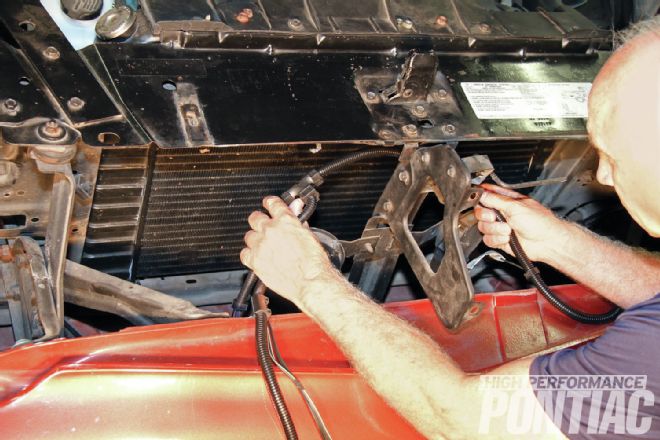
 27. The engine- and forward lamp–harness connections are clipped together as a unit, and the bulkhead assembly is carefully positioned onto the junction on the firewall. M&H thoroughly coats the bulkhead with di-electric grease, as original. The retaining bolt is tightened to 60 lb/in using a 3⁄8-inch socket.
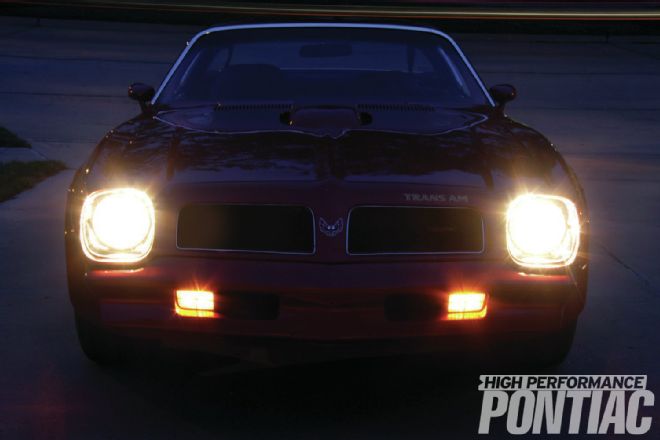 28. A quick check of the electrical system revealed that everything proceeded according to plan. The engine fired as easily as before and every external lamp on the Firebird seemed brighter. In just a few hours, we replaced all of our Pontiac’s critical wiring harnesses and our vehicle is now ready for another 40 years of use!