
For most vintage pickup trucks with a cab-mounted gas tank located behind the seat, there’s not typically a lot of room left over for any storage; in fact, there really isn’t any room. Removing the tank frees up enough space to add all kinds of things behind the seat, but it’s usually not real pretty. The tanks were usually left in a semi-raw state, that is, most trucks didn’t get a full upholstery job around the tank, not to mention the surrounding cab sheetmetal. Once removed, the resulting space once occupied by the gas tank needs to be addressed if your plans consist of making the interior of your truck nice and finished.
In past editorials, I’ve waxed philosophically about how projects get hijacked by all those projects that you didn’t expect to tackle at first glance; for me, this is one of those projects. Not that there’s anything wrong with a little extra work. In fact, I went back and forth about how far I wanted to take this little project and at the end of the day it turned out to be more work than I first expected, but it also turned out much nicer than it ever would have if I’d had taken the lazy way out.
When I started looking for locations to mount the Holley Dominator ECU in the cab of my ’68 C10, it became quickly apparent that there was a lack of room behind the dash. Under the seat there was a similar situation, since I had already mounted a pair of Kicker subwoofers as well as a DX 600.5 amp and the PXi50.2 iPod controller. That left the space created behind the seat when I relocated the gas tank as the perfect spot, provided the wiring harness would reach. As it turned out, if I routed the main bundle through the trans pan and up the back of the engine instead of out the top of the firewall, not only would it be less of an eyesore, but it would stretch from the ECU to all the components in the engine compartment with room to spare. Solves that dilemma!
But I couldn’t simply bolt the ECU to the floor and call it a day, could I? Nope. And that’s where the sidetrack begins, because not only did I need to mount the Dominator ECU, I had a pair of 12-inch Kicker Comp RT enclosures that I wanted to add to the existing Kicker stereo system I installed a year or so ago. With the stock gas tank out of the way, it now meant I could add those as well.
The first step in getting these components in place was to fabricate a nice base that could be mounted to the truck’s cab since the floor where the original tank sat was uneven. A 60x5-inch piece of ¾-inch pine was used to mount atop the high points on the cab’s floor, attaching with a handful of ¼-20 fasteners. Then the ECU was centered and bolted in place, followed by the two subs.
With that sorted, it was time to dress up the backside of the cab. It’s basically one big piece of sheetmetal, so first I added a bit of Dynamat to help deaden the tin can effect before creating three templates to cover the back side of the cab. Once satisfied with the fit of the templates, I transferred their dimensions to a piece of 1⁄16-inch, 4x8-foot plastic wall panel that I picked up from the local hardware store. This stuff is nice and flexible and is impervious to moisture, mold, mildew, and looks great covered in carpet, which I also sourced from the local do-it-all box store. A quick coat of spray-on adhesive to both surfaces and I had three panels covered in carpet, held in place on the back of the cab thanks to a dozen or so Velcro strips.
For a day’s worth of work and about $30 in material, I’m pretty happy with my mini-upholstery job. It gave me a nice platform to mount the engine’s ECU as well as some added tunes and finished off the back of the cab nicely. While I would have been happier spending the time wiring the truck and getting it that much closer to the road, I knew at some point I would have to tackle this project, so it just made sense to handle it now rather than later. And I’m glad I did, as it’s one less thing to worry about later!
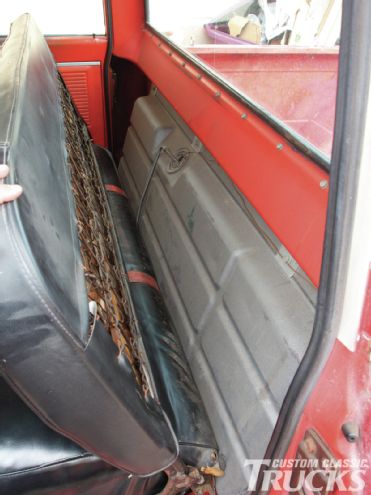 1. Here’s a shot behind the seat with the fuel tank still in place. As you can see, there isn’t much room for anything but a pair of gloves and maybe a light jacket.
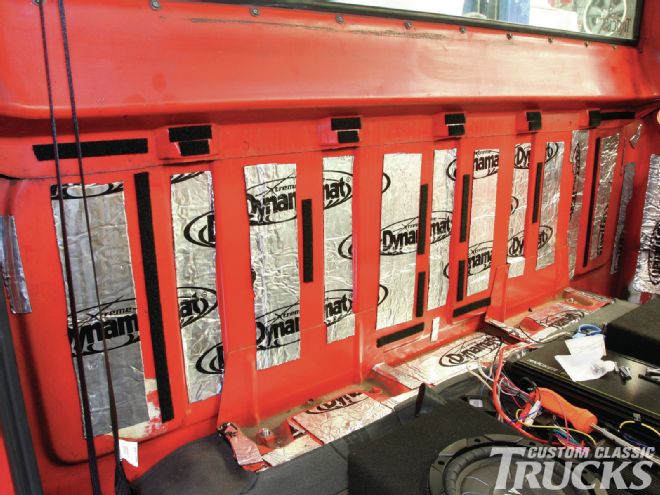
 2. With the tank and seat removed, I decided to install some Dynamat on the back of the cab. Then, I set out to make the templates that would become the carpeted panels. Here, I’ve got one corner template in place. At the bottom is the board that will mount the two subwoofers and the Holley ECU.
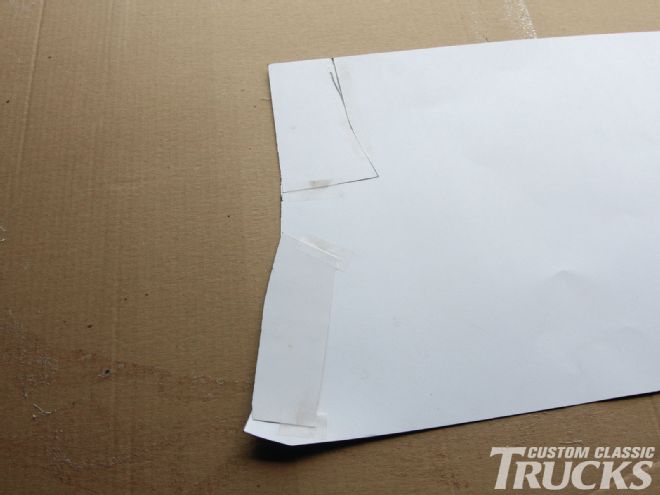 3. Making templates can be a frustrating process as little by little they’re trimmed to fit. Sometimes, a bit too much is trimmed off and a “patch panel” needs to be taped on to make up the difference. The better the fit at this point, the better the fit of the final panel.
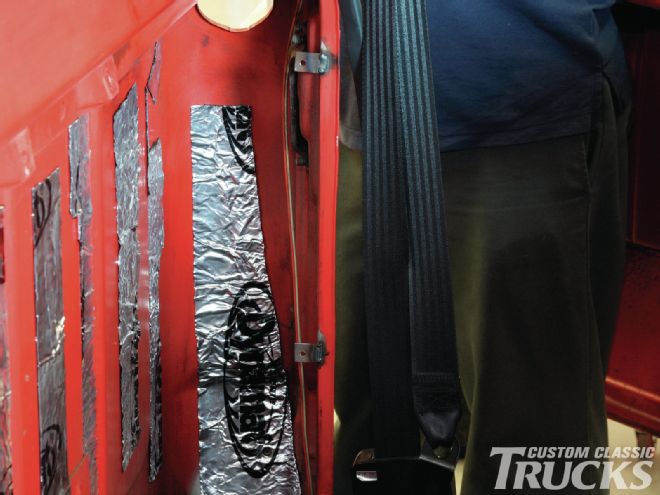 4. I found that the corner panels didn’t want to stay in place very well so I welded two small tabs on the door pillar to give them something to sit against.
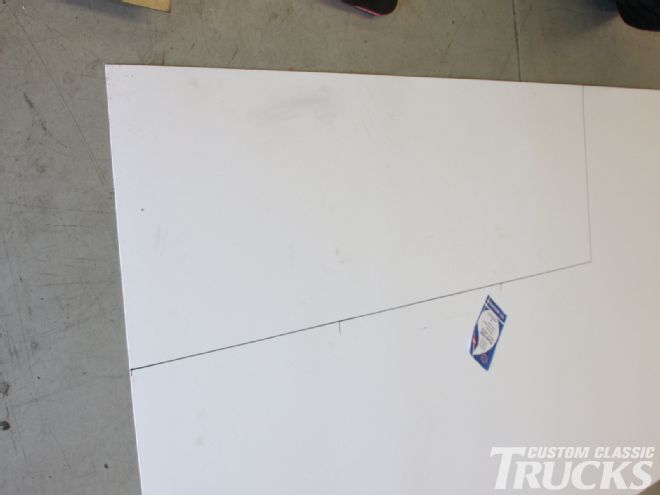 5. This is the plastic wall panel that I picked up at the hardware store. It’s nice and flexible and can be manipulated to hold its shape. I didn’t try it, but I’m even guessing that a heat gun could be used to further manipulate it and, once cooled, it would hold that shape for good. Here, I’ve traced the main center panel’s dimensions onto the panel from the template.
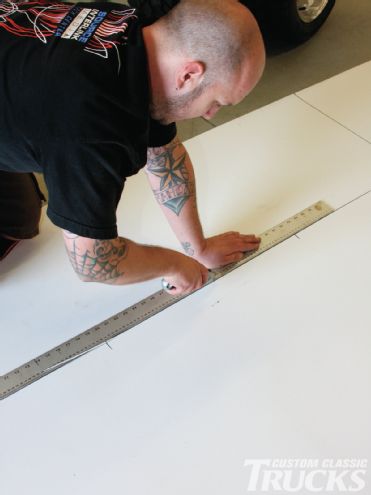 6. Another nice feature of the 1⁄16-inch wall board is that you can cut it with a sharp razor blade. A straight edge helps cut a long, perfect line.
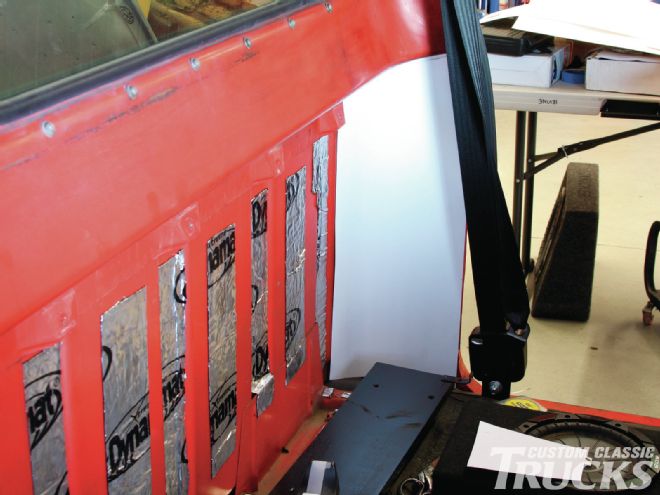
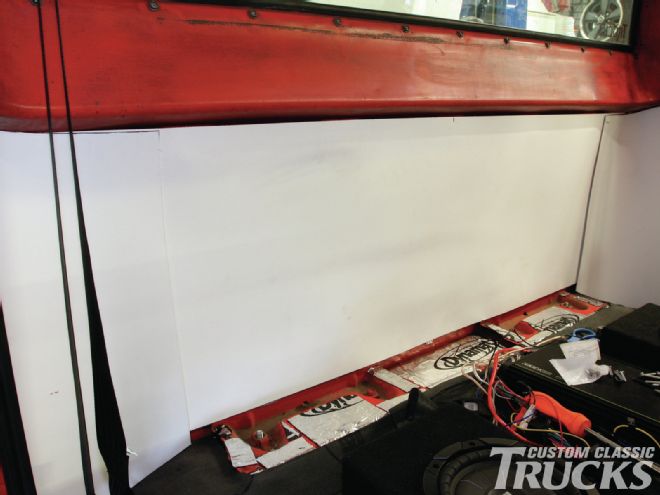
 7. This shot shows the raised portions of the cab where the stock gas tank attached, which was one of the problems I faced when I was initially trying to decide what to do with this area. I used those raised sections to attach the panel (notice the Velcro strips in place).
 8. After a bit of trimming, the three plastic panels are fitted for the final time before being covered. The 60x5-inch board covers the rear of the floor at the bottom of the cab wall.
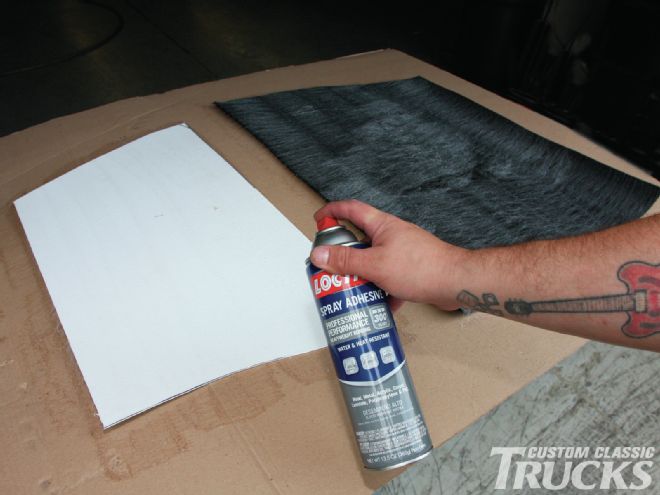 9. I trimmed a section of carpet about 2 inches larger than the panel and then applied spray adhesive to both. After a few minutes, both sides were tacky and they were joined together, hopefully forever.
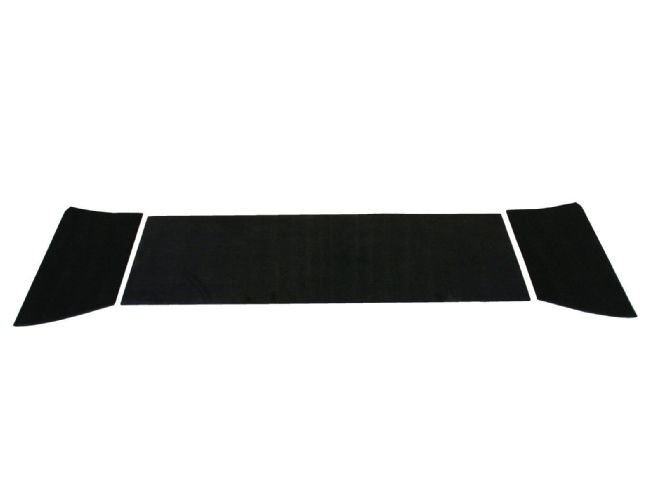 10. Here are the three covered panels, ready to be slapped into place.
 11. I designed the center panel to cover the width of the cab, in the hope that the seam between it and the corner panels would be minimal.
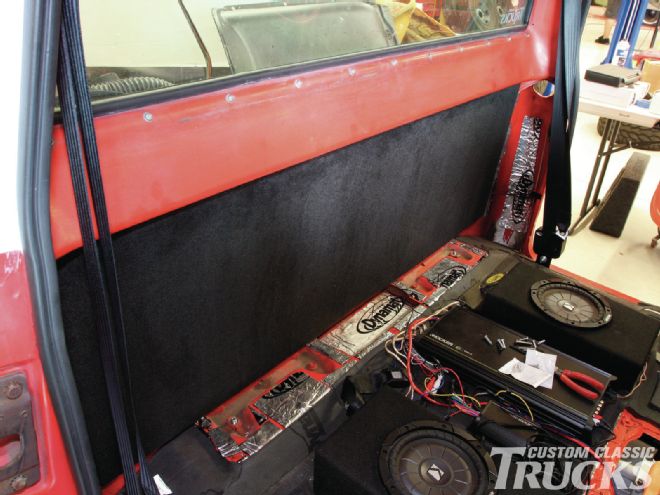
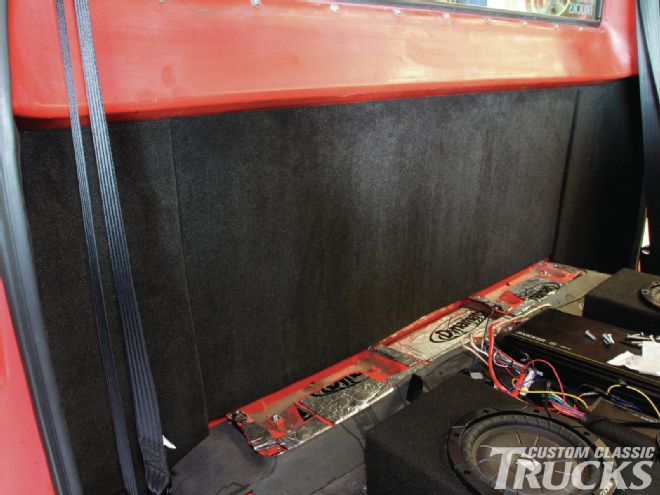 12. With the corner panels in place, it’s starting to look pretty good. I’m happy with the fit at this point and I like how they tuck up under the bodyline at the top.
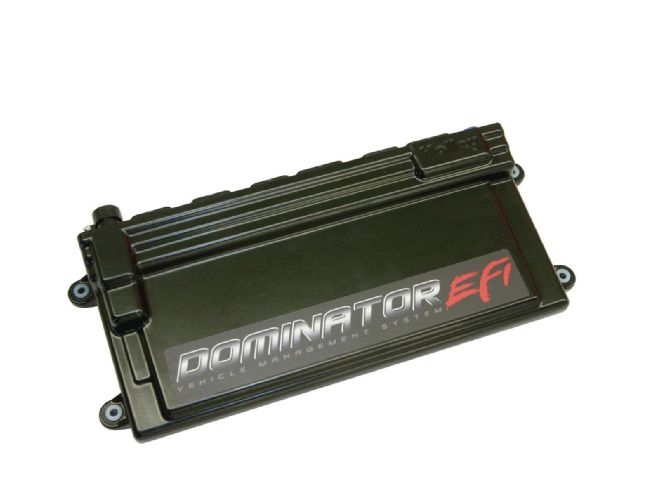 13. Here are the components that started it all. Holley’s Dominator ECU will not only be managing the EFI system on our LS engine, but will also handle the ignition duties as well as a handful of other engine related requirements. Like it says, it truly is a vehicle management system.
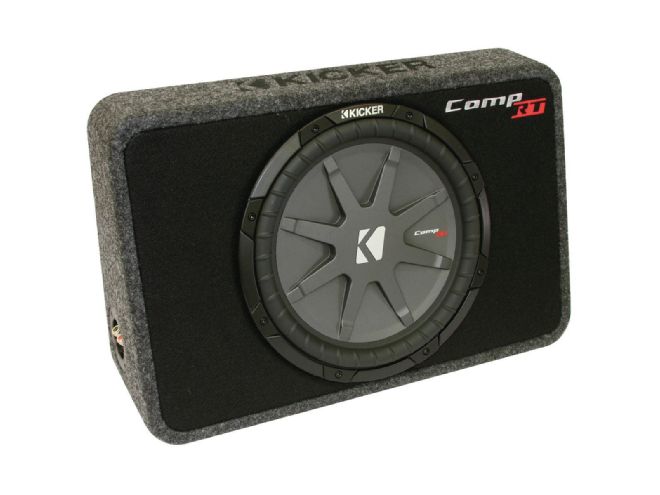 14. With the additional space forfeited by the old gas tank, I also opted to add a pair of Kicker Comp RT 12-inch subwoofer enclosures. These should complement my existing system nicely and fit behind the seat perfectly.
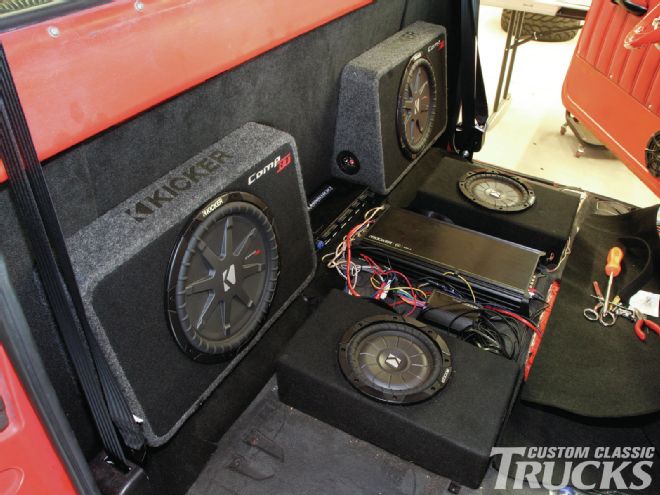 15. Once the panels were in place, I opted to use some of the extra carpet to cover the cab floor behind the seat as well as the mounting board for the speakers and ECU. Then it was a simple matter of attaching the board to the cab floor and attaching the components. Not bad for a day’s work. Once I get the wiring sorted out, the rest of the cab will get a similar treatment.