Deadlines. Every car build I've ever undertaken has had one, whether self-imposed or magazine-related. The latter are the worst, as there's no way to extend them, whether it be shooting tech for each issue or getting a car done for an event. In the case of the R&C 60th Anniversary Speedway Motors Tribute T, the car had to be ready to head out to Louisville, Kentucky, for the NSRA Street Rod Nationals.
So, as usual it came down to a mad thrash in the final few days. While we were out at the Goodguys show in Columbus, Ohio, the T was at Loyola Auto Interiors in Gardena, California, where Luis Loyola and Jose were certainly kept busy for a few days building our interior from scratch in restaurant-grade Naugahyde. On our return, we collected the car, and headed back to our tech center to wire it and fire it, while Jeff Styles literally worked around us to pinstripe the body and chassis. Street Rod Glass in Riverside, California, installed the glass in our frame, then once every bolt was tightened and checked, every cotter pin installed, the brakes bled, all fluids added, and the lug nuts tightened for the final time, we hit the starter button and took it for a blast up the street on Friday evening. Deemed done, it was ready for its trip to Louisville on Monday morning.
Of course we had a few last minute hiccups. With the PowerGen installed, our Edelbrock air cleaner wouldn't fit, so we swapped it out for an OTB Gear cleaner. A faulty ignition switch sourced from a local auto parts store caused some wiring problems, and there were a few minutes of holding our breath while the holes were drilled in the dash for the gauges … after the body was painted. But we didn't slip with the hole saw, the wiring came out good, and we completed a project car on time. Come back next month to see the finished build!
 Prior to installing the body for the final time, I fabricated this bracket to sit over the chassis, attached with three 1/4-28 bolts and with six studs blind welded vertically …
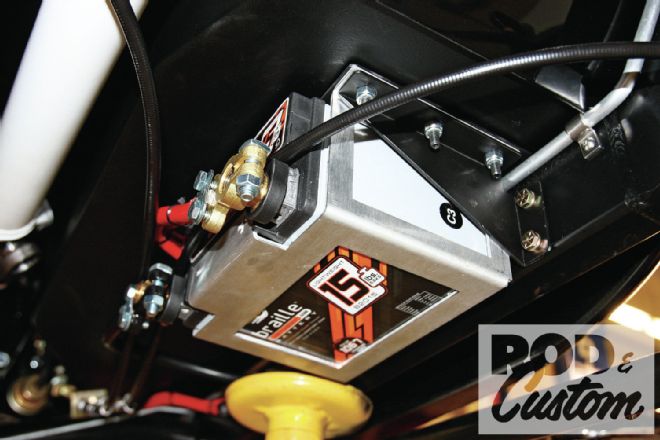 ...which in turn allow the Braille battery box to be bolted in place. A pair of triangulated gussets attaches this to the inside of the framerails, the assembly firmly securing the small but heavy battery. The fuel line passes between the battery box and the framerail.
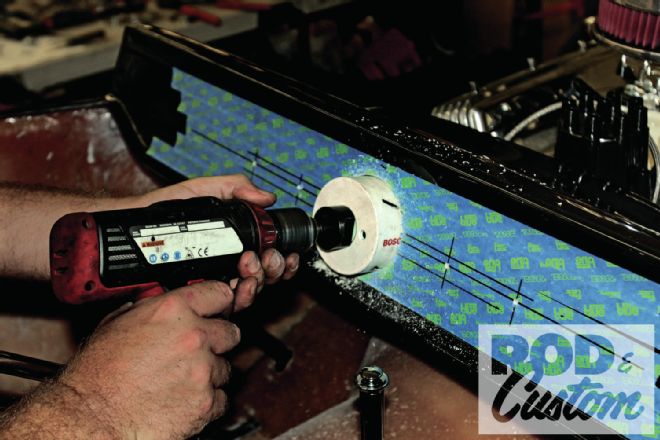 Magazine deadlines wait for no man, meaning some jobs were tackled in an illogical order. Ideally we’d have drilled the dash for the gauges prior to paint, but we didn’t want to do so until we had the gauges in our possession!
 The dash was protected with masking tape and pilot holes drilled before taking a deep breath and firing up the hole saws. No room for error here!
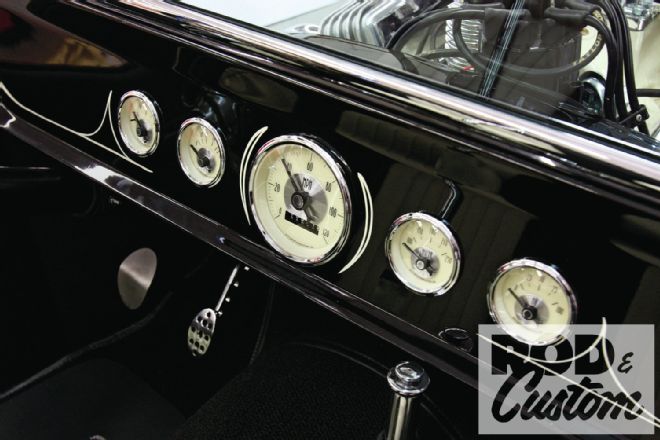 Jumping ahead slightly, the Auto Meter Prestige Antique Ivory gauges perfectly suit the style and color scheme of the Tribute T. They also feature plastic “cups” on the rear rather than metal C-brackets, and hand-tightening knurled nuts, making installation a breeze.
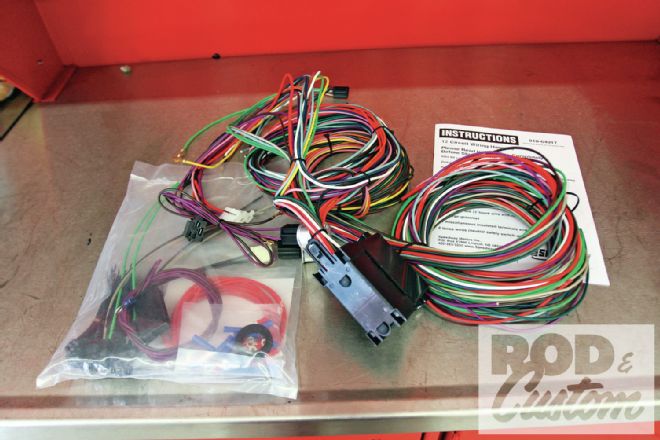 The Speedway Motors wiring harness was simple to install, though admittedly we didn’t use many of the circuits on the T. The fuse panel includes relays for a fan and horn, and was mounted above the steering column bracket for easy access. We’d planned on mounting it in the bed, but would have had to lengthen too many wires to make it practical.
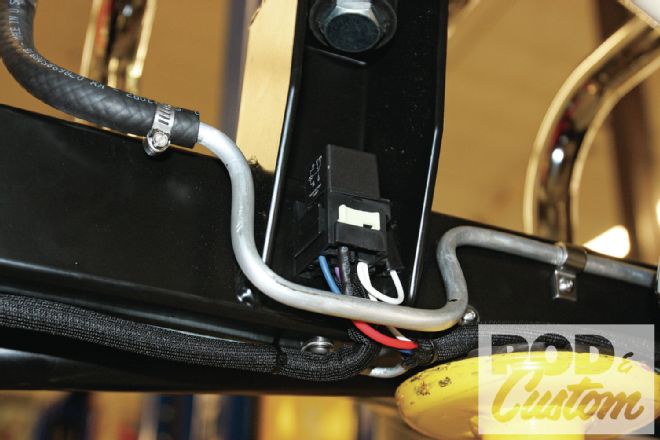 Though a fan relay is included on the fuse panel, we opted to use the Vintage Air–supplied relay, mounting it behind the engine mounting bracket. We mounted the circuit breaker farther back along the chassis rail, and opted to use a manual switch rather than a temperature-sensing switch, all in an effort to minimize visible wiring.
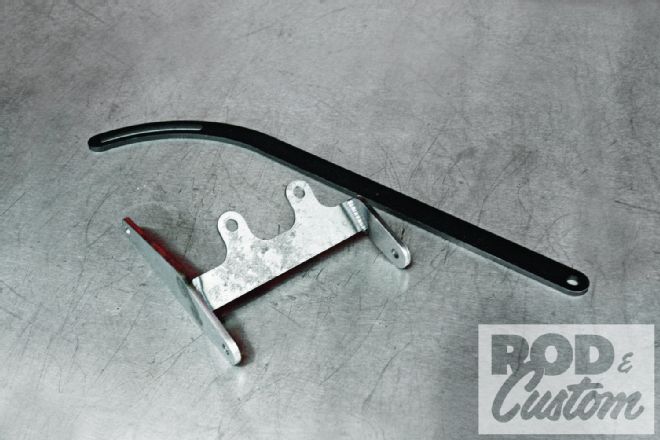 Jake Jacobs offers “Jitney: HOP-UP Parts By Jake” through Walden Speed Shop, as well as left- or right-side alternator brackets for the SBC, and also offers similar for the Powermaster PowerGen. Here’s the left side bracket …
 ... and here’s the PowerGen mounted on the right-side bracket. The PowerGen is a 12V 90A one-wire alternator designed to look like a generator. It’s wired using a 10-gauge wire to the battery.
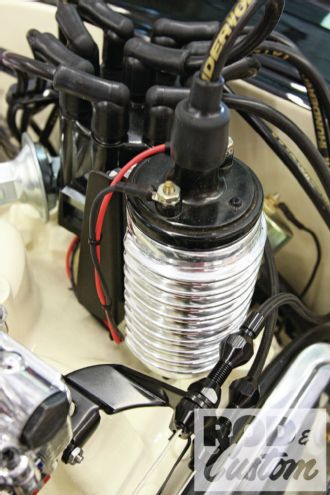 The T uses a cast body PerTronix Flamethrower distributor, with the company’s Ignitor electronic ignition, as well as a Flamethrower coil. This was mounted in a finned cover from OTB Gear. Though designed to be mounted to the firewall, we fabricated a bracket to bolt it to the intake manifold.
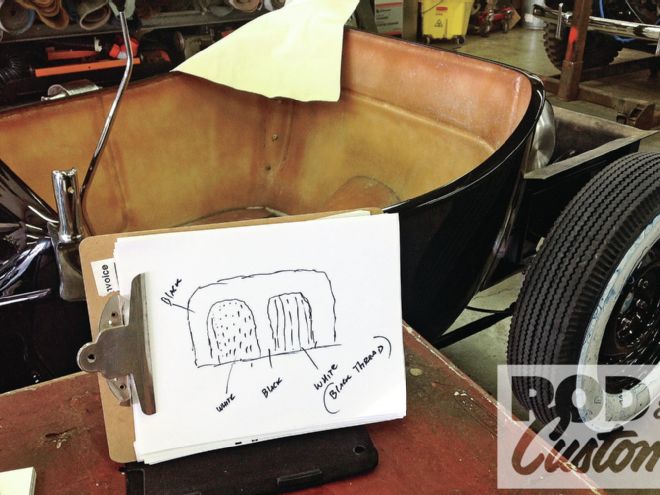
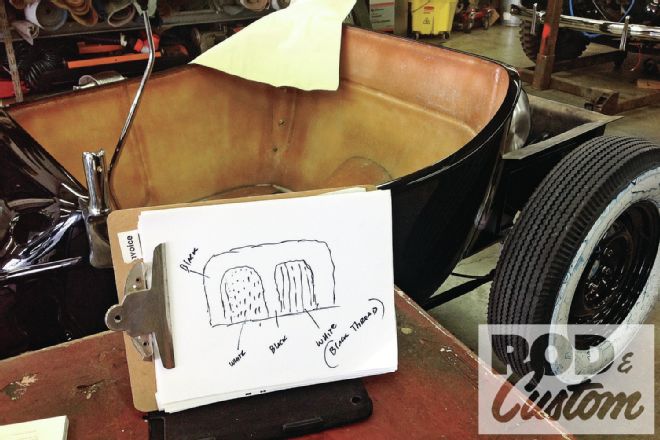 With our build deadline rapidly approaching, the T was delivered to Loyola Auto Interiors in Gardena for them to work their magic with loop carpet and Naugahyde. We gave them a loose brief, and the Jimmy Smith illustration. With a fully white interior deemed impractical, the pleats were retained but in horseshoe inserts on the seat.
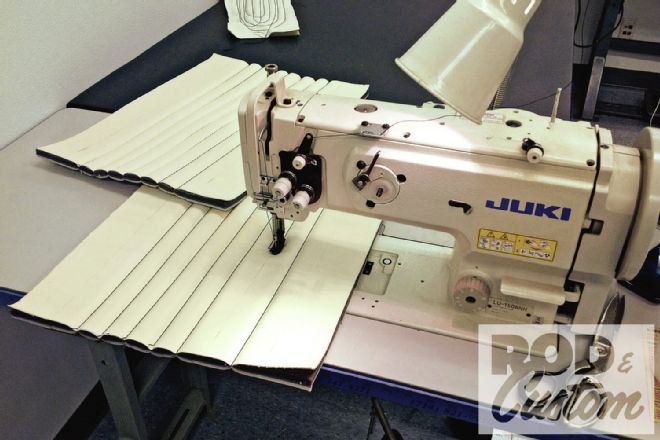 The pleated sections were backed with 1/2-inch foam and large black stitching used for a ’60s-era feel.
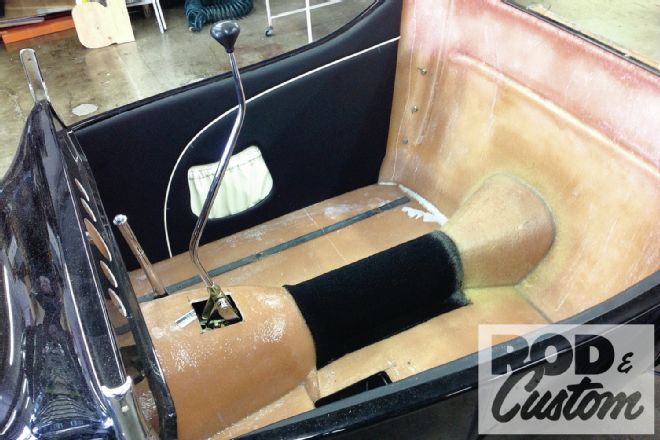
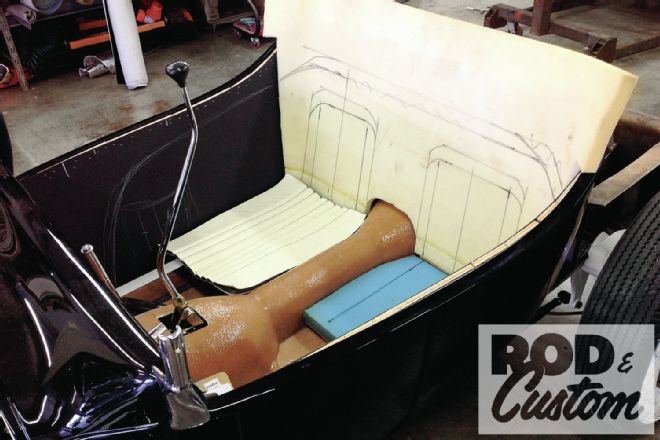 Two-inch medium density core foam was used for the seat back. Note the proposed horseshoe insert pattern and piping locations marked on the foam, and the piping and pocket locations on the side cards.
 The side cards were tackled next with Model A–style pockets and off-white piping. The trans tunnel was also carpeted at this point.
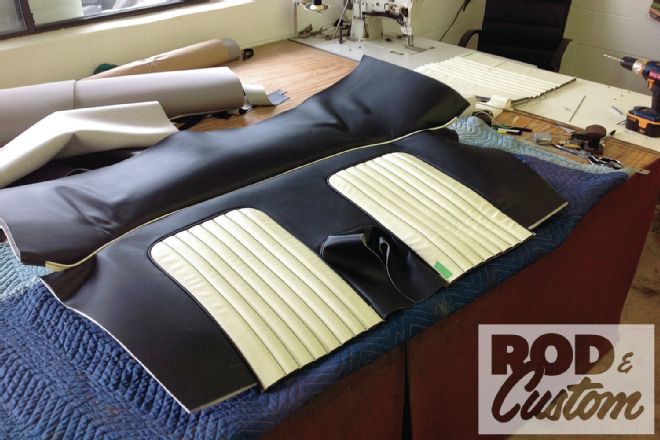 With the seat back upholstery stitched together, it was time to …
 ...secure it in place on the 2-inch foam. The bolster was formed using 1/12-inch foam on top of the 2 inch already in place. The seat bases use more 2-inch foam on 1/2-inch plywood.
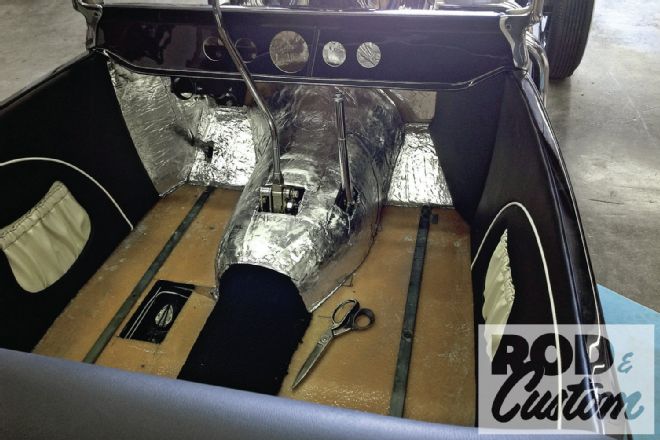 Prior to the carpet and kick panels going in, the tunnel, cowl sides, and toeboards were covered with insulation.
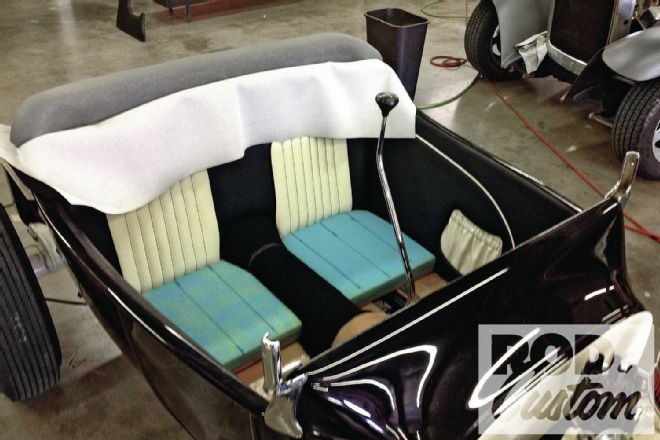
 The complete interior minus the seat bases. Note the loop carpet has trimmed edges, and Luis Loyola fabricated off-white gaiters for the shifter and e-brake.
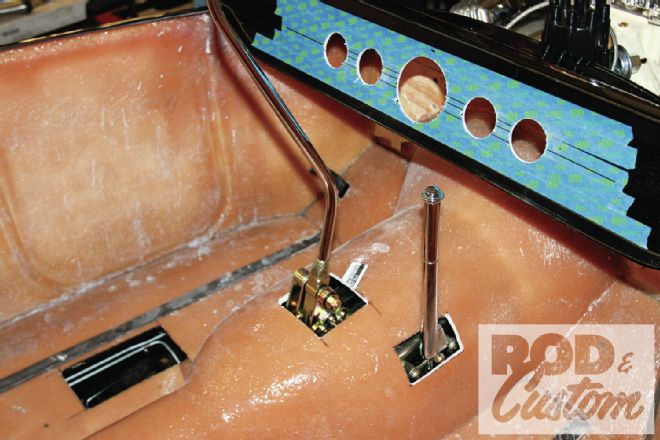
 The Tribute T has a model-specific steering column that mounts to a substantial bracket bolted to the inside of the reinforced firewall. At its lower end it has a splined U-joint that slips over the splined steering box input shaft, secured with a set screw.
As supplied, the steering column has an outer column tube, which hides the U-joint (and has an access hole for the set screw), but we elected to trim the tube back and install a short section of rubber tubing (actually a lower radiator hose offcut) as, being a snug fit in the firewall hole, it sealed the interior.
The Tribute T has a model-specific steering column that mounts to a substantial bracket bolted to the inside of the reinforced firewall. At its lower end it has a splined U-joint that slips over the splined steering box input shaft, secured with a set screw.
As supplied, the steering column has an outer column tube, which hides the U-joint (and has an access hole for the set screw), but we elected to trim the tube back and install a short section of rubber tubing (actually a lower radiator hose offcut) as, being a snug fit in the firewall hole, it sealed the interior.
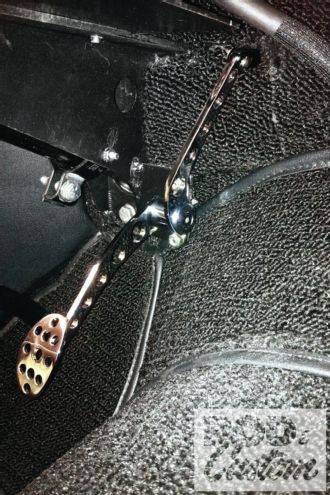 A small bracket with captive bolts was welded to the steering column support bracket to mount the Lokar throttle pedal, ensuring the pedal pad was at the same height as the stainless pad on the Speedway brake pedal.
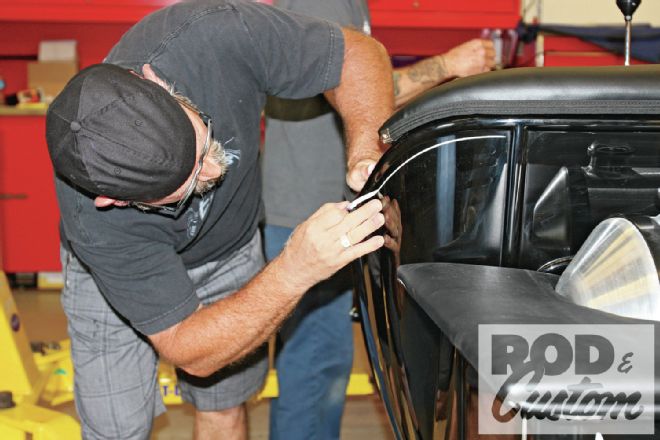 While we were thrashing to finish the car in time to meet deadline, Jeff Styles was working around us pinstriping the body.
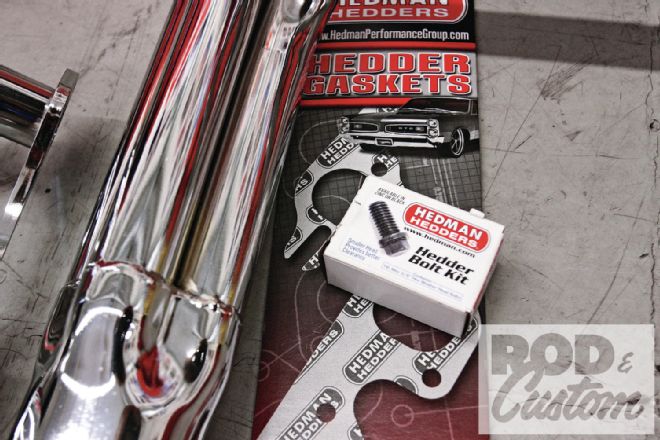 We’d removed the headers to make Styles’ job easier, and refitted them using Hedman Hedder bolts and gaskets.
 While all this was going on, Carson Hobson at Street Rod Glass was cutting and installing 1/4-inch glass in the Speedway frames.
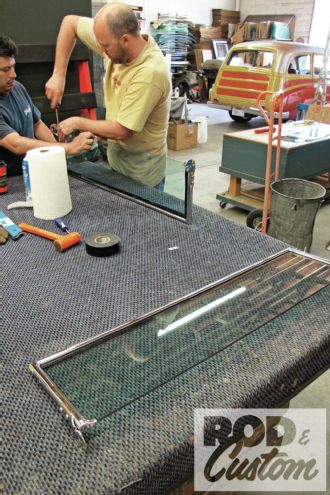 The glass mounts in the frames using specialized rubber, with a couple of chrome caps on each section of the frame to secure it in place.
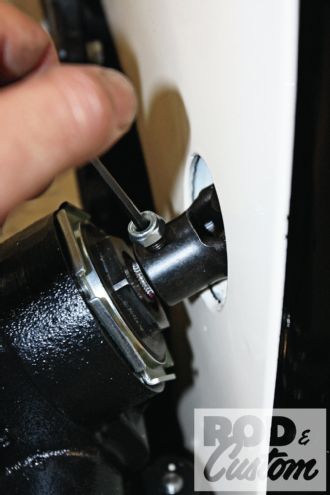
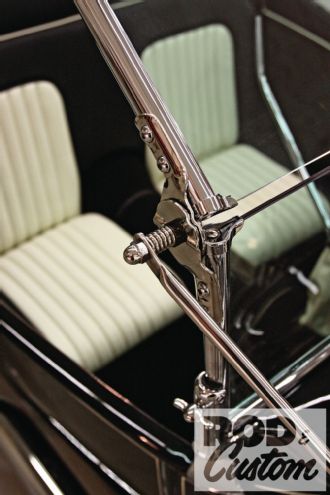 The caps can be seen here, along with the stainless windshield support rods.
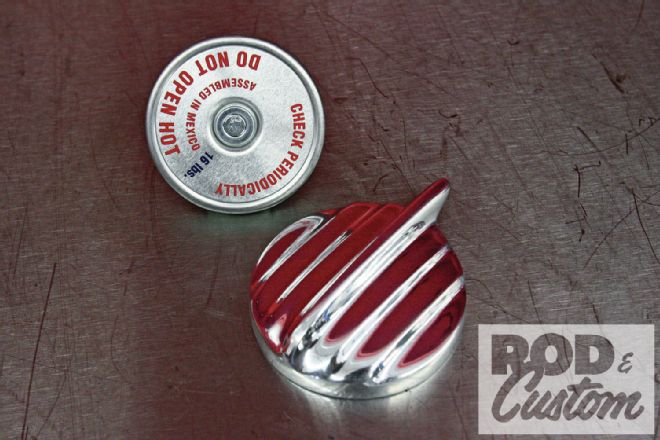
As well as the coil cover and air cleaner (we had to remove the Edelbrock cleaner as it wouldn’t fit with the PowerGen in place), OTB Gear supplied this cool radiator cap cover, which simply presses into place on the cap they supply.
The caps can be seen here, along with the stainless windshield support rods.
As well as the coil cover and air cleaner (we had to remove the Edelbrock cleaner as it wouldn’t fit with the PowerGen in place), OTB Gear supplied this cool radiator cap cover, which simply presses into place on the cap they supply.
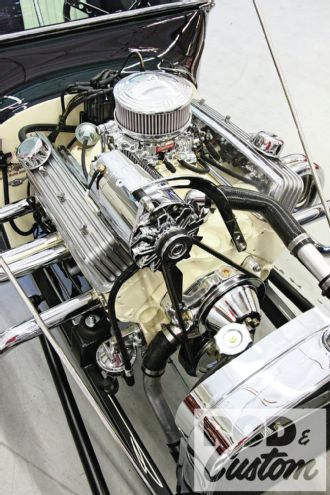 The completed engine. We ran the plug wires under the headers for a cleaner appearance.
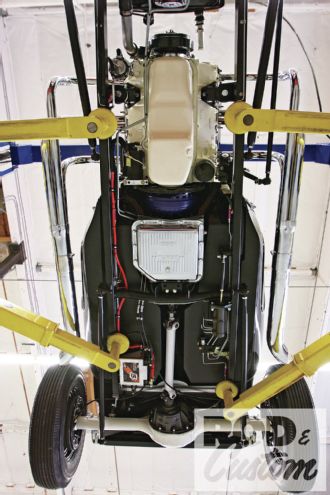 Here’s the underside of the T showing the battery and master cylinder location. The latter is accessed through a hole in the floor, thanks to a nifty cover fabricated by Luis Loyola. While a T is minimalist, it sure made the task of keeping everything out of sight a lot harder than a full-bodied build!