The initial hard part of the job is over. In the last issue, we showed you the process of creating the transmission cover for a T5 in a Flathead-powered '33 coupe (along with ways to make that popular engine/transmission matchup work). It takes a lot of skillful sheetmetal manipulation to create those complex tapers from a single piece of 16-gauge, and Ben Vasquez at Stone's Metal Shop knocked it out in a day. We won't say he made it look easy. He just made it look perfect.
This month, we're showing you the rest of the job as the under-dash floorboards are constructed and grafted to the tunnel.
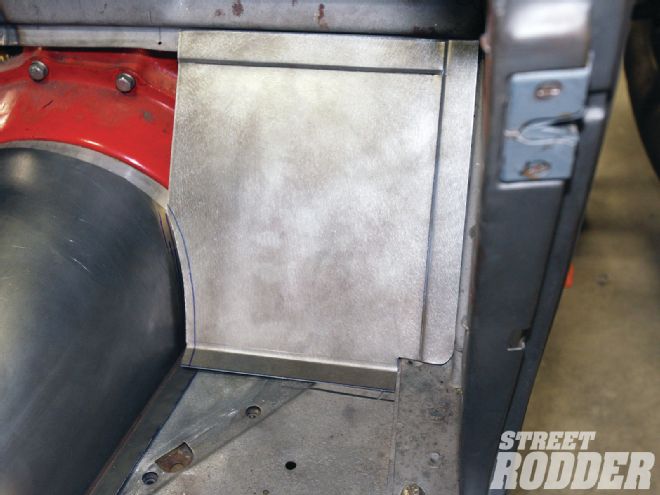
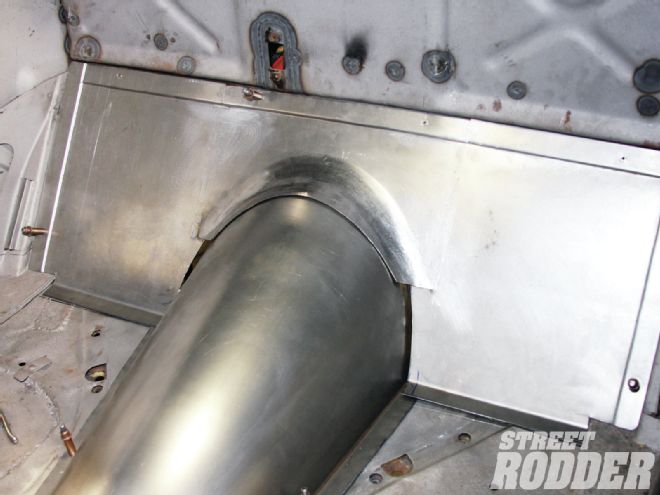
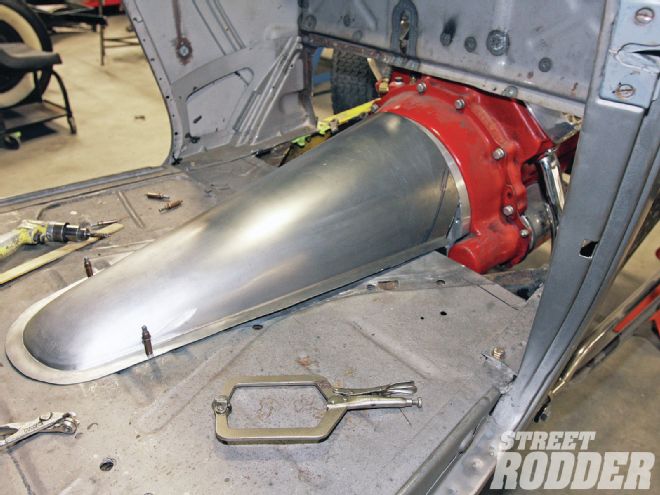 <strong>1</strong>. Here's where we left the project last month. The tunnel was finished, but the floor panel still needed to be constructed.
2. Cardboard templates for the right and left portions of the floor panel were created. ">
<strong>1</strong>. Here's where we left the project last month. The tunnel was finished, but the floor panel still needed to be constructed.
2. Cardboard templates for the right and left portions of the floor panel were created. ">
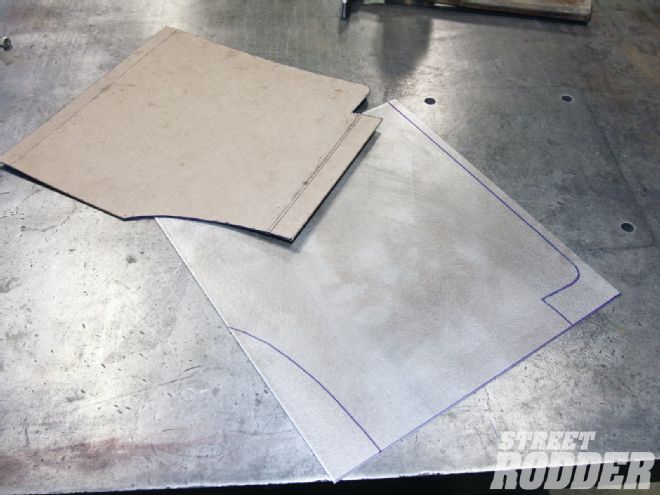
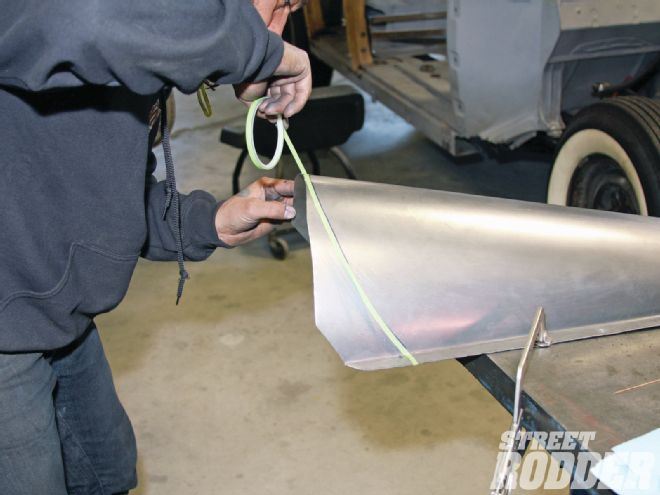
 <strong>2</strong>. Cardboard templates for the right and left portions of the floor panel were created.
3. The templates were traced onto 16-gauge sheetmetal, the same material used for the tunnel.">
<strong>2</strong>. Cardboard templates for the right and left portions of the floor panel were created.
3. The templates were traced onto 16-gauge sheetmetal, the same material used for the tunnel.">
 <strong>3</strong>. The templates were traced onto 16-gauge sheetmetal, the same material used for the tunnel.
4. Using a bead roller, Ben Vasquez at Stone's Metal Shop formed an 1/8-inch-deep step along the top and outer edge of the right and left side plates.">
<strong>3</strong>. The templates were traced onto 16-gauge sheetmetal, the same material used for the tunnel.
4. Using a bead roller, Ben Vasquez at Stone's Metal Shop formed an 1/8-inch-deep step along the top and outer edge of the right and left side plates.">
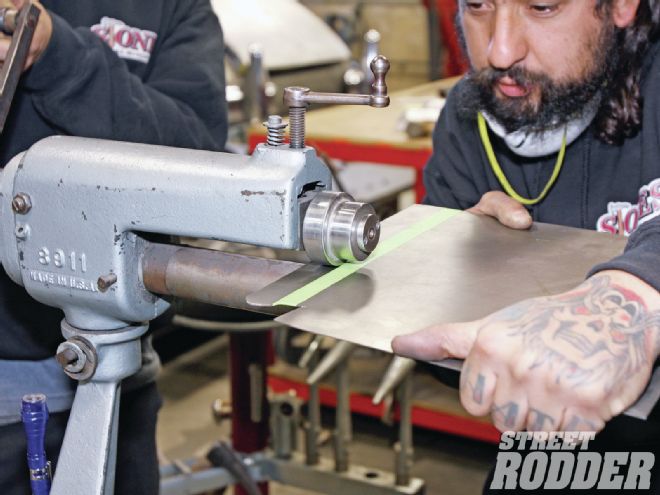 <strong>4</strong>. Using a bead roller, Ben Vasquez at Stone's Metal Shop formed an 1/8-inch-deep step along the top and outer edge of the right and left side plates.
5. The step creates rigidity. It also creates a 1-inch flange that lets the panel drop into the opening on either side of the transmission when the plate is welded to the firewall. A flange along the bottom (where it will be welded to the floor) was bent on a sheetmetal brake.">
<strong>4</strong>. Using a bead roller, Ben Vasquez at Stone's Metal Shop formed an 1/8-inch-deep step along the top and outer edge of the right and left side plates.
5. The step creates rigidity. It also creates a 1-inch flange that lets the panel drop into the opening on either side of the transmission when the plate is welded to the firewall. A flange along the bottom (where it will be welded to the floor) was bent on a sheetmetal brake.">
 <strong>5</strong>. The step creates rigidity. It also creates a 1-inch flange that lets the panel drop into the opening on either side of the transmission when the plate is welded to the firewall. A flange along the bottom (where it will be welded to the floor) was bent on a sheetmetal brake.
6. This sheet will be the center piece of the panel. It will have an identical step along the top. The lower portion will be shaped to make the arc and curves of the trans tunnel.">
<strong>5</strong>. The step creates rigidity. It also creates a 1-inch flange that lets the panel drop into the opening on either side of the transmission when the plate is welded to the firewall. A flange along the bottom (where it will be welded to the floor) was bent on a sheetmetal brake.
6. This sheet will be the center piece of the panel. It will have an identical step along the top. The lower portion will be shaped to make the arc and curves of the trans tunnel.">
 <strong>6</strong>. This sheet will be the center piece of the panel. It will have an identical step along the top. The lower portion will be shaped to make the arc and curves of the trans tunnel.
7. Work on the center plate started with the shrinker/stretcher to get the shape going. Vasquez had used shrinking dies on this machine to form the tail end of the tunnel, and switched to stretcher dies to form an arch on this piece. ">
<strong>6</strong>. This sheet will be the center piece of the panel. It will have an identical step along the top. The lower portion will be shaped to make the arc and curves of the trans tunnel.
7. Work on the center plate started with the shrinker/stretcher to get the shape going. Vasquez had used shrinking dies on this machine to form the tail end of the tunnel, and switched to stretcher dies to form an arch on this piece. ">
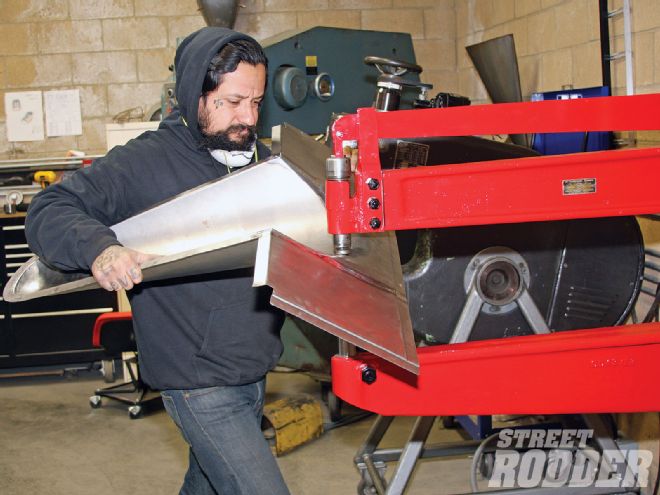
 <strong>7</strong>. Work on the center plate started with the shrinker/stretcher to get the shape going. Vasquez had used shrinking dies on this machine to form the tail end of the tunnel, and switched to stretcher dies to form an arch on this piece.
8. With the curve starting to flare out, the lower portion was marked and cut out to reduce resistance.">
<strong>7</strong>. Work on the center plate started with the shrinker/stretcher to get the shape going. Vasquez had used shrinking dies on this machine to form the tail end of the tunnel, and switched to stretcher dies to form an arch on this piece.
8. With the curve starting to flare out, the lower portion was marked and cut out to reduce resistance.">
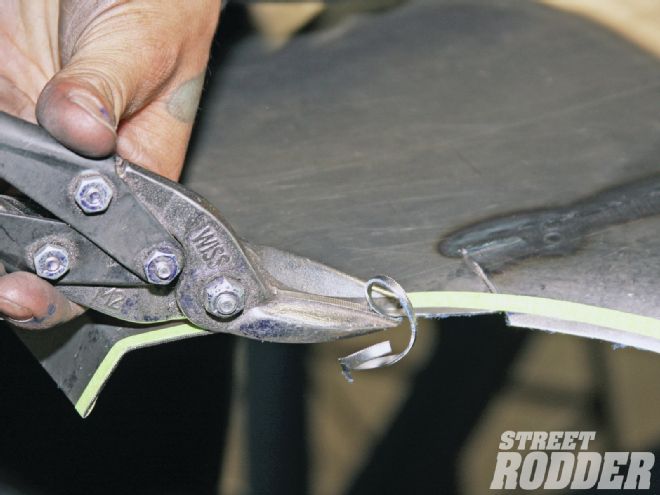
 <strong>8</strong>. With the curve starting to flare out, the lower portion was marked and cut out to reduce resistance.
9. This power hammer was used to further the shape of the flare.">
<strong>8</strong>. With the curve starting to flare out, the lower portion was marked and cut out to reduce resistance.
9. This power hammer was used to further the shape of the flare.">
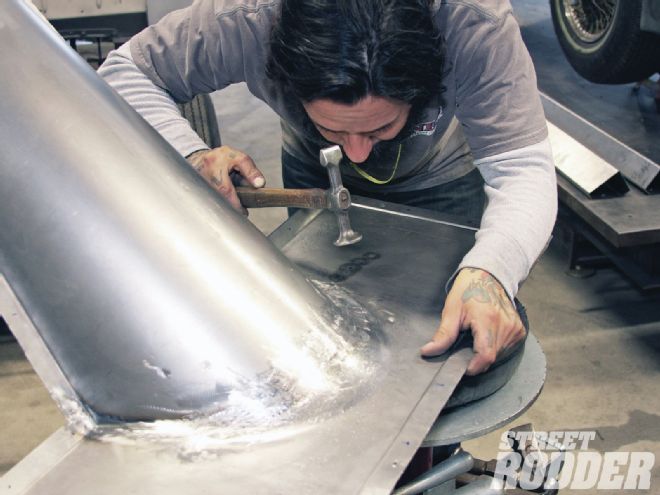
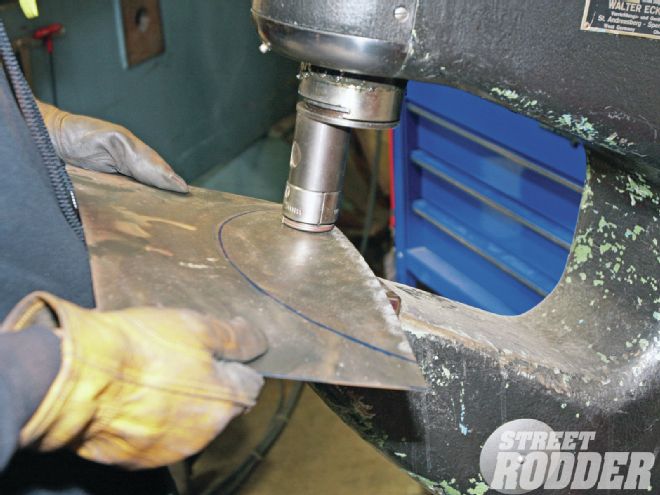
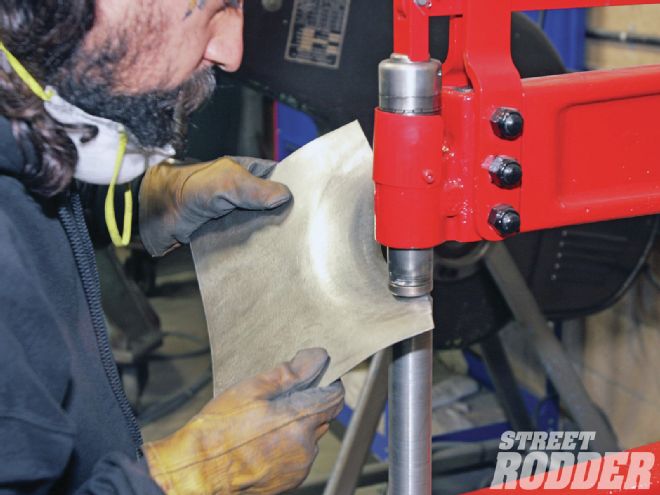 <strong>9</strong>. This power hammer was used to further the shape of the flare.
10-11. In addition to the machines, an assortment of hammers and other tools, dollies, and sandbags were used to perfect the shape by hand.">
<strong>9</strong>. This power hammer was used to further the shape of the flare.
10-11. In addition to the machines, an assortment of hammers and other tools, dollies, and sandbags were used to perfect the shape by hand.">
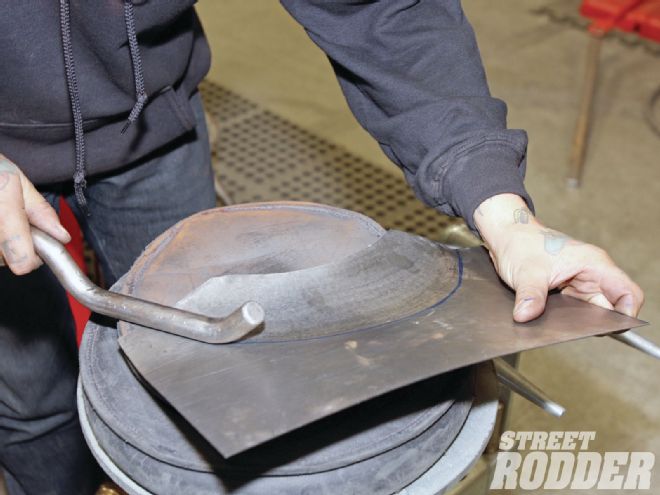 <strong>10-11</strong>. In addition to the machines, an assortment of hammers and other tools, dollies, and sandbags were used to perfect the shape by hand.
10-11. In addition to the machines, an assortment of hammers and other tools, dollies, and sandbags were used to perfect the shape by hand.">
<strong>10-11</strong>. In addition to the machines, an assortment of hammers and other tools, dollies, and sandbags were used to perfect the shape by hand.
10-11. In addition to the machines, an assortment of hammers and other tools, dollies, and sandbags were used to perfect the shape by hand.">
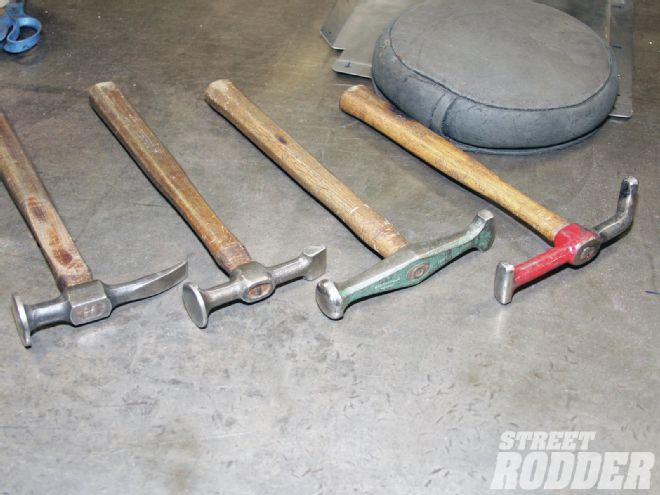 <strong>10-11</strong>. In addition to the machines, an assortment of hammers and other tools, dollies, and sandbags were used to perfect the shape by hand.
12. Continually throughout the process, the panel was measured against the tunnel. This single picture represents a lot of trips from the workbench, to the power hammer, and back to the car, making sure the fit was right.">
<strong>10-11</strong>. In addition to the machines, an assortment of hammers and other tools, dollies, and sandbags were used to perfect the shape by hand.
12. Continually throughout the process, the panel was measured against the tunnel. This single picture represents a lot of trips from the workbench, to the power hammer, and back to the car, making sure the fit was right.">
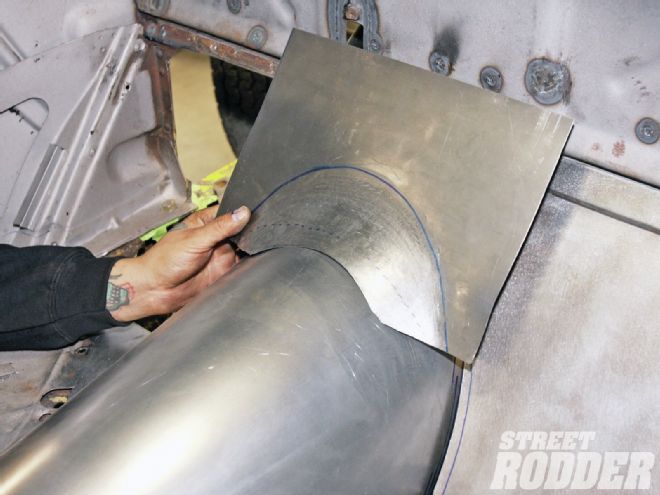 <strong>12</strong>. Continually throughout the process, the panel was measured against the tunnel. This single picture represents a lot of trips from the workbench, to the power hammer, and back to the car, making sure the fit was right.
13. When the lower flare was finished, the upper edge of the center piece was stepped.">
<strong>12</strong>. Continually throughout the process, the panel was measured against the tunnel. This single picture represents a lot of trips from the workbench, to the power hammer, and back to the car, making sure the fit was right.
13. When the lower flare was finished, the upper edge of the center piece was stepped.">
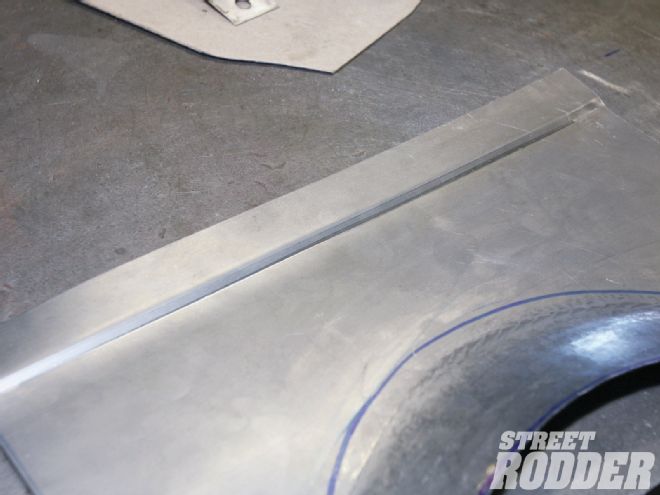 <strong>13</strong>. When the lower flare was finished, the upper edge of the center piece was stepped.
14. All three pieces of the floor panel were fastened with Cleco pins to make sure they fit together correctly, and with the firewall, floor, and tunnel.">
<strong>13</strong>. When the lower flare was finished, the upper edge of the center piece was stepped.
14. All three pieces of the floor panel were fastened with Cleco pins to make sure they fit together correctly, and with the firewall, floor, and tunnel.">
 <strong>14</strong>. All three pieces of the floor panel were fastened with Cleco pins to make sure they fit together correctly, and with the firewall, floor, and tunnel.
15. Satisfied with the fit, Vasquez welded the three panels together, resulting in this single panel.">
<strong>14</strong>. All three pieces of the floor panel were fastened with Cleco pins to make sure they fit together correctly, and with the firewall, floor, and tunnel.
15. Satisfied with the fit, Vasquez welded the three panels together, resulting in this single panel.">
 <strong>15</strong>. Satisfied with the fit, Vasquez welded the three panels together, resulting in this single panel.
16. Some sheetmetal had to be removed from the lower flanges where they overlapped.">
<strong>15</strong>. Satisfied with the fit, Vasquez welded the three panels together, resulting in this single panel.
16. Some sheetmetal had to be removed from the lower flanges where they overlapped.">
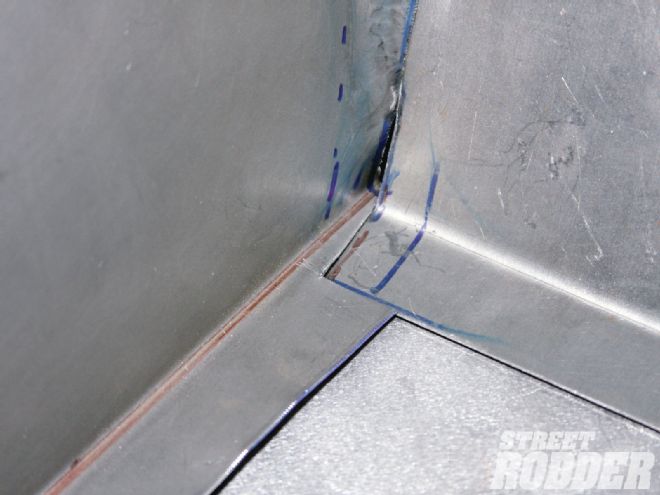 <strong>16</strong>. Some sheetmetal had to be removed from the lower flanges where they overlapped.
17-18. The next step was to measure, mark, and cut the front of the tunnel to match the radius of the panel.">
<strong>16</strong>. Some sheetmetal had to be removed from the lower flanges where they overlapped.
17-18. The next step was to measure, mark, and cut the front of the tunnel to match the radius of the panel.">
 <strong>17-18</strong>. The next step was to measure, mark, and cut the front of the tunnel to match the radius of the panel.
17-18. The next step was to measure, mark, and cut the front of the tunnel to match the radius of the panel.">
<strong>17-18</strong>. The next step was to measure, mark, and cut the front of the tunnel to match the radius of the panel.
17-18. The next step was to measure, mark, and cut the front of the tunnel to match the radius of the panel.">
 <strong>17-18</strong>. The next step was to measure, mark, and cut the front of the tunnel to match the radius of the panel.
19. With the fitting completed, the panel and tunnel could be fastened in place with Cleco pins and welded together. The Cleco pins stabilize the pieces and help reduce any possible warping or misshaping of the sheetmetal.">
<strong>17-18</strong>. The next step was to measure, mark, and cut the front of the tunnel to match the radius of the panel.
19. With the fitting completed, the panel and tunnel could be fastened in place with Cleco pins and welded together. The Cleco pins stabilize the pieces and help reduce any possible warping or misshaping of the sheetmetal.">
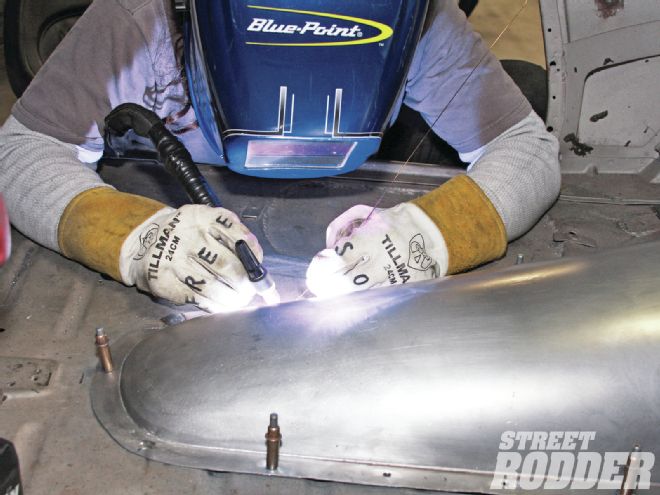
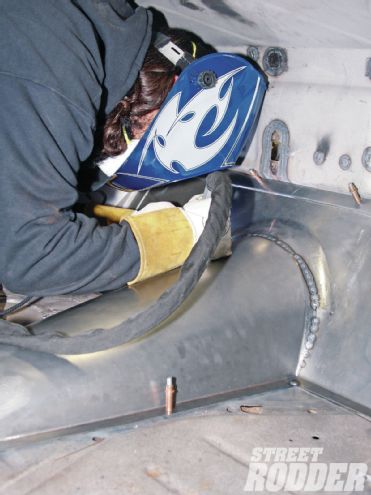 <strong>19</strong>. With the fitting completed, the panel and tunnel could be fastened in place with Cleco pins and welded together. The Cleco pins stabilize the pieces and help reduce any possible warping or misshaping of the sheetmetal.
20. Once the tunnel and floor were welded, the planishing hammer could be used only on accessible areas, such as the inside arc of the tunnel. From this point, most of the metal finishing will require hand tools. ">
<strong>19</strong>. With the fitting completed, the panel and tunnel could be fastened in place with Cleco pins and welded together. The Cleco pins stabilize the pieces and help reduce any possible warping or misshaping of the sheetmetal.
20. Once the tunnel and floor were welded, the planishing hammer could be used only on accessible areas, such as the inside arc of the tunnel. From this point, most of the metal finishing will require hand tools. ">
 <strong>20</strong>. Once the tunnel and floor were welded, the planishing hammer could be used only on accessible areas, such as the inside arc of the tunnel. From this point, most of the metal finishing will require hand tools.
21. Some warping of the large flat panels during the welding process is hard to avoid. That was remedied by heat shrinking. Vasquez used a torch to heat the affected areas. ">
<strong>20</strong>. Once the tunnel and floor were welded, the planishing hammer could be used only on accessible areas, such as the inside arc of the tunnel. From this point, most of the metal finishing will require hand tools.
21. Some warping of the large flat panels during the welding process is hard to avoid. That was remedied by heat shrinking. Vasquez used a torch to heat the affected areas. ">
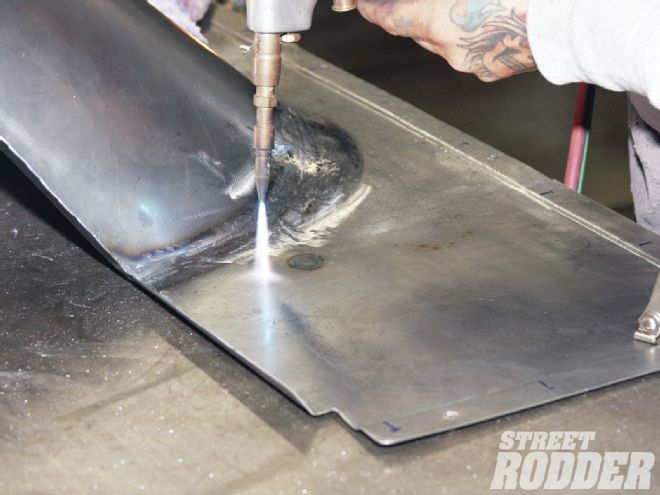 <strong>21</strong>. Some warping of the large flat panels during the welding process is hard to avoid. That was remedied by heat shrinking. Vasquez used a torch to heat the affected areas.
22. The next step is to shape the heated metal, using a soft leather hammer. A polisher with an 80-grit disc will help to further reduce the warp.">
<strong>21</strong>. Some warping of the large flat panels during the welding process is hard to avoid. That was remedied by heat shrinking. Vasquez used a torch to heat the affected areas.
22. The next step is to shape the heated metal, using a soft leather hammer. A polisher with an 80-grit disc will help to further reduce the warp.">
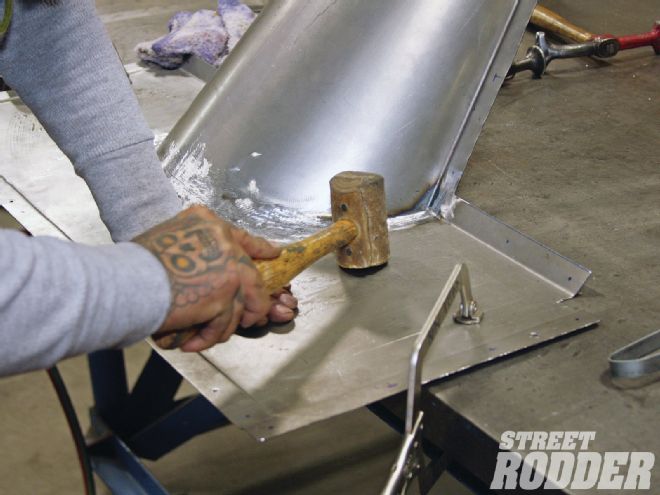 <strong>22</strong>. The next step is to shape the heated metal, using a soft leather hammer. A polisher with an 80-grit disc will help to further reduce the warp.
23. Finally, the area is cooled with a wet cloth to shrink the metal and tighten it up. ">
<strong>22</strong>. The next step is to shape the heated metal, using a soft leather hammer. A polisher with an 80-grit disc will help to further reduce the warp.
23. Finally, the area is cooled with a wet cloth to shrink the metal and tighten it up. ">
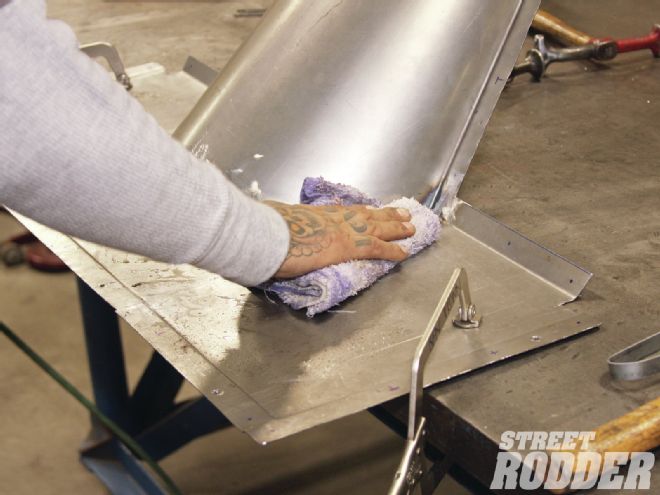 <strong>23</strong>. Finally, the area is cooled with a wet cloth to shrink the metal and tighten it up.
24. Plug welds were used to weld the entire piece to the floor and firewall. The 3/16-inch holes for the welds were drilled into the flange 4 to 4-1/2 inches apart. Extra strength is recommended in the areas where joints meet. When making his rosette welds, Vasquez started nearer to the rim and worked toward the center.">
<strong>23</strong>. Finally, the area is cooled with a wet cloth to shrink the metal and tighten it up.
24. Plug welds were used to weld the entire piece to the floor and firewall. The 3/16-inch holes for the welds were drilled into the flange 4 to 4-1/2 inches apart. Extra strength is recommended in the areas where joints meet. When making his rosette welds, Vasquez started nearer to the rim and worked toward the center.">
 <strong>24</strong>. Plug welds were used to weld the entire piece to the floor and firewall. The 3/16-inch holes for the welds were drilled into the flange 4 to 4-1/2 inches apart. Extra strength is recommended in the areas where joints meet. When making his rosette welds, Vasquez started nearer to the rim and worked toward the center.
25. Creating the floor openings for the clutch and brake pedals was easier with this factory '33 Ford floor plate, which served as a guide for determining the accurate pedal position.">
<strong>24</strong>. Plug welds were used to weld the entire piece to the floor and firewall. The 3/16-inch holes for the welds were drilled into the flange 4 to 4-1/2 inches apart. Extra strength is recommended in the areas where joints meet. When making his rosette welds, Vasquez started nearer to the rim and worked toward the center.
25. Creating the floor openings for the clutch and brake pedals was easier with this factory '33 Ford floor plate, which served as a guide for determining the accurate pedal position.">
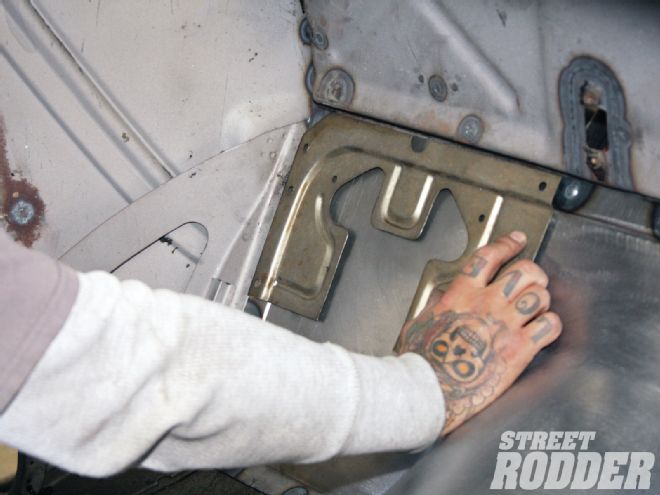 <strong>25</strong>. Creating the floor openings for the clutch and brake pedals was easier with this factory '33 Ford floor plate, which served as a guide for determining the accurate pedal position.
26. From the other side, the pedal arms were held in place against the floor, and a center punch was used to mark that spot.">
<strong>25</strong>. Creating the floor openings for the clutch and brake pedals was easier with this factory '33 Ford floor plate, which served as a guide for determining the accurate pedal position.
26. From the other side, the pedal arms were held in place against the floor, and a center punch was used to mark that spot.">
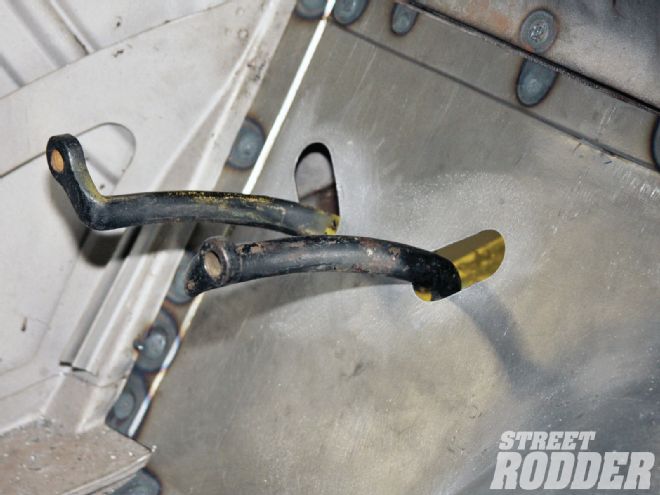
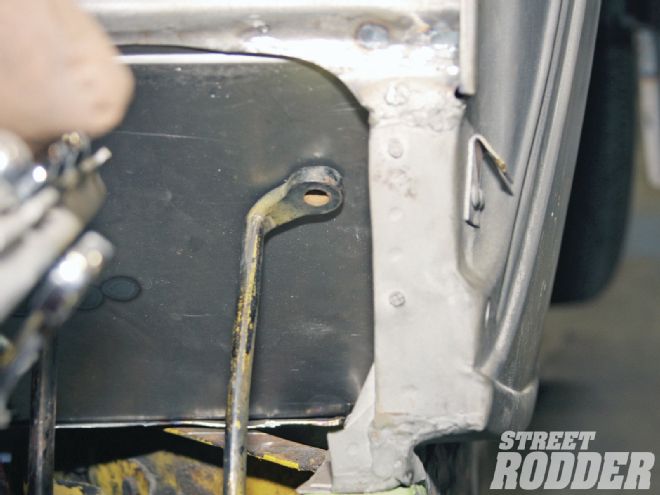 <strong>26</strong>. From the other side, the pedal arms were held in place against the floor, and a center punch was used to mark that spot.
27. Back inside the car, Vasquez used a 1-1/2-inch hole saw to drill where the punch marks appeared; the holes were expanded to fit the pedals. ">
<strong>26</strong>. From the other side, the pedal arms were held in place against the floor, and a center punch was used to mark that spot.
27. Back inside the car, Vasquez used a 1-1/2-inch hole saw to drill where the punch marks appeared; the holes were expanded to fit the pedals. ">
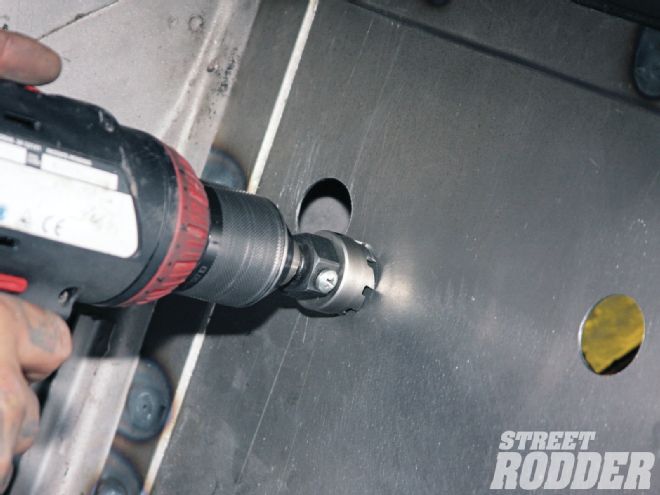 <strong>27</strong>. Back inside the car, Vasquez used a 1-1/2-inch hole saw to drill where the punch marks appeared; the holes were expanded to fit the pedals.
28. The goal was to make the openings no larger than they had to be to allow full pedal travel.">
<strong>27</strong>. Back inside the car, Vasquez used a 1-1/2-inch hole saw to drill where the punch marks appeared; the holes were expanded to fit the pedals.
28. The goal was to make the openings no larger than they had to be to allow full pedal travel.">
 <strong>28</strong>. The goal was to make the openings no larger than they had to be to allow full pedal travel.
29. The floor is finished and the transmission is covered. When carpet is installed, this piece will be covered too—but for right now, the expert sheetmetal work is plain to see.">
<strong>28</strong>. The goal was to make the openings no larger than they had to be to allow full pedal travel.
29. The floor is finished and the transmission is covered. When carpet is installed, this piece will be covered too—but for right now, the expert sheetmetal work is plain to see.">
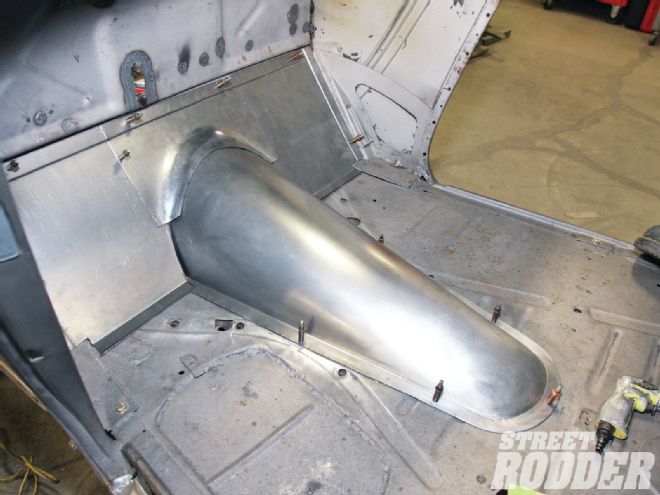
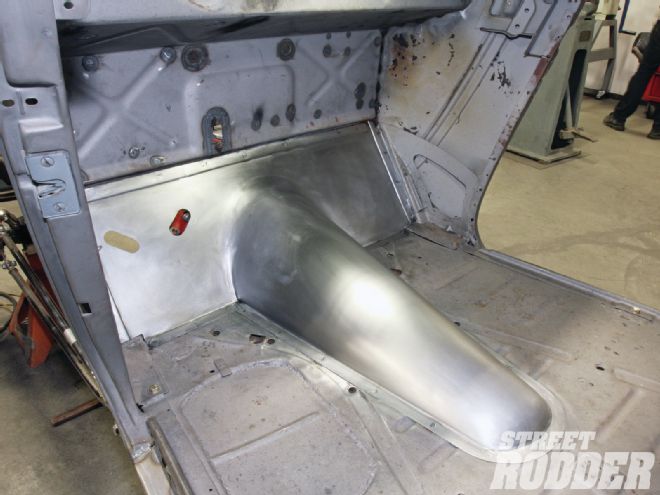 <strong>29</strong>. The floor is finished and the transmission is covered. When carpet is installed, this piece will be covered too—but for right now, the expert sheetmetal work is plain to see.