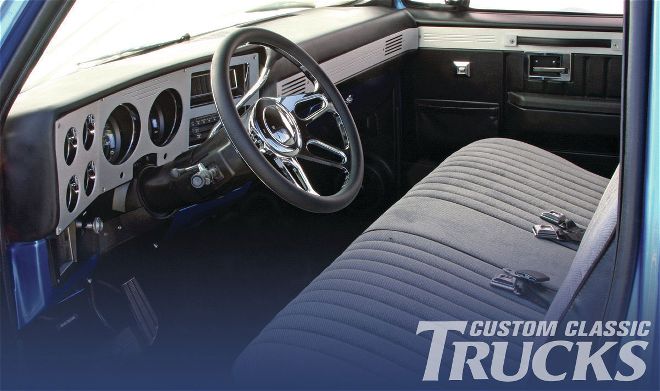
We left off last month with our hands smack-dab in the middle of the cookie jar installing a ground up LMC Truck interior in a ’73-’87 C10. In the previous story, the foundation of the interior was installed, which included the sound and heat barriers, carpet, seat cover and door panels. In this month’s installment, the interior will be wrapped up by installing the upper half of the cab. Included in this install is a new dashpad with all the trimmings, a billet steering wheel, and a new headliner with accessories.
When it comes to old trucks that have battled Father Time, you always find common ground among the headliners and dash. For starters, thumbtacks. When it comes to looking up at the headliner, the most common accent one sees is a multitude of rainbow-colored thumbtacks holding inverted rolling hills of headliner in place. Atop the dashpad is usually some sort of carpet liner, hula girl, or even a bobbing head Chihuahua covering up the sun cracks that run rampant. All in all, the sight of an aging cab is one that should be forgotten.
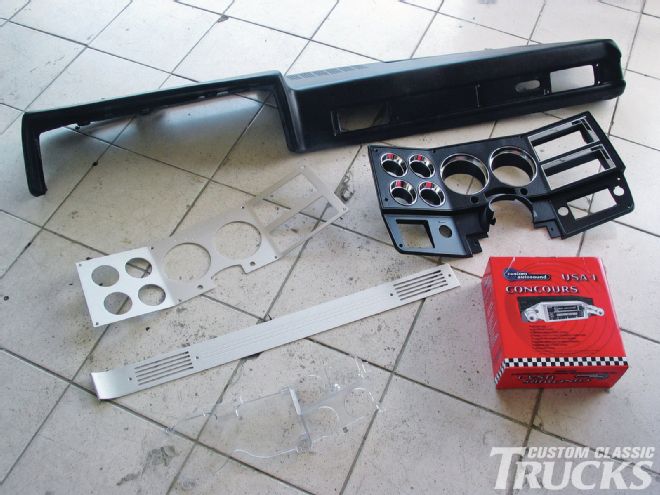
LMC Truck offers an option to the weathered components festering inside. Better news is even though the task of replacing the dash and headliner may look daunting and intimidating, the fact of the matter is things are installed and handled with a matter of screws and clips that would fit in the hand of a second grader! Along with just replacing worn-out interior pieces, LMC also offers several pieces of ornamentation to breathe some youth and vibrancy back into the aging hauler. Things like billet trim, Colorbond, and a billet steering wheel will add a touch of class to the cab.
 At first glance, the bulk of the dashpad may send chills of anxiety, but the truth is, the install isn’t much more than 20 screws and a few snaps!
As the last pieces of the interior are installed you’ll notice that nothing outside of the ordinary garage’s toolbox is being used to handle the install. Reason being is that everything is prefabbed and installs with simple screws and clips. Beyond the simplicity of the install is that all of the ensuing steps can be performed in a day, largely because the components are manufactured to be direct replacement components. Follow along as we wrap up this installment of a backyard upholstery job. CCT