Chatter, slipping, limited or no adjustment, catastrophic failure, and heavy pedal pressure are the most common reasons to upgrade your clutch, but sometimes the simplest reason is a technological upgrade for comfort. Older OEM finger clutches have been used with most three- and four-speed standard shift cars for decades. These old heavy-duty clutches sound cool, but have you ever driven one in stop-and-go traffic? Not fun, unless you have a hydraulically powered left leg. This '70 Judge had an older aftermarket performance clutch, which was getting tired. It started chattering and wasn't holding sufficient pressure on the flywheel. And most aggravating, it was a bear to operate. Time to upgrade.
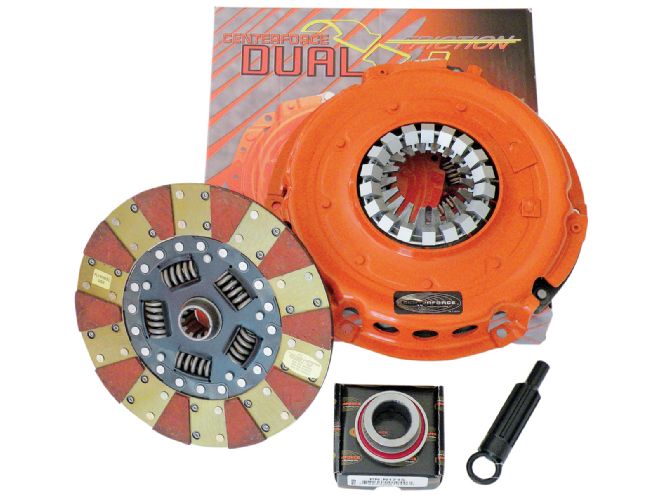
 Here are the components of the Centerforce Dual Friction clutch assembly.
The disc and pressure plate come as a matched pair. Always install a new throwout bearing. We're also are using a Centerforce clutch alignment tool (PN 53010).
Here are the components of the Centerforce Dual Friction clutch assembly.
The disc and pressure plate come as a matched pair. Always install a new throwout bearing. We're also are using a Centerforce clutch alignment tool (PN 53010).
We're installing a Centerforce Dual Friction clutch (PN DF271739), which distributes pressure evenly over a 360-degree friction facing on one side of the clutch disc, and uses a segmented design on the other side to concentrate clamping pressure, hence the "dual friction" moniker. We chose this clutch because it combines excellent driveability with light pedal pressure.
Whenever you're replacing a clutch, always have the flywheel resurfaced or install a new flywheel. Just because it looks good doesn't mean it is good. Any clutch disc needs a flat surface to properly engage the flywheel, and about 500 miles of use to break-in properly. If your flywheel is glazed or uneven, the clutch disc will wear out in short order.
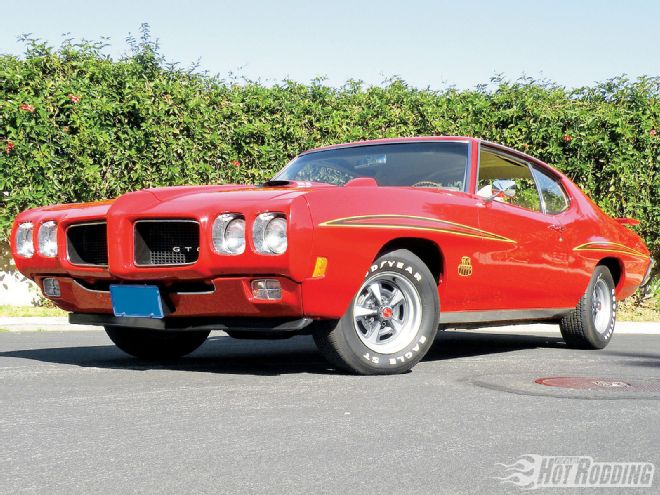 Here's the patient waiting for the clutch transplant. It's a 400hp, four-bolt main, 400-cid Ram Air III engine backed by a Muncie M-20 wide-ratio and a 3.55 factory GM 10-bolt.
The engineering of this Centerforce pressure plate includes a centrifugal weight system. As engine rpm increases, the centrifugal force also increases due to these weights. This force increases the diaphragm pressure, resulting in more clamp load down through the pressure plate and disc to the flywheel. Simply put, this creates a clutch that functions more efficiently and with far less pedal pressure than a conventional finger-style clutch.
If you're installing a new clutch install a new throwout bearing. They're inexpensive, and are a critical part of the system. A worn bearing will usually be noisy and will not provide the proper release capabilities for the clutch. We're installing a Centerforce self-aligning bearing (PN N1716), but will first compare it with the one we remove from the car. They must be the same height, diameter, and have the right inside diameter to work properly. Always check before installing the new bearing. This bearing is the replacement for all GM applications that use a stamped-steel throwout bearing fork.
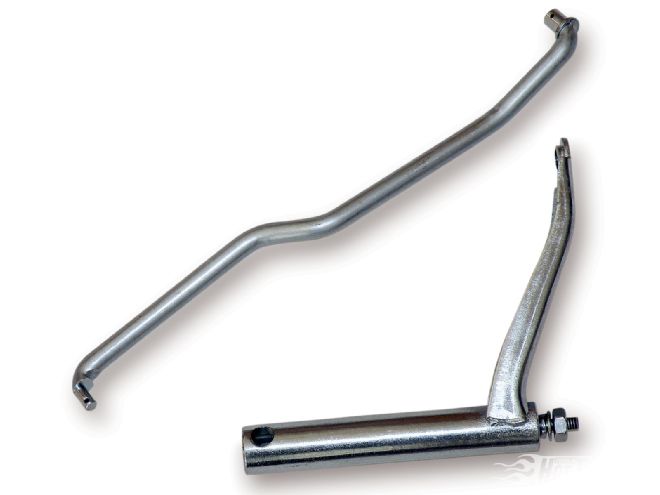 We are installing a new bellcrank and pedal-to-crank actuation rod. The attaching holes in the original crank are slightly out of round from four decades of wear, and this slop affects the precise action of the clutch.
Our installation took between four and five hours, working slowly. Allow a day if you are working on the floor. After we adjusted the clutch, the testdrive was amazing. The pedal pressure was half of what it was, and the clutch engagement was positive, smooth, and effortless, making the car a pleasure to drive. Let's proceed with the R&R of the clutch, and look at some other critical parts and procedures along the way.
Preinstallation Checklist
• It's a good idea to have a factory service manual for your car
• Have a can of brake cleaner handy to wash the machined flywheel
• You'll need a torque wrench for the flywheel/clutch plate bolts
• Do you have an alignment tool for the clutch assembly?
• Do you have a replacement pilot bearing and removal tool if applicable?
• You'll need a floor jack and four jackstands for on-the-ground work
• Have a jack to support the transmission if working on the ground
• Take pictures of all the components and linkages before removal
• Refer to your vehicle manual service for clutch adjustment procedure