Total tuning is a philosophy that involves putting parts together that will work well as a whole to net the maximum performance intended. The ultimate goal of our KA24DE build is to yield extreme power yet keep it within a reasonable realm of reliability. With the completion of our long-block assembly, we ensured that we had a strong core for our KA24DE. Next, we will go over the external engine accessories and parts to seal up our motor, preparing for its installation into our donor vehicle.
 |
Nissan 240SX KA24DE Turbo Engine Build Up
|
Nissan 240SX KA24DE Turbo Engine Build Up
Since Naoto was going to build a KA24DE project long before we approached him about it, he had already begun making appropriations for an intake and exhaust manifold. By the time we got to our build, the basic construction of both pieces was already done. All that remained was for it to be adjusted for final fitment.
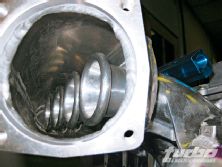
The KA24DE intake manifold is similar in design to its S13 SR20DET brother in that it also has a two-piece design and runner path. After analyzing the overall design of various SR20DET aftermarket surge tanks, Naoto came up with his own design, using a SR20DET surge tank and the factory KA24DE as a base. The surge tank is a five-piece design that's constructed of a 3mm die-pressed aluminum sheet. That means that each sheet is cut to fit, inserted into a die mold, and pressed to shape. Each of the pieces are fitted together like a jigsaw puzzle to give it the overall shape. To promote a smoother, even flow of air, Naoto added velocity stacks at the end of each runner. The entire assembly is welded together after careful fitment.
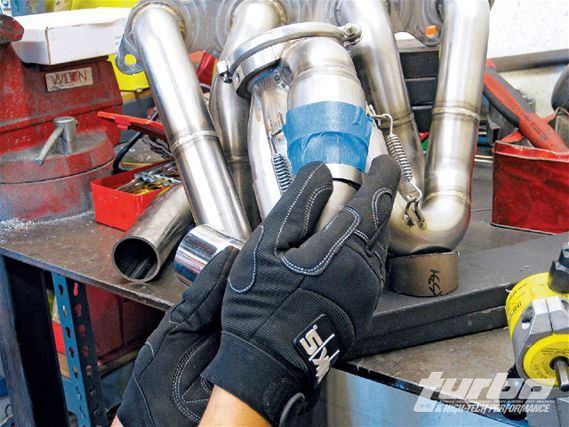 |
You can see the preliminary fitting process here. Only when the pipe is properly fitted can it be welded.
|
You can see the preliminary fitting process here. Only when the pipe is properly fitted can it be welded.
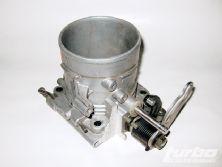
To get more injector choices, collars are machined and inserted into the injector bosses. Usually an O-ring would be used here to seal between the boss and the collar, but to prevent leak under high boost, Naoto chose to weld them instead. A GReddy fuel rail then feeds each injector. As for throttle body choices, initially we thought about going with a Pulsar N15 70mm (OD 80mm) throttle body, but after thinking it over Naoto didn't want to take any chances with choking the motor off, so we chose to use a Q45 83mm (OD 90mm) throttle body.
 |
Nissan 240SX KA24DE Turbo Engine Build Up
|
Nissan 240SX KA24DE Turbo Engine Build Up
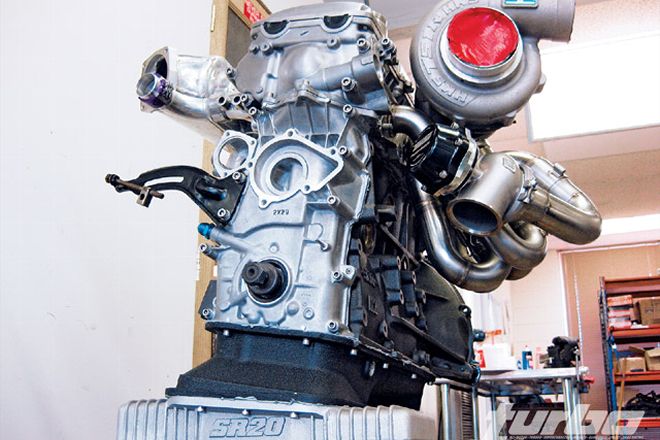
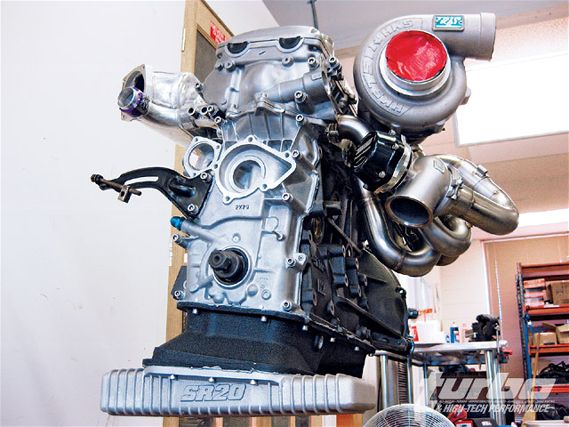
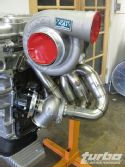
To flow enough air to hit our power goals we knew a big turbo was in order, but we didn't think that NPD would go with a turbo this big. The weapon of choice is an HKS T51KAI turbo. Our initial reaction was: "No, that is way too big," but after the shock, we realized it made a lot of sense. This turbo is rated to make power in the 800bhp range, a hair over our target of 750 bhp. A heavy-duty turbo needs an equally heavy-duty wastegate to keep up with it. We called on Turbosmart for its new Power-Gate60. Newly released, it's 30 percent lighter, 20 percent smaller, and has 40 percent more flow than its previous Power-Gate50.
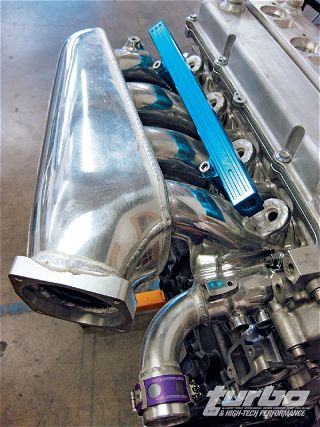 |
This is the final overall shape of the intake manifold. We will be using top-feed injectors rather than the factory side-feed style.
|
This is the final overall shape of the intake manifold. We will be using top-feed injectors rather than the factory side-feed style.
The design of the exhaust manifold is pretty straightforward. The key criterion is the same as any high-performance exhaust manifold: be able to adequately flow, be rigid enough to not crack, and be serviceable. The base flange is a 19mm CNC-machined piece designed by NPD. Exhaust moves out of the flange into 42.7mm ID, 3mm thick runners. Each runner meets at a 4-1 merge collector and is finally pushed out through a HKS v-band turbo inlet. Waste pressure is sent through a double-slip fit wastegate outlet tube. The wastegate tube is plumbed right at the base of the merge collector to maximize efficiency. The combination of wall thickness, pipe size, design, and slip fit joints work together to meet all of our criteria.
The preliminary fitment of the manifold was done in the car to ensure that there were no clearance problems. Since we didn't have the wastegate at the time, Naoto had to fabricate the wastegate tube with the framerails in mind. We also had to remember not to interfere with the power steering pump. This tube is probably the preliminary design and will have to be adjusted once we have everything in the car.
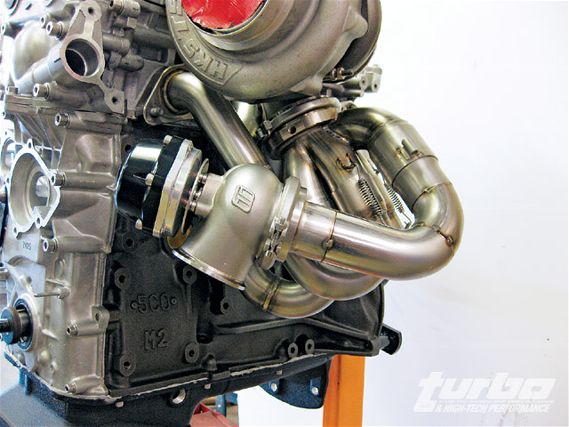 |
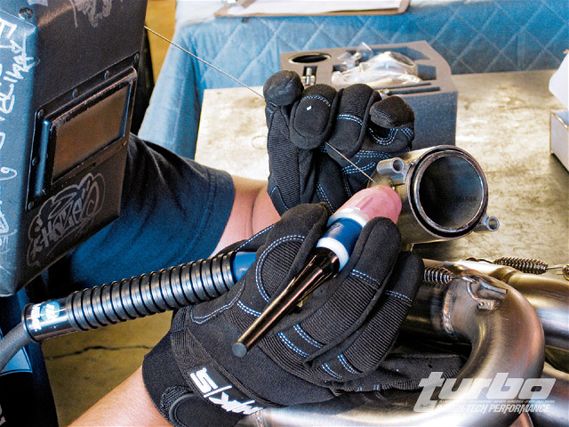
The pipe is only tacked together since a final fitment will be done once the motor is installed into place.
|
The pipe is only tacked together since a final fitment will be done once the motor is installed into place.
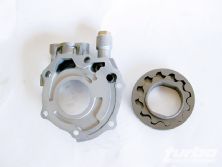
The surfaces of the pump gear, relief piston, and pump housing are all treating to reduce the amount of friction that you can see. This will be especially effective under the increased rpm we will be throwing at the motor.
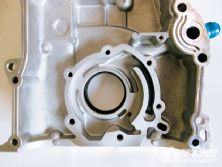
Now that our manifolds are taken care of, Naoto wanted to seal up the motor before it was installed. First, we started with the front cover assembly. The oil pump is built into the front cover. We had WPC treat our pump gear, oil relief piston, and the cover itself. As we discussed before, WPC treatment is effective on any friction surface, which in turn allows our pump to spin with ease.
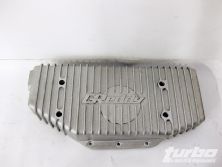
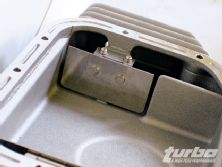
Scouring the Internet for KA parts, he came across a new piece by a company called Xcessive Manufacturing. The factory KA24DE oil pan is made of stamped steel. Xcessive made a cast pan extension similar to a factory SR20DET that uses the stock pickup and requires no modification to the engine or chassis. They also incorporate a 1/2-inch NPT port for the oil drain off our turbo.
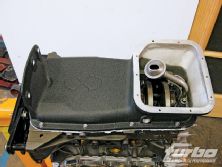
We got an oil sump from GReddy to mate to the extension. Originally designed for an SR20DET, this sump features swing baffles to keep oil where it needs to be in the pan under high g's. It is also casted with fins to promote cooling and an 1/8-inch NPT bung for a temperature sensor. The combination of the extension and sump increases our oil capacity by over 1,000cc.
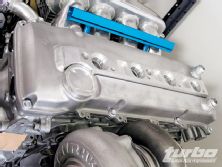
Since we are going to use a standalone system, Naoto wanted to incorporate a coil pack system to our build. Using Okada Projects S2000 coil packs as a base, he machined and welded an adaptor plate to the valve cover, taking into account the height of the new coil packs and positioning to fit each cylinder. (We will discuss this more in depth in our electronics article.) An AN-10 fitting is also welded on for appropriations for a catch can.
Each of the parts we installed work as a whole to our estimated power goals. We are now ready to get this motor installed and mate it to drivetrain. Stay tuned because next month we will get our motor in and discuss how we'll get the power to wheels.