 | Both 5.9L and 6.7L Cummins fuel filters are located on the driver side of the engine, below the intake manifold.
Cummins
On Cummins engines, the fuel filter type and style has changed slightly over the years, so for our purposes we’re going to describe those found on the common-rail engines. Both 5.9L and 6.7L filters are located on the driver side of the engine, below the intake manifold. The major difference lies in how they are oriented, with the 5.9L filter being accessible from the topside of the engine and the 6.7L from under the truck.
To change the filter, the first step is draining the fuel. Located on the bottom of the filter housing is a water drain valve. Attach a hose to this nipple and route it to a catch pan, then open the valve and drain the fuel. With the filter drained you can now remove the housing. On the 5.9L, the cap is removed and the filter lifts up and out, however, on the 6.7L you first need to unplug the water-in-fuel sensor before lowering the canister and filter out through the bottom of the vehicle. The filters are reinstalled in the reverse order; make sure to replace and lubricate the canister O-ring. To prime the system, cycle the key without starting the truck 10 to 20 times.
| Both 5.9L and 6.7L Cummins fuel filters are located on the driver side of the engine, below the intake manifold.
Cummins
On Cummins engines, the fuel filter type and style has changed slightly over the years, so for our purposes we’re going to describe those found on the common-rail engines. Both 5.9L and 6.7L filters are located on the driver side of the engine, below the intake manifold. The major difference lies in how they are oriented, with the 5.9L filter being accessible from the topside of the engine and the 6.7L from under the truck.
To change the filter, the first step is draining the fuel. Located on the bottom of the filter housing is a water drain valve. Attach a hose to this nipple and route it to a catch pan, then open the valve and drain the fuel. With the filter drained you can now remove the housing. On the 5.9L, the cap is removed and the filter lifts up and out, however, on the 6.7L you first need to unplug the water-in-fuel sensor before lowering the canister and filter out through the bottom of the vehicle. The filters are reinstalled in the reverse order; make sure to replace and lubricate the canister O-ring. To prime the system, cycle the key without starting the truck 10 to 20 times.
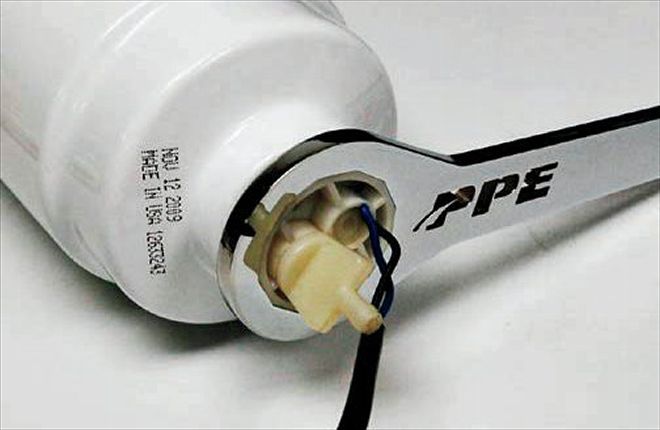
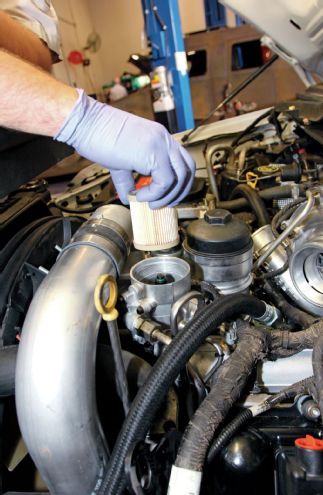
 | All the Cummins-equipped Rams use a cartridge-style filter, with the 5.9L being accessible from the top. A 1 1⁄8-inch socket is used to remove the filter cap.
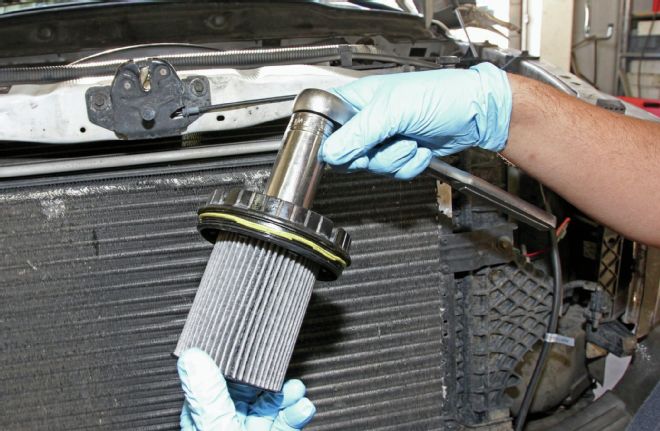
 | This is the Duramax fuel filter’s factory location. As you can see, it can be tough to reach from the top.
| While some people resort to pliers to remove the fuel-in-water sensor, there’s a special tool that makes the job much easier and doesn’t risk destroying the delicate plastic.
| This is the Duramax fuel filter’s factory location. As you can see, it can be tough to reach from the top.
| While some people resort to pliers to remove the fuel-in-water sensor, there’s a special tool that makes the job much easier and doesn’t risk destroying the delicate plastic.
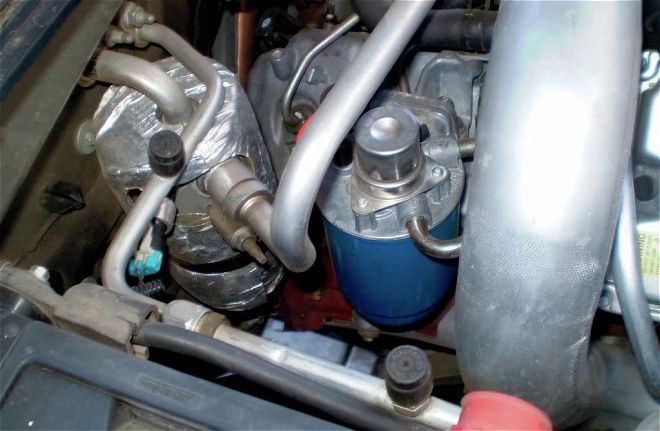
 | On this relocated filter you can clearly see the relief valve and the primer pump.
Power Stroke The Power Stroke family of engines is the most unique when it comes to not only fuel filter type and placement, but also quantity. While the Duramax utilizes a single sealed spin-on-type filter and Cummins uses a single cartridge, Fords equipped with 6.0L, 6.4L, and 6.7L engines receive two cartridge filters (7.3L engines use a single cartridge.) The primary filter is located along the driver framerail at about the midpoint of the chassis, and brake lines and wire harnesses can obstruct depending on year. On ’03 and newer models, the secondary filter is located on top of the engine. Thankfully, changing the filters is a relatively straightforward task. The first step is to drain the filter using the water drain valve. While the procedure is the same, the actual drain valve is different on each engine model. With the fuel drained, the canister cap can be removed and the new filter installed. Make sure to replace the old O-rings with the ones provided. On the 6.0L and 6.4L engines, the secondary filter is changed in much the same way. Simply remove the plastic cap and replace the filter element and O-ring. As a departure from the previous cartridge-style secondary filter, the 6.7L uses a sealed cartridge, which is replaced as a unit. Replacement requires a setscrew to be loosened and the two quick-disconnect fuel lines to be removed. With those steps complete, the unit simply lifts out for disposal. For a quick way to know if the filter has ever been changed, look for a third nipple, which is present only on the original factory filter. Priming the fuel system simply requires the key to be cycled 10 to 20 times without starting the engine. This will allow the vehicle’s low-pressure fuel pump to fill the new filters with fuel and purge the system of air.
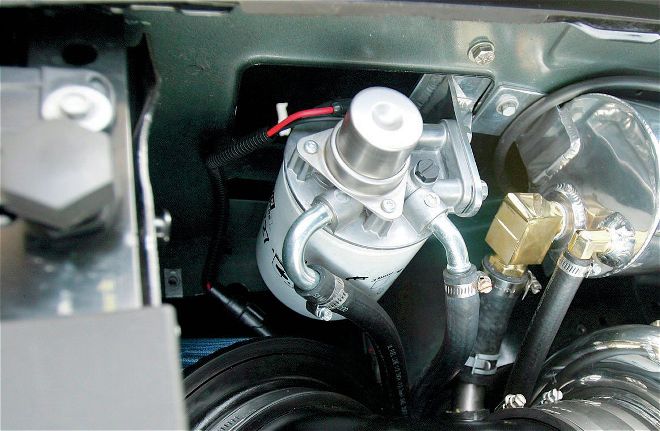
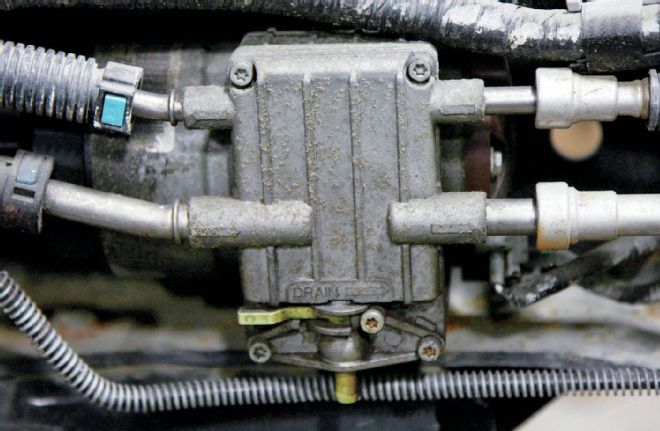
 | If you’re lucky enough to own a 6.0L, 6.4L, or 6.7L Power Stroke, you’ll find a secondary fuel filter, similar to this one, under the hood.
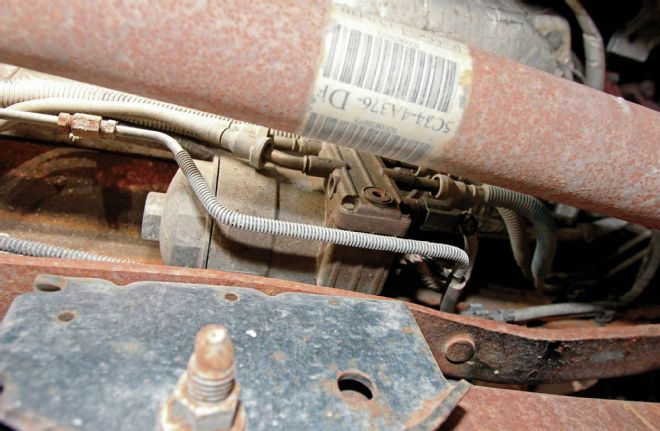 | Seen here is the primary fuel filter on a 6.0L-equipped F-550 four-wheel drive. Mounted near mid-chassis on the driver side, this truck’s filter is partially obscured by the front driveshaft. Also note the water drain is a plug, which is removable with a hex bit.
 | On 6.4L-equipped trucks, the water drain valve became more user friendly—and it got even easier on 6.7Ls.