Walking off the lot with a new truck usually means that it has the latest in bells and the most advanced whistles, but it can also be the start of add-on time. Trucks practically beg you to customize them and with a host of available upgrades the sky can be the limit. Getting a new truck up to personal standards can be a long process, but a quick upgrade can be seen and felt in the exhaust. An aftermarket exhaust can get you the right pitch and throaty growl with a quick swap of the piping. Sound is not the only gain; responsiveness and cooler running temps will be a noticeable change as well. And since the truck is new, there won’t be that much road crud covering the underside, making for a much more pleasant install.
For this vehicle, a ’14 Chevy Silverado Z71, we turned to the good folks at MagnaFlow who have been in the exhaust game for over 30 years standing for quality, technological advancement, and pursuit of performance the whole time. Using only the best build techniques, these exhaust systems are fully welded, mandrel bent, and made of stainless steel. As a leader in the industry, MagnaFlow uses every bit of knowledge they have gained over the past three decades to give consumers real horsepower gains, deeper tones, and impeccable build quality.
For the installation, we headed out to LGE-CTS in San Dimas, California, to work with their quality technicians. This dual-exit system, PN 15269, can be purchased through LGE-CTS or any MagnaFlow-authorized distributor at www.magnaflow.com. Follow along as we install a cat-back system from MagnaFlow onto a ’14 Chevrolet Z71..
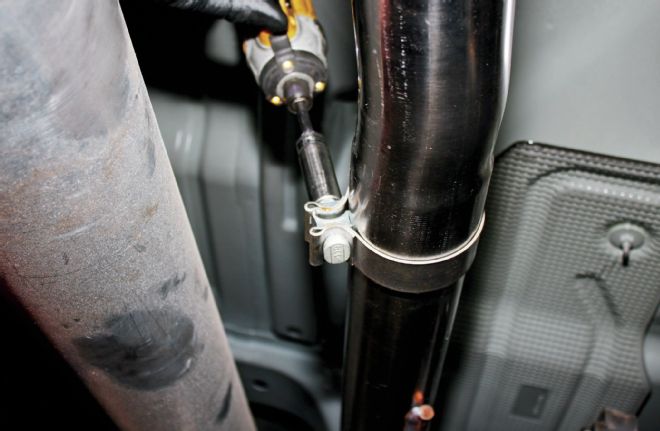
| Exhaust Clamp
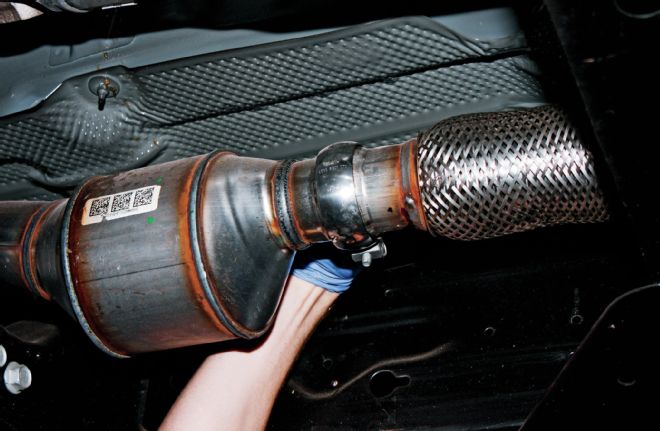
1. First, we located and removed the exhaust clamp located on the passenger side just behind the catalytic converter. We were then ready to disengage the hangers and remove the exhaust. One way of doing this is to take a reciprocating saw and cut the pipe behind the muffler. Since we had the truck up on a lift and had the room, we removed the exhaust without cutting it.
| Oem Fasteners Inlet Pipe
2. Then, we removed the hangers from their rubber mounts using the careful and precise method of a large screwdriver, and removed the tailpipe. After the tailpipe had been removed, we then got to work unfastening the muffler inlet from the catalytic converter at the clamp junction. We saved the OEM fasteners and the rubber insulators to reuse when we installed the new system.
| Old Exhaust Removal
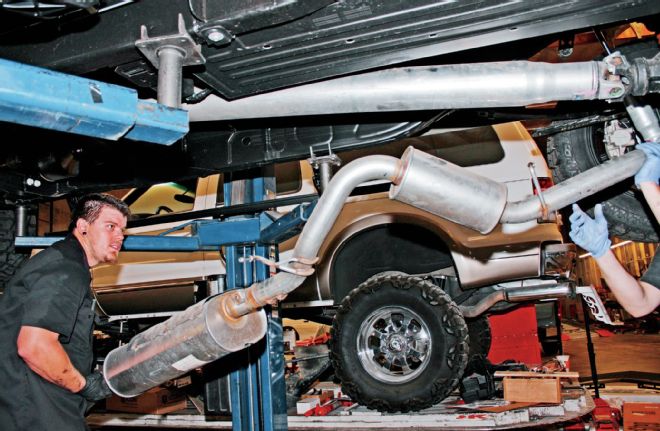
3. We removed the old exhaust by snaking it over the axle and down. It helps if you have two people under there to get the exhaust out, but it can be done with one person with a hoist and a little elbow grease. This is fairly easy if you have access to a lift, as the length of the factory system won’t allow you to fish it through the axle if your truck is on jackstands. Again, you may need to cut the factory exhaust into two pieces in order for it to clear the rear axle.
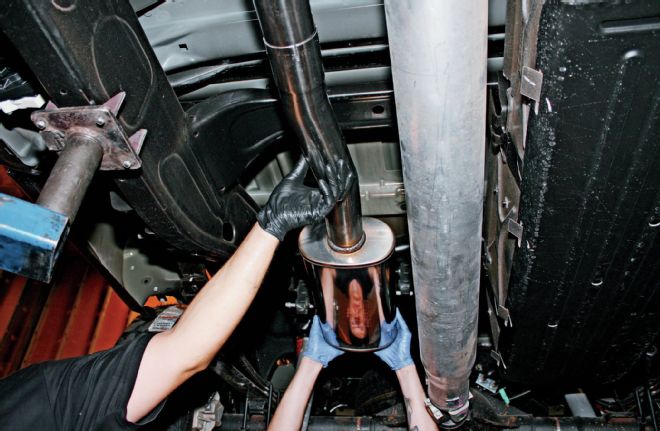
| Inlet Pipe
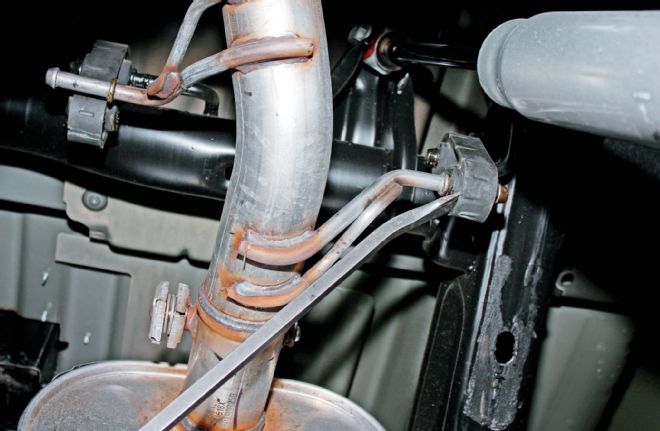
4. We then installed the new inlet pipe at the ball flare using the OEM fasteners and left all the clamps loose for final adjustments of the complete system.
| 3 Inch Clamp
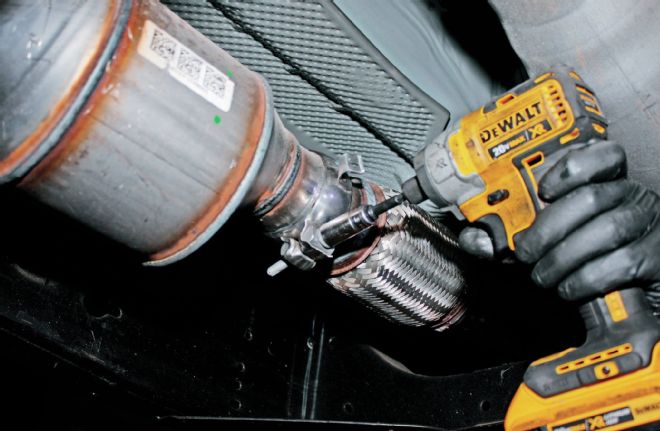
5. We carefully eased the pipe into place before the muffler assembly and loosely tightened the 3-inch clamp.
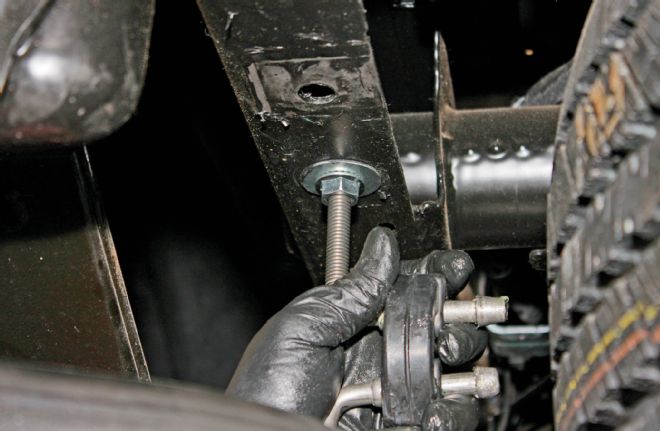
| Rubber Mounts
6. We made sure to grease up the holes of the rubber mounts and slid the exhaust hangers back into place, and the muffler was installed.

| Extension Pipes
7. We slipped the two extension pipes onto the muffler and attached them using the 2.5-inch round clamps, once again leaving them loose for final adjustment.
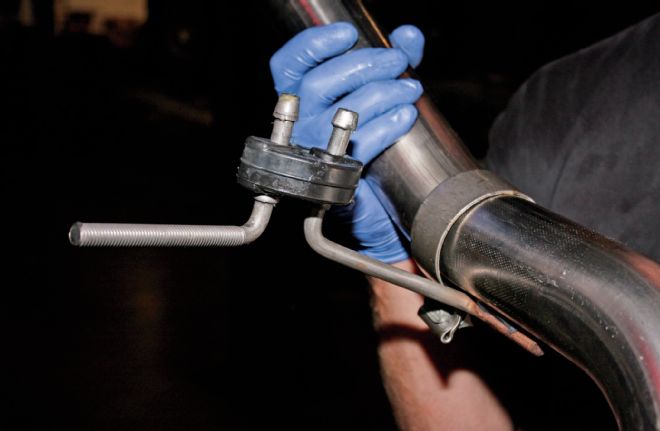
| Threaded Hanger 1
8. There is a threaded hanger that needs to be attached to the rubber mounts that fits into the frame on the driver side.
| Threaded Hanger 2
9. This was attached loosely, and we made the final adjustment after we were done with the installation.
| 2 75 Inch Clamps
10. We then added the 2.75-inch clamps to the tailpipe, again attaching them loosely.
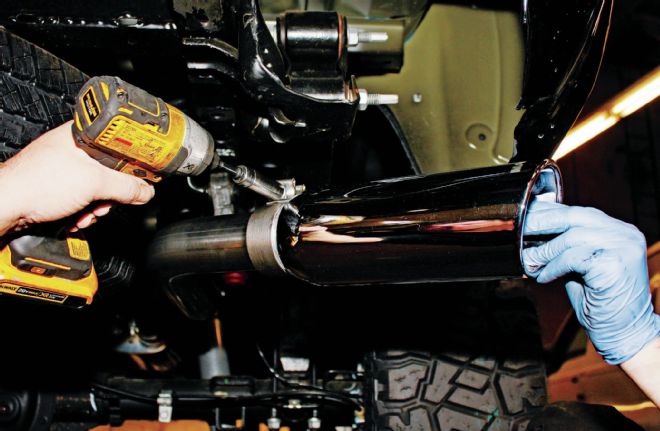
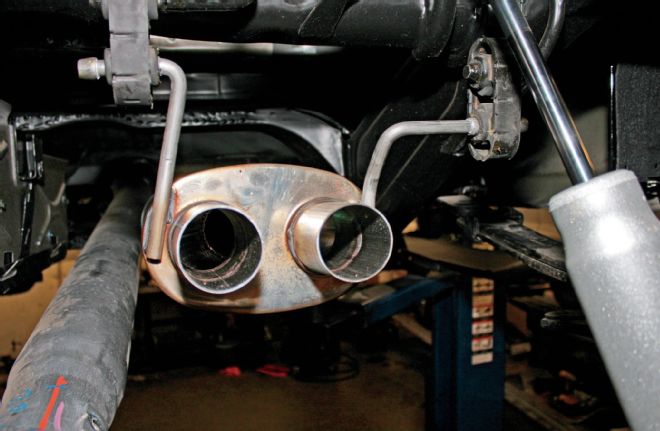
| Exhaust Tips
11. The exhaust tips slide over each tailpipe and are held in place with the final two clamps. Now we move back up the chain to make any final adjustments.
12. - 14. We visually inspected all the connections to make sure they were where they needed to be, and adjusted the system for overall aesthetics and clearance of frame and bodywork. After that we finally tightened everything down. It is recommended to have at least ½ inch of clearance between the exhaust and any body panels to prevent heat-related damage. Now our otherwise stock 2014 has the cool look of a dual outlet exhaust and a great sound to go with it, not to mention a few extra ponies. Check out the MagnaFlow website to see if they make a dual outlet system for your truck.


