It wasn’t long ago that the terms leather equipped seating and pickup truck were never used in the same sentence, but these days leather seats seem to be a standard feature. Back in the day, it really didn’t make sense to have leather-trimmed seats, as trucks were mainly used for work, and most truck owners who could afford leather seats wouldn’t think about putting them in their work truck. They would rather have leather in the car they went out to dinner in. With the boom of the truck craze beginning back in the early 1990s the new truck owner’s mindset began to change, and many aftermarket suppliers outfitted factory-style seats with leather-trimmed replacement covers.
This was the dawn of the era of the leather seat cover, but the name was somewhat misleading, as it sounds like anyone can just pull off their factory cloth upholstery to replace it with a soft leather seat cover. Soon, manufacturers caught on and knew they could charge a premium for the luxury. New models hit dealerships equipped in different trim levels, sometimes paired with other luxuries to form a package deal. One complaint that many truck enthusiasts still had was the lack of style or complementary colors to the exterior, as manufacturers have stuck to simplistic, plain-looking designs and monotone color options.
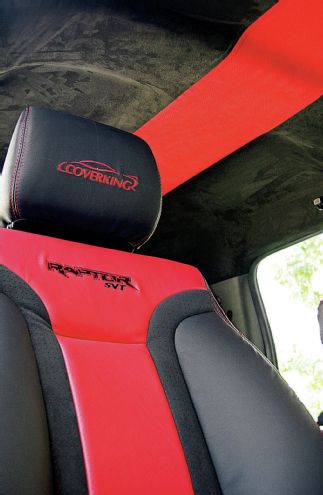
The truth really is that the average truck owner who is considering upgrading to a leather interior isn’t always thinking about feel, wear, and possibly staying cooler. Truck guys have always needed more options, like styling upgrades or color-matching choices. Take for example the Ford Raptor, which is by far the most OEM-upgraded truck ever built. Known as the weekend warrior to the truck world, the Ford Raptor is a good mix of aftermarket upgrades mixed together with luxury and styling. For some, the Raptor is perfect just the way it came from the factory. But the hard-core enthusiast wants to stand out even more so than the average Raptor guy.
| Coverking Leather Raptor Seats Installed
So how does one go about upgrading an upgraded truck, and what are the benefits over the luxury that has already been installed? Well that’s the question that we asked Coverking when they announced their partnership with Pecca Leather. Both companies have been standout manufacturers of their well-known products for decades. Coverking, of course, is known for their high-quality car covers, and Pecca, known for their luxurious interior kits for a huge list of vehicles. When both companies sat down to discuss a joint venture, both wanted to make sure that they had their eye on the prize for a successful partnership. Their theory is quite simple: Stick to the basic fit of the factory cover, but offer different designs and colors to personalize the seats to the customer’s taste. Furthermore, most factory leather quality falls short as they order lesser quality leather hides than what Coverking/Pecca would even hold in their inventory. Their motto is if you’re going to upgrade, then make it a real upgrade—one that you’ll be happy with for years and should last for years as well.
We liked the idea of designing our own interior, and were curious about the different options that Coverking/Pecca had to offer, so we rounded up a slightly used model, to use as a test mule to allow them to work their magic. We got to follow along with the steps, and learn a few new tricks as well, which proved to us that even a slightly knowledgeable truck enthusiast could install these covers if they had to. Follow along as we show you what we learned from the pros at Coverking/Pecca.
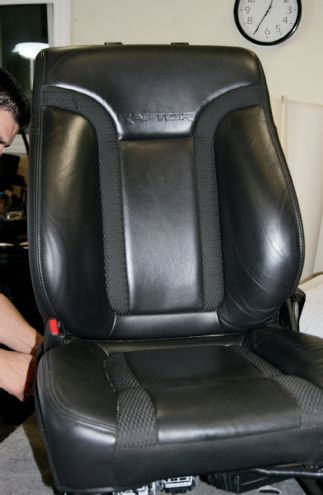
| Stock Ford Raptor Seat
Beginning with the removal of the front seats we already notice the wear and tear from the less-than-perfect factory-equipped covers on this Raptor. Coverking/Pecca’s seats use only high-quality hides to ensure a longer-lasting seat cover that is soft and supple right from the beginning, while strong and durable for many years to come. In fact, Coverking/Pecca seats don’t wear out as much as they wear in.
Coverking/Pecca seat covers install much like the factory OEM covers, so the installer pays close attention to the way the covers are attached when removing them. He’ll need to take mental notes, or sometimes even photos, to make the installation of the new covers simple.
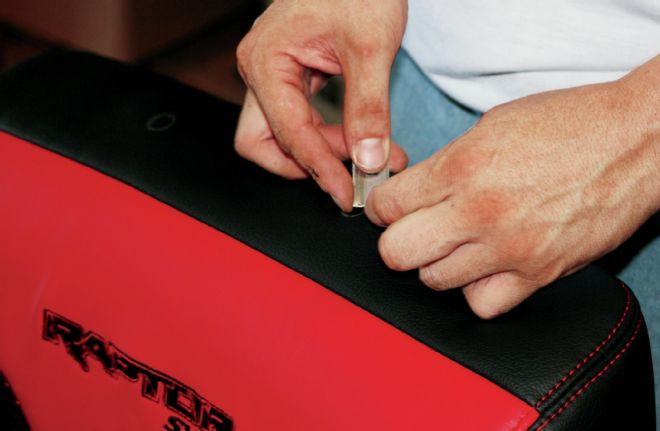
First up on the install list are the seatback covers. A tip that we picked up from one of the installers was to set the covers outside in the sunshine to warm up a bit. This makes the covers expand and will help us to stretch the covers over the seat foam a little easier. After some time in the sun, hog rings are used to anchor the seatback covers to a metal wire that is sunk into the foam at both the bottom and top of the seatback foam.
| Velcro Straps For Vertical Pieces
Vertical strips of Velcro are sewn into the seatback cover and the seatback foam to hold the vertical pleats in place.
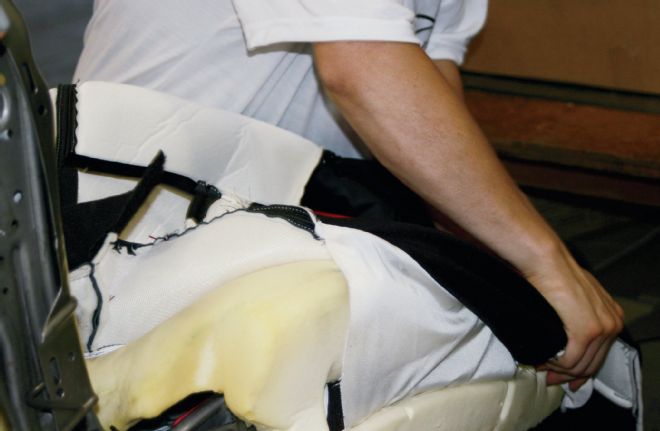
| Pushing Bottom Of Cover Through Gap
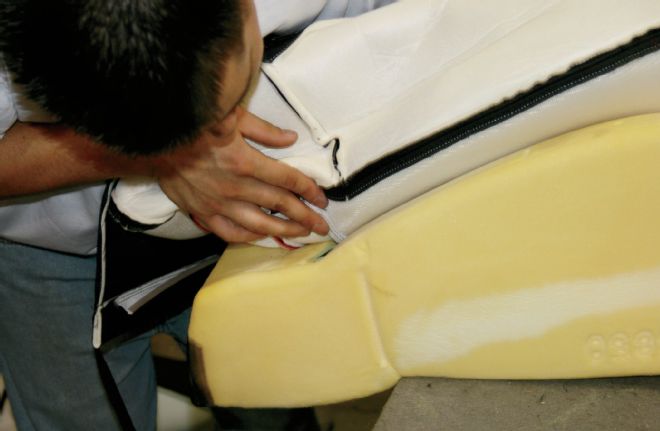
The tongue of the seatback cover is pushed in between the seatback foam and the seat bottom foam, which will clip together when the seatback cover is fitted at a later time.
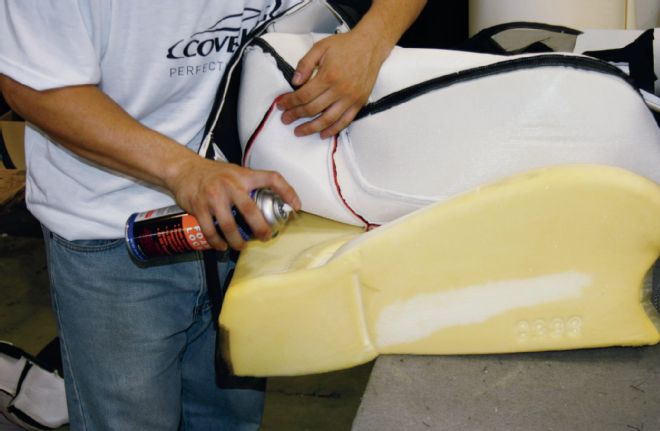
| Spray Glue Application
Before the sides of the cover are slid over the bolsters, a touch of spray glue was placed at the top areas of the seat foam to keep the cover in place while the rear portion of the seatback cover is fitted.
| Sides Stretched Over Foam
Allow the glue to set for a few minutes, then the sides of the seatback cover are stretched over the seatback foam bolsters.

| Using A Steamer To Lossen Cover
To get the proper fit that we’re looking for, our installer uses a steamer to help loosen the cover and reduce winkles.
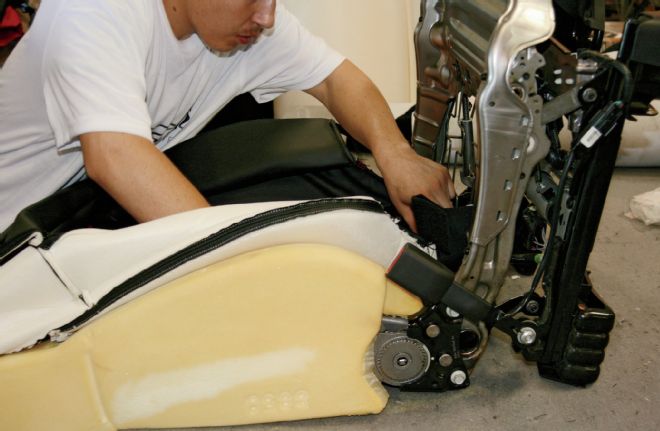
Next, the seat bottom cover is installed on the seat bottom’s foam. The same process of using hog rings and the Velcro strips makes the seat bottom process similar to the seatback installation.
Coverking/Pecca’s covers fit much like the OEM seat covers, so the same type of clip rail fasteners are used on the new covers as they were on the old covers. Our installer pulls the carpet bottoms back until the sewn-in plastic rails can clip together or clip over the metal rails set in place by the factory.
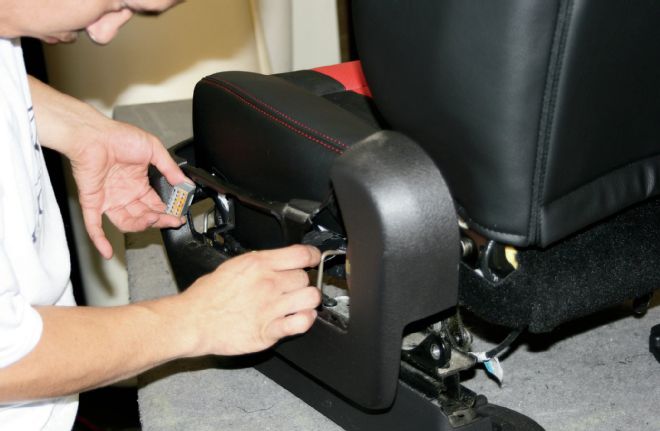
| Pulling Electrical Connectors Through
Before the seat bottoms were installed, our installer took note on where the cutouts for the seat’s electronics were placed and marked with some chalk.
Before he cut into the cover, he double-checked to make sure that is where the access holes needed to go before using a razor blade to cut out the access holes.
| Connecting Seat Wiring
With the access holes cut, the wiring is fed through the cover, and the seat’s hinge and rail covers can be installed to make things look as if they were never removed.
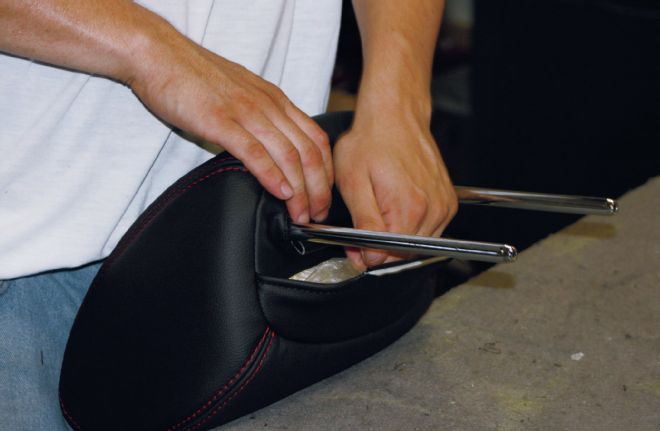
| Cutting Headrest Holes
Moving on to the top of the seatback cover, access is needed to allow the use of the headrest posts. Again, those measurements were taken from the old cover, as the info was transcribed onto the new seat cover. To be on the safe side, nothing was cut until the cover was placed over the seat foam.
Using a razor blade, the installer cuts a small hole in the center of the cover at each headrest post just small enough for the cover to stretch over the headrest post.
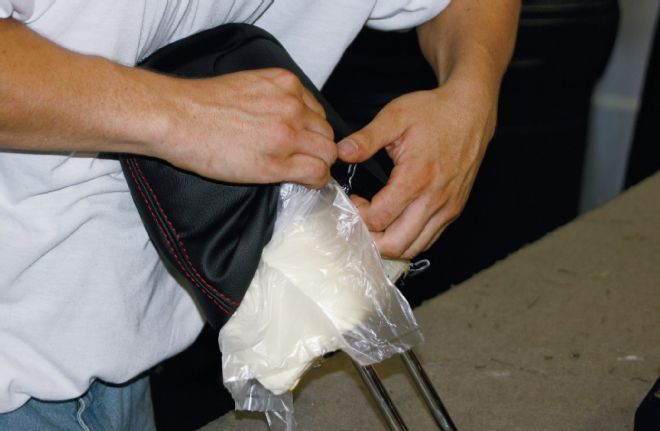
| Pulling Cover Over Headrest
The headrests are next up, and here a plastic bag acts as a lubricant for the cover to slip over the headrest foam.
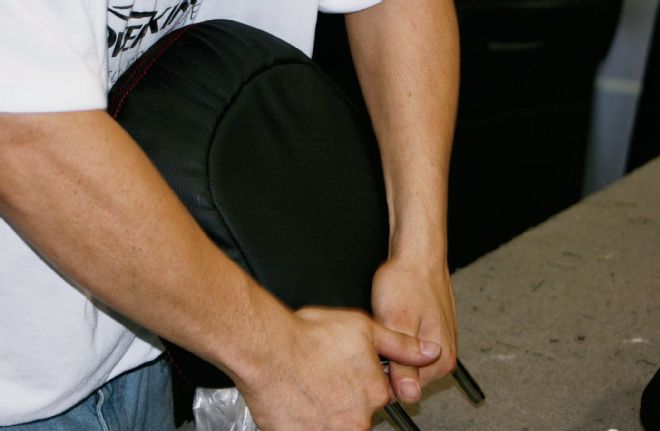
| Pulling Cover Over Headrest
Again before the install of the cover begins, some time out in the sun to warm the material up will help you get the cover on fairly easy.
| Plastic Railcap Installed
After the cover is set in place, the plastic rail system is used again to hold the cover over the foam nice and tight.
The same process is used for the rear seats, where hog rings, Velcro strips, and the good, old warmth from the sun helps us finish this install.
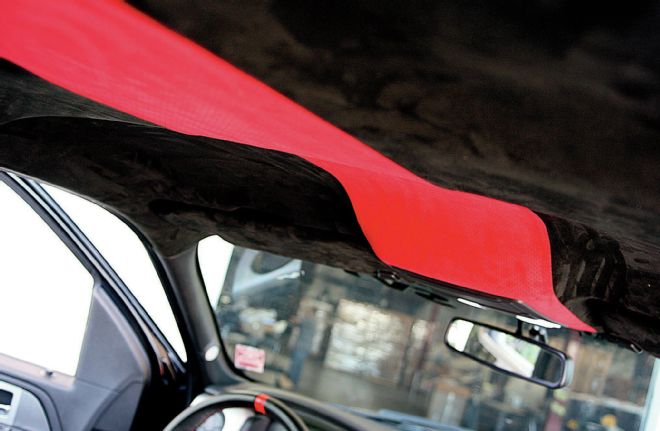
| Custom Headliner Installed
To give this Raptor some more of the unique treatment that we all crave, they wrapped the headliner in black suede leather, with a perforated red suede stripe down the center to really set things off.
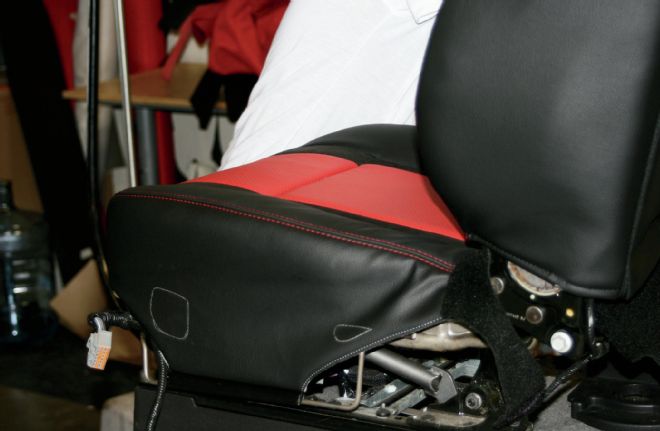
We set the rear seats in first, followed by the fronts. The fresh leather, with the three-tone treatment really made the inside of this truck stand out, especially when contained within a blacked-out exterior. As you can see, custom embroidery is offered on both the seatback and the headrest.


