The front calipers on the Honda Civic EX are known as sliding calipers. The two bolts holding the calipers in are screwed into pins that are designed to allow the caliper to slide, slightly, back and forth. Over time, these pins can become rusty or just covered in debris, which prevents them from sliding as freely. This lack of movement can cause one brake pad to constantly rub against the rotor and wear out faster. Fortunately, these pins can be removed and reconditioned with relative ease.
Loosen the lug nuts from the Civic's front wheels.
Place the floor jack beneath the Civic and raise the front end.
Put jack stands beneath the vehicle to secure it.
Remove the front wheels by removing the lug nuts and pulling the wheel off.
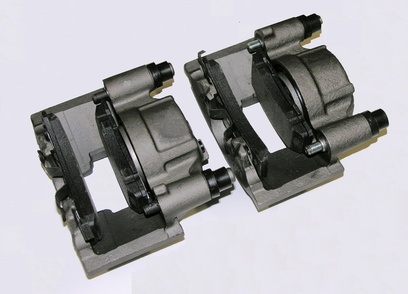
Look on the rear of the brake caliper and locate the upper and lower bolts, known as caliper bolts.
Loosen and remove the caliper bolts, using the ratchet and socket. If the pin that the bolts screw into spins, use the open end of a combination wrench to hold, keeping it from turning.
Pull the caliper from the brake assembly and attach it to a suspension component using a bungee strap.
Look on the caliper bracket, the metal object that the caliper was bolted to. Locate the two caliper pins, the two objects that the caliper bolts were screwed into.
Remove the caliper pins by grabbing them with the channel-lock pliers and pulling them outward. A light twisting motion may help. Notice the rubber boots will remain attached to the caliper bracket, pull these rubber boots from the bracket.
Insert the metal pipe cleaner into the holes in the caliper bracket where the caliper pins were inserted. Clean the entire bore of these holes with an in-and-out motion of the metal pipe cleaner.
Place the rubber boots back on the caliper bracket until they properly sit on the grooves provided.
Remove any rust or debris from the caliper pins, using the wire brush. Never use sandpaper, as this creates a rough surface and limits the pin's ability to slide.
Spray the pins with the brake parts cleaner and wipe them with a shop rag.
Repeat steps 10 and 11 until the pins are completely clean and smooth.
Apply a generous coat of an anti-seize chemical to the length of both pins and reinsert them into the caliper bracket. Make certain the rubber boots sit in the grooves on the pins.
Remove the caliper from the bungee strap and place it over the brake pads.
Hand-tighten the upper and lower caliper bolts.
Hold the caliper pins with the open end of a combination wrench, and tighten the caliper bolts, using a ratchet and socket.
Repeat steps 5 through 18 for any other caliper pins needing repair.
Place the wheels back on the Civic and hand-tighten the lugs.
Remove the jack stands from under the vehicle, and slowly lower it to the ground.
Tighten the lugs to 80 foot-pounds, using the torque wrench and a socket.
Press and release the brake pedal to ensure the brakes are working properly.