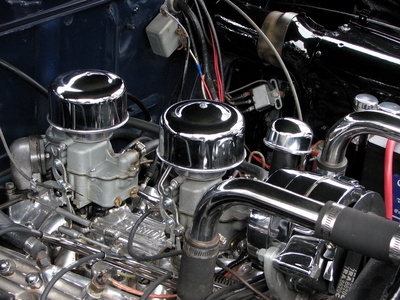
The single-barrel carburetor dates back to the dawn of the automotive age. It saw continuous use in one form or another until all carburetor-equipped vehicles were replaced with fuel injection in the late 1980s. The one-barrel carburetor could be used individually for obtaining good fuel economy, or in multiple synchronized stacks to provide amazing horsepower performance. Consisting of a single fuel jet feeding into one venturi, rebuilding a single-barrel carburetor is as simple as its design.
Remove the accelerator pump link and fast idle rod. Remove the screws holding the air horn onto the main body and lift off the air horn.
Remove the float, needle valve and needle valve seat. Unscrew the main jet from the bottom of the float bowl. Push down on the accelerator pump and remove the retainer clip. Remove the accelerator pump and check the ball.
Turn the carburetor upside down and remove the screws holding the main body onto the throttle plate assembly. Remove the throttle plate assembly from the main body.
Place all metal parts into the carburetor cleaning dip. Do not place plastic, rubber or leather parts into the dip or they will be permanently damaged. Soak the parts until all grease and dirt has been dissolved away. The rate at which the cleaning process takes place is based upon how dirty the parts are and the ambient air temperature. In colder weather, the cleaning will take longer than it does on warmer days.
Remove the parts from the cleaning solution and rinse them off in clean water. Blow the parts dry with compressed air and ensure all passages are clean of dirt and corrosion. On particularly dirty carburetors, you may have to scrub the parts with a wire brush or pipe cleaners. Take as much time as necessary to ensure that the parts are absolutely clean of all dirt and varnish before proceeding. Repeat Steps 4 and 5 if required.
Attach the throttle plate assembly to the main body using a new gasket. Screw the main jet into the bottom of the float bowl. Install a new accelerator check ball and pump. Compress the accelerator pump and install a new retainer ring.
Install a new float valve seat and float valve. Install the float in the float bowl and adjust the float level. Turn the carburetor assembly upside down and allow the float to hang naturally. Measure from either the lip of the float or the soldered line to the machined edge of the float bowl. Consult the manufacturer's specifications for the exact measurement. Bend the float tab to adjust the float level. Ensure this adjustment is exact; the float level is the most critical adjustment on a single-barrel carburetor and once the carburetor is assembled it cannot be changed.
Install the air horn assembly and tighten it down using a new gasket. Do not over-tighten the hold-down screws or the air horn may become warped. Install the accelerator pump link and fast idle rod. Adjust the accelerator linkage by bending it with a pair of needle-nose pliers until the pump actuates as soon as the throttle plate begins to move.
Adjust the fast idle rod by rotating the fast idle cam until the stop screw is resting on the highest lobe. Measure the distance between the throttle plate and the body of the carburetor. Consult the manufacturer's specifications for the exact model of carburetor you are working on. Bend the fast idle rod with a pair of needle-nose pliers until the throttle plate is within specifications.
Adjust the automatic choke assembly if equipped. Loosen the automatic choke hold-down bracket and turn the choke assembly until the reference mark on the choke spring housing lines up with the index mark on the air horn body. Tighten the hold-down screws.