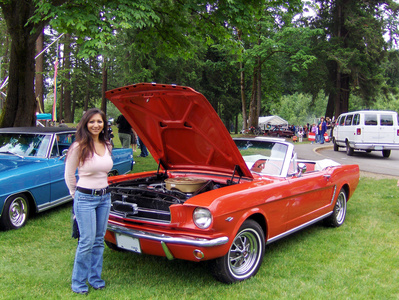
The 1966 Mustang was equipped with a one-piece fender designed made entirely from steel. This heavy-duty construction was fairly durable but lacked the elasticity of fiberglass. As a result, if an object strikes the fender with enough force, the fender will dent rather than flex. Fortunately, reproduction fenders are readily available at reasonable prices and installation is fairly straightforward.
Raise the front of the Mustang with a jack, then lower the car onto jack stands positioned underneath the frame rails.
Remove the bolts which secure the front bumper to the car with a socket wrench, then pull the bumper off the car. Access the bumper bolts from underneath the bumper. Note that a single bolt is located on each end of the bumper.
Disconnect the turn signal wiring harnesses from the front turn signals. Access the wiring harnesses underneath the front valance panel. Trace the wire which protrudes from the back of each turn signal until a wiring connection is reached, then unplug the wire from the connection.
Remove the bolts which secure the front valance panel in place with a wrench.
Open the Mustang’s door and remove the single fender bolt through the door jam opening with a socket wrench and a long extension.
Remove the single fender bolt located on the bottom of the fender, between the front tire and the door, with a socket wrench.
Reach through the wheel well opening and disconnect the headlight’s wiring harness in the same manner used to disconnect the turn signal wiring harnesses.
Open the hood and remove the two bolts which secure the front of the fender to the outside of the radiator support with a socket wrench.
Remove the bolts which secure the top of the fender to the engine compartment rail, then lift the fender off the car.
Remove the bolts which secure the headlight housing to the front of the fender with a socket wrench. Access the bolts from the inside of the fender.
Position the headlight assembly against the front of the replacement fender, then install the assembly’s bolts with the socket wrench until the assembly is secure.
Position the fender onto the car, ensuring that the bolt holes on the upper lip of the fender align with the bolt holes on the top of the engine compartment rail.
Install the bolts which secure the top of the fender to the engine compartment rail. Do not tighten the bolts, as the position of the fender may need to be adjusted slightly to align the fender’s remaining bolt holes.
Install the two bolts which secure the front of the fender to the outside of the radiator support. Do not tighten these bolts yet.
Open the Mustang’s door and install the single fender bolt located through the door jam opening with a socket wrench and a long extension. Do not tighten this bolt yet.
Install and tighten the bolt into the bottom of the fender, between the tire and the door, with a socket wrench.
Tighten all of the fender’s bolts with a socket wrench.
Reach through the wheel well opening and plug the headlight’s wiring plug into the Mustang’s wiring harness.
Position the valance panel onto the front of the car, then install and tighten the panel’s retaining bolts with a wrench.
Plug both turn signal wires into their respective wiring harnesses.
Position the bumper onto its brackets on the front of the car, then install and tighten the fender’s retaining bolts with a socket wrench.