The brake light replacement process on the 2000 Jeep Grand Cherokee is very easy once you know where to start. The brake light bulb illuminates each time that pressure is applied to the brakes. The brake lights are a safety feature that lets the driver behind you know that you are coming to a stop. A burned-out brake light bulb can cause another driver to rear-end your car. Always check on your brake lights to make sure that they work at all times.
Raise the rear window lift on the back of the Jeep, and then let the tailgate down.
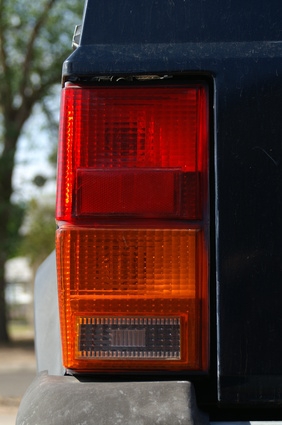
Locate the rear of the taillight assembly that contains the burned out taillight bulb. There are two screws holding the rear section of the taillight assembly in place to the taillight bracket. Remove both of the screws with a Phillips head screwdriver.
Gently pry up on the edges of the rear section of the taillight section. Then turn the rear section back and forth to loosen the rear taillight section for the ball joint. The rear taillight section is locked on by a ball joint that will release once you pry outward on the rear section. Keep pulling until the rear taillight section pops off.
Locate the burned out brake light bulb. The brake light bulbs on the 2000 Jeep Grand Cherokee are the very top bulb. There are three bulbs on the rear section of the 2000 Jeep Grand Cherokee. Top bulb is the brake light bulb, the middle bulb is the blinker bulb and the bottom bulb is the back-up bulb. Rotate the top bulb counterclockwise until it unlocks from the socket. Gently pull the bulb out of the socket.
Push the new bulb into the socket and turn the bulb clockwise until the bulb locks in place. Once the bulb locks in place, gently pull back on the bulb to ensure that the bulb is locked into the bulb socket. Now have someone apply pressure to the brakes while you inspect the brake light bulb to make sure that the new bulb is working.
Put the rear taillight section back on by lining up the ball joint with the insert. Take the palm of your hand and gently tap the rear section in place until you feel the ball joint lock in place inside of the insert.
Insert the two Phillips head screws and tighten the rear section of the taillight assembly back down tight with the Phillips head screwdriver.